Archive for the ‘Season 8’ Category

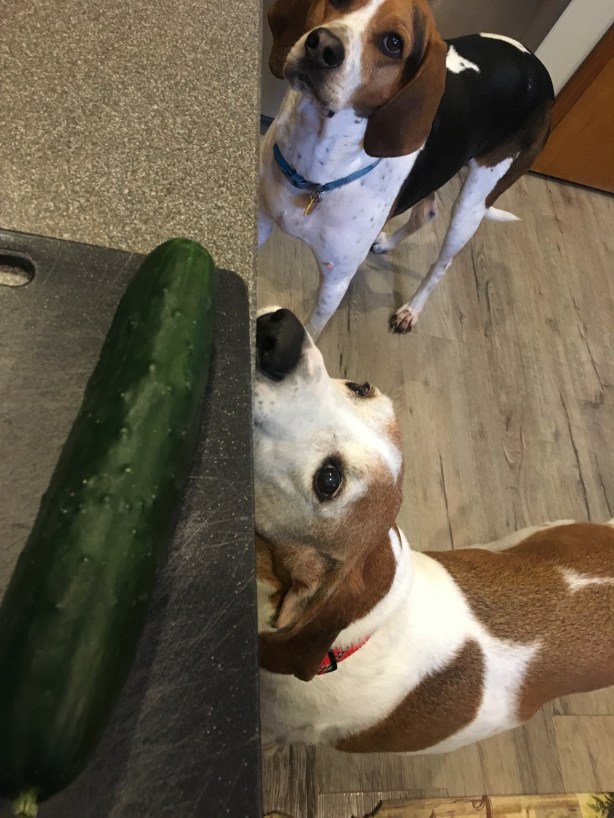
Although we have had a lot of sadness in 2019, we also have some recent and upcoming blessings. A few days after our dog died, we wound up adopting another little hound who has been living with us now for about a month. We named our little Redtick Coonhound Julep, and she has been a funny and busy distraction. Aside from chasing the cat, she has really been quite a good puppy so far. She is only about eight months old, so she has much more energy than we do! We figure this puppy is excellent practice for our baby who is due to arrive in October. Yowza! I think I can safely say that 2019 has already been the greatest year of transition I will likely ever have. Now, onto the cooking.

Wild Mushroom and Asparagus Risotto

My mom was the person who first introduced me to risotto after she had ordered it in a restaurant years ago. She said she instantly thought of me when she ate it, as she was sure it would be something I would love. I have made many risottos over the years, trying various methods and recipes, including a pressure cooker risotto and an almost no-stir recipe. Alton’s risotto is a pretty classical version that requires only about 10 ingredients. You will need some steamed asparagus that is cut into one-inch pieces and some wild mushrooms that you have browned in butter and Kosher salt (you want approximately seven ounces of asparagus and five ounces of mushrooms). You can easily prep the veggies a day in advance, or you can sub any leftover veggies you have on hand. When ready to make the risotto, bring 6 C of chicken broth to a simmer, along with 1 C white wine; Alton likes to use an electric kettle for this, but I just used a saucepan.

IMG_2188

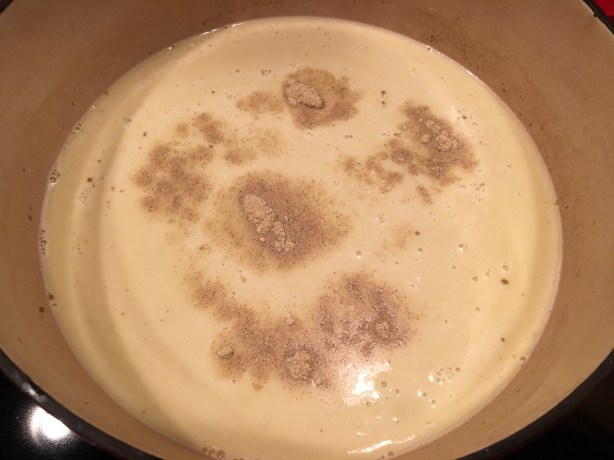
Simmering broth/wine.

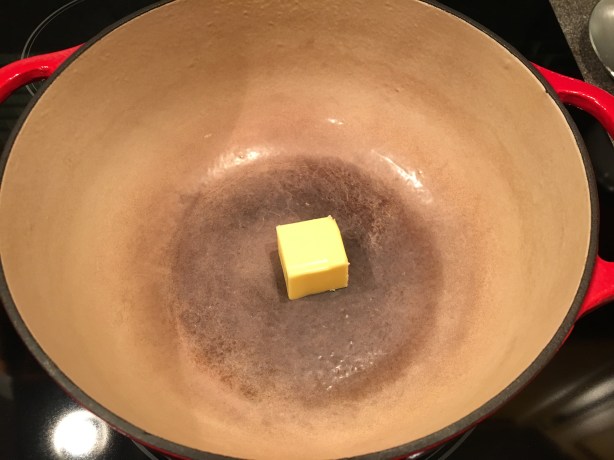
You want to keep this liquid at a low simmer for the duration of making the risotto. Next, heat a heavy 3 to 4 quart pan over medium heat and add 2 T butter, 1 C chopped onion, and a pinch of Kosher salt. Sweat the onion until it is soft and add 2 C Arborio rice, which is a short-grain rice.

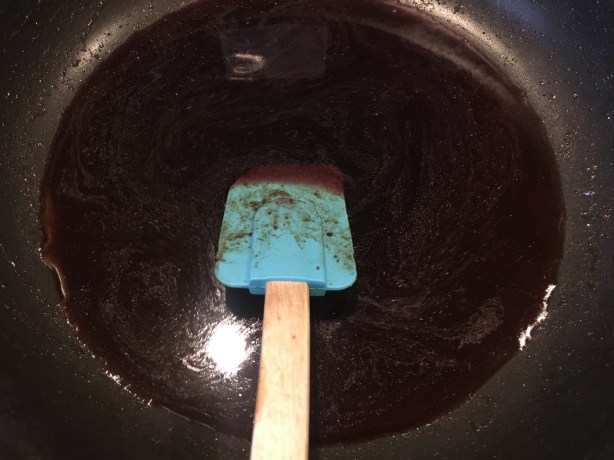
Stir the rice for 3-5 minutes or until the grains become translucent around their edges.

IMG_2190

Rice stirred until clear at the edges.

Once translucent, add enough of the hot broth to the pan to just cover the rice and shake/stir the rice. Alton’s shaking method was new to me, as the other risotto recipes I have made have called for stirring. Continue to cook the rice, shaking the pan occasionally, at a bare simmer until no liquid remains in the pan when you move the rice with a spatula. At this point, add hot broth/wine again just to cover the rice.

Continue cooking the rice and adding more liquid as needed. When 3/4 of the liquid has been added to the rice, give the risotto a taste; if the rice is tender and creamy, you may not need to add any more liquid. When I tasted my risotto at this point, the rice grains were still quite crunchy, so I ended up adding all of the hot liquid.

When the risotto has reached a creamy texture, give it another taste and adjust the salt, as needed. To finish the risotto, add the cooked mushrooms and asparagus to the pan, along with 2 ounces of grated Parmesan, 1 t lemon zest, and 1/2 t nutmeg.

IMG_2207

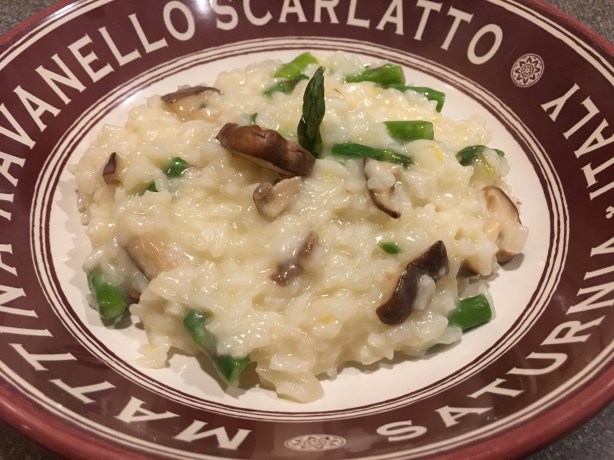
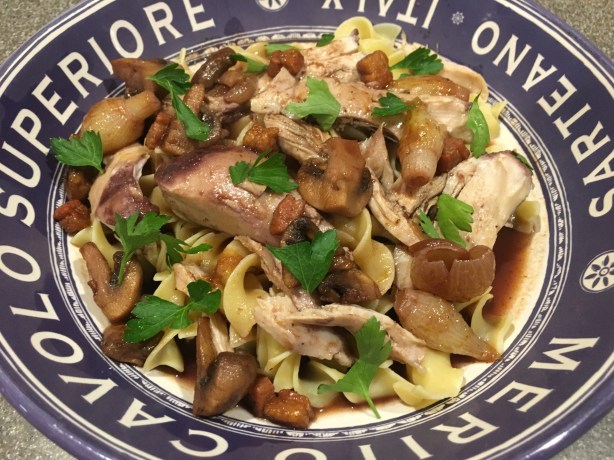
A bowl of Alton’s risotto.

Alton’s risotto is a very classic recipe that works very well. Yes, it does take some time for all of the liquid to be absorbed by the rice, but risotto is really not a difficult thing to make and you can get creative with the additions you make. If you are new to risotto, I can say that Alton’s recipe is a fool-proof introduction.

Brown Rice Salad

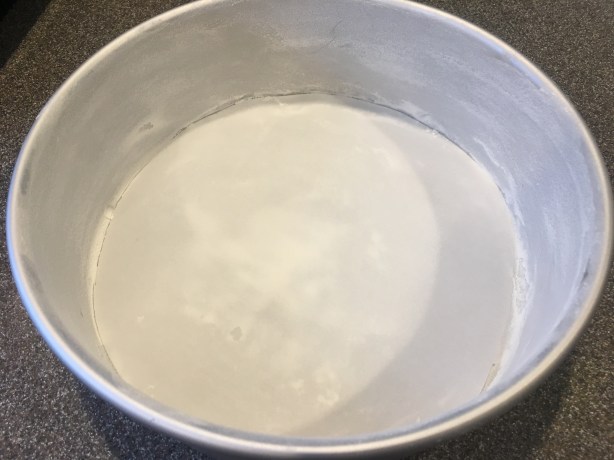
I have always been really comfortable cooking white rice, but have never had a great way to cook brown rice. For this brown rice salad, Alton shares his preferred method for cooking brown rice, which is an oven method. To cook brown rice Alton’s way, put 1 1/2 C short or medium grain brown rice in an 8-inch square pan. Add 2 1/2 C of water just off the boil, 1 T butter, and 1 t Kosher salt, and give it all a stir.

IMG_2146

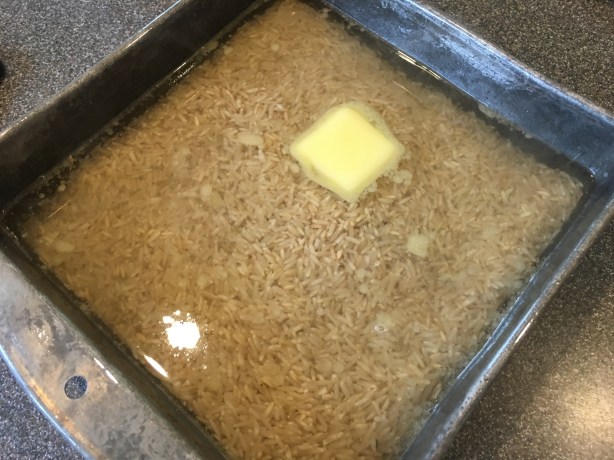
Brown rice, hot water, butter, and Kosher salt in an 8-inch pan.

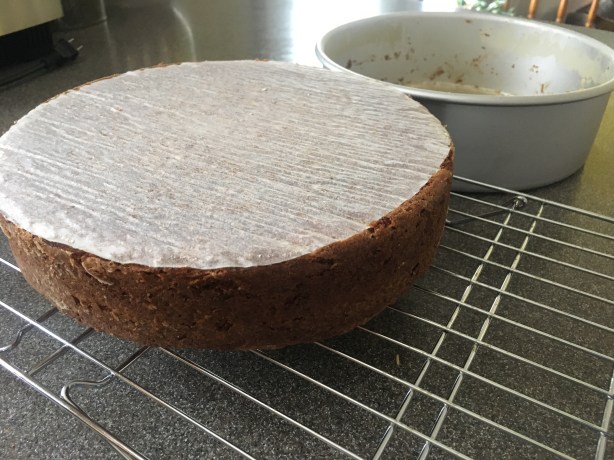
Cover the pan tightly with foil and place it in a 375 degree oven for one hour. After an hour, remove the foil and fluff the rice with a fork. Voila – perfect brown rice!

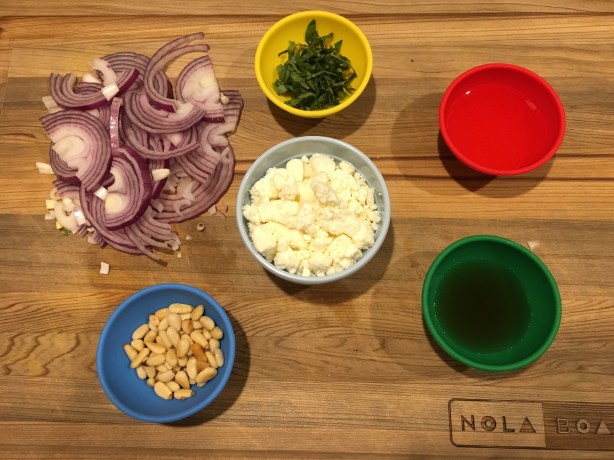
To make Alton’s brown rice salad, heat a 10-inch pan over medium heat and fry six pieces of bacon until crispy. Remove the bacon from the pan and add 1/2 C diced red onion.

When the onion is golden, add 1/2 C white wine vinegar, 1/2 C chicken broth, 2 t Dijon mustard, 1 t sugar, 1 t Kosher salt, and 1/2 t pepper.

IMG_2155

White wine vinegar, chicken broth, Dijon mustard, sugar, Kosher salt, and pepper added to the cooked red onion.

Crumble the bacon into the pan, along with the cooked brown rice and 1 T chopped fresh dill. Stir the mixture until the liquid is absorbed.

IMG_2156

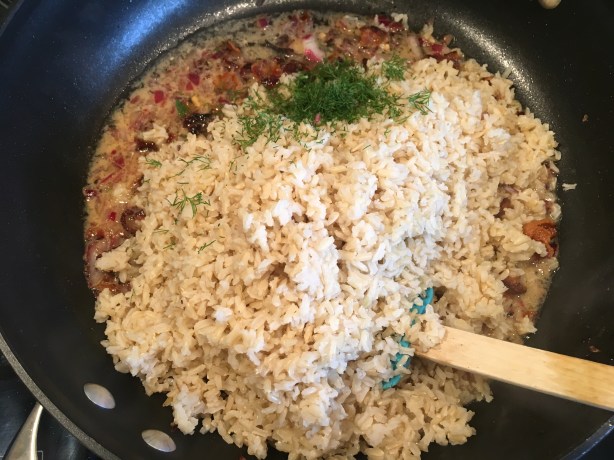
Cooked brown rice, bacon, and fresh dill stirred into liquid.

You can eat the salad immediately or you can refrigerate it for up to a week.

IMG_2158

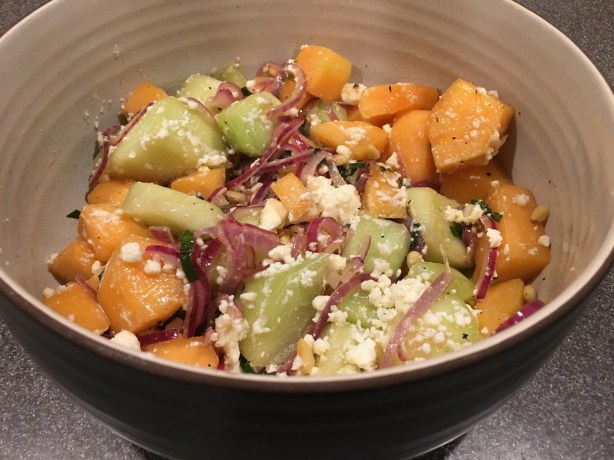
Alton’s brown rice salad.

I fixed this rice salad for lunch for us and we thought it was great. The rice is perfectly cooked and the salad is super tangy and zesty. I highly recommend this salad for a side dish or light meal. And, Alton’s brown rice cooking method is awesome!

In case you are curious about different types of rice, Alton explained the differences in grain lengths in this episode. Short-grain rices, like Arborio, contain a lot of amylopectin, so they release a lot of starch and have a sticky, creamy texture. Medium-grain rices have a soft texture when cooked and have a mixture of amylose and amylopectin; they have less amylopectin than short-grain rices have, but more amylopectin than long-grain rices do. Finally, long-grain rices have the most amylose and the least amylopectin, so they release less starch and cook up with a fluffy texture.


We eat a lot of produce in our house, but I feel like we sometimes get in a rut with our veggie side dishes; our go-tos are usually steamed asparagus or broccoli with olive oil, vinegar, salt, and pepper. For whatever reason (probably laziness), I tend not to venture too far out of my side dish comfort zone, unless I take the time to find an actual recipe. The 125th episode of Good Eats forced me to try some different side dishes, as it included three recipes for different types of greens, the first being collard greens.

Pot O’ Greens

I can really only recall eating collard greens one time, which was in a Southern-themed wedding buffet. I remember liking them, so I had no qualms about prepping them with Alton’s recipe. Collard greens need to be trimmed and cleaned properly, as they have woody stems and they grow in sandy soil. To trim collard greens, fold a leaf in half along the stem line and use a sharp knife to cut out any stems thicker than 1/8″.

Stack the trimmed flat leaves on top of each other, fold them in half as you did before, and roll them from the bottom up.

Cut the roll of leaves in half the long way and then slice the greens perpendicularly.

Place your chopped greens in a sink full of cold water, swishing them around and allowing them to sit for several minutes; this will allow any sand/dirt to sink to the bottom.

IMG_2231

Trimmed/chopped greens placed in a sink of cold water.

To drain his greens, Alton likes to put his greens in a large zip-up pillow case. He then places the pillow case in his washing machine for one minute on the spin cycle. I did not have a zip-up pillow case, so I opted to roll my greens in a stack of paper towels.

IMG_2233

Cleaned greens on paper towels to dry.

To store trimmed/clean greens, place them in a large plastic bag in the refrigerator. For Alton’s collards, put a 1 1/2 pound smoked turkey leg in a large pot; I could only find a raw turkey leg, so I had to roast it in the oven first. Add a quart of water to your turkey leg, cover the pot, and bring the water to a boil over medium-high heat. Let the turkey simmer in the water for 10 minutes.

Next, add 1 t sugar and 1 t Kosher salt to the pot, along with 2 pounds of trimmed/cleaned/chopped collard or turnip greens.

Place the lid back on the pot and gently simmer the greens for 45 minutes, stirring every 10 minutes. Be sure to keep the heat very low, as you only want a very gentle simmer.

Use tongs to place the greens in bowls and serve them with hot sauce. To be like a true Southerner, try sipping some of the cooking liquid, which is called “pot liquor.”

IMG_2249

A bowl of Alton’s collard greens after cooking for 45 minutes.

You can also bag and freeze the cooked greens for later use. To thaw frozen collard greens, run the frozen bags under cold running water. I have to be honest that I didn’t enjoy this recipe as much as I expected to. The turkey gave the greens a meaty flavor and the greens were cooked well, so as to maintain a bit of texture instead of being mushy. I found that I needed to add a fair amount of salt to the cooked greens, as they were really lacking in seasoning. Hot sauce definitely gave the greens a needed punch of flavor, as they were otherwise not very exciting. I won’t go out of my way to make these again, but I do hope to encounter collard greens more often, as I hope to sample other preparations. Maybe I am just not as fond of collard greens as I thought I was!

Lemon Sesame Glazed Greens

Alton’s second greens recipe utilizes kale, and you will need 1 1/4 pounds of cleaned/trimmed kale. As with the collard greens above, remove thick stems from the kale leaves, chop the kale, and rinse the chopped greens in a sink of cold water.

While the kale soaks, place a roasting pan over two stove burners on medium heat. I chose to use a large skillet instead of a roasting pan because my burners are different sizes and the roasting pan does not heat evenly. Either way, brush your pan with 1 T olive oil and add 2 cloves of minced garlic and the zest of one lemon.

IMG_2437

Oil, garlic, and lemon zest in the pan.

Next, add 2 t fresh lemon juice to the pan, along with 1 T honey. Follow the honey with 1 1/2 t Kosher salt and 1/4 t pepper, and add your just-washed greens; don’t worry about drying the greens here, as you want some water in the pan. If necessary, add up to 1/2 C additional water.

Use tongs to toss the greens until they have cooked down to resemble thawed frozen spinach. At this point, remove the greens from the heat and stir in 1/2 t red pepper flakes and 1 T sesame seeds.

IMG_2441

Kale cooked down until very wilted. Sesame seeds and red pepper flakes stirred in.

Serve the kale immediately. We liked the flavors in this dish, as the lemon brightened up the greens, while the red pepper flakes gave subtle heat and the sesame seeds gave a bit of nuttiness. The honey served to lightly glaze the greens.

IMG_2443

A bowl of Alton’s lemon sesame glazed greens.

I have never been a huge kale fan, as its chewy texture is just not my favorite, and I found that to be the case with this recipe as well. I think kale lovers would really like this recipe, however, and it comes together super easily with ingredients often on-hand.

Mustard Green Gratin

The third type of green Alton uses in this episode is the mustard green, which he uses to make this gratin. As soon as I saw Alton prepare this recipe, I recognized it from the beet episode. Sure enough, this mustard green gratin is nearly identical to the beet green gratin in episode 83. For the gratin, butter the bottom and sides of a 2 or 2 1/2 quart baking dish. Beat three eggs in a large bowl and add 10 ounces ricotta, 2 ounces grated Parmesan, 1/2 t Kosher salt, and 1/4 t pepper.

Next, melt 1 T butter in a roasting pan placed over two burners on medium heat. Add 2 cloves of minced garlic to the pan, along with 12 ounces of sliced mushrooms. Add a large pinch of Kosher salt and toss the mushrooms until they have browned.

Add a pound of stemmed/rinsed/chopped mustard greens and toss until the greens have wilted.

Remove the pan from the heat and use tongs to add the greens to the egg/ricotta mixture. Stir the mixture to combine.

Place the egg/mustard green mixture in your buttered baking dish, avoiding packing down the greens. Sprinkle the top of the greens with 1 C of crushed Ritz crackers.

Bake the gratin at 375 for 35-40 minutes and let cool slightly before serving.

IMG_2177

Alton’s mustard green gratin.

We were not huge fans of Alton’s beet green gratin, but we both really liked the mustard green version. Mustard greens, if you didn’t know, truly do taste like mustard, so they bring a lot of flavor to the party. To me, I specifically tasted a Dijon mustard-like flavor in this gratin, which I found to pair very well with the creaminess of the egg/ricotta mixture. The cracker crust adds some crunchy texture and buttery flavor. This is really good and we both said we would like to eat it again. I’m surprised Alton didn’t make this addition, but I would personally add a little bit of ground nutmeg to the ricotta mixture. This was by far our favorite recipe of this episode, though it doesn’t look too pretty in the photo. Honestly, though, casseroles are just never pretty, right?

I keep meaning to get in a good rhythm with this project, and then I keep having the rug pulled from under my feet. Just as I was starting to begin to recover from the death of my dad, my beloved dog, Hitcher, suddenly died from a pulmonary embolism eight days ago. We had Hitcher for 12 years, after finding him, starving on a roadside, when he was less than a year old. Although we knew Hitcher wouldn’t be around for a long time to come, it was completely unexpected for him to die last week, and his death has completely crushed me. Over the years, Hitcher was my constant “helper” in the kitchen, and made many cameos in this project. Seeing that I prepared the recipes from the next couple episodes before he died, he will make a few final cameos. It is just not the same to cook without him by my side.

224075_1040779094361_6486_n

My beloved Hitcher in his younger years.

Gyro Meat with Tzatziki Sauce

I actually made Alton’s gyro recipe several weeks ago, but then had too much going on to do the write-up. Lamb has a flavor that you either love or hate, and I happen to really love it. I tend not to cook with lamb very often because it is expensive, but this recipe gave me a good excuse. Gyro, by the way, means “to turn,” as gyro meat is typically cooked on a rotisserie. If you have a rotisserie, Alton has a method in this episode for using it, but he also has an alternative method if you (like me) do not have a rotisserie. Regardless of whether you will use a rotisserie, you will want to whip out your food processor for this recipe. The first part of this recipe is the Tzatziki sauce. Make the sauce by placing 16 ounces of plain yogurt in a tea towel. Wrap up the yogurt, suspend it with a chopstick and rubber band over a container, and allow it to drain for one to two hours. You will want to use a fairly thin towel for this – I had to switch to a thinner towel when I discovered no draining was occurring.

While the yogurt drains, peel, seed, and chop a medium cucumber.

IMG_1929

Ready to peel, seed, and chop one cucumber. Hitcher loved cucumbers.

Place the cucumber on a tea towel or paper towels with a pinch of Kosher salt and wrap up the cucumber, setting it aside.

IMG_1930(1)

Peeled, seeded, and chopped cucumber placed on paper towels with Kosher salt.

Once the yogurt has drained, place 4 minced garlic cloves in a bowl, along with 5-6 chopped mint leaves, 2 t red wine vinegar, 1 T olive oil, the drained yogurt, and the cucumber. Stir the sauce to combine and refrigerate for up to a week.

For the gyro meat, start by chopping a medium onion with a knife, and then process the onion in the food processor until it is very finely chopped. Line a bowl with  a tea towel and dump the chopped onion into the towel. Squeeze as much juice as you can out of the onion, discarding the juice; you will be surprised at how much juice is in one onion.

Place the onion back in the food processor bowl, along with 1 T minced garlic, 1 T dried rosemary, 1 T dried marjoram, 1/2 t pepper, 2 t Kosher salt, and 2 pounds of ground lamb.

Process the lamb mixture until it forms a paste-like consistency.

IMG_1923(1)

Meat mixture processed until paste-like.

If you are using a rotisserie, place two large pieces of plastic wrap on your counter, overlapping them by about two inches. Dump the meat mixture onto the center of the plastic wrap, form a log shape, and roll the meat up tightly in the plastic. Place the meat log in a container and refrigerate the log for at least two hours, as this will allow the log to set into its shape. After chilling, place the lamb log on your rotisserie, leaving some room at the ends. Preheat your grill to high. For a charcoal grill, distribute coals evenly between the front and back portions of the grill, leaving the middle section clear of coals. Regardless of your type of grill, place a double layer of foil beneath the rotisserie to catch drippings and grill the meat on high for 15 minutes. After 15 minutes, decrease the temperature to medium and continue to cook the lamb for 20-30 more minutes, or until the center of the meat is 165 degrees. To finish cooking, turn the grill off and let the meat continue to spin for 15 minutes more, or until the internal temperature hits 175 degrees. If you do not have a rotisserie, skip rolling the meat into a log and dump it into a loaf pan. Place a pan with an inch of water in the oven and preheat the oven to 325 degrees. Place the loaf pan in the water bath and cook the lamb for 60 to 75 minutes, or until it reaches 170 degrees.

Remove the loaf from the oven and pour off any fat. Set a foil-covered brick on top of the meat and let the meat cool until it just cool enough to handle.

Slice the meat and serve it on warm pita bread with Tzatziki sauce, chopped tomato, chopped onion, and feta cheese.

IMG_7866(1)

Sliced gyro meat.

IMG_7867(1)

Alton’s gyro.

I have not eaten many gyros, but I thought this was a delicious recipe. The meat  held together well when sliced and remained moist. The herbs accentuated and complimented the lamb’s grassy flavor, and the whole gyro was a pleasing combination of textures, flavors, and temperatures. With the warm lamb and pita, the cooling Tzatziki, tangy onion, and sweet tomato made a wonderful pairing. Unfortunately, I only got to have one meal out of this recipe since I had to leave town the following day, but I intend to make this again and enjoy it for several meals!

I think baking, and particularly bread making, can be intimidating for those who have little experience with it. However, I also find that baking can be one of the most rewarding culinary escapades. I began making bread at home many years ago, sort of just thrusting myself into the process, and I found that a hands-on approach was the fastest, and best, way to learn. I’ve had some flops over the years, but I’ve also made some really delicious bread and pastries. The 123rd episode of Good Eats takes the viewer through the two-day process of making a homemade loaf of white bread, and I think it is a great introduction to home bread making.

Very Basic Bread

Alton’s basic bread starts in the evening with a pre-fermentation step, which is also called a sponge. To make the sponge, place the following ingredients in a lidded, straight-sided container:  10 ounces of water (bottled is best), 5 ounces of bread flour, 1/4 t instant dry yeast, and 2 t honey.

Note that instant dry yeast is different from active dry yeast, as active dry yeast must first be activated in warm water, while instant dry yeast can be added without the hydration step. Whisk the sponge ingredients together until they are combined, place the lid on the container, and refrigerate the sponge for eight to 12 hours, or overnight.

IMG_7736(1)

Sponge after refrigerating overnight.

The following day, put the following ingredients in the bowl of your stand mixer:  11 ounces of bread flour, 3/4 t instant dry yeast, 2 t Kosher salt, and the refrigerated sponge from the night before.

Using the dough hook attachment on the mixer, let the machine knead the dough until it forms a ball in the bottom of the bowl, which should take a few minutes. Cover the bowl with a tea towel and let the dough rest for 20 minutes.

After the dough has rested, let the machine knead the dough (again, with the dough hook) for 5-10 minutes on medium speed or until the dough appears to be smooth and elastic. Oh, and if your dough starts climbing the dough hook, increase the mixing speed briefly and it should dislodge the climbing dough. You will know your kneading is complete when a small marble of dough can be flattened and stretched between your fingers, such that the dough is thin enough for light to shine through the dough without the dough tearing; this is called the windowpane test.

IMG_1856

Dough after kneading for 5-10 minutes and able to pass windowpane test.

Once your dough passes the windowpane test, place the dough ball in a tall, clear, oiled container. Place a rubber band around the container to mark the top surface of the dough, as this will allow you to monitor how much your dough rises. Next, place the container in a cold oven, leaving the container uncovered. Place a 9 x 13″ baking dish beneath the dough and pour in some hot water. The hot water will provide a warm, moist environment in which the bread can rise. Shut the oven door and allow the dough to rise for one to two hours, or until it has doubled in size.

After rising, dump the dough onto a smooth surface and use your knuckles to dimple/flatten the dough into a rectangle.

Fold the left third of the dough in to the center of the rectangle, and then fold the right third of the dough over the top (as if making a tri-fold wallet).

Repeat the procedure again, first using your knuckles to flatten the dough, and then folding the dough like a wallet again.

After folding the dough a second time, cover the dough with a towel and allow it to rest for 10 minutes.

IMG_1875

Dough after resting for 10 minutes.

Next, flatten the dough and form it into a smooth, tight ball by pulling the ends under the dough, as if forming a jellyfish. Smooth the ball by lightly rolling it on the counter in a circular motion between your hands, as if almost tossing it laterally from hand to hand.

When your dough has formed a smooth ball, place the dough on a cornmeal-sprinkled pizza peel, cover the dough with a towel, and allow the dough to rise at room temperature for an hour. Toward the end of the rise, place the base of a large, unglazed terra cotta planter upside down in a cold oven (if the oven is hot, the planter base will crack). Preheat the oven to 400. If you do not have a planter base, you can use a pizza stone.

IMG_1833

Inverted terra cotta planter base in cold oven.

After rising, brush the bread with a shaken mixture of 1/3 C water and 1 T cornstarch, and use a sharp knife to cut four slits in the top of the dough, forming a square shape.

As for the first rise, pour hot water into the 9 x 13″ pan beneath the planter. Using the pizza peel, slide the dough onto the terra cotta base (the dough will stick a little), and set the oven timer for 50 minutes.

IMG_1887

Dough placed on hot terra cotta planter base. Tray of water beneath.

After 50 minutes of baking, use a thermometer to check the internal temperature of your bread – it should be between 205 and 210 degrees.

IMG_7779(1)

Bread at 207 degrees.

Once your bread is in the desired temperature range, remove it from the oven and allow it to cool for at least 30 minutes before slicing.

IMG_7850(1)

Finished bread.

IMG_7852(1)

Finished bread, sliced.

This is a really good recipe because it isn’t over complicated and it works. This recipe produces a great, all-purpose loaf of bread with a crispy crust and chewy crumb. This is a great everyday go-to bread recipe.


Since it appears that spring has officially sprung, this leek episode seems super appropriate, both for the ingredient and for the episode title. I have used leeks in many recipes in the past, but they have typically assumed more of a back-up role to other ingredients. In these recipes, however, the leek takes center stage.

Grilled Braised Leeks

This recipe is (or, at least was) Alton’s favorite leek preparation. If you have ever worked with leeks before, you will know that it is crucial to clean them thoroughly, unless you enjoy sand and grit in your teeth. To clean leeks as Alton does, barely cut off the white root tip of each leek, discarding the tips. Next, cut off the dark green leaves of the leeks and discard them.

IMG_8115(1)

Trimmed leeks.

Place a leek on a cutting board such that the center oval inside the leek is perpendicular to the cutting board.

IMG_8116(1)

Leek, placed so its oval is perpendicular to the cutting board.

Use a sharp knife to cut straight down through the top of the oval, slicing the leek in half lengthwise, while keeping the leek layers together.

IMG_8118(1)

Leeks split in half.

To rinse the leeks, hold onto their white ends as you dip/swirl them in a large bowl of water; any grit should fall to the bottom of the bowl.

IMG_8120(1)

Leeks, swirling in water to clean.

To store cleaned leeks, wrap them in a layer of damp paper towels, followed by a layer of plastic. This recipe uses a grill, so preheat your grill such that one end of the grill is hot and the other is cool. While the grill heats, brush the cut sides of eight leek halves (prepped as above) with bacon drippings. We happen to keep a jar of bacon drippings in our refrigerator, so I just melted some of the drippings in the microwave. After brushing the leeks with bacon fat, sprinkle them liberally with Kosher salt.

Place the leeks, cut side down, on the hot side of the grill, and check them after three minutes of grilling.

IMG_8125(1)

Leeks placed, cut side down, on the grill.

You want your leeks to have grill marks, but you do not want them to get charred. My leeks were ready after three minutes. When your leeks have grill marks, transfer them to a large piece of foil and brush on some balsamic vinegar; Alton said he used about 1 T of balsamic vinegar, but he appeared to use more than that in the episode.

Reassemble the leeks by placing two matching halves together and fold the foil closed to make a tight pouch. Place the foil packet over indirect heat and grill for 10-12 more minutes, or until the leeks are tender.

Serve the grilled leeks with any combination of black pepper, goat cheese, artichokes, and greens. This leek recipe really showcases the leek. I served my leeks with pepper, marinated artichoke hearts, and goat cheese, and it was a fantastic combination of flavors.

IMG_8133(1)

Grilled braised leeks served with pepper, goat cheese, and marinated artichoke hearts.

I do think my leeks could have used more time on the grill, as the outer layers of the leeks were pretty chewy and had a strong onion-like bite to them. The inner layers, however, were tender and had the sweetness of cooked onions. I definitely want to make these again, but I think I will let them sit on indirect heat for at least a good half hour. Next time, I will also purchase the smallest leeks I can find, as the larger leeks seemed to have much tougher outer leaves. These would be a perfect accompaniment to any summer (or spring) barbecue.

Leek Rings

For a twist on onion rings, Alton turns here to the leek. This recipe uses 12 ounces of leeks, and you’ll first want to remove their root tips and their dark green leaves. Next, slice the leeks into half-inch rings, separating the layers to form rings.

IMG_7825(1)

Leek layers separated into rings.

To set up the breading stations for this recipe, combine 2 C flour with 2 t Kosher salt and divide the mixture between two containers. For the third station, combine 1 1/2 C milk with a beaten egg in a third container, and place the liquid container between the two flour containers.

Preheat three quarts of oil (vegetable, safflower, or canola) in a large Dutch oven to 375 degrees. While the oil heats, you can bread your leek rings by using your left hand to place a handful of rings into the first flour container, tossing them to coat.

Next, with the left hand, move the floured rings to the milk and toss the rings with your right hand.

IMG_7834(1)

Rings into the milk station.

Also with the right hand, move the milked leeks to the second flour container and use a fork to toss.

Remove the breaded leeks with your left hand, transferring them to a spyder or to a plate. Use the spyder to gently drop the leeks into the hot oil, frying them for 30-90 seconds, or until golden brown.

Transfer the fried leeks to a rack over a sheet pan to drain.

IMG_7845(1)

Fried leek rings.

We ate these a side with dinner one night and they were pretty fun. We thought they looked a lot like calamari rings. The nice thing about these was that they stayed pretty crispy, while onion rings can sometimes get a bit soggy. Before eating these, I wondered if they would need some sort of dipping sauce, but a little extra Kosher salt was all these needed for me. They have a slightly sweet onion-like flavor and a crispy outer shell. It was a little tedious to separate the leek layers and to bread them, but these were a fun thing to do for something different.

Leek Potato Soup

Alton’s take on Vichyssoise soup is the final recipe in this episode. It starts with melting 3 T butter in a lidded six quart pot over medium heat.

IMG_7787(1)

Butter in large pot.

While the butter melts, prep a pound of leeks, as done above for grilling (trim, cut in half through the oval, wash). Slice the leek halves into thirds lengthwise, and then chop them.

Add the chopped leeks to the melted butter, along with a large pinch of Kosher salt. Turn the heat to medium-low and let the leeks sweat for 20-25 minutes.

Once the leeks are tender, add 14 ounces of Yukon gold potatoes, peeled and chopped, along with a quart of vegetable broth.

Increase the heat to medium-high and bring the liquid to a boil. Once boiling, decrease the heat to a simmer, put a lid on the pot, and cook the soup for 45 minutes.

After 45 minutes, use an immersion blender, or a regular blender, to puree the soup to a smooth consistency.

Combine a cup of heavy cream with a cup of buttermilk and stir the dairy into the soup; combining the dairy prior to adding it to the soup will help to prevent curdling.

IMG_7809(1)

A cup of cream and a cup of buttermilk.

Finally, stir in a teaspoon of white pepper.

IMG_7813(1)

Dairy and white pepper added to soup.

Serve the soup topped with chopped chives.

IMG_7818(1)

Leek potato soup

This was a really delicious and simple soup. It was rich, without being heavy, and the leeks contributed a sweet flavor and aroma. This is a soup that could be eaten year-round, as you could serve it hot in colder seasons or cold in warmer weather. It is also a great vegetarian option, and it really highlights the flavor of leeks.

I have not been able to bring myself to write up a Good Eats episode. My dad died on March 18th, after spending three weeks in the ICU; those three weeks were a roller coaster ride, as his condition fluctuated often and rapidly. At times, we thought he would soon be leaving the hospital to head to a rehab facility, but then he would head downhill again. Finally, on March 18th, he succumbed. We received a great gift that day, as Dad was suddenly the most lucid he had been in weeks. He was able to tell us that he was ready to go and he said his goodbyes to all of us.

Needless to say, my dad’s funeral was two days ago and I am still completely devastated, as I lost one of my very best friends, and also my key life adviser. Dad and I shared many common interests, but food and Good Eats were among them. Dad always loved to chat about the recipes I was cooking for my next blog post, and he often recalled watching particular episodes with me in earlier years. Although it is emotionally tough to write a post without him here, I also know he would want me to continue my project, as he thought it was really “neat.”

Carrot Slaw

For a make-ahead side dish, try Alton’s carrot slaw. Begin by washing two pounds of carrots. If they are thicker than an inch at their bases, peel them also.

IMG_1596

Two pounds of carrots.

Next, use a vegetable peeler to peel the carrots into thin strips. This was quite a noisy task in my house, as our coonhounds are obsessed with carrots, and they howled for the duration of my peeling!

IMG_1597

Two pounds of carrots, peeled into ribbons.

Place the following ingredients in a lidded container that is twice the volume of your carrot strips:  1/2 C mayo, pinch of Kosher salt, 1/3 C sugar, 1/2 C drained crushed pineapple (canned), 1/2 C raisins, 2 t curry powder, a pinch of caraway and/or celery seed, and 1 t minced garlic.

Whisk these ingredients together to form a dressing.

IMG_1609

The combined dressing.

Finally, add the carrot strips, place the lid on the container, and shake the carrots until they are thoroughly coated with the dressing.

IMG_1617

Carrot slaw.

You can eat the slaw immediately or refrigerate it for up to a week. We ate this slaw as a side dish with dinner and both found it to be a flavorful vegetable option, though I felt it was a little sauce-heavy. I don’t know about you, but we tend to get in a rut with our vegetable side dishes, so this was definitely a different choice. My carrot strips were pretty long, which ended up being a bit tricky to eat (like super long noodles), so I would recommend trying to make slightly shorter carrot strips. This recipe is a mix of sweet and savory flavors, and the raw carrots maintain a slight crunch. This could be a good make-ahead option for a summer potluck.

Glazed Carrots

In this episode, Alton refers to this recipe as his all-time favorite carrot recipe. When purchasing carrots, Alton recommends buying carrots with fresh-looking green ends; be sure to trim the stems to a length of one inch once you are home, as they tend to pull moisture from the carrots. And, if you want to store carrots as Alton does, keep them wrapped in bubble wrap. I tend to just opt for plastic wrap, myself. To make glazed carrots, cut, on the bias, a pound of carrots into coins that are 1/3″ to 1/4″ thick.

Place the carrot discs in a 12-inch skillet, along with an ounce of butter, a large pinch of Kosher salt, and a cup of ginger ale.

Heat the burner to medium heat, cover the pot, and bring the liquid to a simmer. Once simmering, decrease the heat to medium-low and cook the carrots for five minutes with the lid on.

After five minutes, remove the lid, add 1/2 t chili powder, and increase the heat to high. Resist the urge to stir the carrots, though you can gently shake the pan. Continue to cook the carrots until the liquid is almost gone, which should take about five minutes.

Check the carrots with the tip of a sharp knife – they should be just knife-tender. Sprinkle the carrots with a tablespoon of chopped parsley and serve immediately.

IMG_1709

Glazed carrots.

I have to agree with Alton that these glazed carrots are delicious. This recipe comes together super quickly and is perfect for any weeknight. I highly recommend this one for a side dish.

Carrot Cake

Carrot cake seems to be the most polarizing type of cake. For me, carrot cake is way up at the top of the list, so this recipe gave me a good excuse to have a few slices. To make Alton’s version of carrot cake, preheat your oven to 350 and lube the bottom and sides of a cake pan with butter. Coat the pan with flour, removing any excess, and line the bottom of the pan with a disc of parchment paper. When I watched Alton prep his pan, I recognized the pan immediately as the same one he used to make his cheesecake in episode 61.

IMG_1717

Buttered and floured pan, lined on the bottom with parchment.

Next, shred 12 ounces of carrots on the large side of a box grater and place them in a bowl. Yes, this part is a pain, but at least your arm burns some calories, so you can eat a larger slice of cake later.

Dump the following ingredients into the bowl of a food processor:  12 ounces of flour, 1 t baking powder, 1 t baking soda, 1/4 t allspice, 1/4 t  cinnamon, 1/4 t nutmeg, and 1/2 t salt. Pulse the dry ingredients until combined and add them to the carrots, tossing them until coated.

Next, combine 10 ounces of sugar, 2 ounces of dark brown sugar, 3 eggs, and 6 ounces of plain yogurt in the food processor. With the machine running, drizzle in 6 ounces of vegetable oil. Add the wet mixture to the carrots, mixing ten times with your hands.

Pour the carrot mixture into your prepared pan and bake the cake for 45 minutes.

IMG_1741

Batter poured into prepared pan.

After 45 minutes, decrease the heat to 325 and bake for 20 more minutes, or until the cake has an internal temperature between 205 and 210 degrees (mine was at 208 after the initial 20 minutes). Oh, and when taking the temperature of a cake, place the thermometer half-way between the center of the cake and the rim of the pan.

IMG_1742

Cake after baking for 65 minutes.

Let the cake cool completely before frosting. I let my cake cool in the pan for the first half hour, and then removed it from the pan for the remainder of the cooling process.

IMG_1745

Cake, removed from pan after 30 minutes of cooling. Allowed to cool completely on rack.

For Alton’s cream cheese frosting, combine 8 ounces of room temperature cream cheese with 2 ounces of room temperature butter.

IMG_1747

Softened cream cheese and butter in mixer.

Add 1 t vanilla and 9 ounces of sifted powdered sugar, mixing until smooth.

Chill the frosting for 5-10 minutes before using it to frost your cooled cake.

IMG_1757

Frosted carrot cake.

IMG_1760

A slice of Alton’s carrot cake.

As I said before, I love carrot cake, and this is a simple one. I like the fact that the carrots are really the star of this cake, as there are no pineapple chunks, or walnuts, or raisins in this one. Also, since this is a one-layer cake, it is a cake that can easily be made on a busy day. Alton’s carrot cake is moist, dense, and has just the right amount of sweetness to balance with the sweeter cream cheese frosting. The frosting is smooth and creamy, and the recipe makes the perfect amount to frost the top of this carrot cake. I am actually making this cake again this weekend, as it is my dog’s 13th birthday on Sunday and he adores carrots. He will only get a tiny nibble, but we humans will eat the rest in celebration of him.

I have had a busy last few weeks and really not by any sort of choice. First, I found myself with a full week of jury duty, which saw me spending full days at the courthouse. While the experience was educational and informative, I am glad to once again have control over my schedule.

Unfortunately, right at the end of my jury service, my dad had an accident and broke eight ribs; two of the ribs were displaced and he also had a Hemothorax. Needless to say, I flew to be with him as soon as I could, and I spent six days visiting him. He is, unfortunately, still in the ICU, so I will likely be traveling to see him again shortly. I am hoping and praying for good news soon. It would be great to see him finally turn the corner. Yes, 2019 has not been kind to me thus far.

Coq au Vin

In an effort to distract myself and do something productive, I’m sitting down to write up a dish I actually prepared weeks ago:  Alton’s Coq au Vin. Coq au Vin is an old French dish that was originally composed as a means of cooking old, tough roosters (I was informed of this fact by both Alton and my dad). This dish certainly takes some time to prepare and you need to start a day ahead of eating. Salt pork is the first ingredient in this recipe, but you can substitute slab bacon if you are unable to find the salt pork. I lucked out and found salt pork at my local grocery store.

IMG_1639

Salt pork.

Cube six ounces of the salt pork and place it in a large skillet over medium heat, along with 2 T water. Cover the skillet and let the pork cook for 5-10 minutes.

IMG_1647

Cubed salt pork in skillet with water.

While the pork cooks, place four chicken thighs and four chicken legs on a metal rack over a sheet pan and season them liberally with Kosher salt and pepper.

IMG_1641

Chicken thighs and legs seasoned with Kosher salt and pepper.

Put 1/4 to 1/2 C flour in a large plastic bag and add a few pieces of the seasoned chicken at a time. Shake the bag to coat the chicken pieces with the flour until all of the chicken has been coated. Set the coated chicken pieces back on the wire rack and set them aside.

When the pork has darkened in color and has rendered some of its fat, remove the lid from the skillet and continue to cook the pork until it is crispy and brown.

Remove the pork from the pan and add 24-30 pearl onions to the pork fat. You will need to peel your pearl onions prior to using them; you can do this easily by cutting off the root end of each onion and cutting a deep V where the root was. Place the onions in boiling water for a minute and let them cool. Once cool, the skins should slide right off.

Cook the peeled onions in the pork fat until they are golden brown, and then remove them from the pan.

Next, add three or four chicken pieces to the skillet and cook the chicken until it is golden brown on all sides.

While the chicken browns, prepare a “bed” for the browned chicken by placing the following ingredients in the bottom of a Dutch oven:  two quartered ribs of celery, two quartered carrots, a quartered onion, 6-8 fresh Rosemary sprigs, three crushed garlic cloves, and one Bay leaf.

IMG_1637

Vegetable bed in Dutch oven: celery, carrot, onion, Rosemary, garlic, and a Bay leaf.

As the chicken pieces finish browning, place them on top of the vegetables in the Dutch oven.

IMG_1660

Browned chicken placed on vegetables in Dutch oven.

When all of the chicken has been browned, add 1 T butter to the skillet, along with eight ounces of quartered mushrooms. Scraping the pan, cook the mushrooms for about five minutes, or until they are golden brown.

Remove the mushrooms from the pan, let them cool, and combine them in a container with the cooled pork and onions. Set the mushroom mixture in the refrigerator until the next day. Pour any excess fat out of the pan and discard it (I had very little extra fat in my pan). Remove the pan from the burner and add 1 C Pinot Noir to deglaze the pan, scraping the bottom with a spatula.

IMG_1663

Pinot Noir added to deglaze pan.

Add 2 T tomato paste to the skillet, stirring to combine, and pour the liquid over the chicken in the Dutch oven.

Finally, add 2 C chicken broth to the chicken, along with the rest of the open bottle of wine and another full bottle of Pinot Noir.

Put a lid on the Dutch oven and place it in the refrigerator overnight. The following day, place the Dutch oven in a cold oven and set the oven to heat to 325 degrees. Set a kitchen timer for two hours and check the chicken a few times to be sure it is submerged in the cooking liquid. After the two hour cooking period, remove the Dutch oven from the oven and use tongs to transfer the chicken from the Dutch oven to a packet of foil. Place the foil packet of chicken in the cooling oven to keep warm.

Strain the cooking liquid into a saucier, discarding the vegetables (or you can feed them to your dog, as Alton did in the episode).

Place the saucier over high heat and reduce the liquid by one third, which should take about 30 minutes. You can check the fluid level by placing a rubber band around a long spoon handle at the initial fluid level. When that level has dropped by 1/3, you are good to go.

Once the sauce has reduced, add the onions, mushrooms, and salt pork to the saucier and cook for 15 more minutes.

IMG_1685

Salt pork, onions, and mushrooms added to sauce.

Serve the chicken and sauce over cooked egg noodles.

IMG_1688

Coq au Vin served over egg noodles.

This is a really delicious recipe, but it does take some effort and time. For me, it took two and a half hours of prep the first day, followed by the cooking time the second day. I would certainly consider this to be a special occasion dish simply because of the amount of prep. We did, however, get several meals out of this one recipe, so perhaps the time per meal is not much. The chicken in this dish comes out super moist and tender, and has a slight purple hue. The sauce has many layers of flavor, but is light in body. If you want a chicken dish that can serve a group and results in perfectly cooked chicken with lots of flavor, this is the one.

This episode of Good Eats is unique because Alton does not actually cook anything. Instead, this episode serves to prove or debunk five culinary myths. Through a series of kitchen experiments, Alton evaluates each myth and concludes whether each is true or false.

Myth #1 – The juices of meat are sealed in by searing.

For this myth, Alton weighed two steaks prior to cooking. The steaks were both oiled, but no salt was added, as salt pulls out liquid. One steak was seared on both sides in a hot skillet, while the other steak was not seared. The seared and unseared steaks were placed in a 400-degree oven at the same time, and a probe thermometer was placed in the center of each steak; the thermometers were set to beep when the steaks reached a temperature of 140 degrees. The seared steak reached 140 degrees faster than the unseared steak, so the seared steak was removed from the oven and allowed to rest for five minutes. After four additional minutes in the oven, the unseared steak reached 140 degrees, and was removed from the oven/allowed to rest.

After both steaks had rested, they were weighed a second time. The unseared steak lost 13% of its raw weight, while the seared steak lost 19% of its original weight. Based on these results, Alton concluded that searing does not seal in meat juices, and declared this myth to be “SMASHED.”

Myth #2 – Birds can be killed from the toxic fumes of nonstick pans.

In all honesty, Alton did not conduct any actual experiment for this myth. Instead, he simply talked about the conclusions that have been made by studies conducted on this topic. It has been found that nonstick pans release toxic fumes when they hit a temperature above 500 degrees, and especially when they are empty. These fumes can kill birds and can also cause humans to have flu-like symptoms. Alton opts to avoid all high-heat cooking in nonstick pans, including searing, frying, broiling, and even sautéing. This myth is “TRUE.”

Myth #3 – Mushrooms should not be washed because they absorb water.

The method for this experiment was to place four ounces of mushrooms in a hand sieve, which was then placed inside a glass bowl; four of these mushroom/sieve/bowl combos were set up. A liter of water was poured over the mushrooms in three of the four bowls, while the final bowl of mushrooms were left dry. The first bowl of mushrooms was allowed to sit in the water for 10 minutes before removing and draining the mushrooms. The second bowl of mushrooms was allowed to sit in the water for 20 minutes before removing and draining the mushrooms. The third bowl of mushrooms sat in the water for 30 minutes before removing and draining the mushrooms. The final bowl of mushrooms was rinsed thoroughly under running water and allowed to drain.

After all of the mushrooms were drained, the mushrooms from each sieve were weighed to analyze how much water they had absorbed. The mushrooms soaked for 10 minutes had gained 0.2 ounces of water, or about one teaspoon. The 20 minute mushrooms had gained 0.25 ounces of water, or about a teaspoon. Thirty minutes of soaking resulted in the mushrooms gaining 0.15 ounces of water, or about a teaspoon. The mushrooms rinsed under running water had gained 0.2 ounces of water, or about a teaspoon.

This experiment demonstrated that mushrooms absorb a small amount of water regardless of length of exposure to water. Since mushrooms tend to have a fair amount of grit and dirt on them, Alton concluded that he will thoroughly wash his mushrooms. This myth was “SMASHED.”

Myth #4 – Adding oil to pasta water keeps noodles from sticking together.

To test this myth, Alton added a gallon of water, 1 T of olive oil, and a pinch of Kosher salt to a pasta pot. The pot was covered and placed over high heat until the water reached a boil. Once the water was boiling, Alton added a half pound of pasta to the water, decreased the heat to medium-high, and cooked the pasta until it was al dente.

After cooking, Alton drained the pasta, allowing the liquid to drain into a long, clear tube beneath the strainer. After several minutes, the drained liquid had separated into its oil and liquid phases, with the oil rising to the top of the tube. Alton calculated the drained amount of oil to be 0.43 ounces, which was about 85% of the original tablespoon of oil added to the pasta water.

Since only 15% of the olive oil remained on the surface of the drained pasta, Alton concluded that not enough oil coated the pasta to prevent the noodles from adhering to each other. This myth was hereby “SMASHED.” Alton did, however, state that adding oil to pasta water can prevent the water from foaming by oiling the bonds of the starch released from the noodles. Or, you can just use a larger vessel with more water.

Myth #5 – Water can explode when microwaved.

The experiment for this myth involved placing a tall, narrow, glass bottle (picture a Snapple bottle) full of water in a microwave. The water was microwaved for three minutes on high power, which resulted in water spraying all over the inside of the microwave. This “explosion” of water is called spontaneous boiling, which occurs when the temperature rises above the boiling point without the formation of any bubbles. Since the inside of the glass bottle was perfectly smooth, there were no nucleation sites, which are spots where bubbles can form. In addition, the small opening of the bottle kept the water still, so when the heat energy built up within the bottle, one large bubble was formed and the water sprayed everywhere. To avoid this, when microwaving, use a container with a large opening and stir the contents regularly. This final myth was deemed to be “TRUE.”

Seeing as it is currently 12 degrees outside here, it really isn’t peak melon season. I take the episodes in the order they come, though, so we enjoyed a couple melon recipes in February. Although the melon was not of the greatest quality, these recipes still managed to give us a little taste of summer.

Hot Melon Salad

I have wanted to make this melon salad since I watched this episode with my dad when it originally aired in 2005. I remember that it just sounded so good to me when I first watched this episode. Alton prefers to use a high-powered outdoor gas burner for his wok, which is a setup my dad adopted after watching Good Eats. I do have my dad’s outdoor burner, but it needs a new hose, so I used our flat-bottomed wok on our regular old stove. Whether you are cooking indoors or out, heat your wok on a hot burner until water droplets instantly turn to steam upon hitting the pan. As with any stir fry, be sure to have all of your ingredients ready ahead of time, as the cooking goes very quickly. The ingredients for this dish are 1 1/2 T olive oil, a thinly sliced red onion, 8 ounces of cubed honeydew melon, 8 ounces of cubed cantaloupe, 1 T basil chiffonade, Kosher salt, black pepper, 2 t red wine vinegar, 2 ounces feta cheese, and 1 T toasted pine nuts.

IMG_1524

Ingredients for salad: red onion, basil, olive oil, red wine vinegar, toasted pine nuts, and feta cheese. Not pictured: melon.

Speaking of cantaloupe, did you know that all of the cantaloupes in this country are really muskmelons? Anyway, once the wok is hot, add the oil to the pan and swirl to coat.

IMG_1525

Oil in hot wok.

Add the sliced red onion and toss until heated through.

IMG_1526

Onion added to hot wok.

Next, add the cubed melon and toss again, cooking until the corners of the melon just start to brown slightly. Add the tablespoon of basil, along with a pinch of Kosher salt and some black pepper.

Drizzle the vinegar into the pan and transfer the salad to a serving dish. Finish the salad by sprinkling on the feta and pine nuts.

IMG_1532

Alton’s hot melon salad.

We had this as a side dish one night and we ate the entire salad. I really like the flavors in this salad and how they compliment each other. The melon becomes sweeter from the heat, yet the red wine vinegar gives just a light touch of acidity. The feta adds some much-needed salt, while the red onion gives some pungency. The crunch of the pine nuts is a nice addition to a salad that is otherwise composed of ingredients with fairly similar textures. To me, this dish would be a perfect summer grilling side dish, and I intend to make it again, just as soon as deck season arrives.

Melon Sorbet

A fresh melon sorbet is the second recipe in this episode, and it is super easy to throw together.

IMG_1549

Sorbet ingredients: watermelon, lemon juice, vodka, and sugar.

Puree a pound plus five ounces of watermelon in a food processor.

IMG_1550

Pureed watermelon.

To the pureed melon, add 3 T fresh lemon juice, 2 T vodka, and 9 ounces of sugar. The vodka serves to lower the freezing point of the sorbet, making the texture softer and less icy.

IMG_1552

Lemon juice, vodka, and sugar added to watermelon puree.

Refrigerate the melon mixture for at least two hours before churning in an ice cream maker.

IMG_1570

Churning sorbet after chilling.

Once churned, transfer the sorbet to an airtight container and freeze for 3-4 hours before eating.

IMG_1620

Watermelon sorbet.

The amounts of watermelon flavor and aroma in this sorbet are amazing, especially considering that I could not get great fruit. The color of the sorbet also seemed more vibrant than the color of the melon itself. As for texture, this sorbet stayed pretty soft and scoopable, and had very few large ice crystals. This sorbet truly is a taste of summer. It is quite sweet, so I have to wonder if a slight decrease in sugar could make this even better, though I suppose that could also alter the final texture of the sorbet. Perhaps I will just have to make two batches of sorbet once melon is in season – one with the original sugar concentration and one with a slightly lower concentration. I also intend to try this with some other types of melon, though I would imagine the sugar would have to be adjusted accordingly for the sugar contents of different melons. This sorbet is super refreshing, easy, and can brighten up even the coldest of winter days.

I was not overly stoked for an entire episode of pudding recipes. I mean, pudding is fine, but it’s not exactly exciting. I did, however, get very happy when I was a kid and my mom would leave pudding in the refrigerator for an after-school snack; chocolate pudding was my brother’s favorite, while I always preferred butterscotch. Speaking of butterscotch pudding, if you have not tried the butterscotch pudding in Alton’s latest book, it is a must-make. Here is my rundown of Alton’s pudding recipes, and I must say that two out of three wowed me.

Indian Rice Pudding

Indian rice pudding is the first recipe in this episode. The ingredients in this recipe are 1 C cooked rice, 1 C milk, 1/2 C heavy cream, 3/4 C coconut milk, 2 ounces sugar, 1/4 t ground cardamom, 1 1/2 ounces golden raisins, and 1 1/2 ounces chopped unsalted pistachios.

IMG_1429

Rice pudding ingredients: cooked rice, milk, heavy cream, coconut milk, sugar, cardamom, golden raisins, and pistachios.

For the pudding, put the milk and rice in a large skillet and bring to a boil over medium heat, stirring.

Once boiling, decrease the heat to low and simmer the milk/rice until it has thickened slightly, which should take about five minutes; if you run a spatula along the bottom of the pan, the liquid should be thick enough to part and stay parted.

IMG_1432

Rice and milk after coming to a boil and simmering.

When you have achieved this desired consistency, increase the heat to medium and add the cream and coconut milk, followed by the sugar and cardamom (use a whisk to incorporate the cardamom).

When the mixture has reached a boil again, decrease the heat to low and cook for five more minutes.

IMG_1439

Pudding cooked for 5 more minutes.

Remove the pan from the heat and stir in the raisins and nuts.

IMG_1440

Raisins and pistachios added to pudding off the heat.

Transfer the pudding to your desired serving vessel(s) and enjoy immediately, or you can chill the pudding overnight, which is how Alton prefers it. If you do opt to chill the pudding, press plastic wrap on the surface of the pudding to prevent formation of a skin.

IMG_1442

Alton’s rice pudding.

I tasted the rice pudding when it was warm, but chose to refrigerate it overnight before eating a full serving. This rice pudding is delicious. The pudding is thick, rich, creamy, and indulgent. The subtle flavor of coconut milk is in the background, while pistachio flavor is predominant. The raisins add little punches of fruit flavor, while the nuts add a little crunch. This is great for dessert or for breakfast, or for both! I fully intend to make this again soon. In fact, I am really wishing I had some right now! Excellent recipe.

Tapioca Pudding

I do not recall ever having tapioca pudding prior to making this recipe. I asked my parents about tapioca pudding the other day and my mom said she remembers her mother making it, while my dad did not think he had ever had tapioca pudding. Tapioca, by the way, is a starch from the cassava plant. Tapioca is sold in several forms, but this recipe calls for large pearl tapioca. The recipe begins by soaking 3 1/2 ounces of tapioca in a pint of cold water overnight; you can do this at room temperature.

After the soak, drain the pearls and put them in a crock pot, along with 2 1/2 C milk, 1/2 C heavy cream, and a pinch of Kosher salt. Stir the pudding, put the lid on the cooker, and let the pudding cook on high for two hours.

After the two hour cook time, beat one egg yolk with 1/3 sugar in a bowl – this will form a paste.

IMG_1513

Tapioca after cooking for two hours.

Temper the egg yolk mixture by slowly whisking 1 – 1 1/2 C of the warm tapioca into the eggs.

Once tempered, add the egg mixture back to the crock pot of tapioca and whisk to combine. Add the zest of a lemon to the cooker, place the lid back on, and let the pudding cook for 15 more minutes.

Transfer the tapioca to an airtight container, pressing plastic wrap directly onto its surface. Let the pudding cool to room temperature before refrigerating until it is thoroughly chilled.

IMG_1521

Pudding after cooking for 15 more minutes.

IMG_1558

Chilled tapioca pudding.

This pudding was good, but not amazing like the rice pudding. Since I am not a tapioca pudding expert I cannot say for sure, but I felt like the texture of this pudding was maybe a little thinner than it should be. I liked the added texture from the slightly chewy tapioca pearls, but the base was a little on the soupy side. As for flavor, it was just sort of creamy with subtle lemon overtones. I may make this again, simply because I have half a bag of tapioca pearls remaining, but I won’t add this one to the permanent recipe vault.

Chocolate Pudding

What pudding episode would be complete without a recipe for chocolate pudding? This is a two-step recipe, in which you first make a dry pudding mix, and then use the mix to make the pudding. To make the dry mix, in a lidded container combine 1 1/2 ounces non-fat dry milk, 2 ounces cornstarch, 1 t salt, 3 ounces Dutch cocoa powder, and 6 ounces powdered sugar. Shake the container to combine the ingredients.

To make the pudding, put 1 3/4 C of the dry pudding mix in a saucier. Whisk 2 C milk and 2 C heavy cream into the dry pudding mix.

Bring the mixture to a boil over medium heat, whisking occasionally. Once boiling, decrease the heat to low and simmer for four minutes, whisking.

Remove the pan from the heat and stir in 1 t vanilla.

IMG_1458

Adding vanilla off the heat.

Pour the pudding through a sieve and into a serving bowl. Press plastic wrap directly on the surface of the pudding to prevent the formation of a skin, and refrigerate the pudding for at least four hours before eating.

IMG_1481

Alton’s chocolate pudding.

This is the best chocolate pudding I have ever eaten. The pudding is super rich and creamy in both texture and flavor. It is smooth and chock full of chocolate flavor, and a little goes a long way. I am going to whip up another batch of this pudding shortly. It is super good.