Posts Tagged ‘sauce’

We sat down last night and watched the first two new episodes of Good Eats:  The Return. I was really happy with the episodes, as they seemed to maintain the original character of the show, while in a more modern setting. It was a little hard for me to watch the new episodes since my dad is no longer here; he was super excited when I told him last year that new episodes were on the horizon. We surely would have been chatting on the phone today about Alton’s newest recipes.

I have realized that I think I sometimes put off writing for this project because it does always remind me that my dad is not here. I shared my love of Good Eats, and food in general, more with him than with anyone else. I think, though, that it is time for me to alter my mindset, and view each part of this project as an ode to Dad. He would have wanted me to continue on with vigor, so it’s time to hold myself to it.

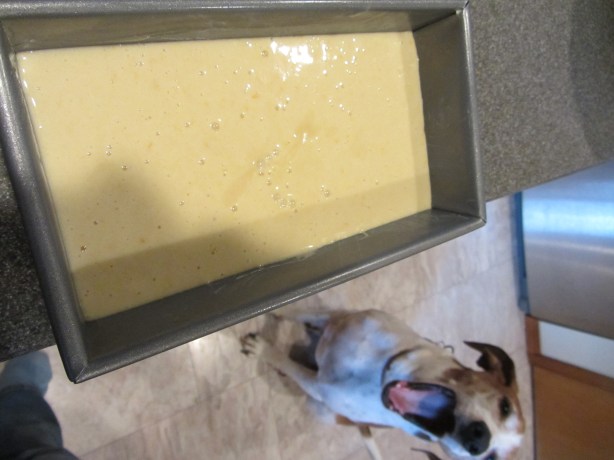
In other news, I am officially 34 weeks pregnant, and things will soon be very busy and different in our house. I feel much of the time like a beached whale, so I am fast approaching the point of being ready for the baby to be out. A few more weeks of baking are good though, I know. Speaking of baking, onto the food…

Beef Jerky

I love when this project leads me to make things I have never attempted before, and this episode’s beef jerky was just that. Alton’s jerky uses 1.5-2 pounds of flank steak, which you will want to place in a plastic bag in the freezer until it is almost solid.

IMG_2951(1)

Flank steak before freezing.

Once the beef is nearly solid, use a Santoku or chef’s knife to cut the meat into thin strips along the grain; don’t worry if some of the strips are larger than others – just follow the natural grain of the meat.

Place the meat strips in a large plastic bag and add the following ingredients:  2/3 C soy sauce, 2/3 C Worcestershire sauce, 1 T honey, 2 t black pepper, 2 t onion powder, 1 t red pepper flakes, and 1 t liquid smoke (I combined my marinade ingredients in a liquid measuring cup first).

Seal the bag, and massage the bag with your hands, working the marinade thoroughly into the meat. Place the meat in the refrigerator for three to six hours.

IMG_2963(1)

Marinade massaged into beef, and placed in the refrigerator for 3-6 hours.

After marinating, drain the meat, discarding the excess marinade.

Pat the meat dry with paper towels.

IMG_2968(1)

Beef patted dry.

Now it is time to dry the beef. To dry the beef Alton’s way, place the meat strips on the ridges of clean furnace filters, stacking the filters on top of each other, and placing a final clean filter on top. Using a bungee cord, strap the filters to a box fan. Turn the fan on, and allow the meat to dry until jerky-like, which Alton says should take 8-12 hours. Rather than buying a bunch of new supplies, I opted to use my mom’s old food dehydrator, following the manufacturer’s instructions for jerky.

IMG_2970(1)

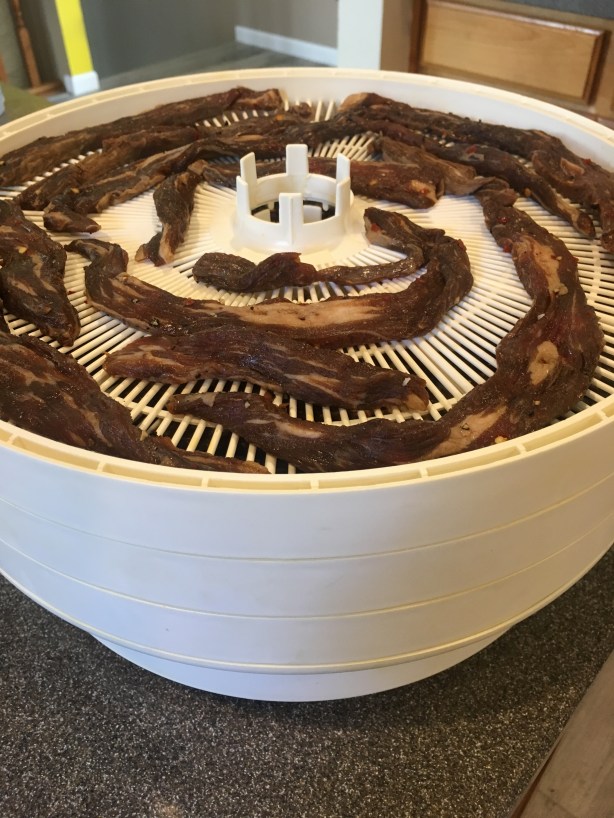
Beef strips placed in dehydrator.

I found that my jerky was done after about 13 hours of drying, and that was with a temperature of 145 degrees, so I have to imagine that Alton’s cool air method of drying would take considerably longer.

IMG_3052(2)

Alton’s beef jerky.

The marinade for this jerky is amazing, and produced maybe the most flavor-packed jerky I have ever tasted. Some of the jerky strips that had more fat were a little more on the chewy side, so I liked the leaner ones better. With being pregnant, they tell you that you should avoid eating dried meat, so I only tasted the jerky (this is probably overkill). I do plan to make more of this jerky once I am not pregnant, as we both really liked it and it is much cheaper than purchasing commercial jerky. I recommend this recipe for sure.

Jerky Tomato Sauce

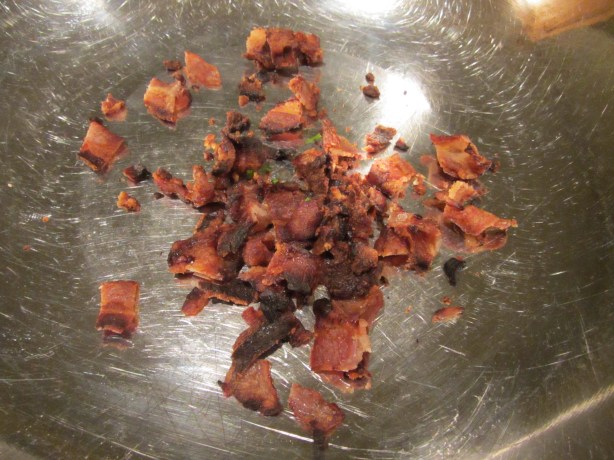
Aside from snacking on jerky, you can also use it as an ingredient, as Alton did in his tomato sauce. Jerky was, afterall, made originally as a means of preservation. Alton made his sauce on a camping stove in a tent, and you surely could make this in camping circumstances, but I made it for a regular weeknight meal. To make his sauce, use kitchen shears to cut 3-4 ounces of your homemade jerky into small pieces.

Place the jerky pieces in a bowl and pour 1+ C of boiling water over them, setting the jerky aside.

IMG_3055(2)

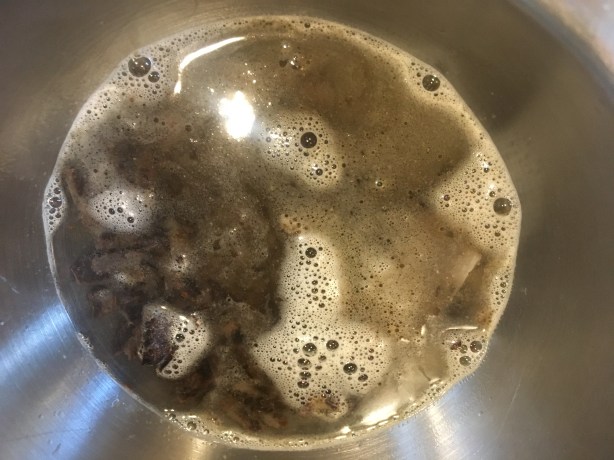
Boiling water poured over chopped jerky.

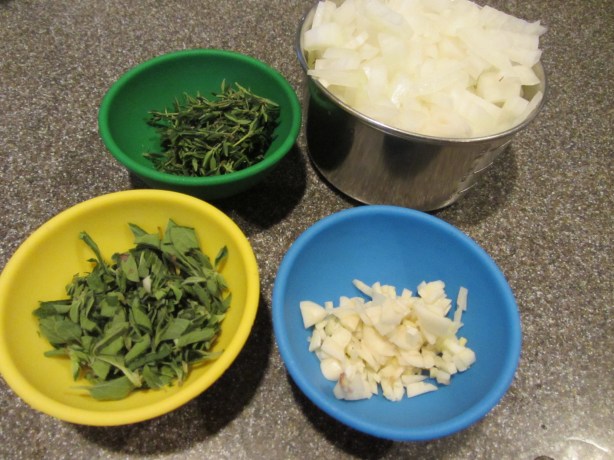
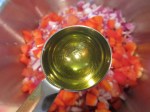
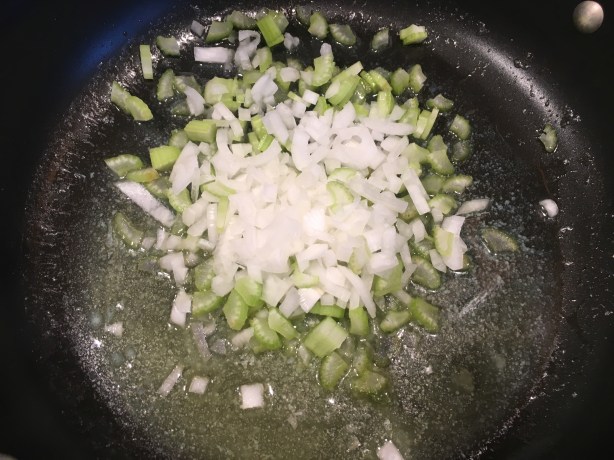
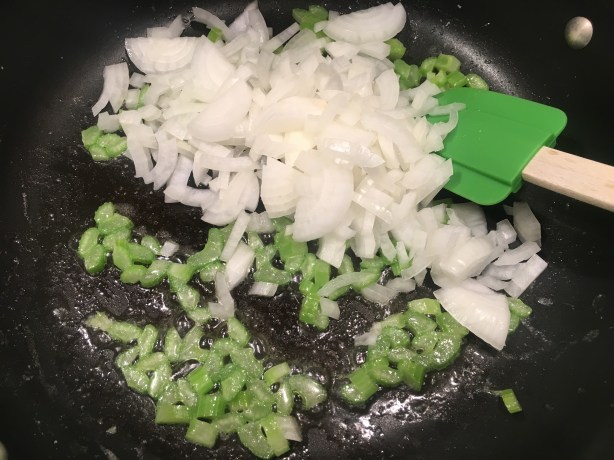
Next, heat a medium saucier or skillet over medium heat, adding 1 T vegetable oil, 1/2 C chopped onion, 1/2 C chopped green bell pepper, and a pinch of Kosher salt. Let the vegetables sweat for 4-5 minutes, or until soft.

IMG_3057(2)

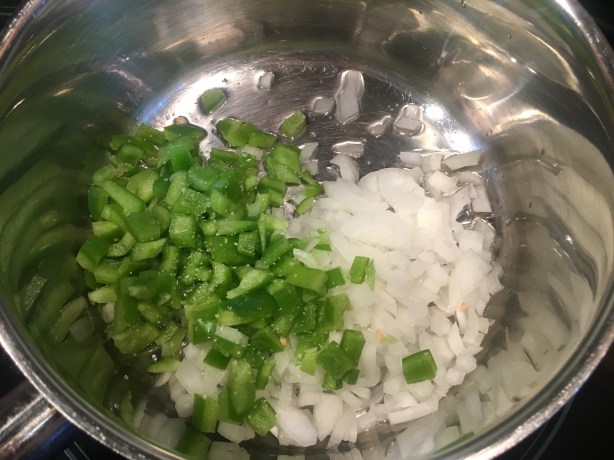
Vegetable oil, onion, green bell pepper, and Kosher salt in a medium saucier.

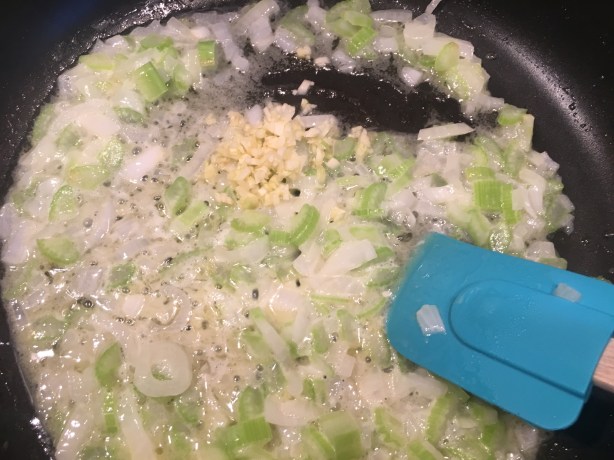
Add two cloves of minced garlic to the pan, cooking for two more minutes.

IMG_3058(2)

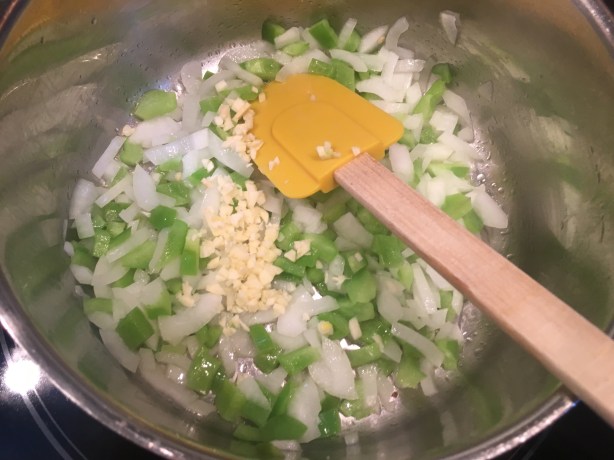
Two cloves of garlic added to the softened veggies.

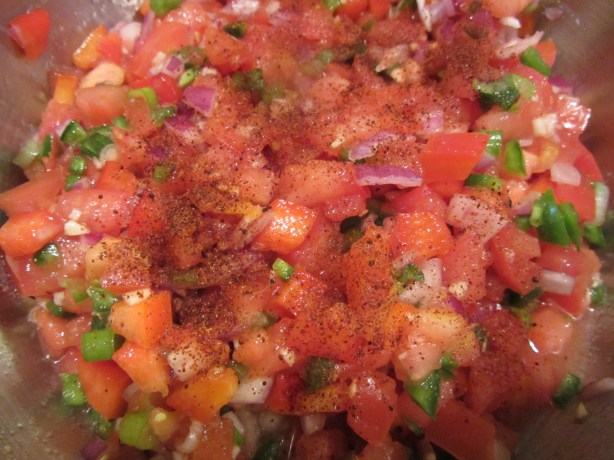
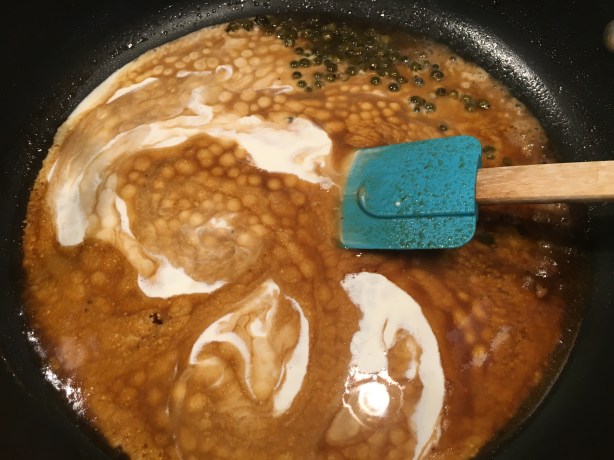
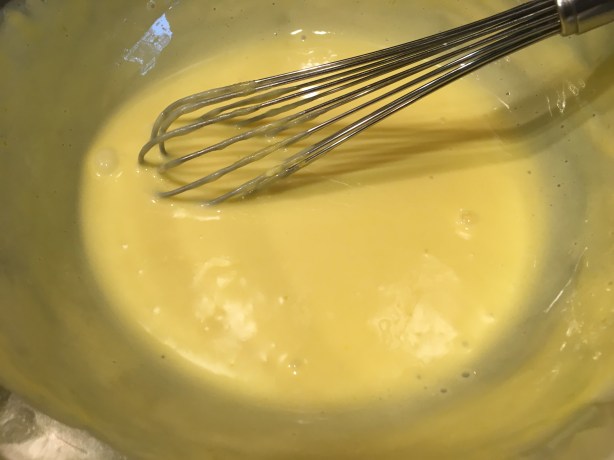
Add the jerky and its soaking liquid, a 14.5 ounce can of chopped tomatoes, and 1/4 C heavy cream.

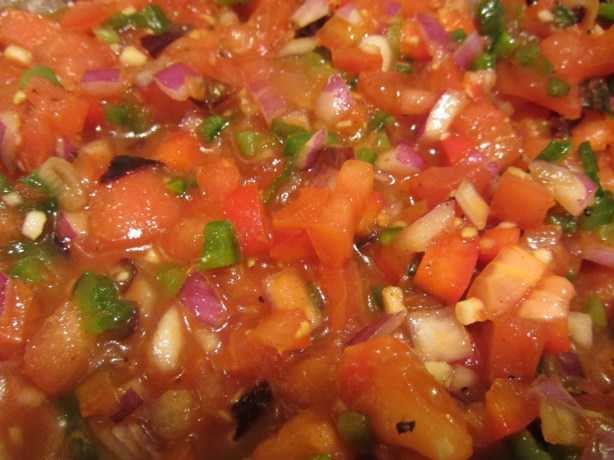
Increase the heat to high and bring the mixture to a boil, stirring. Sprinkle in some dried parsley (I used fresh), and simmer the sauce until it has reduced to your desired consistency.

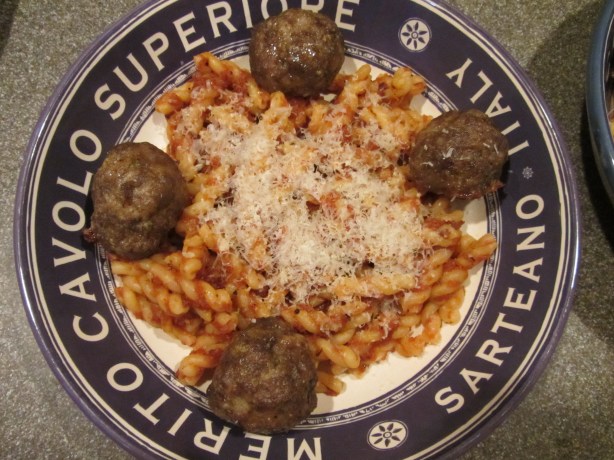
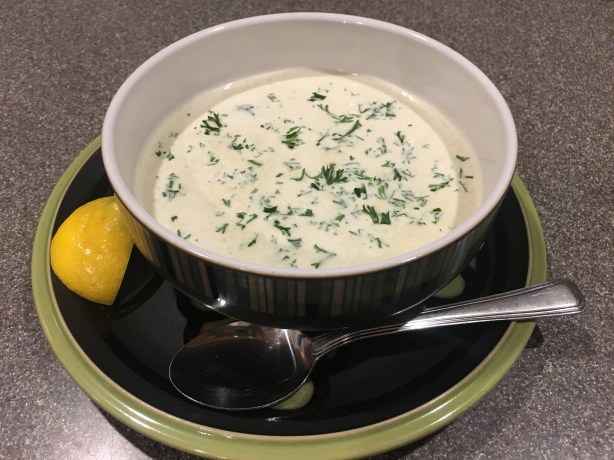
Serve the jerky sauce over pasta, rice, or biscuits. I served Alton’s jerky sauce over pasta, adding some freshly grated Parmesan.

IMG_3065(2)

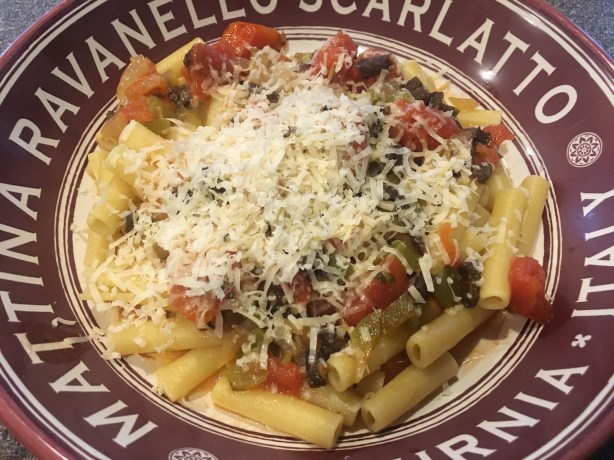
Reduced sauce served over pasta.

We liked this sauce more than I thought we would, to be honest. I initially thought this would be just another tomato sauce, but the jerky really did add a lot of flavor, making a sauce that was fairly interesting and with some added meaty flavor. I still don’t know that I would go out of my way to make this again, but for a convenience meal it was really quite good. Should you happen to find yourself with some extra jerky lying around, this is certainly a good use for it.

I keep meaning to get in a good rhythm with this project, and then I keep having the rug pulled from under my feet. Just as I was starting to begin to recover from the death of my dad, my beloved dog, Hitcher, suddenly died from a pulmonary embolism eight days ago. We had Hitcher for 12 years, after finding him, starving on a roadside, when he was less than a year old. Although we knew Hitcher wouldn’t be around for a long time to come, it was completely unexpected for him to die last week, and his death has completely crushed me. Over the years, Hitcher was my constant “helper” in the kitchen, and made many cameos in this project. Seeing that I prepared the recipes from the next couple episodes before he died, he will make a few final cameos. It is just not the same to cook without him by my side.

224075_1040779094361_6486_n

My beloved Hitcher in his younger years.

Gyro Meat with Tzatziki Sauce

I actually made Alton’s gyro recipe several weeks ago, but then had too much going on to do the write-up. Lamb has a flavor that you either love or hate, and I happen to really love it. I tend not to cook with lamb very often because it is expensive, but this recipe gave me a good excuse. Gyro, by the way, means “to turn,” as gyro meat is typically cooked on a rotisserie. If you have a rotisserie, Alton has a method in this episode for using it, but he also has an alternative method if you (like me) do not have a rotisserie. Regardless of whether you will use a rotisserie, you will want to whip out your food processor for this recipe. The first part of this recipe is the Tzatziki sauce. Make the sauce by placing 16 ounces of plain yogurt in a tea towel. Wrap up the yogurt, suspend it with a chopstick and rubber band over a container, and allow it to drain for one to two hours. You will want to use a fairly thin towel for this – I had to switch to a thinner towel when I discovered no draining was occurring.

While the yogurt drains, peel, seed, and chop a medium cucumber.

IMG_1929

Ready to peel, seed, and chop one cucumber. Hitcher loved cucumbers.

Place the cucumber on a tea towel or paper towels with a pinch of Kosher salt and wrap up the cucumber, setting it aside.

IMG_1930(1)

Peeled, seeded, and chopped cucumber placed on paper towels with Kosher salt.

Once the yogurt has drained, place 4 minced garlic cloves in a bowl, along with 5-6 chopped mint leaves, 2 t red wine vinegar, 1 T olive oil, the drained yogurt, and the cucumber. Stir the sauce to combine and refrigerate for up to a week.

For the gyro meat, start by chopping a medium onion with a knife, and then process the onion in the food processor until it is very finely chopped. Line a bowl with  a tea towel and dump the chopped onion into the towel. Squeeze as much juice as you can out of the onion, discarding the juice; you will be surprised at how much juice is in one onion.

Place the onion back in the food processor bowl, along with 1 T minced garlic, 1 T dried rosemary, 1 T dried marjoram, 1/2 t pepper, 2 t Kosher salt, and 2 pounds of ground lamb.

Process the lamb mixture until it forms a paste-like consistency.

IMG_1923(1)

Meat mixture processed until paste-like.

If you are using a rotisserie, place two large pieces of plastic wrap on your counter, overlapping them by about two inches. Dump the meat mixture onto the center of the plastic wrap, form a log shape, and roll the meat up tightly in the plastic. Place the meat log in a container and refrigerate the log for at least two hours, as this will allow the log to set into its shape. After chilling, place the lamb log on your rotisserie, leaving some room at the ends. Preheat your grill to high. For a charcoal grill, distribute coals evenly between the front and back portions of the grill, leaving the middle section clear of coals. Regardless of your type of grill, place a double layer of foil beneath the rotisserie to catch drippings and grill the meat on high for 15 minutes. After 15 minutes, decrease the temperature to medium and continue to cook the lamb for 20-30 more minutes, or until the center of the meat is 165 degrees. To finish cooking, turn the grill off and let the meat continue to spin for 15 minutes more, or until the internal temperature hits 175 degrees. If you do not have a rotisserie, skip rolling the meat into a log and dump it into a loaf pan. Place a pan with an inch of water in the oven and preheat the oven to 325 degrees. Place the loaf pan in the water bath and cook the lamb for 60 to 75 minutes, or until it reaches 170 degrees.

Remove the loaf from the oven and pour off any fat. Set a foil-covered brick on top of the meat and let the meat cool until it just cool enough to handle.

Slice the meat and serve it on warm pita bread with Tzatziki sauce, chopped tomato, chopped onion, and feta cheese.

IMG_7866(1)

Sliced gyro meat.

IMG_7867(1)

Alton’s gyro.

I have not eaten many gyros, but I thought this was a delicious recipe. The meat  held together well when sliced and remained moist. The herbs accentuated and complimented the lamb’s grassy flavor, and the whole gyro was a pleasing combination of textures, flavors, and temperatures. With the warm lamb and pita, the cooling Tzatziki, tangy onion, and sweet tomato made a wonderful pairing. Unfortunately, I only got to have one meal out of this recipe since I had to leave town the following day, but I intend to make this again and enjoy it for several meals!

For one of my parents’ first dates, my dad took my mom out to dinner. My dad ordered oysters on the half shell as an appetizer for the two Marylanders to share. It turned out that my mom had never before eaten a raw oyster, but, wanting to impress her date, she feigned experience and got them down. If you think about it, perhaps, in a small way, oysters contributed to my very existence.

I never tried a raw oyster myself until 2015 when we took a trip to New Orleans between Ted’s chemo/radiation and subsequent surgery. We headed to a nice restaurant for happy hour and ordered a dozen oysters to go with our cocktails. Our waitress suggested that we try our first oysters on Saltine crackers, along with some cocktail or mignonette sauce, and her tips led to us ordering an additional dozen.

Horseradish Cream Sauce

Apparently, Alton likes to eat his oysters at home with a horseradish cream sauce. This sauce should be made several hours before you will be eating your oysters.

IMG_9030

Ingredients for horseradish sauce: horseradish root, Dijon mustard, Kosher salt, white wine vinegar, pepper, and sour cream.

When serving oysters at home, plan for six large, or eight to ten small, oysters per person as an appetizer. Store oysters flat in the refrigerator with damp cloths between layers, and do not keep them for any longer than a week (preferably only a day or two). Shucking oysters can be a bit tricky, so it’s helpful to watch some videos. Alton’s tips are to hold the round side of the oyster down, insert the knife at the hinge, and give the knife a little twist. Oh, and don’t forget to cut under the oyster once you have the shell open.

IMG_9039

Oysters, ready to be shucked.

Now, back to the sauce. Grate 1/4 C of peeled horseradish root into a bowl, using a microplane. Add 1 t white wine vinegar, 1/4 t pepper, 1/2 t Kosher salt, 1 T Dijon mustard, and 1 C sour cream.

Whisk the sauce until combined, and refrigerate until use.

IMG_9035

Horseradish cream sauce.

The sauce will get less intense with time. I served this sauce with some fresh oysters on the half shell, and I really liked its subtle heat.

IMG_9045

Horseradish cream sauce served with shucked oysters.

If you are looking for a horseradish sauce that really burns your nose, this isn’t it. Of course, you could always add some additional horseradish to make it spicier. This sauce would also pair beautifully with red meat, as it would not overpower the flavor of the meat. This is a really well-balanced, delicious sauce.

Baked Oysters Brownefeller

If you are an oyster newbie, you may find a baked preparation like Alton’s version of Oysters Rockefeller to be less intimidating. Still, though, you will need to get some raw oysters and shuck them. The oysters I ended up with were Pacific oysters, I believe, and they were humongous! I would opt for smaller oysters next time. For Alton’s baked oysters, melt 6 T of unsalted butter in a large skillet over medium-low.

IMG_9066

Unsalted butter in a large skillet.

Once melted, add 3/4 C chopped onion, 3/4 C chopped celery, and 1/2 t Kosher salt. Increase the heat to medium and cook the vegetables for about five minutes.

IMG_9067

Celery, onion, and Kosher salt added to butter.

Add 1 T minced garlic and cook for about a minute.

IMG_9069

Garlic mixed in.

Next, add a 14 oz can of artichoke hearts drained/chopped, 1 C Panko breadcrumbs, 2 t lemon zest, 1/2 t pepper, 1 t dry oregano, and a pinch of Kosher salt. Stir this mixture until the butter has been absorbed by the breadcrumbs, and then cook for another minute.

Spread 4 C of rock salt on a rimmed baking sheet, and nest 24 shucked oysters in the salt (I did fewer oysters since there were only two of us). Evenly distribute the Panko mixture to cover the oysters.

Bake the oysters at 425 for 10-12 minutes, or until the topping is golden.

IMG_9075

Oysters into the oven.

IMG_9077

Oysters Brownefeller.

I wanted to like this more than I did, but I don’t think I can blame all of that on Alton’s recipe. The biggest problem I had with this recipe came down to my oysters themselves. My market ordered oysters for me, and said they would get what was available, which meant I had no choice in what they received. My oysters were honestly just too big, which made them very difficult to eat along with all of the topping. Oysters are supposed to be a one-bite experience, which was just impossible with mine. The flavor of the topping was nice, but the topping did not crisp up as much as I hoped it would. Again, though, I wonder if this was  because my oysters were so large that they contributed a lot of moisture to the topping. I imagine that this recipe could be quite successful with small oysters, so I would encourage oyster lovers to give this a try with better oysters.

Oyster Soup

Alton’s final oyster recipe is for an oyster soup. This recipe is a little easier because you can use pre-shucked oysters in a jar. When buying them, be sure they are in clear liquid, as cloudy liquid can be a red flag.

IMG_9088

Jarred oysters.

There really are only a few ingredients in this simple soup, which begins by draining the liquid from a pint of jarred oysters into a saucepan containing a quart of heavy cream.

Heat the cream and oyster liquor, avoiding bringing it above a simmer. Meanwhile, melt 1 T unsalted butter in a large skillet over medium heat, and add two ribs of chopped celery and a large pinch of Kosher salt.

Add a chopped onion to the skillet and cook for a few minutes.

IMG_9092

Onion added to the pan.

Next, add the drained oysters to the pan, along with 1 t celery seed and 1 1/2 t hot sauce. Cook the oysters just until they plump up and curl at the edges.

Place the oyster mixture in the carafe of a blender, along with enough of the warm cream to cover the oysters. Blend the oysters until smooth.

Return the remaining cream to medium heat and add the oyster puree, stirring to combine.

IMG_9098

Oyster puree added back to remaining warm cream.

Serve the soup with a squeeze of lemon and some parsley, chives, or chervil.

IMG_9100

Bowl of oyster soup with lemon and parsley.

This soup had subtle briny flavor of the ocean balanced with the richness of cream, and if it had been placed in front of me I probably would have guessed it was a smooth clam chowder. I don’t think I would have ever been able to identify that oysters were the main ingredient in this soup. With the heavy cream base of this soup, I was afraid the soup would be super rich, but it was light enough that I had no trouble eating a whole bowl of it. This is a good recipe for those who like clam chowder but want to try something a little bit different.

This episode of Good Eats is all about sauces and their power to take a dish to new levels. Alton gives some basic tips about thickening sauces and soups, stating that his preferred thickener is arrowroot starch. If you need to thicken a hot soup or sauce, first dissolve arrowroot starch in cold liquid (such as broth), and add the cold liquid to your warm sauce/soup. A good starting amount of starch is one tablespoon of starch per cup of liquid you wish to thicken. I always try to stash these sorts of tips in the library in the back of my brain!

Strip Steak with Pepper Cream Sauce

A pepper cream sauce is first in this episode, and Alton serves this sauce over strip steaks. In the episode he does not show how he cooks the steaks, but it is stated that the steak recipe accompanies the sauce recipe online. I cooked my steaks per the online recipe, and kept them warm in the oven while I made the sauce.

For the sauce, you will need beef broth, cognac, green peppercorns (these come in a brine and can be found near capers in the store), and cream.

IMG_8866

Ingredients for pepper cream sauce: beef broth, green peppercorns, cognac, and cream.

The first step of this sauce is deglazing the pan in which the steaks were cooked, which is done by adding 3/4 C of beef broth to the pan and scraping up any browned bits in the pan.

Let the broth reduce for a few minutes over high heat. Next, add 3 T cognac to the pan (this is about one miniature bottle), along with 1 T green peppercorns, drained and lightly crushed. Follow the peppercorns up with 3/4 C cream.

IMG_8878

Cognac, green peppercorns, and cream stirred into broth.

Let the sauce reduce until it is thick enough to coat the back of a spoon.

IMG_8879

Reducing the sauce.

Spoon the sauce over your cooked steaks and enjoy!

IMG_8882

Strip steak with pepper cream sauce.

This is sauce is really quite delicious. It is indulgent without being heavy, and the spice from the green peppercorns is excellent with meat. The cognac gives the sauce a sweet, fruity character and the cream makes the sauce rich and smooth. You could pair this sauce with any meat, really. I would be quite happy to be served this sauce in a high-end steakhouse. The next time you serve steak, whip up a batch of this sauce to kick your steak game up a notch.

Hollandaise

Hollandaise sauce was something my mom made fairly regularly, usually serving it over asparagus or broccoli. While I knew Hollandaise could be a bit finicky, my mom did not solely reserve her Hollandaise efforts for holidays. We are so fortunate to have a mom who was such a good cook, and who served us things like Hollandaise! I have only made Hollandaise a couple of times myself, and making Alton’s recipe made me realize it is something to make more regularly. For Alton’s Hollandaise, you will need a heavy saucepan with about an inch of water, and a mixing bowl that comfortably nests on top of the saucepan. I’m sure a double boiler would also work. Begin by bringing the water in the saucepan to a simmer.

IMG_8899

Simmering water.

While the water heats, place three egg yolks and 1 t water in the bowl and whisk – do this off of the heat. Whisk the yolks until they are lighter in color, which will take a minute or two.

Add 1/4 t sugar to the yolks and whisk for another 30 seconds.

IMG_8898

Sugar added to yolks.

Place the yolks over the simmering water and whisk them continuously for three to five minutes, or until they thicken, lighten in color, and fall from the whisk in a ribbon.

At this point, remove the bowl from the heat and whisk in 12 T unsalted butter, one tablespoon at a time; you will need to place the bowl back over the simmering water occasionally to melt the butter.

IMG_8905

Sauce after adding all butter.

When all of the butter has been incorporated, add 1/2 t Kosher salt, 2 t lemon juice, and 1/8 t cayenne pepper.

IMG_8906

Kosher salt, lemon juice, and cayenne pepper added to sauce.

Serve the Hollandaise immediately, or store in a thermos until you are ready to use it. I served my Hollandaise for dinner over Eggs Benedict and steamed asparagus.

IMG_8908

Alton’s Hollandaise, served over asparagus and Eggs Benedict.

First off, we should all eat Eggs Benedict for dinner more often! Alton’s version of Hollandaise seems pretty foolproof to me, and is rich, creamy, and buttery. My only complaint about his Hollandaise is that I prefer my Hollandaise to have a bit more lemon. Otherwise, his Hollandaise hits all the marks of this classic sauce.

While I breeze through some episodes, this episode was one that took a little while for me to complete. Not only were there five recipes in this episode, but they also all contained nuts; this made for some pretty rich food, so I had to space the recipes out a little bit. First was Alton’s cashew sauce.

Cashew Sauce

This recipe is really two recipes in one:  one for cashew butter, and another for the cashew sauce that is made WITH the cashew butter. To make the cashew butter, combine 10 ounces of roasted/unsalted cashews with two heavy pinches of Kosher salt in a food processor.

Place 2 T honey in the microwave for ~15 seconds to loosen it up, and combine the honey with 1/3 C walnut oil.

With the food processor running, slowly add the oil/honey until the mixture is smooth.

IMG_7339

Honey/oil drizzling into cashews.

If you just want cashew butter, you can stop here.

IMG_7343

Cashew butter.

To continue on and make Alton’s cashew sauce, whisk 1/2 C of your cashew butter with 3/4 C coconut milk and 1/4 t cayenne pepper in a saucier over medium heat. Once smooth, use the sauce as desired.

Alton recommended serving the cashew sauce over chicken or rice. I chose to serve my cashew sauce over some sweet potato “noodles” and meatballs, along with a little bit of cilantro.

IMG_7351

Cashew sauce served over sweet potato noodles and meatballs.

IMG_7353First off, Alton’s cashew butter is super delicious; it’s sort of like a richer, sweeter, better peanut butter, and it is great on pretty much anything. We were also fans of the cashew sauce, which was rich, nutty, and had a perfect punch of heat from the cayenne pepper. And, if you are too lazy to make your own nut butter (it is worth it, though), you could always use purchased nut butter to make the sauce. This sauce is also super versatile, as you could use it over meat, pasta, or vegetables.

Pistachio Mixed Herb Pesto

I love pesto and it is something I make every summer. I typically make basil pesto, so I can use up the last of my fresh basil, freeze the pesto in batches, and continue to dream of summer as the weather gets colder. Sage pesto is nice to make in the fall too! Alton’s pesto recipe in this episode was a little different from the other pestos I have made in the past, as parsley was the primary herb and toasted pistachios were the nut of choice (I toasted my pistachios in a 400 degree oven for ~5 minutes).

IMG_7473

Ingredients for pesto: garlic, thyme, tarragon, sage, oregano, olive oil, Parmesan, parsley, and toasted pistachios.

To make Alton’s pesto, drop 1/2 to 1 clove of garlic into the lid of a running blender, chopping the garlic finely (I opted for a full clove since I like garlic). When the garlic is chopped, turn off the blender and add 2 T fresh lemon thyme (I could not find lemon thyme, so used regular thyme), 2 T fresh tarragon, 1 T fresh sage, 1 T fresh oregano, 2 C packed flat leaf parsley, 1/2 C grated Parmesan, and 3/4 C toasted pistachios.

With the blender running, drizzle in 2/3 C olive oil until emulsified.

IMG_7481

Pesto, after drizzling in olive oil.

Alton recommends serving his pesto on pesto or toast. I served the pesto over zucchini “noodles” with fresh Parmesan.

IMG_7484

Pesto over zucchini noodles.

This pesto is super flavorful, tastes like a variety of herbs, and has great color. Since everyone always thinks of basil and pine nuts/walnuts for pesto, this version really mixes things up. And, if you happen to have fresh herbs in your garden, this can also be a relatively inexpensive pesto recipe. Give this one a try for a tasty twist on pesto.

Pistachio Fruit Balls

For a sweet treat using nuts, Alton made these pistachio fruit balls.

IMG_7596

Ingredients for pistachio fruit balls: roasted pistachios, dates, dried apricots, orange juice, golden raisins, creme de cassis, and dried cherries.

Begin this recipe by grinding 1 C roasted pistachios in a food processor. Set the pistachios aside.

Next, in a large bowl combine 1/2 C pitted dates, 1/2 C dried apricots, 1/2 C golden raisins, and 1 C dried cherries.

IMG_7601

Combined dried fruit.

Run the dried fruit mixture through a meat grinder with a medium die, catching the ground fruit in a bowl.

Add half of the ground pistachios to the ground fruit, along with 1 T fresh orange juice and 2 T creme de cassis. Note:  creme de cassis is a black currant liqueur.

Using your hands, work the mixture together until thoroughly combined. Once combined, use a melon baller to form individual balls of the fruit mixture, and roll the balls in the remaining ground pistachios.

If you find that the mixture is too sticky, you can put some vegetable oil on your hands. Store the fruit balls in the refrigerator for up to a week.

IMG_7611

Pistachio fruit balls.

The online reviews of this recipe are mixed, which I find surprising. We thought these were a really great, healthy, sweet snack. Some reviewers complained of this being a messy or difficult recipe, but I found neither to be the case at all. You could always substitute a different liqueur if you did not have creme de cassis, but I wanted to test the recipe as written. These fruit balls had just the perfect amount of sweetness, held together perfectly, and had great crunch from the pistachios. We ate these as a snack every day for a week. I liked this recipe!

Macadamia Nut Crusted Mahi Mahi

When Alton made this recipe in the episode, he used mahi mahi, but I could not find mahi mahi where I live. Instead, Ted splurged and picked up a couple halibut fillets. This recipe makes enough for four servings, so I halved the recipe for us. To make the recipe for four servings, coarsely crush 5 ounces of roasted macadamia nuts; you can do this in the food processor or you can put them in a tea towel and whack it on the counter.

Put the macadamias in a bowl and add 2 T flour, 1/2 C Panko bread crumbs, and 1/2 a stick of butter, melted. Stir the mixture to combine and set it aside.

Preheat your oven to 425, placing a rack in the center of the oven. While the oven preheats, line a sheet pan with foil and brush it liberally with vegetable oil. Place fish fillets (6-8 ounces each) on the foil and season them with Kosher salt and pepper.

IMG_7623

Fish fillets placed on lubed foil and seasoned with salt and pepper.

Stick the fish in the preheated oven for five minutes to par cook.

IMG_7624

Par cooking the fish.

Remove the fish from the oven and brush it with coconut milk; it should take about 2 T.

Pat the nut mixture lightly onto the fish, crumpling the foil up around the edges of the fish to keep the nut crust from sliding off.

IMG_7629

Nut crust patted onto fish, and foil propped up.

Stick the fish back in the oven for 5-10 more minutes, or until golden brown. My crust took the full 10 minutes to be golden.

IMG_7630

Fish after cooking.

Let the fish rest at room temperature for ~10 minutes before eating. Honestly, I was worried that the time needed to make my nut crust golden would render my fish overcooked, but the fish turned out to be perfectly cooked. We enjoyed this on a warm evening, with a glass of white wine and a squeeze of lemon.

IMG_7633

Alton’s macadamia nut crusted fish.

This is a rich fish dish that would be worthy of serving for a special occasion. The fish was moist and the nut crust was rich, crunchy, buttery, and nutty. Great recipe. Oh, and if you don’t know, keep the macadamia nuts away from your dogs, as they are toxic.

Macadamia Nut Crust

It turns out that the macadamia nut crust above can also be used as a pie crust. So, again, to make the crust, chop 5 ounces of roasted macadamia nuts (you can roast them in the oven for about 5 minutes at 400 degrees).

Combine the chopped macadamia nuts with 2 T flour, 1/2 C Panko bread crumbs, and 1/2 a stick of butter, melted.

Pat the crust mixture into a pie plate and use with any pie filling recipe. If you need to blind bake the crust for your pie recipe, bake it at 375 degrees for 20-25 minutes. Well, I ended up making this pie crust twice. I needed to blind bake my crust because I was making a no-bake key lime pie, but it turns out that 20 minutes is way too long to blind bake this crust. Yep, my first crust was scorched.

When I made the crust the second time, I began checking it at 10 minutes and it was done in about 15.

IMG_7520

A slice of key lime pie with macadamia crust.

This crust added a great crunch and nutty flavor to my pie, and it was very easy to prep with no rolling/chilling of dough. The downside of this crust was that it was super crumbly, so it didn’t make for pretty slices of pie. Other than that, though, this was a buttery, nutty, crispy pie crust.

The 73rd episode of Good Eats is all about tomatoes and different uses for them. Seeing that Ted is not a huge tomato fan, I was not sure what he would think of some of these applications, but worst case scenario would see me stocking up heavily on lycopene. Alton went over some tomato facts in the episode, stating that there are six types of tomatoes we can get commercially – globe, plum, cherry, pear, grape, and currant (in order of size from largest to smallest). A beefsteak tomato is a red globe tomato that is extra large in size. Oh, and never store tomatoes in the refrigerator, as temperatures colder than 50 degrees permanently stop a component of tomatoes that gives them flavor.

Stuffed Tomatoes

For six servings of Alton’s stuffed tomatoes, cut the tops off of six large globe tomatoes, using a serrated knife. Scrape the seeds and pulp out of the tomato, using your fingers or a grapefruit spoon.

Sprinkle the tomatoes liberally with Kosher salt and invert them on a rack for 15 minutes; this will remove excess moisture from the tomato shells.

While the tomatoes drain, combine 2 C sauvignon blanc and 1 C hot water; add 3 C dried mushrooms to the liquid mixture to rehydrate.

While Alton used a blend of chanterelles, morels, and shiitakes, I only used shiitakes. Next, heat a large skillet, adding 2 T olive oil, 1 T minced garlic, 2 T minced shallots, and 1 C finely diced onion. Cook the onion until translucent.

img_5763

Garlic, shallots, and onion, cooking in olive oil.

Using your hands, squeeze excess moisture from the hydrated mushrooms, reserving the liquid. Chop the mushrooms and add them to the pan, cooking for five minutes over medium heat.

Add a cup of your reserved mushroom liquid to the pan and bring it to a simmer for five minutes. Follow this up with 1/4 t pepper and 1 chopped tomato. Finally, add 1 1/4 C panko breadcrumbs.

By this time, your tomato shells should have shed any excess moisture and you can use a measuring cup to fill the shells with the mushroom mixture.

For a final topping, combine 3 1/2 ounces of goat cheese with 1 T parsley, dividing this mixture evenly among the tomatoes. Place the stuffed tomatoes under a preheated broiler for 5-7 minutes, and enjoy!

We ate Alton’s stuffed tomatoes as a side dish to my mom’s hearty minestrone soup.

img_5783

Stuffed tomatoes alongside hearty minestrone soup.

Ted thought this recipe was just OK, as he didn’t care for the tomato shells. As a tomato fan, however, I thought Alton’s stuffed tomatoes were delicious. The tomato shells maintained their texture and were far from soggy, contributing a bright tomato flavor. The mushroom filling had a fantastic umami flavor and slightly crunchy texture, and, well, who doesn’t like goat cheese? This recipe is a great blend of textures and flavors, and could be served as a vegetable side dish or as a vegetarian entree.

Tomato Sauce

I was curious to see how this episode’s tomato sauce would compare to Alton’s canned tomato sauce that I made over two years ago when I was writing up the second season of Good Eats. This episode is all about using fresh tomatoes, and this recipe calls for 20 fresh Roma tomatoes. In addition, you’ll need olive oil, fresh thyme, fresh oregano, Kosher salt, pepper, garlic, and onion.

img_5708

Garlic, onion, oregano, and thyme.

Begin by halving/seeding the Roma tomatoes, placing them cut side up in two 13×9-inch glass baking dishes.

Spritz (or, in my case, drizzle) the tomatoes with olive oil, and sprinkle them evenly with 1 T each of chopped fresh thyme and oregano. Alternatively, you can use 2 t of each herb, dried.

img_5710

Tomatoes, drizzled with olive oil and sprinkled with oregano and thyme.

Sprinkle Kosher salt and 1/2 t black pepper over the tomatoes, along with 2 t minced garlic and 1 C finely diced onion (any type will work).

img_5711

Kosher salt, pepper, garlic, and onion added to tomatoes.

Stick the tomatoes into a 325-degree oven for two hours.

img_5714

Tomatoes after roasting for two hours.

After two hours, increase the oven’s temperature to 400 degrees for an additional half hour.

Remove the tomatoes from the oven and run them through a food mill (I have my mom’s ancient one that she used to use for applesauce) to get rid of their skins/seeds; you can do this directly over a medium saucepan. It will take a while to push them all through the food mill and you will get very little yield.

Add a cup of white wine (Alton used “cheap Chardonnay”) and bring the sauce to a boil over medium heat. Once boiling, decrease the heat and simmer the sauce for five minutes.

I served this tomato sauce over pasta, along with homemade lamb/beef meatballs (made by Ted) and Parmesan.

img_5732

Alton’s completed tomato sauce. with pasta and meatballs.

Honestly, I was disappointed in this sauce. This recipe made just enough sauce for a pound of pasta, and it was nothing special. The wine flavor seemed too prominent for my taste, so I would simmer it longer, if I were to make this again… which I probably will not do. I expected to prefer this sauce over the one from season two, especially since this one uses fresh tomatoes, but I would choose Alton’s canned sauce any day.

TBL Panzanella

The final recipe from this episode is for a TBL (tomato/bacon/lettuce) panzanella salad. In the episode, Alton demonstrates that this panzanella is a great alternative to a BLT sandwich, and that it showcases tomatoes very well. I love a good panzanella, or a good BLT for that matter, so I was enthusiastic about this recipe. Beginning the night before you want to eat this panzanella, cut a quart of 1-inch high-quality bread cubes, placing them on a pan to dry overnight.

The following day, cook six slices of bacon, saving the drippings. I used my bacon that I made from episode 59.

Cut the bacon into 1-inch pieces and place them into a large bowl.

img_5742

Chopped bacon.

In a separate bowl, toss the dried bread cubes with the warm bacon drippings.

img_5748

Dried bread cubes tossed with bacon drippings.

Next, sear 2 C of halved grape tomatoes in a hot pan, face down, for about five minutes. Add the seared tomatoes to the bacon bowl.

Halve 2 C of raw yellow pear tomatoes (I had to use yellow grape tomatoes), adding them to the bacon/tomato bowl. Next, add 2 C of chopped Romaine lettuce.

In a small lidded container, shake together 3 T olive oil, 1/4 C red wine vinegar, 1/4 t salt, and 1/4 t pepper.

img_5736

Olive oil, red wine vinegar, salt, and pepper for the dressing.

Combine the bread cubes with the rest of the salad and drizzle on the dressing. Finish the salad off by adding a chiffonade of fresh basil and mint.

I thought this was a really good panzanella salad. The bread cubes stayed crunchy, the bacon added meatiness, and the tomatoes gave a super fresh flavor. I thought the vinegar-based dressing paired well also.This is also a very colorful, pretty salad. To me, this is more of a warm weather meal, but we enjoyed it nonetheless. I think this still had a few too many tomatoes for Ted’s taste, but I may make this again for myself and enjoy it on a sunny day on the deck.

Fresh Yogurt

Yogurt is one of those things that I always feel I should eat more of than I do. I tend to go in spurts with yogurt, eating it frequently for a while, and then not at all. Alton’s yogurt episode began with homemade yogurt. I made homemade yogurt once years ago when I was in grad school, as part of my food microbiology lab course. All I really remember from that experience was that I had a lab partner from Mongolia who called himself “Woody,” I could barely understand a word he said, and our yogurt was very pink. Needless to say, I was hopeful that my Woody-less yogurt would be more successful. When making Alton’s yogurt, you can use any type of milk that you choose, but Alton opted for organic 2% milk in the episode of Good Eats. Alton did say that whole milk will result in looser yogurt, while skim milk will yield yogurt with a grainy texture. In addition to a quart of milk, you will need 1/2 C of powdered milk, 2 T honey, and 1/2 C of plain yogurt, containing live cultures.

img_5475

Ingredients for homemade yogurt: plain yogurt with live cultures, dry milk, honey, and milk.

Begin by pouring your milk into a saucepan, adding the powdered milk and honey.

Meanwhile, allow your yogurt to come to room temperature.

img_5482

Plain yogurt, being brought to room temperature.

Using a probe thermometer, heat the milk mixture to 120 degrees over medium heat. Remove the milk from the heat, and pour it into a clean cylindrical container, allowing it to cool to 115 degrees.

Once the milk has cooled, whisk about a cup of the warm milk into the yogurt.

img_5488

About 1 C of warm milk whisked into yogurt.

Then, whisk the yogurt/milk mixture back into the cylinder of milk. Wrap the cylinder in a heating pad that will maintain the yogurt’s temperature between 100 and 120 degrees; you can test your heating pad first by filling your cylinder with water.

img_5489

Yogurt added to milk and wrapped with heating pad to ferment for 6 hours.

Allow your yogurt to ferment for three to 12 hours, depending on how you like the texture of your yogurt; a shorter fermentation will yield looser yogurt, while a longer fermentation will give thicker yogurt. Alton did an even six hours in the episode.

img_5491

Yogurt, after fermenting for 6 hours.

Refrigerate your yogurt overnight before using.

img_5493

Alton’s homemade yogurt.

I thought this yogurt was fine, but really nothing special. If anything, I would have liked this yogurt to have had a thicker texture, so I would possibly ferment it a little longer if I were to make it again. Honestly, I wouldn’t go to the trouble of making this again when I can easily buy yogurt that I like just as much.

Thousand Island Dressing

So, really, Alton calls this dressing “Million Island Dressing” in the episode, and it is a good use for some of his homemade yogurt. To make his dressing, whisk together 1 C plain yogurt, 2 T vegetable oil, and 2 T tomato sauce.

img_5523

Yogurt, tomato sauce, and vegetable oil.

Once combined, add 2 t lemon juice, 2 t dry mustard, and 2 t sugar.

img_5525

Lemon juice, dry mustard, and sugar added to dressing.

Next, whisk in 1 t Kosher salt and 1/2 t pepper.

img_5526

Kosher salt and pepper added to dressing.

Finally, fold in 1/2 C diced onion, 1 T relish, 1 T chopped green olives, and 1 minced jalapeno.

I enjoyed this dressing more than I thought I would. It has a really good kick from the jalapeno, tang from the yogurt and lemon, and bite from the onion. It also adds a lot of texture to a salad. We actually liked this enough that I made it a couple times in one week for us to eat on our lunch salads. This is a really good salad dressing.

Tarragon Yogurt Sauce

If you are looking for another savory application for plain yogurt, this tarragon sauce is one to try. This sauce is very versatile and could be served over many things, including fish, eggs, and vegetables; in the episode, Alton says that his favorite use of this sauce is over braised carrots, so that is how I opted to use mine. For this sauce, begin by heating a saucier over medium heat, adding 2 T olive oil, 1/2 t Kosher salt, 1/2 C finely chopped onion, and 1 1/2 t minced garlic.

img_5530

Olive oil, Kosher salt, onion, and garlic in saucier.

I did not have a saucier until recently, but I inherited my parents’ copper-bottomed Calphalon saucier when my brother and I finished sorting through our parents’ belongings; thankfully, my parents are still living, but they really do not cook anymore. Yes, I have learned that a saucier is a very nice tool to have for a job such as this tarragon sauce. While your onion and garlic saute, combine 2 T cornstarch and 1 C chicken stock in a lidded container, and shake to combine. This slurry will help to thicken the sauce, and will also prevent over-coagulation of proteins, AKA curdling. Cream-based sauces have enough fat to prevent curdling, but yogurt-based sauces do not. Anyway, add the slurry to the pan, increase the heat, and add 1 1/2 T dried tarragon, whisking.

Remove the pan from the heat and temper 1 C of plain yogurt by gradually whisking in some of the sauce mixture. Finally, add the tempered yogurt to the pan, whisking.

Heat the sauce over low heat, just until warmed through. As I said before, we ate this sauce over carrots as a side dish.

The tarragon flavor in this sauce is quite strong, giving a real anise-like flavor, and you also really taste the yogurt. This is a sauce you could make with other herbs too; I think a dill version would pair terrifically with salmon. Either way, this is an easy sauce to dress up veggies or protein.

Yogurt Cheese

What is yogurt cheese? Yogurt cheese is yogurt that has been allowed to drain, removing whey. While cheese has had its whey removed, regular yogurt has not. Allowing yogurt to drain results in a thick yogurt that has a consistency similar to cream cheese. To make yogurt cheese, line a strainer with two layers of cheesecloth, setting the strainer over a bowl. Add a quart of plain yogurt to the strainer, folding the cheesecloth over the top.

img_5593

A quart of plain yogurt in a cheesecloth-lined strainer.

Weigh the yogurt down with the lid of a pot and a can, refrigerating it for four hours.

Yogurt cheese can be used plain as a spread, or in Alton’s recipe for frozen yogurt, which I will write about below. I tasted the plain yogurt cheese, but opted to use it for Alton’s other recipe; it tasted like plain yogurt… just much, much thicker.

Herb Spread

This herb spread is basically the same recipe as the one for yogurt cheese above, but with added seasonings. To a quart of plain yogurt (I used homemade) add 1 1/2 t cumin, 2 T chopped parsley, 1 t Kosher salt, and 1/2 t pepper.

img_5497

Cumin, parsley, Kosher salt, and pepper added to a quart of plain yogurt.

As with the yogurt cheese above, place a cheesecloth-lined strainer over a bowl and add the yogurt mixture.

img_5499

Seasoned yogurt poured in cheesecloth-lined strainer to drain.

Weigh the yogurt down with a pan lid and can, allowing it to drain for four hours in the refrigerator.

The resulting spread is tangy and has a punch of cumin, and it is great with crackers or on sandwiches.

img_5504

Herb spread with crackers.

Talk about an easy hors d’oeuvre, and it is even easier if you use store-purchased yogurt!

Lemon-Ginger Frozen Yogurt

This recipe is the perfect use for Alton’s yogurt cheese. Combine in a bowl 4 C plain yogurt cheese, 3/4 C sugar, 1/2 C light corn syrup, 2 t lemon zest, 1 T minced fresh ginger, and 3 T lemon juice.

Whisk the yogurt mixture until smooth and freeze in an ice cream mixture per the manufacturer’s instructions.

In the last few minutes of churning, add 1/4 C chopped crystallized ginger.

Freeze the frozen yogurt in the freezer until firm.

img_5606

Alton’s lemon-ginger frozen yogurt.

This frozen yogurt is super refreshing and reminds me of warmer weather (as I type this, it is snowy outside and the Christmas tree is illuminated). The first time we ate this frozen yogurt, the crystallized ginger seemed too chewy, but after freezing the yogurt for a longer period, the chewiness went away. I definitely foresee making this again, as it is packed with ginger and lemon flavor, and is a relatively healthy treat. This is worth making.


It is hard to believe that this post will mark the end of the 4th season of my Good Eats project. Only 10 seasons to go, plus some special episodes! It is also hard to fathom all that has happened since I started this blog 19 months ago. In addition to moving to a new house, Ted was diagnosed with cancer and underwent 5.5 weeks of chemo/radiation, along with two major operations. Thankfully, he just began (what should be) the final phase of his treatment:  12 rounds of chemo that should finish up at the end of June. One down… 11 to go, and boy are we counting down. This project has served to be a great distraction for me when I have had the opportunity to put time into it. Here’s to hoping that the next several months fly by!

Salsa

I love spicy food, and thankfully I have a relatively high tolerance for it. The final episode of season four was all about chile peppers and the Scoville unit of measurement for their heat levels. Always remember the general chile heat rules that smaller peppers are hotter than larger peppers, longer peppers are hotter than short ones, and green peppers tend to be hotter than other colors. To demonstrate the variations of heat and flavor among different chile peppers, Alton whipped up a batch of his salsa. To make Alton’s salsa, you will need 6 Roma tomatoes, 4 cloves of garlic, 1/2 a red onion, 1/2 a red bell pepper, 1 T olive oil, the juice of one lime, chili powder, Kosher salt, black pepper, 4 jalapeno peppers, 1 dried New Mexico chile, and something green (scallions, cilantro, and/or parsley). Note:  the online recipe calls for dried ancho chiles, but Alton used a New Mexico chile in the episode.

IMG_4137

Ingredients for Alton’s salsa: red bell pepper, Roma tomatoes, scallions, garlic, jalapenos, red onion, lime, olive oil, chili powder, Kosher salt, and pepper. Not pictured: dried New Mexico chile.

You will need to roast two of your jalapeno peppers. If you have a gas range, you can do this right over the burner, rotating the pepper over the burner until blistered on all sides. Alton placed his jalapenos on a collapsible stainless vegetable steamer to do this. We do not have a gas range, so I roasted my two chiles on a baking sheet under the broiler, turning them until all sides were roasted.

IMG_4141

Roasting jalapenos under the broiler.

Whichever method you use, watch your peppers carefully! Once your peppers are roasted, place them in a plastic wrap-covered bowl or in a paper bag for a few minutes; this will steam the peppers, allowing their skin to come off easily. While your peppers steam, place your chopped tomatoes, minced garlic, chopped red onion, diced bell pepper, olive oil, lime juice, and chopped scallions (or parsley/cilantro) in a bowl.

As for the two raw jalapeno peppers, seed them both, as the seeds are not digestible. Finely chop one raw jalapeno, leaving its white membrane in place; the membrane will add more heat. Remove the white membrane from the second raw jalapeno and chop it into slightly larger pieces. The second jalapeno will serve to add more fruity notes to the salsa. Add both jalapenos to the bowl.

This slideshow requires JavaScript.

Season the salsa to taste with chili powder, Kosher salt, and pepper.

IMG_4159

Salsa seasoned with chili powder, Kosher salt, and pepper.

Next, cut the end off of your dried New Mexico chile, and shake it to remove the seeds. Using scissors, cut the dried chile into strips, and then fine pieces. Mix the dried chile pieces thoroughly into the salsa. They will initially be chewy, but will hydrate from the liquid in the salsa.

IMG_4162

Dried New Mexico chile, snipped into small pieces with scissors.

Finally, remove the skins from your roasted jalapenos by rinsing and rubbing them under running water. At this time, open the peppers up and pull out the seeds. Roughly chop the roasted peppers and add them to the bowl. They will add a sweetness to the salsa.

Taste the salsa again, adjusting the seasoning if needed. Cover and refrigerate the salsa for at least an hour before eating, so the flavors can blend and the dried chile can hydrate.

IMG_4167

Alton’s finished salsa.

I made this salsa early in the day, and we had it as an appetizer (with tortilla chips, of course). We actually ate it two nights in a row, and it was just as good the second night, though Ted insisted it was less hot the second night.

IMG_4170

A perfect bowl of Alton’s salsa with tortilla chips.

We like homemade salsas in general, though we do not make them enough, and this recipe ranked right up there with some of our favorites. Though this salsa has a lot of chiles in it, it really only has a moderate heat level, which really allows all of the varying flavors to shine. While I like really hot salsas, sometimes hot salsa is only that – hot. This salsa is a perfect balance of heat, freshness, and acidity, and really does showcase the ways chile peppers can be used to create different effects. Plus, it’s super colorful. I mean, really, salsa is a cheery food. This one is a keeper.

Spicy Pineapple Sauce

The second, and final, recipe in this episode is for a pineapple sauce with habanero pepper. To make the sauce itself you will only need three things:  a can of pineapple tidbits, a habanero pepper, and 2-3 sprigs of mint, bruised.

IMG_4172

Ingredients for Alton’s pineapple sauce: 1 can of pineapple tidbits, fresh mint, and a habanero pepper.

The online recipe calls for pineapple chunks and for you to cut your mint into chiffonade, but I prepared the recipe as done in the episode. Simmer the pineapple, habanero, and mint together in a saucepan for five minutes.

Cool the mixture to room temperature and remove the mint.

IMG_4182

The sauce, after removing the mint.

As a serving recommendation, Alton recommends frying some corn tortilla wedges in corn oil, dusting them with sugar while they are still warm; though there is cinnamon in the online recipe, Alton did not use cinnamon in the episode.

Serve the pineapple sauce and warm, sugared tortilla chips with vanilla ice cream.

IMG_4195

A fun and tasty dessert.

We ate this two nights in a row for dessert and both thought it was great. The sauce packs a good punch of heat, but is also sweet from pineapple. Honestly, the mint really did not come through much for me. The sauce on its own would be quite hot, but the ice cream really cools it down, and the chips add a completely different textural component. This is a fantastic combo and I think I will make this again. This is a fun, easy, and unusual dessert.


While I have adored mustard for as long as I can remember, I have never been a fan of mayonnaise. That is to say, I have never liked store-bought mayonnaise, for I still remember the first time I tasted my dad’s homemade mayonnaise. I was skeptical when Dad insisted I try his mayo, for I had already convinced myself that I would not like it; I could not have been more wrong, for his mayo was completely different from every mayonnaise I had ever had. The problem was that it only further poisoned my taste for store-bought mayo! If you have never had homemade mayonnaise, it is a must-try!

Mayonnaise

Though I already knew I loved homemade mayonnaise, I had never actually made it before watching Alton’s mayonnaise episode of Good Eats. A little over a week ago, I set out to eliminate my “mayonnaise virgin” status. The ingredients you need for Alton’s mayo are an egg yolk, salt, dry mustard, sugar, lemon juice, champagne vinegar, and safflower or corn oil.

IMG_3947

Mayonnaise ingredients: corn oil, salt, egg, sugar, lemon juice, champagne vinegar, and dry mustard.

Mayonnaise is an emulsion of oil in liquid. Lecithin, a phospholipid in egg yolks, allows the emulsion to form because its phosphoric acid end dissolves in water, while its lipid end dissolves in oil; this keeps the oil droplets suspended in their surrounding liquid, rather than allowing them to pool together. Fresh eggs have higher amounts of lecithin, so it is best to use very fresh eggs for mayonnaise making. To begin Alton’s mayo, combine 2 t lemon juice with 1 T champagne vinegar.

IMG_3948

Champagne vinegar and lemon juice.

Next, in a glass bowl (do not use an aluminum or iron bowl, as they will turn your mayo gray), combine one egg yolk, 1/2 t salt, 1/2 t dry mustard, and 2 pinches sugar.

IMG_3950

One egg yolk, 1/2 t salt, 1/2 t dry mustard, and 2 pinches of sugar.

Add half of the lemon/vinegar mixture to the bowl and whisk everything until it is frothy.

IMG_3952

Half of vinegar/lemon juice added to bowl, and whisked until frothy.

Once frothy, slowly begin adding 1 C corn or safflower oil to the egg mixture a few drops at a time, whisking constantly. A plastic squeeze bottle is ideal for adding the oil slowly.

IMG_3955

A squeeze bottle for corn oil.

When about 1/4 of the oil is in the bowl, you can begin adding the remaining oil in a slow, steady stream, still whisking constantly. Once half of the oil is incorporated, add the remaining lemon juice/vinegar.

IMG_3958

My mayo after about 1/2 of oil incorporated. Remaining lemon juice and vinegar added.

Finish by adding the rest of the oil, still in a thin stream, whisking steadily until it is all incorporated. Your arm will have to whisk a lot, but it will be worth the effort! It is necessary to add the oil slowly and to whisk quickly to avoid having your emulsion break, or separate. Once your mayonnaise is complete, let it sit at room temperature for 4-8 hours. After that, refrigerate any remaining mayonnaise for up to a week.

IMG_3962

The delicious completed mayo.

This mayonnaise is delicious. We ate it primarily on sandwiches and it was gone within a matter of days. The mayo is tangy and has a rich mouthfeel. Aside from the whisking labor, this is easy and definitely worth the effort.

By the way, should your mayo happen to break, all is not lost. To fix a broken mayonnaise, whisk an egg yolk in a bowl until it is frothy. Slowly add the broken mayo to the egg yolk, whisking until incorporated. Ta-da!

Party Mayonnaise

As I type, I am closely monitoring a batch of my dad’s smoked salmon that I am smoking in my Alton Brown cardboard smoker. My dad traditionally serves his salmon with his “Dog Shit Sauce,” which is a fabulous aioli. Seeing as an aioli is essentially a mayonnaise (or at least a close relative), perhaps we will have to sample our freshly smoked salmon this evening with some Alton Party Mayo. Since we plowed through our first Alton mayo really quickly, I was onto making the second recipe from this episode a mere five days later. This recipe for mayonnaise uses a food processor, which I welcomed after making the first mayo by hand.

IMG_3963

Ingredients for party mayonnaise: corn oil, eggs, chile oil, salt, dry mustard, lime juice, champagne vinegar, and sugar.

To start Alton’s party mayonnaise, to a food processor add 1 t salt, 1/4 t sugar, 1 t dry mustard, 2 T champagne vinegar, 2 T lime juice, 1 egg, and 1 egg yolk.

IMG_3965

Salt, sugar, dry mustard, champagne vinegar, lime juice, one egg, and one egg yolk in food processor.

Pulse the mixture five times.

IMG_3966

After five pulses in the food processor.

Next, using the feeding tube, slowly add 2 C corn or safflower oil minus 2-3 T. In addition, add 2-3 T chile oil. I added 3 T.

IMG_3970

Oil slowly being incorporated through feeding tube.

IMG_3971

Alton’s party mayo.

Again, let the mayonnaise sit at room temperature for a few hours before refrigerating for up to a week. We liked this mayonnaise even more than Alton’s first mayo. This one has the added kick from the chile oil, which just pumps it up a notch. Plus, using the food processor makes this one come together in a snap. It has a slightly pinkish hue from the chile oil, which is kind of nice, along with the tang from the lemon and vinegar.

IMG_3972

This mayo is wonderful.

Again, we have used this mayo mostly for sandwiches so far, but I do think we will test some with our smoked salmon this evening. It would also make a great base for a killer tartar sauce. Do not miss making this mayonnaise. It is fantastic.

Since I last posted, Ted has continued to have a rough time, resulting in a second major surgery on November 2nd and six more days in the hospital. With a grand total of 26 days (divided among three visits) in the hospital, he finally came home November 7th. We are crossing our fingers that we are hopefully on the real road to recovery this time.

Sweet and Sour Dessert Sauce

I prepped the recipes from the 49th episode of Good Eats over the course of a couple weeks. This episode was all about honey, or as Alton referred to it, “bee backwash.” After hearing that quote, I think I shall perhaps never look at honey quite the same again!

The first recipe in this episode is for Alton’s honey dessert sauce. Really it does not get much simpler than this one. To make Alton’s sauce, you will need only honey and sour cream.

IMG_3895

Honey and sour cream.

For the honey, Alton recommends a light honey, such as wildflower honey. I will confess that I used the honey I had on hand, which had no specific varietal on the label. To make the sauce, pour 1/4 C honey in a stainless steel bowl and heat it on a burner, just until warm.

IMG_3899

Honey, heating slightly on a burner.

Into the honey whisk 1 C sour cream.

IMG_3900

Sour cream added to warm honey.

IMG_3901

Sour cream and honey, whisked together.

Serve the sauce over fruit, cake, or anything else you can think of. I served the sauce over the orange cake that was also featured in this episode (see below).

IMG_3905

Alton’s dessert sauce, served over cake.

The sauce had a nice balance of sweetness and tartness and was pretty thin in consistency. I thought this sauce was just okay; it did not wow me in any way and I probably will not be making this one again.

Honey Mustard Dressing

Growing up, my brother would order honey mustard dressing every time he ordered a salad at a restaurant, so I instantly thought of him when making Alton’s honey mustard dressing. This is another super simple recipe, requiring only three ingredients:  honey (medium-bodied like sourwood), Dijon mustard, and rice wine vinegar.

IMG_3907

Rice wine vinegar, Dijon mustard, and honey.

For this dressing, I used the same honey that I used in my dessert sauce (above). To make Alton’s dressing, whisk together 5 T honey, 3 T smooth Dijon mustard, and 2 T rice wine vinegar.

IMG_3908

Honey in a bowl.

IMG_3909

Dijon mustard and rice wine vinegar added to honey.

IMG_3911

Alton’s honey mustard dressing.

Serve this as either a dressing or dipping sauce. I eat a lot of salads, so I served this over a large entree salad I made for myself.

IMG_3913

A salad with Alton’s honey mustard dressing.

I thought this dressing was really quite nice. I have found some honey mustard dressings in the past to be too sweet, but this had a nice balance of sweetness, acidity, and tang. As a bonus, this dressing does not separate in the refrigerator as oil-based dressings do. If you’re a honey mustard fan, this is one to try. I served it to my brother, the honey mustard expert, when he was visiting and he seemed to really enjoy it.

Honey Plums

The third honey recipe Alton made was for honey plums. Again, this is another simple recipe. For this one, you’ll need wildflower honey and under-ripe plums or figs. I could not find plums or figs at my grocery store, so I opted for firm D’Anjou pears.

IMG_3914

Honey and pears.

Begin by covering the bottom of a pan with honey and heat over low.

IMG_3915

Honey covering the bottom of the pan.

Add your fruit, cut side down, and cook for 5-6 minutes. Increase the heat to high for a minute before removing from the heat.

IMG_3917

Pears added to honey in pan.

IMG_3918

Pears after cooking in honey for several minutes.

Serve the honeyed fruit over ice cream.

IMG_3920

Honeyed pears served over vanilla ice cream.

I liked this and it reminded me of the poached pear phase my mom went through. This was another one that was just okay for me, but I think I’ll have to try this again when plums are back in season.

Aunt Verna’s Orange Cake

Of the recipes featured in this episode, I was most excited about this one. Alton claims that this cake recipe came from his Aunt Verna, but who knows if he really had an Aunt Verna?

IMG_3886

Orange cake ingredients: eggs, flour, orange zest, baking powder, butter, baking soda, and orange blossom honey.

For the cake, begin by whisking together 1 C orange blossom honey and 4 eggs.

IMG_3887

Eggs and honey.

To this mixture add 1 T orange zest.

IMG_3888

Orange zest added to honey/egg mixture.

Sift together 1 1/2 C flour, 1 t baking powder, and a pinch of baking soda, and slowly add the flour mixture to the liquid ingredients.

IMG_3889

Flour, baking soda, and baking powder sifted together.

Pour the batter into a greased loaf pan and bake at 350 degrees for 30 minutes, or until a wooden skewer comes out dry.

IMG_3892

Batter poured into the pan.

IMG_3893

Alton’s orange cake.

My cake took about 45 minutes to be done. I sliced my cake and served it with Alton’s sweet and sour dessert sauce (above).

IMG_3898

Alton’s orange cake, sliced.

I found this cake to be highly disappointing. It did have a lot of orange flavor, but the cake was quite dry and the outside of the cake was a bit darker than I would have liked. For me, this one was a bit of a flop, and I will not be making this one again. In fact, I would say that this episode of Good Eats (and the recipes featured) was one of my least favorites thus far.