Archive for the ‘Season 5’ Category

It’s hard to believe that this post will finish up five seasons of Good Eats – only nine more seasons to go! So, what did Alton choose to finish up his fifth season with? Potatoes were the choice for this season finale, and if you recall, they were also the subject of the second episode of Good Eats. It’s only fair for the mighty potato to star in two episodes since there are so many things you can do with it, such as…

Leftover Baked Potato Soup

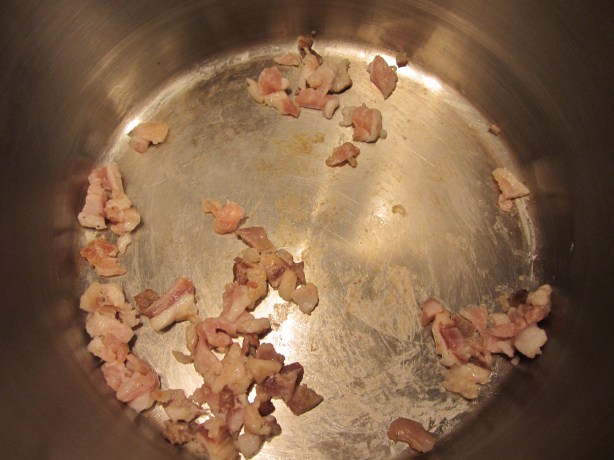
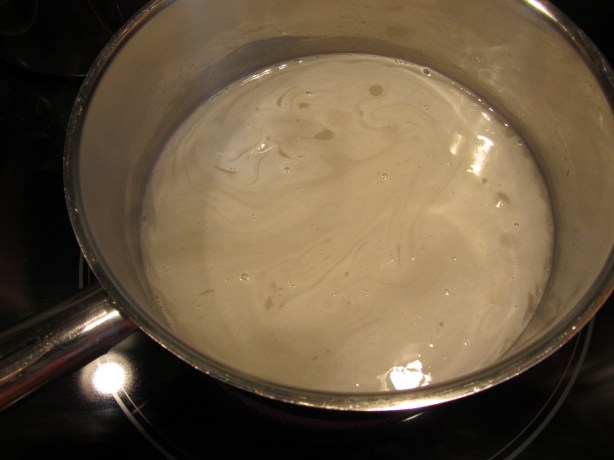
First up was Alton’s potato soup. This soup comes together pretty quickly, so you can easily make it on a weeknight. Begin by melting 3 T butter in a pot.
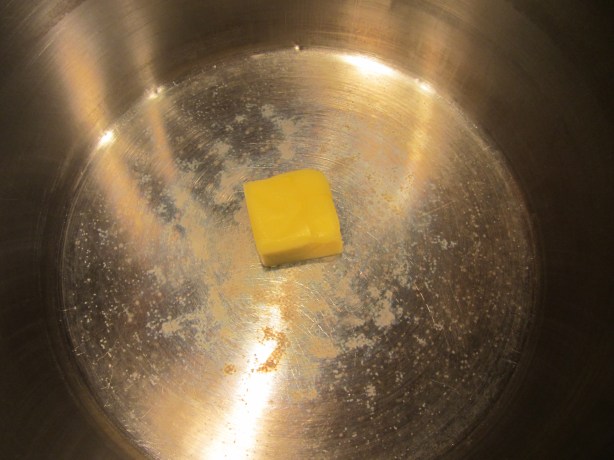
img_5279

3 T butter

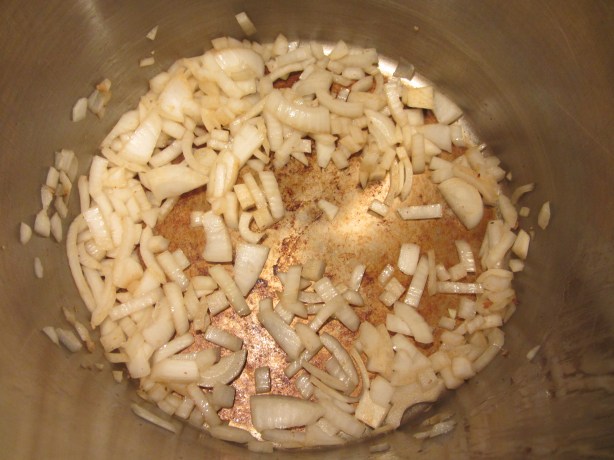
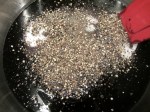
Add 1 1/2 C diced leeks, 1 1/2 T minced garlic, and some Kosher salt. Sweat the leeks until they are translucent and add 6 C chicken stock to the pot, increasing the heat to a simmer.

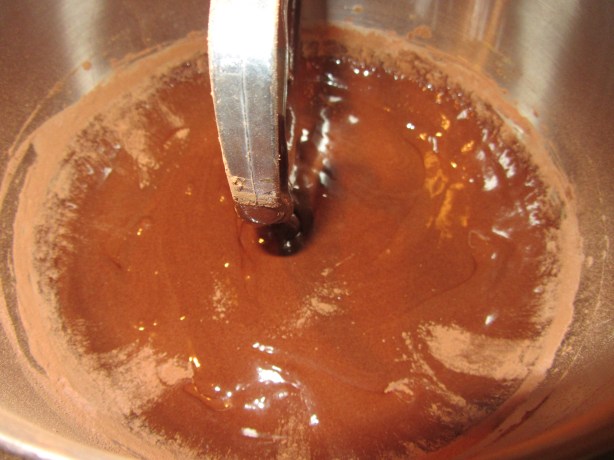
While the liquid simmers, press four baked russet potatoes through a ricer into a bowl. Though the online recipe says you should peel the potatoes, Alton did not peel his potatoes in the episode.

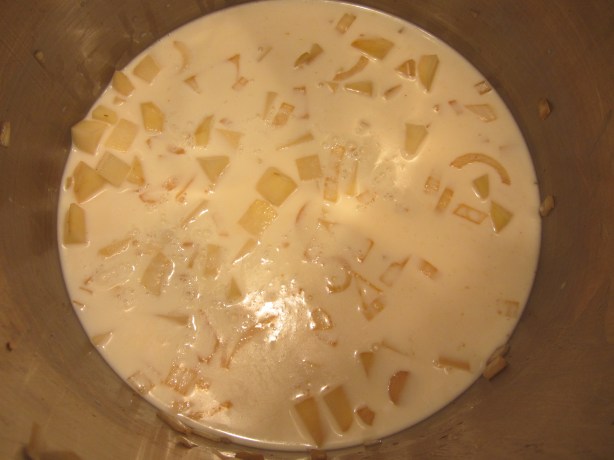
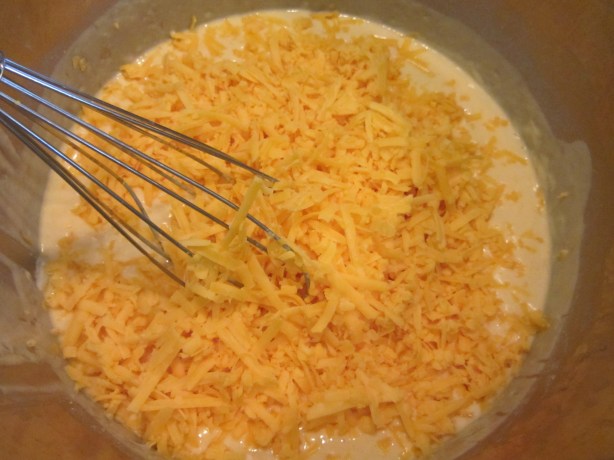
Pour 1 1/2 C buttermilk into the riced potatoes, whisking. The starch from the potatoes will prevent the buttermilk from curdling when it is added to the hot stock. Also whisk 1/2 C sour cream and 1/2 C grated Parmesan into the potato mixture.

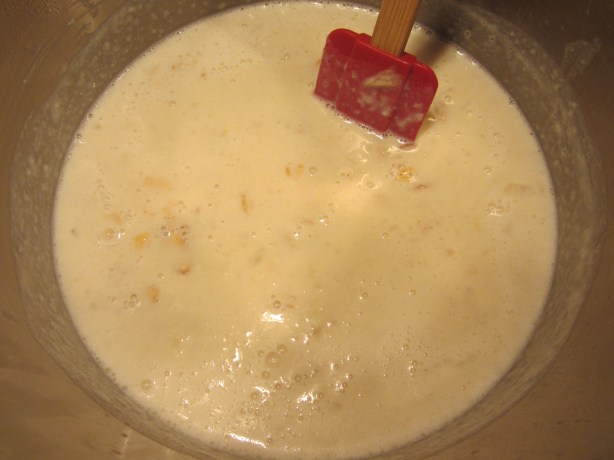
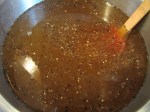
By the time you are done prepping the potatoes, the stock should be simmering nicely on the stove. Add the potato mixture to the hot stock, and bring the soup back to a simmer.

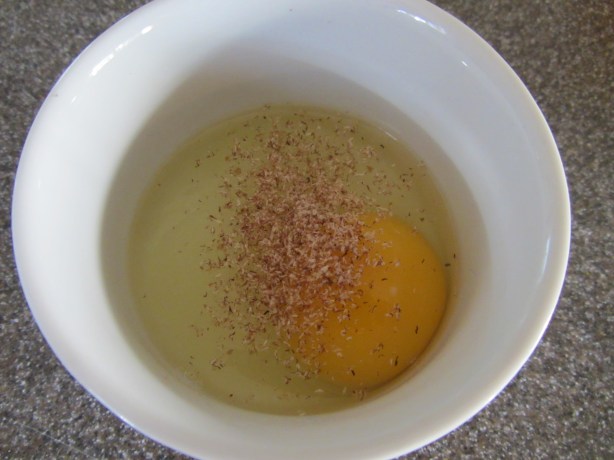
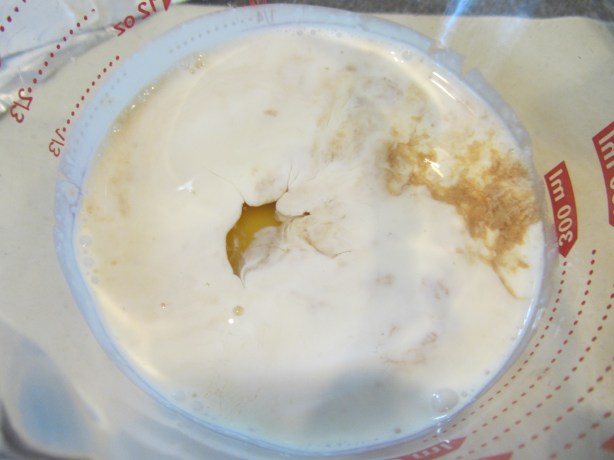
Just before serving, stir 2 T sherry vinegar into the soup.

img_5291

Sherry vinegar, to be stirred in right before serving.

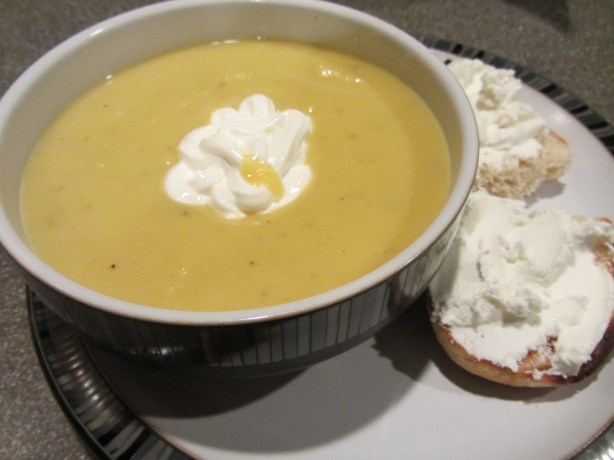
Garnish the soup with Kosher salt, pepper, and chopped chives.

img_5293

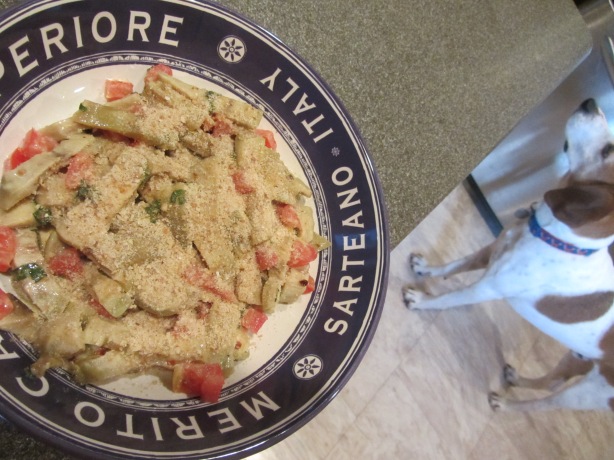
A bowl of Alton’s potato soup with Kosher salt, pepper, and chives.

I fixed this soup for us two nights ago after baking my potatoes earlier in the day. The soup itself really takes no time at all to make. We liked this soup, though I prefer potato soup that is a bit thicker and that has chunks of potato. I did like the tang this soup had from the vinegar, buttermilk, and sour cream, and leeks always pair well with potatoes. Overall, I’d say this was good but not spectacular. I give it an ‘A’ for flavor, but only a ‘C’ for texture/consistency.

Cold-Fashioned Potato Salad

Just as with potato soup, you couldn’t very well have a potato episode without including a recipe for potato salad. This was one of those recipes where I got hungry watching Alton make it. Begin by placing 2 1/2 lb small red potatoes in a pot, covering them with cold water.

img_5216

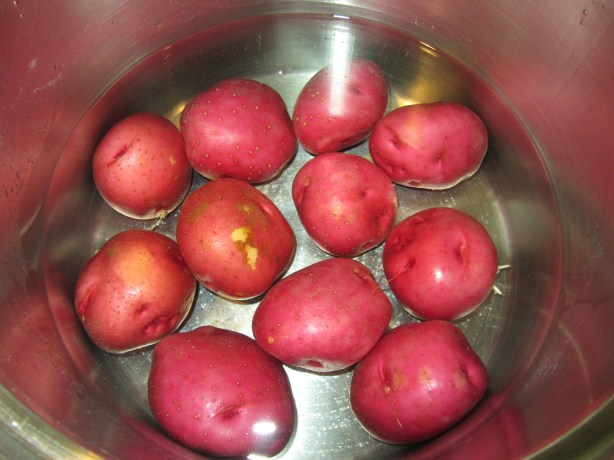
2 1/2 lb red potatoes covered with cold water.

Bring the water to a boil, and then drop the heat to a simmer. Check the potatoes after 5 minutes, and every 3 minutes thereafter for doneness; you should be able to stick a skewer through a potato with no resistance. If you cook your potatoes too quickly or for too long, their skin will crack. I thought my potatoes were done after about 20 minutes of cooking. Drain the water from your potatoes and immediately place them in ice water for 2-3 minutes to halt their cooking.

Again, drain the potatoes. According to Alton, you should be able to easily remove the skins of your potatoes by simply rubbing them in a tea towel, but this was not the case for me, and I ended up using a peeler. Either way, once your potatoes are peeled, thinly slice them; if you have an egg slicer, that will work well for this. Place your still-warm potato slices in a large Ziploc bag, add 3 T cider vinegar, seal the bag tightly and place it in your refrigerator overnight.

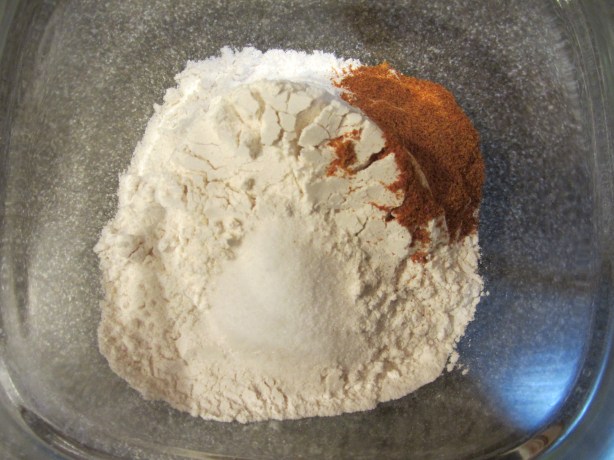
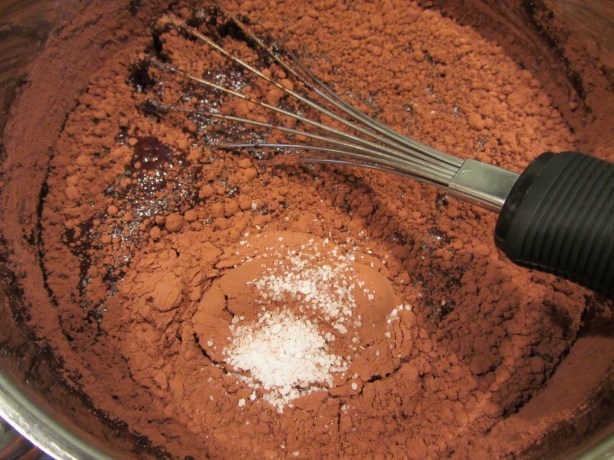
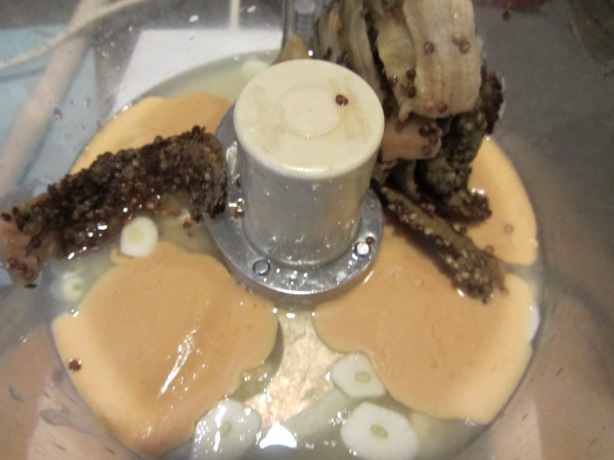
The following day, combine in a bowl:  3/4 C mayonnaise, 1/2 t dry mustard, 2 t minced garlic, 1 T minced tarragon, and 1/4 C chopped parsley.

img_5226

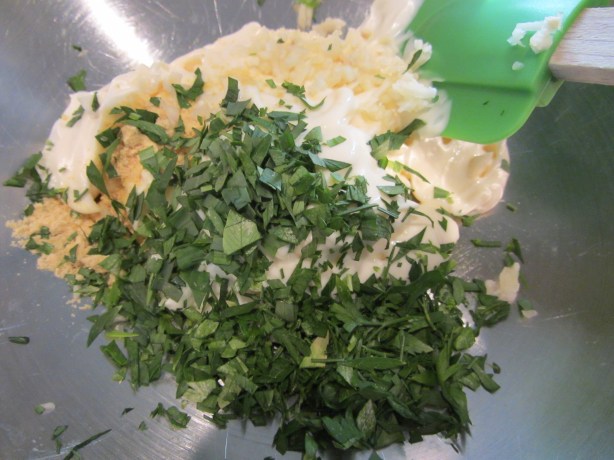
Mayonnaise, dry mustard, garlic, tarragon, and parsley.

Once combined, add 1/4 C chopped cornichons, 1/2 C minced red onion, and 1/2 C thinly sliced celery.

Give everything a good stir and fold in the potato slices, along with their vinegar. Season to taste with Kosher salt and pepper.

Remember how my potato skins did not come off very easily? Yeah, I’m pretty sure that’s because I didn’t cook them quite long enough. I loved the combination of flavors in this potato salad, but my potatoes were a little too toothsome. It seems to me that most people generally prefer either creamy potato salads or German-style potato salad. I felt that this recipe would really please both camps, as it is both creamy and acidic. The dry mustard and red onion give the salad a nice bite, while the celery and cornichons lend a good crunch. I also really liked the anise-like flavor from the tarragon. This is a winning potato salad – just be sure to cook your potatoes long enough. Doh!

Potato Roesti

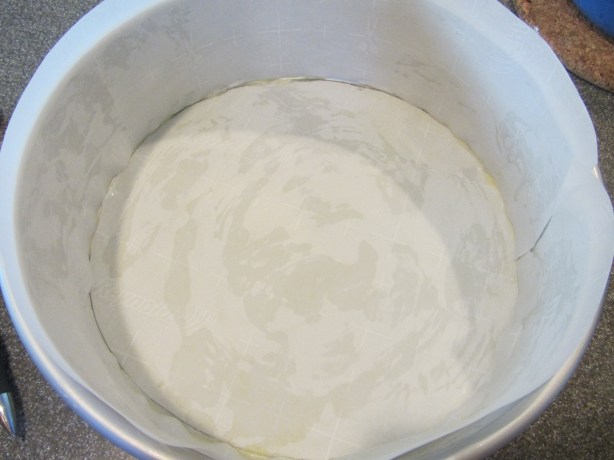
I really did not know what a roesti (“roshe-ti”) was until I watched this episode. Basically, it is like a hashbrown that contains onions and is tender on the inside. I made this for breakfast for us last weekend, as it seemed like a perfect breakfast before a 14-mile run. You will start by grating 3 Yukon Gold potatoes and 1 onion. Spin the potatoes and onion in a salad spinner, getting rid of as much moisture as possible.

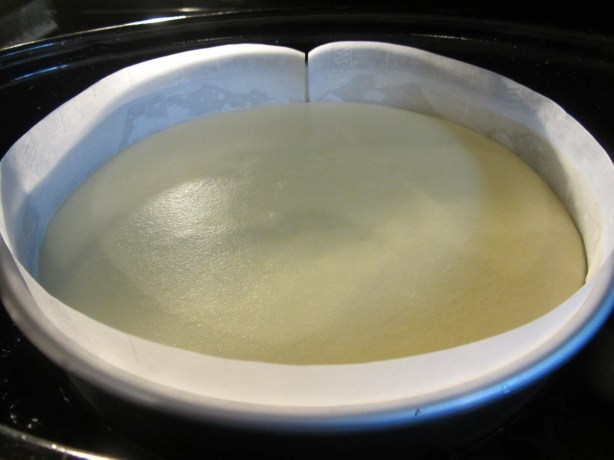
This recipe makes four servings, and Alton recommended seasoning/cooking each serving separately, as the salt will pull moisture out of the potatoes. Since I knew we had a long run ahead of us, I divided the mixture into only two portions. While you melt 1/2 T butter in a nonstick skillet, season 1/4 of the potato mixture with Kosher salt and pepper. Add the seasoned potato mix to the melted butter, using a spatula to form a thin, round cake. You should hear a light sizzle when you press the cake with a spatula.

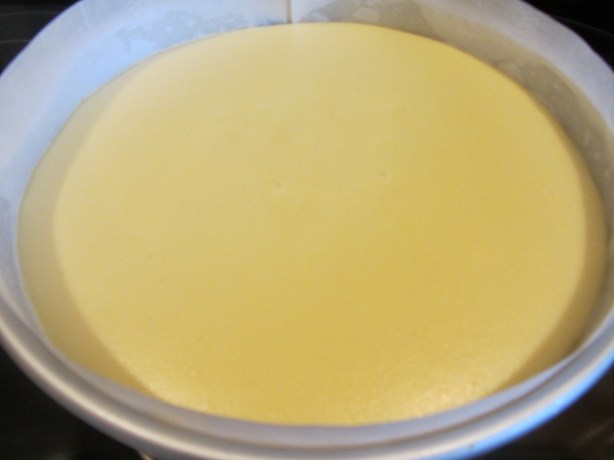
Cook the roesti for 7 minutes or until golden; now it is time to flip. Cut 1/2 T butter into chunks and disperse it on top of the roesti. Slide the cake onto a pan lid, using the lid to flip the cake back into the pan, butter down.

Cook the roesti for ~5 more minutes, or until golden brown. If you want to serve your cakes all at once, you can keep them warm in a low oven for ~20 minutes while you cook the other cakes. Serve the roesti with sour cream.

img_5263

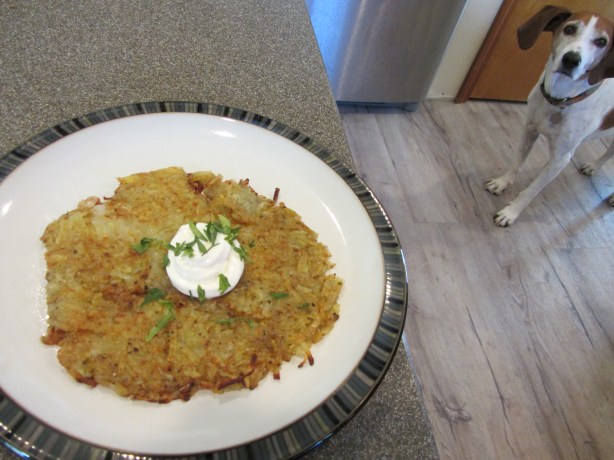
Roesti with sour cream.

We thought this was tasty. At first, we thought it was possibly undercooked inside, but then I read that a roesti is supposed to be tender inside. I liked the additional flavor the onion added to potatoes, and the crispy exterior. I like sour cream, but wasn’t sure how I would like this combo; it turns out that sour cream really did pair nicely with this. The one thing I will say is that we had some GI issues as the day progressed, and I have to wonder if they could have been from the roesti. This did make for a tasty breakfast, so I think I will have to give it another go and hope for the best. With that… onto the 6th season!

Clams on the Half Shell with Fresh Mayonnaise

Once again, with this episode, my Good Eats project has led me to prepare a food item at home that I have never before prepared. This, to me, is the best part of this project, as I am learning to cook things I potentially would never have otherwise attempted. Clams, this time, were the subject of my exploration.

Though I have eaten other shellfish on the half shell (namely oysters), clams on the half shell were new to me. Really, this isn’t so much a recipe, but rather more of a method. Here’s a link to Alton’s recipe. All you really need for this preparation are fresh, live clams and a batch of Alton’s mayo, which I made previously. When eating raw clams, you want small clams (like littlenecks), as they are more tender than larger clams. When purchasing clams, you want to go to reputable seller and you want to purchase clams that are closed, very hard, and that sound like rocks when you tap them. My grocer had to special order littleneck clams for me and they seemed to be pretty fresh. Clams do sometimes open a little bit, even when they are alive, but they should close if you tap them; discard any clams that do not close when tapped. Also, it really is ideal to purchase clams the day you plan to serve them. Store them in your refrigerator before use in an open container that has been topped with a wet paper towel. When ready to serve your clams, dump them in a colander and give them a good rinse.

img_5186

Littleneck clams after being rinsed off.

Wipe off any additional grit in a clean tea towel. Next, set them in the freezer for 30 minutes before shucking, as this will make the process easier.

img_5187

Littlenecks, ready to be wiped dry in a tea towel before going in the freezer for 30 minutes.

To shuck, insert a butter knife into the groove at a “corner” of the shell, working the knife between the sides of the shell and prying it open.

Detach the meat from the shell by scraping it off of both sides of the shell with the knife, leaving the meat in the bottom side of the shell. Set your clams on a serving plate, topping each clam with some of Alton’s mayo.

img_5191

Not the greatest photo, but a shucked littleneck with Alton’s mayo.

My shells were really lopsided and toppled a bit, so setting them on a bed of greens may make a more attractive presentation. We ate our raw clams as an appetizer one evening, having just a handful or so each. When I eat raw shellfish, I prefer to have condiments, so I liked the addition of Alton’s mayo, which I love anyway. Since I’m a newbie to prepping raw shellfish, I get a little nervous when I am eating them at home, so I think I would have enjoyed raw clams more if I were eating them in a restaurant. Overall, I’ll say that we thought they were good, but not fantastic, and I don’t know that I’ll be jumping to prepare them again anytime soon.

Radonsky for the New Millennium 

For the second recipe in this episode, Alton used cherrystone clams, which are larger than littlenecks. I could not find cherrystone clams where I live, so I ended up using manila clams for this one.

img_5265

My manila clams.

As with the recipe above for clams on the half shell, you will want to shuck your clams, but for this preparation you will only want to detach the clam meat from one side of the shell. You will also want to discard the empty half of the shell from each clam.

img_5268

Shucked clams.

Mix together 1/4 C flour, 1/4 C breadcrumbs, 1 T freshly grated Parmesan, black pepper, and Kosher salt. Sprinkle the flour mixture liberallly over the shucked clams.

Melt 3 T bacon fat in a skillet over medium-high heat; we keep bacon fat in the refrigerator for occasions such as this.

img_5267

Bacon fat in the pan.

When the bacon fat has melted, fry the clams, shell side up, until they are golden brown and their shells have lightened in color.

img_5272

Clams frying in bacon fat.

Serve the clams with malt vinegar and parsley.

img_5275

My fried clams.

So, I really thought I would like these better than the clams on the half shell, but it turned out that we both found the clams to be too strong in flavor. I liked the crispy coating on the clams and the tang from the malt vinegar, but the clams I used were extremely briny in flavor and had a strong aftertaste that lingered. Perhaps this recipe would have been better with littlenecks? If I were to make this again, I would try it with littlenecks, or cherrystones if I could find them.

Clam Chowder

A clam episode would not be complete without a recipe for clam chowder. We always seem to eat more soup in the fall, so clam chowder seemed like a perfect thing to eat on a fall evening, though I am still clinging to the idea of summer. This recipe begins by rendering the fat from 3 ounces of salt pork or bacon over medium heat; I used Alton’s bacon that I made previously.

img_5192

Bacon fat rendering.

Once the fat is rendered, remove the meat pieces from the pan and save for another use. Add 1 1/2 C chopped onion to the pork fat and cook until translucent.

img_5195

Onion added to bacon fat.

Next, add 6 C of cubed russet potatoes, peeled (this is about 4 medium or 3 large russets). Add whole milk to the pan, just to cover the potatoes.

img_5197

Potatoes and whole milk added to pot.

Meanwhile, drain and reserve the juice from 14 ounces of canned clams, and chop the clam meat. You will want to have at least 1 C of clam juice; if you do not, add water to make 1 C of liquid.

Pour the clam juice into the bottom of a steamer and steam 12 clams over the clam juice, checking on them after 5 minutes.

img_5205

My clams, steaming over canned clam juice.

Remove the clams as soon as they open, as they will become tough if overcooked. Save the steaming liquid!

img_5208

Steamed clams.

When the clams are steamed, use an immersion blender to blend the potato mixture to your desired consistency – I left some lumps in mine.

To your blended soup, add ~1/2 of the steaming liquid and taste it. Alton cautioned that the steaming liquid can be quite salty, so you want to add it gradually. I wound up adding all of my steaming liquid, as it did not make my soup overly salty. Fold in your chopped canned clam meat.

img_5210

Canned clams and steaming liquid added to soup.

Top the soup with black pepper, sour cream, parsley, and grape tomatoes, and serve with steamed clams on the side.

img_5214

Clam chowder with parsley, pepper, tomatoes, sour cream, and steamed clams.

We both thought this chowder was great. It had lots of clam flavor and pieces, along with plenty of potatoes. Ted even declared this one of the best clam chowders he has had. I don’t know if serving the steamed clams on the side is even necessary, though it does make for a nice presentation. I was not sure about serving the soup with sour cream and tomatoes, but I actually quite liked the garnishes. I will make this one again. It makes for an easy weeknight meal.

Baked Macaroni and Cheese

Next up in my blog project was Alton’s recipe for baked macaroni and cheese. Last fall, Alton posted an updated version of this recipe on his web page, and I went ahead and made it, despite knowing it would be coming up later in my project. Yes, I usually try to wait to make the Good Eats recipes until their time arrives in sequence, but last fall was a rough time and I was searching for the highest calorie recipes I could find. Ted had lost 35 pounds from his skinny runner/cyclist frame, due to complications from cancer treatment, so I was on a mission to fatten him up. When Alton’s baked macaroni and cheese showed up in my Facebook feed, it was just perfect timing. Knowing this recipe was good, I was excited to make it again – this time for my blog.

Cheese-wise, you will need 12 ounces of grated cheddar cheese for Alton’s recipe.

IMG_4950

12 ounces of grated cheddar.

Begin by cooking 1/2 pound of elbow macaroni in salted water for six minutes. Drain the pasta and rinse it with cold water to halt the cooking process.

IMG_4953

1/2 pound of elbow macaroni, cooked for 6 minutes and rinsed under cold water.

Next, melt 3 T butter in a pan over medium heat, and whisk in 3 T flour. Cook this mixture until it is sandy in color.

Add 1 T powdered mustard, 1/2 t paprika (I used hot, smoked paprika), 1/2 C chopped onion, 1 bay leaf, and 1 t Kosher salt, whisking to incorporate.

Slowly add in 3 C whole milk, whisking until thickened, which will take several minutes.

Discard bay leaf. In a small bowl, lightly beat one egg. Temper the egg by whisking in 2 T of the hot milk sauce. You can now add the egg to the pan of hot sauce and it will not curdle.

Whisk in 3/4 of the grated cheese until melted.

IMG_4967

3/4 of cheese being added to sauce.

Fold the cooked noodles into the cheese sauce and pour into a 2-quart casserole dish. Sprinkle the remaining grated cheese over the top of the casserole.

Finally, combine 1 C panko bread crumbs with 4 T melted butter, and sprinkle the buttered crumbs evenly over the surface of the casserole.

Bake the macaroni and cheese at 350 degrees for 30 minutes. Let the macaroni and cheese sit for a few minutes before serving.

IMG_4988

Alton’s baked mac and cheese.

As I said before, this macaroni and cheese is not low-cal, but it is quite delicious. While the noodles remain “toothsome,” the sauce is rich and cheesy with a little bite from the powdered mustard and paprika. The crispy panko topping is the icing on the… mac and cheese? For mac and cheese fans, this is a sure hit.

Stove Top Mac-n-Cheese

As if one great macaroni and cheese recipe weren’t enough, Alton also has a stove top version of America’s greatest casserole. For this recipe, you will need eggs, evaporated milk, hot sauce, powdered mustard, Kosher salt, pepper, elbow macaroni, butter, and cheddar cheese.

IMG_4928

Ingredients for Alton’s stove top mac and cheese: pepper, hot sauce, powdered mustard, butter, eggs, cheddar cheese, elbow macaroni, evaporated milk, and Kosher salt.

Begin by grating 10 ounces of cheddar cheese.

IMG_4929

10 ounces of grated cheddar cheese.

Next, whisk 2 eggs in a bowl and add 6 ounces of evaporated milk. Add 1/2 t hot sauce, 3/4 t powdered mustard, 1 t Kosher salt, and some pepper.

Set the sauce aside while you cook 1/2 pound of elbow macaroni in salted water until al dente. Drain the pasta and place it immediately back in the pan, stirring in 4 T butter until melted.

IMG_4940

Butter added to hot elbow macaroni.

On a low burner, add the egg mixture to the noodles, along with the grated cheddar cheese. Cook and stir until the sauce is smooth.

IMG_4949

Alton’s stove top mac and cheese.

Honestly, we thought this mac and cheese was great, especially for the time and effort required. I actually thought this recipe had stronger cheese flavor than Alton’s baked version. I did, however, miss the crispy panko topping. Next time I make mac and cheese, I think I will opt for this version because it is easier, faster, and on par with Alton’s baked recipe – I just might add some buttered, toasted panko to the top. I will be making this again for sure.

Next Day Mac and Cheese “Toast”

In case macaroni and cheese was not sinful enough, Alton decided to make it that much richer with this recipe for fried macaroni and cheese. I made this with leftovers from Alton’s baked macaroni and cheese. Begin by combining 1 C flour, 1 t salt, and 1 t cayenne pepper.

IMG_4990

Flour, salt, and cayenne.

Slice your cold leftover macaroni and cheese into individual servings and coat each piece in the flour mixture. Next, dunk each piece in beaten egg. Finally, dip each slice in panko bread crumbs.

While you are preparing your macaroni and cheese, heat peanut oil to 375 degrees on the stove.

IMG_4995

Peanut oil, heating to 375.

When the oil has reached its temperature, fry the macaroni and cheese slices until golden brown and crispy.

Sprinkle the slices with Kosher salt and hot sauce before serving.

IMG_5006

Alton’s fried macaroni and cheese.

This was delicious. The already wonderful, cheesy, rich macaroni and cheese was enhanced with a golden, crispy fried crust all around. If you have leftover macaroni and cheese, frying it makes an extra special treat, and who couldn’t use a treat now and then?

It’s been a while since I last posted. While I actually prepared the recipes from this episode of Good Eats weeks ago, I am only just now having time to sit down and actually write them up. Since I last made a post, we have left town a couple times, Ted finished up chemo and had scans (clear – yay!), we hosted a clear scan party, and my mom ended up in the hospital/had surgery. Hopefully things will slow down here at some point!

Anyway, the subject of the 64th episode of Good Eats was squash, and particularly winter squash. Needless to say, this episode would have been more ideal if it had popped up during cooler months of the year. Thankfully, you can purchase winter squash at any time of the year.

Squash Soup

First up in this episode was Alton’s squash soup. Alton used two Kabocha squash to make his soup, though he stated you could use any hard winter squash; I could not find Kabocha squash at my store, so I used acorn squash.

IMG_4843

The hounds, checking out my acorn squash.

You first need to quarter your squash and remove the seeds. Alton quartered his squash by hitting a vegetable cleaver with a wooden mallet.

IMG_4844

Quartered acorn squash.

Brush the squash quarters with melted butter, sprinkle them with Kosher salt and pepper, and stick them in a 400-degree oven.

IMG_4848

Quartered acorn squash, brushed with melted butter and sprinkled with pepper and Kosher salt.

According to Alton, your squash should be tender and roasted within 25 minutes, but my squash took nearly an hour to become tender.

IMG_4851

Squash, after roasting for almost an hour.

When your squash are cool enough to handle, use an ice cream scoop to remove their flesh. You will need six cups of cooked squash, and the easiest way to measure this is using displacement. You can do this by putting the squash in a large measuring vessel with 1 1/2 C chicken stock; when the liquid line hits 7 1/2 C, you know you have 6 C of squash. Dump the squash/stock in a pot and add 1 1/2 C additional chicken stock, 4 T honey, and 1 t grated ginger.

IMG_4853

Squash in soup pot, along with chicken stock, honey, and grated ginger.

Heat the soup over medium-high heat until bubbles begin to form on the surface, and process the soup with an immersion blender until smooth. Finally, finish the soup by stirring in 1/2 C heavy cream, 3 big pinches of Kosher salt, 2 small pinches of white pepper, and 6 grates of nutmeg on a microplane grater.

Simmer the soup over medium heat until it is heated through. Serve in bowls with sour cream. We ate this soup with goat cheese toasts on the side.

IMG_4862

Finished squash soup with sour cream.

Ted is not particularly fond of squash, but he thought this soup was “pretty good.” Honestly, I found this soup to be a little too sweet, so I would consider cutting down on the honey. The sour cream does help to cut the sweetness also. This would be a perfect soup for a chilly night, so it did not seem apropos when we were eating it in the heat of summer. This is a good, easy, traditional squash soup, and it would come together in minutes if you prepped the squash ahead of time.

Butternut Dumplings with Brown Butter and Sage

Of the recipes in this episode, I was most excited to make Alton’s squash dumplings. For this recipe, you will need a one-pound butternut squash.

IMG_4863

A one-pound butternut squash.

Halve the squash, remove the seeds, brush the flesh with olive oil, and sprinkle them with Kosher salt and pepper.

IMG_4867

Halved squash, brushed with olive oil and sprinkled with Kosher salt and pepper.

Roast the squash in a 375-degree oven for 45 minutes, or until tender. When you put the squash into the oven, also add 4 medium russet potatoes to the oven, taking care to prick their flesh with a fork first.

IMG_4866

4 medium russets, skin pricked with a fork.

While your vegetables are roasting, you can gather your other ingredients:  Kosher salt, 1 1/2+ C flour, and an egg, lightly beaten with a pinch of nutmeg.

IMG_4869

One egg, to be beaten with a pinch of nutmeg.

Once the vegetables are cool enough to handle, mash the flesh of the squash together with the flesh of the potatoes, mashing only until combined.

Using a wooden spoon, stir the egg and 1/2 C flour into the squash/potato mixture. You want to add flour gradually until you have a dough that is slightly wet, but not sticky.

While Alton only needed a small amount of flour to get his dough to the proper consistency, I ended up needing over 5 C of flour to get my dough to the point where I could handle it; several online reviewers had this same problem. Once your dough is ready, bring a pot of salted water to a boil. On a floured surface, turn out your dough and divide it into eight equal balls.

One at a time, roll each ball into a 1/2-inch thick snake, and cut each snake into 1/2-inch pieces.

At this point, you can cook the dumplings or place them on a floured baking sheet and freeze for later use. To cook the dumplings, add them to the boiling water in batches, removing them from the water as they float to the surface. To cease cooking, place the boiled dumplings immediately in ice water before drying them on a tea towel.

Next, heat a skillet over high heat, adding 1 T softened butter. Once the butter is melted, add 2 chopped sage leaves and 1 C of the boiled/cooled/dried dumplings. Cook the dumplings until they are golden brown and crispy on all sides.

Serve the dumplings with lots of Parmesan cheese and pepper.

IMG_4900

A bowl of dumplings with Parmesan and pepper.

We really liked these dumplings, though they definitely needed a healthy sprinkle of Kosher salt in addition to the Parmesan and pepper. The dumplings are fairly dense, but delicious with their crispy exteriors and softer interiors. The dumplings are slightly sweet and pair greatly with the savory browned butter, sage, and Parmesan. I will say that the process of making the dough was much more tedious than Alton demonstrated in the show, but we ended up with enough dumplings for at least three meals. I foresee making these again, especially in the Fall.

Pumpkin Bread

Last up in this episode was Alton’s pumpkin bread recipe. Ideally, for this recipe you will want to use fresh pumpkin, but I had to settle for canned pumpkin since it was the middle of July. Either way, you will need 3 C of pumpkin; if using fresh pumpkin, grate the flesh. You will also want to toast 1 C of pumpkin seeds for 5 minutes at 400 degrees. I purchased pumpkin seeds that were already toasted. In a bowl, sift together 2 C flour, 2 t cinnamon, 1/2 t Kosher salt, 1 t baking soda, and 1/4 t baking powder.

In a separate large bowl, beat 3 eggs and gradually add 1 1/2 C sugar.

IMG_4908

3 eggs, beaten with 1 1/2 C sugar.

Once the sugar is incorporated, slowly whisk in 3/4 C vegetable oil. Finally, add 1 t vanilla extract.

Fold the pumpkin mixture into the egg mixture, along with the cup of toasted pumpkin seeds.

IMG_4914

Pumpkin and pumpkin seeds added to egg mixture.

Finally, add the dry ingredients to the wet mixture, and fold everything together. Pour the batter into a nonstick loaf pan and bake at 325 degrees for 75 minutes, or until the tip of a paring knife comes out clean.

Cool the bread in the pan for 15 minutes before turning the bread onto a rack to cool completely. If you prefer to make muffins instead of bread, divide the batter among muffin tins and bake for 30 minutes at 325 degrees.

IMG_4926

Alton’s pumpkin bread.

This is a very delicious pumpkin bread, but I really did not care for the texture of the pumpkin seeds. I found the pumpkin seeds to be very chewy from absorbing the moisture of the bread. I definitely plan to make this bread again, but I will be omitting the seeds. The bread itself has just the perfect amount of sweetness, is very moist, and has loads of pumpkin flavor.

In Season 1 of Good Eats, chocolate was chosen as the subject of the final episode, which I wrote about here. That episode featured a couple of chocolate desserts that used chocolate chips. Again, chocolate is the star of the 63rd episode, but this time the recipes utilized cocoa powder as the source of chocolate.

Baking with cocoa powder always makes me nervous since we have two dogs. Years ago, I made a chocolate cake from scratch and placed it INSIDE a kitchen cabinet. Imagine my surprise when Ted called to tell me that he had arrived home to find that Hitcher, our male hound, had jumped onto the kitchen counter, pried open the cabinet, and eaten the chocolate cake. Thankfully, Hitcher turned out to be just fine!

Cocoa Brownies

Naturally, the first recipe Alton tackled with cocoa powder was for a classic brownie. I have always found that brownies made from scratch with cocoa powder are much richer and have more intense chocolate flavor. For baked goods, Alton recommends that you use natural process cocoa, which is redder and more bitter than Dutch process cocoa. To make his brownies, preheat your oven to 300 degrees and spray an 8″ square pan with nonstick spray. Additionally, line the pan with parchment paper, allowing the paper to hang over two opposite edges of the pan; this will allow you to easily lift the brownies from the pan. The online recipe does not mention the parchment paper, but it really is a good trick.

IMG_4769

Pan sprayed with nonstick spray and lined with parchment paper to overhang on two sides.

When your pan is set, sift together 1 1/4 C natural process cocoa, 1 C brown sugar, 1 C sugar, 1/2 C flour, & 1/2 t Kosher salt.

Next, in a stand mixer with the paddle attachment, beat 4 eggs until light.

Add the sifted dry ingredients to the eggs, gradually incorporating them until smooth.

IMG_4780

Batter after incorporating dry ingredients.

Once the batter is smooth, add 2 t vanilla extract and 8 ounces (2 sticks) of melted butter; you will want to add the butter gradually and on low speed.

Finally, scrape the bowl and pour the batter into your prepared pan.

IMG_4802

Batter in pan, and ready to go in the oven.

Bake the brownies for 45 minutes before checking with a toothpick. You will want to remove your brownies from the pan when a little bit of crumb still sticks to the toothpick, which took about 49 minutes in my oven.

IMG_4803

My brownies, after baking for about 49 minutes.

In the Good Eats episode, Alton strictly tells you to remove the brownies from the pan as soon as they come out of the oven. He also tells you to immediately cut the brownies, using a pizza cutter.

Once cut, allow the brownies to cool completely on a rack. My brownies were a little tricky to cut, so I would probably let them cool for a few minutes out of the pan before attempting to cut them. These brownies are really good if you like your brownies to be super dark and rich. Seriously, you cannot eat a lot of these. These paired very well with vanilla ice cream, which helped to cut the chocolate slightly. Personally, I like brownies to be kept in the refrigerator… but that’s just me.

IMG_4812

These brownies pair greatly with vanilla ice cream.

Cocoa Syrup

Next up in Alton’s cocoa arsenal was his take on chocolate syrup. Growing up, I was always more of a hot fudge sauce girl, while my brother was a chocolate syrup fanatic. I was curious to see if homemade chocolate syrup would convert me to more of a syrup person. For this particular recipe, you will want to try to use Dutch process cocoa, as it works better in applications with low fat content. Honestly, I looked at three stores for Dutch process cocoa and could not find it, so I made my syrup with a cocoa powder that was a blend of natural and Dutch process cocoas. To make Alton’s chocolate syrup, begin by combining 3 C sugar, and 1 1/2 C water in a pan. Bring the sugar and water to a boil and add 2 T light corn syrup; this will prevent crystallization.

IMG_4833

Sugar, water, and corn syrup being brought to a boil.

To this, slowly add 1 1/2 C cocoa powder, along with 1/4 t Kosher salt. You will want to gradually whisk the cocoa powder into the liquid, which will take a little bit of time.

IMG_4835

Salt and cocoa powder, gradually being whisked into liquid mixture.

Finally, once all of the cocoa powder is incorporated, stir in 1 T vanilla extract.

Pour the syrup into a squeeze bottle and allow it to cool to room temperature.

IMG_4838

My chocolate syrup.

If you want to reheat your syrup, place the squeeze bottle in hot water for ~10 minutes. I served this chocolate syrup in the traditional way – over vanilla ice cream, and with cake on the side.

IMG_4840

Chocolate syrup over ice cream.

I have to admit that this syrup is pretty darn good, and much better than the stuff you can buy. The chocolate flavor is much more intense, and this tastes like a much darker chocolate than store-bought syrups. I also think this syrup is a bit thicker than other chocolate syrups I have had, which I like. If you’re a chocolate syrup fan, I’d certainly give this one a try. Note that this recipe makes a lot of chocolate syrup, but you could always cut the recipe in half.

Hot Cocoa

Last but not least, no cocoa episode would be complete without a recipe for hot cocoa. To make Alton’s hot cocoa mix, into a large, lidded container place 2 C powdered sugar, 1 C Dutch process cocoa, 2 1/2 C powdered milk, 1 t salt, 2 t cornstarch, and a pinch of cayenne pepper.

Place the lid on the container and shake the mixture to thoroughly combine.

IMG_4821

The shaken/combined cocoa mix.

To serve Alton’s cocoa, fill a mug 1/3 full with Alton’s cocoa mix and add boiling water just to cover the powder.

Stir the cocoa/water mixture to create a thick slurry. Finally, top off the mug with more boiling water and stir again to combine.

We do not typically drink a lot of hot chocolate, but this was pretty good. Of course, this isn’t really the season for hot chocolate either. We both really liked the addition of the cayenne (I added a pretty hefty pinch), which made this a little different from your typical hot cocoa. We had our hot cocoa with whipped cream because really, why not?

IMG_4830

Alton’s hot cocoa, served with whipped cream, of course.

I will probably make this mix again, though I will likely wait for colder weather to make it again. I have to say, though, that I have a serious hankering for some chocolate after typing up this episode. Though the brownies are long gone, we still have homemade chocolate syrup and hot cocoa mix, one of which I will probably be tapping into shortly!

If you’re like me, you haven’t had a lot of experience with eating squid. Sure, I’ve had fried calamari numerous times, but that’s about the extent of my squid exploration. Really, if you think about it, squid is not something you see regularly on restaurant menus. It also is not the easiest ingredient to find, but Ted finally found some for me at an Asian market.

Squid typically come frozen and in two sizes:  10/20 squid (which means you get 10-20 squid per pound) or smaller ones. Ideally, the 10/20 squid are the ones to get because they have a larger tube, but their tentacles are about the same length as those on the smaller ones. One Asian market we went to had a single frozen squid that weighed nearly two pounds; I opted not to get that one. You can thaw frozen squid in the refrigerator for 24-36 hours, or in a tub of cool water with a constant slow stream of cold water.

Squid Vicious

Alton’s squid recipe in this episode is for a squid stir-fry, and you will need 1/2 pound of thawed, prepared squid.

IMG_4743

My package of frozen squid.

To prepare your squid, reach into the tube of the squid on the head end of the squid. Pull the head/tentacle piece to separate it from the tube portion of the squid. Next, cut between the tentacles and the head, discarding the head. The tentacles can be cooked, though Alton really never showed them being used in this recipe; for this reason, I discarded the tentacles also. My squid came already cleaned, so I just had to prep the tubes of the squid.

IMG_4745

My squid were already cleaned, so they just had the tubes and tentacles.

For the tube pieces, pull the rudder fins off and discard them, as they are extremely chewy. Next, split the tubes open with a sharp knife and scrape the thin membrane off of the inside of the tube, holding your knife at an angle. Using a utility knife on the shallowest setting (I just used a knife), score the surface of each tube in a crosshatch pattern; this will keep the squid from curling when cooked.

Finally, cut each tube into four equal pieces.

IMG_4753

Each squid tube was then cut into four pieces.

In addition to the prepped squid, for this recipe you will need 2 t sesame oil, 1 t garlic, 1 t ginger, 2 dried chilies, 1/3 c diced onion, 1/3 c diced red bell pepper, and 1/4 c oyster mushroom strips. For a sauce, combine 1 t balsamic vinegar, 1 t cornstarch, and 1/2 c miso broth.

IMG_4755

Ingredients for Alton’s squid recipe: sesame oil, garlic, ginger, dried chilies, squid, onion, red bell pepper, and oyster mushrooms. Also, a combination of balsamic vinegar, cornstarch, and miso broth.

When ready to cook, heat your wok over high heat and add the sesame oil. Add the garlic, ginger, and chilies to the wok and stir to cook. Next, add your prepared squid.

Follow this with the onion, bell pepper, and oyster mushrooms.

Finally, add the sauce to the wok and toss to coat everything, allowing the cornstarch to thicken the sauce.

IMG_4765

Finally, the liquid mixture was added.

As Alton said in the episode, squid cook on a bell curve – they are tender when cooked 1-3 minutes, tough when cooked for 5-6 minutes, and tender again once cooked for 10 minutes. As with any stir-fry, this recipe should come together extremely quickly, so your squid should only be in the pan for a couple minutes. Serve the squid mixture over rice.

IMG_4766

Alton’s squid stir-fry served over rice.

We weren’t sure what to expect from this recipe, but it was pretty underwhelming. Really, this was just a very under-seasoned recipe and it was very bland. Once we added some salt and soy sauce to this, it was significantly better, but I still would not make this one again. I am sort of bummed that I did not like this better because I wanted the recipe to showcase squid for me. Instead, it was just OK. Ted makes really good stir-fries, so maybe we’ll have to add squid to one of his. Still, I am happy to have gotten to play with a new-to-me ingredient!


After the lack of deliciousness that ensued with the last episode, I was super anxious to make something I knew we would enjoy. Thank goodness cheesecake was next in line. I adore pretty much anything made with cream cheese, but especially cheesecake; oddly, I don’t eat cheesecake very often, which I think needs to be amended pronto.

My mom went through a cheesecake phase when I was a teenager. As you can imagine, it was one of the greatest periods of my life. As she strove to find the perfect cheesecake recipe, we got to sit back and test them all. From New York cheesecake to Italian cheesecake, and everything in between, she tried them all. I honestly don’t recall which cheesecake was deemed the favorite. I only remember that I loved them all.

Sour Cream Cheesecake

This entire episode of Good Eats focuses on one recipe for a sour cream cheesecake. I don’t know about you, but when I think of cheesecake, I think of a springform pan. Alton Brown, on the other hand, suggests that you do not use a springform pan for sweet cheesecakes, as they can leak when you bake the cheesecake in a water bath. Alton does not bake savory cheesecakes in a water bath, so he uses a springform pan for those; strangely, he never really explained why he does not use a water bath for savory cheesecakes. So, what type of pan does Alton recommend for sweet cheesecake? He likes a 9-inch round pan with 3-inch tall sides. Honestly, I was just going to use my springform pan to make this cheesecake… until I tested it in a pan of water. Sure enough, it leaked instantly, so I bought a pan like Alton suggested. Ok, so once you are ready to make your cheesecake, you will want to allow 20 ounces of cream cheese and 1 1/4 C sour cream to sit on your counter to soften while you prepare your crust. Prep your pan by brushing the inside of the pan with melted butter.

Next, line the bottom and sides of the pan with parchment paper.

IMG_4696

Pan brushed with melted butter and lined with parchment paper.

Alton, of course, had a certain technique for cutting  paper to line the pan. Yes, I tried his method, but I screwed it up and ended up just doing it the way my Mom taught me when I was about 10 – tracing the pan with a pencil. Some things never change. For the crust of the cheesecake, put 33 graham cracker squares in a large ziplock bag and crush them with your hands until you have a mixture of crumbs and some slightly larger pieces.

Combine the graham pieces with 1 stick of melted butter and 1 T sugar, and toss everything to combine.

Pour 2/3 of the crumb mixture into your prepared pan, reserving the remaining crumbs for later. Using the bottom of a weighted glass (Alton used coins in his glass), tamp the crumb mixture into the bottom of the pan.

Bake your crust for 10 minutes at 300 degrees, and set it aside to cool while you begin making the filling. You want the crust to be cool before pouring adding the filling to the pan.

To make the filling, beat the 1 1/4 C sour cream on medium-high speed in a stand mixer, using the paddle attachment. The sour cream will coat the bowl and keep the cream cheese from sticking. Next, add the 20 ounces of cream cheese, along with 1 C sugar; begin beating this mixture on low speed, increasing to medium.

IMG_4710

Cream cheese mixed in bowl to coat. Cream cheese and sugar added.

Note:  if you want insurance against your cheesecake cracking, Alton also suggests that you add 1 T cornstarch when you add the sugar, but I opted not to add the cornstarch. While the mixer works on the cream cheese mixture, in a separate container combine 1/3 C cream, 1 T vanilla extract, 3 egg yolks, and 2 whole eggs.

IMG_4711

Cream, vanilla, egg yolks, and eggs.

Scrape the bowl and paddle of the mixer, and slowly add half of the liquid mixture on medium speed. Once half of the liquid is incorporated, scrape the bowl again. Increase the speed of the mixer and add the rest of the liquid.

Keep the mixer running until you have a smooth batter with no lumps. Meanwhile, decrease the oven temperature to 250 degrees and boil 2 quarts of water for your water bath. The water bath will control how quickly heat goes into the cheesecake. When your batter is smooth, pour the batter over your prepared crust, popping any visible bubbles. Place a towel-lined roasting pan in the center of your oven and add your cheesecake to the pan.

IMG_4718

Cheesecake in roasting pan. Water to be added for bath.

Carefully pour boiling water in the roasting pan until it comes 2/3 up the sides of the cheesecake pan; for me, 2 quarts of water was perfect. Bake your cheesecake for 1 hour. When the hour is up, turn the oven off and open the oven door for 1 minute.

IMG_4722

Cheesecake after baking for 1 hour.

Shut the oven door and leave the cheesecake in the cooling oven for an additional hour.

IMG_4723

Completed cheesecake.

Remove your cheesecake from the oven and place it immediately in the refrigerator for at least 6 hours to cool. When you are ready to serve your cheesecake, fill your sink partially with hot water and dip the cheesecake pan in the water for ~10 seconds.

IMG_4727

Getting ready to serve cheesecake – dipping pan in hot water for ~10 seconds.

Next, dip a sharp knife in hot water and run it around the cake between the cake and the parchment paper; this should allow you to pull the wall-lining parchment paper out.

IMG_4729

Cheesecake after running a hot knife around the edges and removing parchment paper.

Place a sheet of wax paper on the surface of the cheesecake and invert it – a springform pan base works well for inverting.

IMG_4732

Inverted cheesecake.

Remove the final parchment paper circle and invert the cake again onto a serving platter. With a hot knife, cut the cake into slices, slicing straight down and pulling the knife out toward you, rather than up. Remember those left over graham cracker crumbs? If desired, toast them in a 350 degree oven for 10 minutes and pat them around the sides of your cheesecake. Voila! Cheesecake a la Alton.

Okay, so this was a pretty darn good cheesecake, but I wish I would have listened to my gut and baked it a little longer. Alton was so definitive about his procedure that I decided to follow it to a T, even though my gut told me my cake would need a little more time. Sure enough, my cake was slightly softer in the middle than I would have liked. Even so, it was delicious. Now, if you are looking for a super thick, dense cheesecake, this isn’t for you. This cheesecake has a lighter, fluffier texture, while still being super rich and tangy. Ted is not as fond of cheesecake, or cream cheese for that matter, as I am and he really liked the texture of this cheesecake. I will make this again, but I will either cook it longer initially or I will not open the oven door for that one minute. Alton emphasized that cheesecake is like eggs:  done in the pan means overdone on the plate. I also might bake the crust just slightly longer initially, as it could have been a tad crispier. Still, we ate every last bit of this, and enjoyed it.

Savory Cheesecake

Although Alton did not make a savory cheesecake in the episode, there is a recipe online for a savory cheesecake from this episode. I tend to print all of the recipes out prior to watching an episode, so I printed this savory cheesecake recipe out, planning to make it when we had my parents over for dinner. Though Alton did not make this in the episode, I decided to make it anyway, using the end of my Alton Brown smoked salmon.

IMG_4742

Alton’s savory cheesecake.

The filling on this cheesecake was really good, but the crust was chewy and disappointing. If I were to make this again, I would make an alternative crust. But, I probably won’t waste my cheesecake-making on this again. Instead, I’ll make Alton’s sweet cheesecake again, tweaking the baking time.

The main star of the 60th episode of Good Eats was none other than eggplant. Eggplant, which is technically a berry, is a food that I have had limited experience with. My mom has an eggplant recipe that she still swears by, which was the only exposure I had to eggplant when I was young; I did not like it. Her version was sliced, breaded, cooked in butter, and coated with Parmesan cheese. A few years ago, I made a batch of Eggplant Parmesan for Ted and me; we did not care for it, opting for frozen pizza, or the like, instead. Still, I figured, if anyone could make me like eggplant, it likely would be Alton Brown.

Baba Ghannouj

First up in Alton’s eggplant repertoire was his take on Baba Ghannouj. For this recipe, you’ll need two eggplants.When selecting eggplants at the store, opt for ones that have a green stem and smooth skin, and that are heavy for their size. Larger eggplants tend to be more bitter than smaller ones. Also, when possible, choose male eggplants instead of females. Who knew there were male and female eggplants? Male eggplants have a small circle on their non-stemmed end, while females have a larger oval shape. Apparently, female eggplants have more seeds and are more bitter (insert bitter female joke here). Oh, and store eggplants on your kitchen counter for 1-2 days, or wrapped in plastic in the refrigerator for longer storage. To make this recipe, prick your eggplants a few times with a fork and roast them on a grill over indirect heat for about a half hour, turning them every 7-8 minutes.

Wrap the hot eggplants in plastic wrap and let sit until cool enough to touch.

IMG_4668

Hot eggplants wrapped in plastic wrap.

When the eggplants have cooled, keep them in their plastic wrap and cut off their stem ends with kitchen scissors. Squeezing the eggplants like a toothpaste tube, squeeze their flesh into a strainer and discard the skins. Note:  this tip sounded cool when I watched the episode, but it did not work for me at all.

IMG_4669

Cut the stem end off of your eggplants and squeeze out their flesh. Didn’t work for me.

I wound up cutting my eggplants completely open with shears and scraped the flesh out with my hands. You will want to have about 2 C of eggplant for this recipe. Let the eggplant drain for about 30 minutes to get rid of its bitter liquid. I also pressed on the surface of my eggplant with paper towels to absorb any excess liquid.

IMG_4670

My eggplant flesh, draining.

Once your eggplant is ready, combine it in a food processor with 2 cloves of sliced garlic, 3/4 t salt, 5 T lemon juice, and 4 T tahini (Alton used twice as much tahini in the episode as in the online recipe).

IMG_4673

Eggplant combined with garlic, salt, tahini, and lemon juice.

Process the mixture until smooth, and add salt and pepper if needed. If your dip tastes too bitter, add some honey.

IMG_4677

Honey, salt, and pepper added to the mixture.

Finally, add 1/2 a sprig of parsley and pulse a few times.

IMG_4678

Fresh parsley added.

Serve the Baba Ghannouj with pita chips.

IMG_4680

My Baba Ghannouj with pita chips.

Honestly, neither Ted or I expected to care for this much, but we actually quite liked it. I did have to add a little bit of honey to my dip to cut the bitterness. Sadly, I think the reason I liked this was because it really did not taste like eggplant to me. It had a bright, lemony flavor and hummus-like texture, with only the faintest hint of bitterness. Hmmm… maybe this Alton guy can make me like eggplant afterall?

Eggplant Steaks

I bravely made Alton’s eggplant steaks for dinner one night last week. Afterall, when Alton cooked them on Good Eats they looked rather appetizing. He explained in the show that eggplant is like a sponge, so it is first necessary to get the eggplant to purge its liquid. To do this, slice your eggplant into 1/2″ slices, place the slices on a rack over a sheet pan, and sprinkle the slices liberally with Kosher salt.

IMG_4615

Eggplant slices, sprinkled with Kosher salt and left to purge their liquid.

After 15 minutes, flip the eggplant slices over and sprinkle them with more Kosher salt. Allow the eggplant to sit for 1-3 hours. There should be quite a lot of liquid on the sheet pan after the purging period.

IMG_4620

Eggplant after purging for 3 hours.

Thoroughly rinse the salt from your eggplant and wring each slice with your hand, as if wringing a sponge. Finally, wrap your slices in paper towels to dry further. Alton’s eggplant slices magically remained round after he wrung them out with his hand, while mine became ugly, oblong blobs; if you want your slices to be round, I’d suggest skipping the wringing step.

IMG_4625

My eggplant slices after being rinsed and wrung out.

Now that the eggplant has purged, it will no longer absorb liquid, but you can get liquid to stick to its surface. Next, combine with a whisk 1/2 C olive oil, 1/4 C Worcestershire sauce, 1 T cider vinegar, 1/4 C steak sauce, and 2 T honey.

Toss the eggplant slices in the sauce mixture until thoroughly coated, and place them on a rack over a sheet pan.

Broil your eggplant “steaks” for ~3 minutes/side or until they start to char around the edges.

IMG_4640

Eggplant “steaks” after broiling for ~3 minutes/side.

Finally, sprinkle your eggplant slices with shredded hard cheese of your choosing (I used Parmesan) and stick them back under the broiler until the cheese has melted.

I went into this recipe pretty optimistic. It turns out my optimism was unfounded. We really did not care for this recipe at all. The eggplant steaks had a texture that sort of reminded me of mushrooms, and their skin was slightly chewy. And, quite frankly, we just didn’t like the taste of this at all. Perhaps we just don’t like eggplant?

Eggplant Pasta

The third (and final, thank God) recipe of this episode was for eggplant pasta. For this recipe, you will need one medium-large eggplant and you will want to peel it before slicing. As in the recipe above for eggplant steaks, you will need to purge the liquid from your eggplant by slicing the eggplant, sprinkling both sides of the slices with Kosher salt, and allowing them to sit for 1-3 hours.

You will then want to rinse the slices, wring them out, and dry them in paper towels.

IMG_4627

Wrung out eggplant slices.

You can complete this purging process ahead of time and store your eggplant slices in the refrigerator for about a week. If you do that, this recipe comes together in no time. In addition to your eggplant, you will need olive oil, garlic, red pepper flakes, a small tomato, cream, fresh basil, Parmesan cheese, and breadcrumbs.

IMG_4651

Ingredients for Alton’s eggplant pasta: red pepper flakes, tomato, Parmesan, garlic, basil, eggplant, bread crumbs, olive oil, and cream.

You will first want to cut your eggplant slices into thin strips. Next, heat 1 T olive oil in a skillet. Once the oil is hot, add 1/4 t minced garlic and a pinch of red pepper flakes.

IMG_4653

Garlic and red pepper flakes added to olive oil in skillet.

Add your eggplant to the skillet next, followed by 1 small tomato, seeded and diced.

Stir in 3 T heavy cream and 1 T basil chiffonade.

Finally, stir in 1-2 T shredded Parmesan cheese.

IMG_4659

Shredded Parmesan to top it off.

Serve the eggplant with breadcrumbs, as desired.

IMG_4662

Alton’s eggplant pasta, topped with breadcrumbs. Even the dog is indifferent about eggplant.

I had high hopes for this recipe, but we did not like this one at all. The texture and flavor of the eggplant were completely unappealing. After completing this episode of eggplant recipes, I think it is safe to say that we just do not like eggplant. I would be curious to know what a true eggplant lover would think of the recipes from this episode, as I do not feel that I can fairly judge them. It is safe to say that this has been my least favorite episode thus far. Thank goodness for the Baba Ghannouj recipe, or this entire episode would have been a dislike in our household! On the plus side, we now know not to order eggplant at a restaurant.


Scrap Iron Chef’s Bacon

I was super excited for the 59th episode of Good Eats. Who wouldn’t be excited at the prospects of making homemade bacon? This episode was a play on the TLC show Junkyard Wars, which I recall seeing several times. I don’t know that this episode would make much sense if you had not seen the original show, but I’m not here to judge production value… I just judge the food!

For Alton’s bacon, you will need a slab of pork belly, preferably from the back end of the pig (it has more fat). How much pork belly will you need? Alton appeared to prep about 10 pounds of pork belly in the episode, while the online recipe calls for five pounds. I, on the other hand, wound up with a 13.5 pound slab of belly. Basically, you can prep as little or as much bacon as you would like; you will just need to adjust the amount of brine you make accordingly. My pork belly was frozen, so I had to allow a couple extra days for it to thaw in the refrigerator. Even if your pork is not frozen, you will need to brine your pork belly for three days before smoking it.

IMG_4537

Ingredients for bacon brine: Kosher salt, sugar, molasses, black pepper, & apple cider. Not pictured: water.

To make enough brine for 10 pounds of pork belly, combine 2 C Kosher salt, 2 C sugar, 8 oz blackstrap molasses, 2 T ground black pepper, 2 quarts apple cider, and 2 quarts water in a large pot.

Bring the brine to a simmer and allow it to cool to room temperature. Once the brine is cool enough to use, portion your pork belly into chunks that can be stored in ziplock bags; I cut my pork belly into six sections.

Divide the brine evenly among the bags and refrigerate the pork for three days, turning the bags once per day to ensure even brining.

IMG_4551

Pork belly and brine in bags for three days.

When smoking day has arrived, remove your pork belly chunks from their brine and dry them on a rack over a sheet pan. A fan can help to expedite this process. Dry the pork for ~30 minutes per side. The purpose of drying the pork is to form a pellicle, or a protein layer, to which the smoke particles can adhere.

IMG_4557

Pork belly drying on racks to form pellicle before smoking.

If you are like me and do not own a smoker, you can build an Alton Brown smoker, much like the one I made for the smoked salmon episode. The difference between the bacon smoker and the salmon smoker is that you want to cold smoke the bacon, while the salmon was smoked with hot smoke. To make a cold smoker a la Alton, you will need a large cardboard box to hold your meat/racks, and a smaller cardboard box to hold your electric burner and wood chips.

You will also need a piece of flexible ductwork to connect the two boxes. Duct tape works great for sealing everything up, and you will want to seal the boxes very tightly.

IMG_4570

My smoker. Two cardboard boxes connected with ductwork.

The smoke will be produced in the smaller box before traveling through the ductwork to the meat box; this keeps the smoke cool. If you have a small fan to push the smoke through the ductwork, that helps too. I used a small personal fan that I taped to the inside of the meat box. Alton recommended inserting a probe thermometer in the meat box to be sure the temperature remains below 80 degrees; my temperature never rose above 63 degrees. You will want to smoke your bacon for about six hours, changing the wood chips about every hour.

IMG_4563

My bacon after drying. Ready to smoke!

Be prepared for some awesome aromas to waft around your home. When your bacon has finished smoking, chill it in the freezer for an hour before slicing. In the episode, Alton did not mention whether his pork belly had the skin on, as my pork belly did. I opted to cut the skin off before slicing the bacon. We have a meat slicer, which made slicing pretty easy, and I honestly cannot imagine slicing it all by hand. Regardless of how you slice your bacon, slice it fat side up.

IMG_4574

My sliced bacon. Freezing the bacon for an hour makes slicing easier.

Alton’s bacon can be stored in the freezer for up to a year. How does Alton recommend that you cook bacon? He recommends that you bake bacon on a rack placed over a sheet pan. Start your bacon in a cold oven that is set to 400 degrees, and check the bacon every three minutes until cooked to your liking. Oh, and save the drippings!

We first tried Alton’s bacon on BLT sandwiches with a slice of cheddar and Alton’s party mayo, and they were delicious sandwiches! The bacon is really quite delicious, though it does not have quite as much smoke flavor as I would have expected. We have a freezer full of delicious bacon that we can eat for months to come. Making bacon is certainly a fun weekend project that is worth a try.

Bacon Vinaigrette with Grilled Radicchio

If you are looking for something to use those delicious bacon drippings for, look no further than Alton’s grilled radicchio. For this recipe you’ll need radicchio lettuce, Kosher salt, black pepper, bacon drippings, brown sugar, coarse mustard, cider vinegar, and olive oil.

IMG_4582

Ingredients for Alton’s grilled radicchio: radicchio lettuce, bacon drippings, Kosher salt, pepper, brown sugar, coarse mustard, cider vinegar, and olive oil.

Cut your radicchio into wedges, leaving some of the core in each wedge. Toss the radicchio wedges in bacon drippings to evenly coat, and sprinkle them with Kosher salt and pepper.

Grill the wedges until they are just starting to brown at the edges. Place the warm wedges on a plate and cover with foil.

Set the radicchio aside and allow the steam to cook the wedges while you make the dressing. For the vinaigrette, combine 1 T brown sugar, 1 T coarse mustard, and 1/4 C cider vinegar in a bowl. Whisk in 1/4 C olive oil and 2 T bacon drippings.

Drizzle the grilled radicchio with the bacon vinaigrette.

IMG_4603

Radicchio wedges served with vinaigrette.

We ate this as a side dish and both thought it was delicious. In fact, we liked it so much that we already plan to have it again. This is an excellent, and different, vegetable side dish that is perfect alongside grilled entrees.

When I think of a standing rib roast, I think of Christmas or another special occasion. When your spouse has cancer, you find yourself creating special occasions to celebrate, whether they be great or small. So, on a random Friday evening in March I cooked Alton’s standing rib roast… just because.

Dry-Aged Standing Rib Roast with Sage Jus

For Alton’s standing rib roast, you will only need a few ingredients:  canola oil, Kosher salt, black pepper, water, red wine, fresh sage, and a standing rib roast. Alton used a 4-bone-in roast, which was about 10.5 pounds. I opted for a smaller, 3-bone-in roast that was about 7 pounds. Our roast came from Costco, and they also had 2-bone-in roasts.

IMG_4492

My 3-bone-in standing rib roast.

Note:  for this recipe, you will need to start prepping 72 hours in advance. In the episode, Alton explains that a standing rib roast is different from prime rib simply because prime rib is from prime beef, while a standing rib roast is not from prime beef. When purchasing a standing rib roast, it is best to get one from the loin end, as the loin end has less bone and connective tissue.

The first step of Alton’s recipe is aging the beef. Place your roast, lightly covered (I used paper towels) in your refrigerator for 72 hours. This aging process will intensify the flavor of the meat.

IMG_4495

My roast, getting ready to age for 72 hours.

After the aging period is complete, remove your roast from the refrigerator and allow it to sit at room temperature for an hour, covered. Your roast will look quite leathery from the aging; Alton says you can trim off any super leathery portions, but I just left my roast as it was.

Now, to cook your roast the Good Eats way, you will need a large, domed terra cotta planter. Place the base of the planter in your cold oven, along with a vessel to hold the roast; I used a glass pie plate. Place the dome of the planter on top and heat your oven to 200 degrees. While the oven is preheating, rub your roast all over with canola oil, and sprinkle with Kosher salt and pepper.

Insert a probe thermometer into the center of the top of the top of the roast, place the roast inside the vessel, and cover with the dome.

Set the probe thermometer alarm to go off when the internal temperature of the roast hits 118 degrees.

IMG_4507

Probe thermometer, set to go off at an internal temperature of 118 degrees.

It took my roast 4 hours and 25 minutes to hit 118 degrees. When your alarm goes off, remove the roast from the oven and let it rest on a rack, covered with foil. Leave the probe thermometer in the roast.

Keeping the dome and vessel in the oven, increase the oven’s temperature to 500 degrees. This is where the online recipe differs from the recipe in the episode:  the online recipe tells you to let the roast rest until it reaches 130 degrees, while Alton simply let his roast rest until its temperature plateaued. Since I prepare everything as done in the episode, I allowed my roast to rest until its temperature was steady at 121 degrees, which took about 25 minutes. Once your roast has rested, remove the foil and place the roast back in the vessel/dome.

IMG_4520

My roast, going back into a 500 degree oven to “sear” for 15 minutes.

Cook the roast for 15 minutes. This 15 minute cook at 500 degrees essentially serves to sear the roast, giving it a crusty exterior. When the 15 minutes are up, remove the roast from the oven, cover it with foil, and let it rest on a cutting board while you prepare the sauce. This is where the cooking vessel comes into play. Discard any excess grease from the vessel – I forgot to do this, so had to skim the grease off my sauce later. If you have a vessel that can go on a burner, place the vessel on a burner over high heat and deglaze the vessel with 1 C water and 1 C red wine.

I did not have a stove-safe vessel, so I had to deglaze with the residual heat of the vessel before transferring to a pot. Bring the liquid to a boil and scrape the pan with a spatula. Cook the sauce until it has reduced by half. Finally, add 3-4 bruised sage leaves to the sauce for 60 seconds and strain.

Carve your roast with an electric knife, first removing the slab of bones. Cut off any large pieces of fat and slice the meat into 1/2-inch or larger slices. Serve the meat with the sage jus.

We ate this for dinner, along with some side dishes and a good bottle of wine. The meat was delicious and tender with a nice crust on the outside, and we both thought we could really taste the aging of the meat.

IMG_4536

Alton’s standing rib roast.

The sauce, in my opinion, was just okay. I think I would have preferred a nice horseradish sauce. Still, if you are looking to celebrate a special occasion, Alton’s standing rib roast is an excellent choice. Follow his protocol and you will not be disappointed. Oh, and if you have leftovers, you can slice them thinly and make fantastic sandwiches!