Posts Tagged ‘vinaigrette’

I fell behind a little bit in my project, as we went out of town a couple times and our 11-month-old has kept me pretty busy. She is crawling everywhere, standing, and into everything, so I can really only get things done when she is sleeping! Oh, and some days we only take one nap! I also wanted to make some of my favorite summer dishes (gazpacho, caprese, and risotto) before the season is over. Summer has gone by way too quickly for my liking.

This episode, featuring another “flat” food, showcases flounder. Alton claims that flounder is a readily available fish, which is probably true in some areas, but not where I live. I called our local markets and was told that they never have flounder, and that any flounder they would order would be frozen. My only option, it seemed, was to use frozen flounder fillets, so that’s what I did.

Baked Stuffed Flounder

The first flounder recipe is for flounder fillets stuffed with a vegetable filling. This recipe, as written, makes enough for four to six people, so I halved it for us. To make the full recipe, you’ll first want to cook enough rice to yield three cups of cooked rice. You can set the rice aside until later. To start the filling, melt 2 T butter in a skillet over medium-low heat, adding a chopped medium onion and a pinch of Kosher salt.

IMG_2283(2)

Onion and Kosher salt in skillet with melted butter.

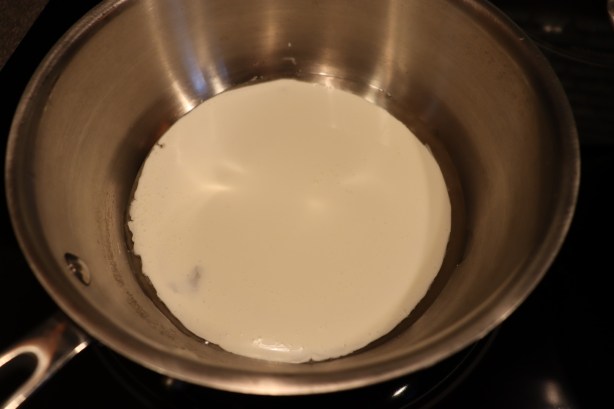
While the onion sweats, pour 1 C heavy cream and 1/4 C white wine into a saucier over medium heat, and whisk as you bring the mixture to a simmer.
IMG_2281(2)

Heavy cream and white wine in saucier.

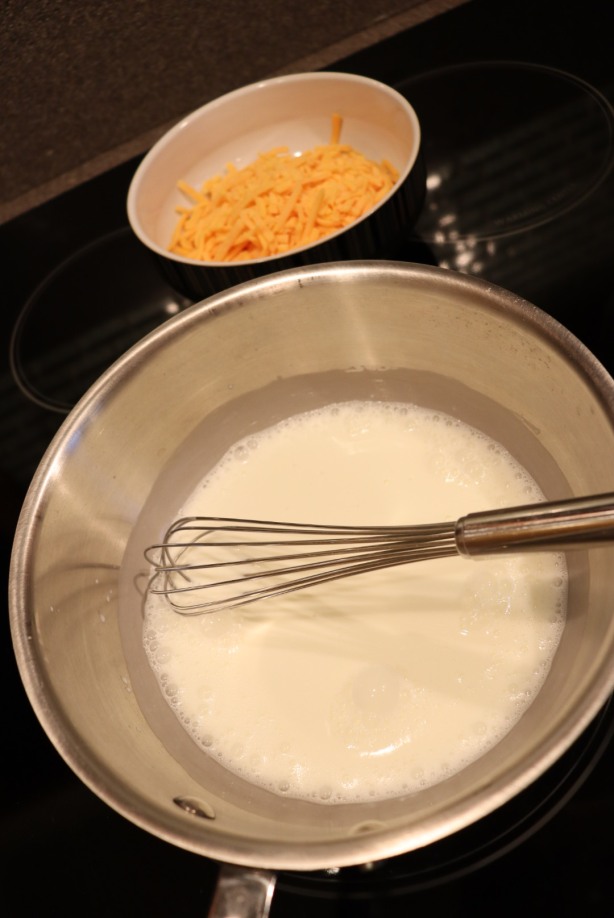
Meanwhile, add 1 minced clove of garlic to the onion and cook for a minute. Once the cream mixture is simmering, slowly whisk in 10 ounces of cheddar cheese, letting each addition of cheese melt before adding more. When all of the cheese is in and the sauce is smooth, remove it from the heat.
IMG_2284(1)

Cheese, ready to add to simmering cream/wine.

To finish the filling, add to the onion pan 10 ounces of chopped frozen spinach that has been thawed and drained, along with the zest of a lemon. Next, add 2 T chopped parsley, 1/2 t Kosher salt, and 1/4 t pepper. Remove the filling from the heat.

Stir the cheese sauce again before placing 1 1/2 to 2 pounds of flounder fillets on a sheet pan. Season the fish liberally with Kosher salt and pepper. Distribute the spinach filling among the fillets, placing a mound at the widest part of each filet.

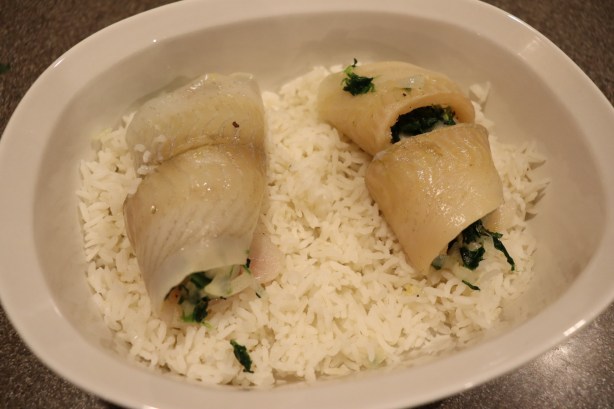
Roll the fish around the filling, bringing the tail end up over the filling and the head portion down, kind of twisting the fish around the filling. Place the fillets seam side down in a 1 1/2 to 2 quart casserole that has been filled with the 3 C of cooked rice from earlier.
IMG_2292(2)

Fillets rolled around filling and placed on rice.

Pour the cheese sauce over the fish and rice and bake the fish for 25 minutes at 350 degrees. Let the fish rest for five minutes before serving.

IMG_2293(2)

Cheese sauce poured over fish and rice.

IMG_2295(2)

Fish after baking for 25 minutes.

IMG_2296(2)

Alton’s stuffed flounder.

Okay, so I instantly cringed at the idea of fish and cheese together when I watched Alton prepare this dish. Cheese and seafood? Well, it turned out that the cheese wasn’t so much of the problem as was my fish. Is all flounder fishy? My flounder smelled super fishy when I opened it and maintained a fishy flavor after cooking. The fish also had a somewhat mushy texture, and we both found it really unappealing. In fact, I just ended up eating the rice with the filling and sauce. I would definitely not make this recipe again as it is written. Maybe this would be better with a different type of fish? Still… fish with cheese. Yeah, I’d recommend skipping this one.

Oil Poached Flounder

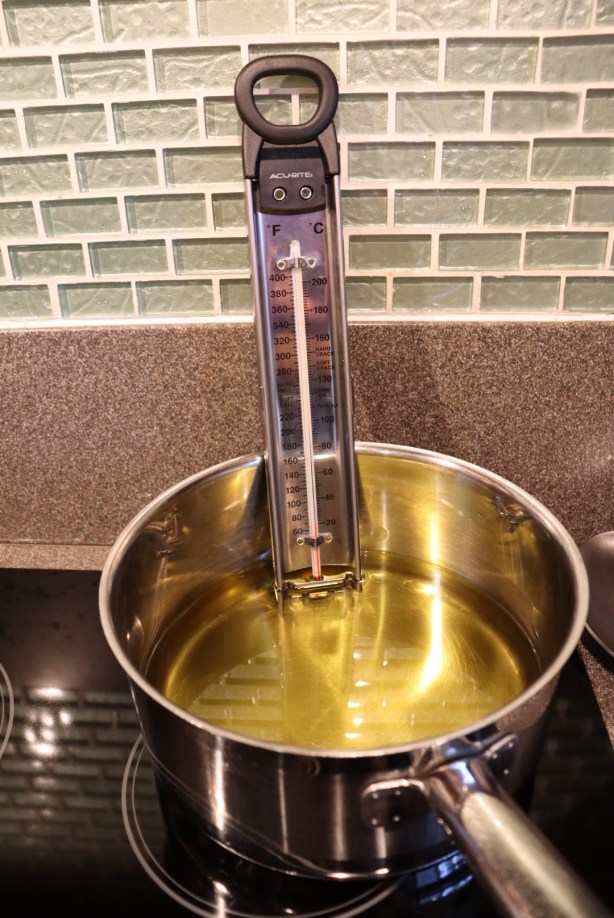
After making Alton’s first flounder dish, I decided to make the remaining to recipes with a different type of fish that I could get fresh locally – salmon. My flounder was just so bad that I could tell it would not taste good in any recipe. Yes, substituting ingredients (especially the main ingredient) goes against the premise of this project, but I chose to do it here in Alton’s oil poached flounder recipe. To poach fish in oil, heat 3 C of olive oil on the stove over low heat until it reaches 300-310 degrees.
IMG_2305(2)

Olive oil heating to 300-310 degrees.

While the oil heats, heat the oven to 350 degrees and season 1 1/2 to 2 pounds of fish fillets with Kosher salt and pepper.

IMG_2307(2)

Salmon, seasoned with Kosher salt and pepper and cut into fillets.

Thinly slice a lemon and line the bottom of a cast iron skillet with the lemon slices. Top the lemon slices with a few sprigs of fresh parsley.

IMG_2304(2)

A layer of lemon slices and parsley in a cast iron skillet.

Place the fish fillets on top of the parsley and top the fish with another layer of thinly sliced lemon and a few more sprigs of parsley. Make sure your parsley is not wet.

Place the skillet in the preheated oven and carefully pour the hot oil over the fish.

IMG_2318(1)

Skillet placed in oven and hot oil poured over.

Let the fish cook for 10 minutes before removing it from the oven. Let the fish rest for five minutes before serving.

IMG_2321(1)

Fish after poaching for 10 minutes in the oven.

IMG_2322(1)

Alton’s oil poached fish.

You can strain and save the oil for later fish cooking. If you plan to make the next recipe, which uses leftovers from this recipe, be sure to save 1/2 C of the cooking oil and two of the lemon slices. My salmon turned out moist and flavorful, yet not greasy. I do think my fish was slightly overcooked, so I would be tempted next time to cut the cooking time by several minutes. I did like this method of cooking fish and I did save the oil, so I think I’ll try this again. I suppose you could always mix up the fresh herbs; since I used salmon, I think dill would pair well.

Flounder Fish Salad

Leftover fish is typically pretty gross, so I wasn’t sure what to think when I saw Alton making a leftover fish salad. To make this salad, whisk together in a bowl:  3 T white wine vinegar, 1 T lime juice, 1/2 t Kosher salt, 1/8 t pepper, and 8-10 drops of hot sauce.

IMG_2327(1)

White wine vinegar, lime juice, Kosher salt, pepper, and hot sauce.

Slowly whisk in 1/2 C of the strained leftover cooking oil from the previous recipe until you have an emulsion.

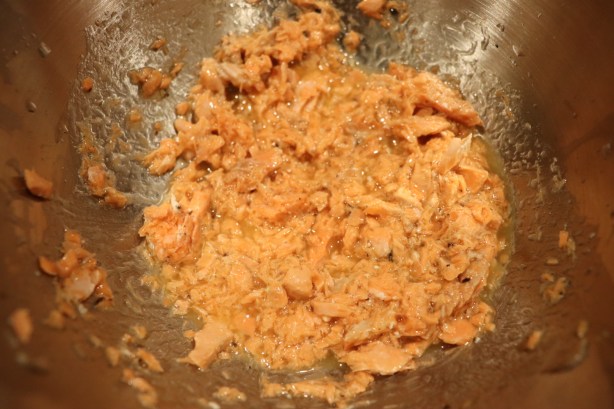
Fold a pound of leftover cooked fish from the previous recipe into the dressing.
IMG_2332(1)

Leftover poached fish added to vinaigrette.

Finally, add two diced  leftover lemon slices from the previous recipe, 2 T parsley, and 2 T scallions. Serve the fish salad with crackers.

IMG_2333(1)

Diced lemon, parsley, and scallions added to fish.

IMG_2334(1)

Alton’s fish salad on crackers.

I used my leftover salmon from the previous recipe and thought this turned out to be surprisingly good. We ate this as an appetizer on crackers. The fish didn’t taste fishy and the vinaigrette had a nice pep to it. The leftover diced lemon added both texture and a bit of tart citrus. I found this to be a very summery dish. While I never would have considered eating leftover fish before, I may make this salad again in the future if we have good leftover fish. I can assuredly say that this recipe would have been awful if I had used the frozen flounder that I used in the first recipe, so if you do decide to try this one, be certain that you are using good fish!

This episode of Good Eats sees Alton in the kitchen with his “nephew,” striving to whip up some kid-friendly sandwiches. Alton has four rules for making sandwiches:

  1. Soft fillings and spreads pair best with soft breads.
  2. A barrier (mayo, butter, oil, etc.) should be used to keep bread from getting water-logged from wet ingredients.
  3. The order of sandwich ingredients matters – slippery ingredients are not to be placed next to each other.
  4. Quality of bread is crucial, and you should only utilize bread that you would happily consume plain. Pre-sliced bread tends to be loaded with preservatives, so should be avoided.

Pan Bagnat

The first sandwich Alton makes is a pan bagnat, which translates to “wet bread.” What is a pan bagnat? Basically, it is a French version of a sub sandwich, consisting of several layers of ingredients. This sandwich is designed to be made a couple hours before consumption, as it is best to let the flavors mingle. This sandwich starts with a vinaigrette made by placing 1/2 t Dijon mustard in a bowl, and whisking in 1 T red wine vinegar, 1/2 t Kosher salt, and several grinds of pepper. While continuing to whisk, drizzle in 3 T olive oil to form an emulsion. Set the dressing aside while you build the sandwich.

This sandwich serves four people, and I only needed enough for two, so I cut the recipe in half. Bread-wise, for four servings, you want to get a 16-inch baguette. Slice the loaf in half horizontally and use your fingers to dig out trenches in the center of each half of bread, as if you are creating bread canoes. You can discard the removed bread, or use it to make bread crumbs.

Fill the trench in the bottom half of bread with 12 ounces of drained tuna fish (you can use either oil or water-packed tuna).

IMG_0225

Bottom bread trench filled with tuna fish.

Next, add a layer of 1/3-inch thick green bell pepper slices, followed by a layer of 1/3-inch thick red onion slices.

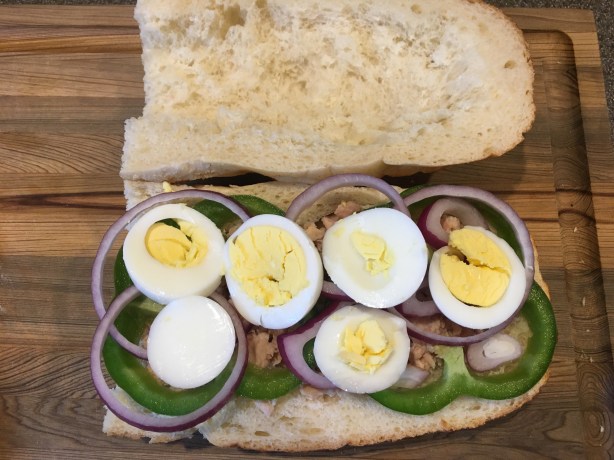
Next, add two hard boiled eggs, thinly sliced.

IMG_0228

Tuna topped with green bell pepper, red onions, and hard boiled eggs.

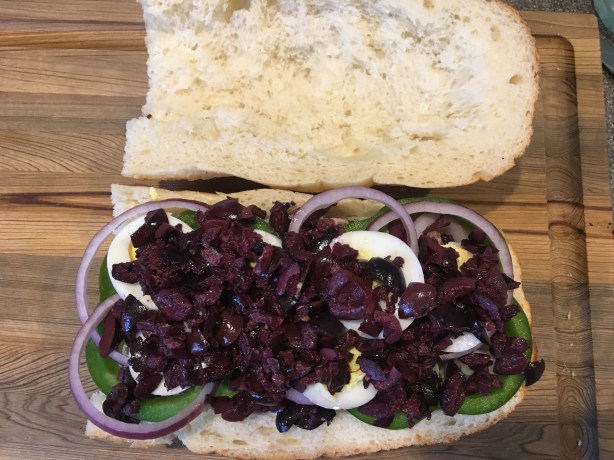
On top of the eggs, sprinkle on 1 C of pitted/chopped Kalamata olives.

IMG_0229

Tuna topped with green bell pepper, red onions, hard boiled egg, and Kalamata olives.

Top the olives with 4-5 slices of very ripe tomato and drizzle on the red wine vinaigrette, letting the dressing drizzle down between the ingredient layers.

Place the top bread on top of the sandwich. Wrap the sandwich very tightly in plastic wrap; you will need to overlap sheets of plastic to have a sheet wide enough for the length of the sandwich. Once wrapped, let the sandwich sit at room temperature for two hours before slicing and eating.

I made this sandwich last Friday, as we were taking a short road trip out of town. The sandwich sat in the car for the duration of our drive, and was then ready to eat for dinner when we arrived at our vacation rental.

IMG_0240

Alton’s pan bagnat. Excuse the poor lighting in this photo, as our vacation rental had horrible lighting.

Personally, I really liked this sandwich, but Ted doesn’t like canned tuna, so he was not a huge fan. He did, however, say that he would really like this sandwich if it were made with a different protein. Basically, if you’ve ever had a niçoise salad, this sandwich is that salad in sandwich form. Alton did not follow his second sandwich rule of using a moisture barrier with this recipe, so I wondered if the sandwich would end up soggy from the tuna, tomato, olives, and dressing, but it really was not soggy at all. What I liked most about this sandwich were its contrasting flavors, colors, and textures. The veggies gave the sandwich a crunch, the tomato and dressing kept the sandwich from being dry, and the eggs gave a slight creamy texture. Flavor-wise, the vinaigrette and olives were tangy, bright and salty, while the red onions gave a bit of spice/heat. The tomato added fruitiness and the tuna contributed a slight fishy flavor. It was also convenient to be able to make this sandwich ahead. I will definitely make a version of this sandwich again, though I likely will substitute something else (chicken salad?) for the tuna unless I am the only one eating it.

Cuban Sandwich

The second sandwich recipe in this episode is for Alton’s take on the classic Cuban sandwich. To make Cuban sandwiches, slice hoagie rolls in half horizontally and liberally spread yellow mustard on both halves of the rolls.

Top the mustard with a thin layer of baked ham, followed by a thin layer of roast pork (I made a small pork roast for these sandwiches).

Top the pork with two slices of provolone or Swiss cheese (I used Swiss) and two long, thin slices of Kosher dill pickle.

You can wrap the sandwiches in plastic and save them for later, or you can cook them right away. To cook the sandwiches, brush/spread them with butter and press them in a panini press for about 10 minutes.

If you do not have a panini press, you can still press the sandwiches by wrapping three fireplace bricks in foil. Place the bricks on a sheet pan. Place three more bricks (they do not need to be wrapped in foil) on a second sheet pan. Place the two sheet pans of bricks in a 500-degree oven for an hour. Remove the sheet pans from the oven and brush the foil-covered bricks with butter. Place the sandwiches on the foil-covered bricks and brush the sandwich tops with butter. Place the sheet pan of unwrapped bricks on top of the sandwiches and let the sandwiches press between the bricks for about 10 minutes.

IMG_0176

Alton’s Cuban sandwich.

I really enjoy Cuban sandwiches because I love their zesty flavor, and I thought this was a great, fast version to make at home. If you don’t want to go to the trouble of roasting pork for this recipe, you could always substitute sliced turkey, or at least that is what Alton says. I’m sure some Cuban sandwich classicists would pooh-pooh Alton’s version with provolone and turkey, but if it tastes good (and it does), who cares?

Roasted Vegetable Spread

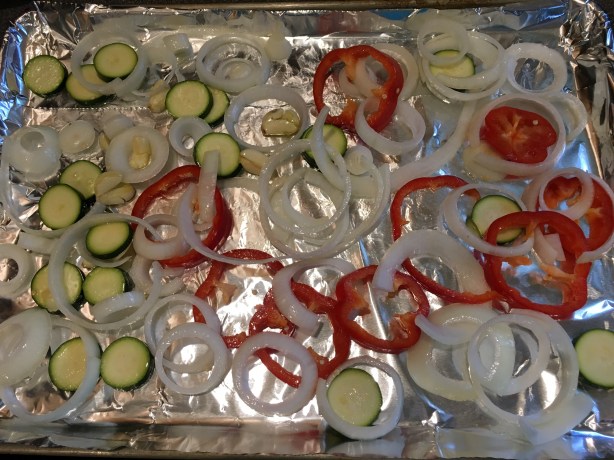
The last recipe in this episode is for a vegetarian spread that you could use on any sandwich, or just on crackers or bread. Preheat your oven to 400. While the oven heats, toss the following vegetables with 1-2 T olive oil:  1 sliced zucchini, 1 sliced (into rings) red bell pepper, 1 sliced (into rings) onion, and 4-5 crushed cloves of garlic.

Spread the veggies on a foil-lined sheet pan and sprinkle them with Kosher salt. Roast the vegetables for 45 minutes, stirring them occasionally.

IMG_0319

Zucchini, red bell pepper, onion, and garlic tossed with olive oil, spread on a sheet pan, and sprinkled with Kosher salt.

Remove the vegetables from the oven and let them cool to room temperature.

IMG_0323

Vegetables after roasting for 45 minutes.

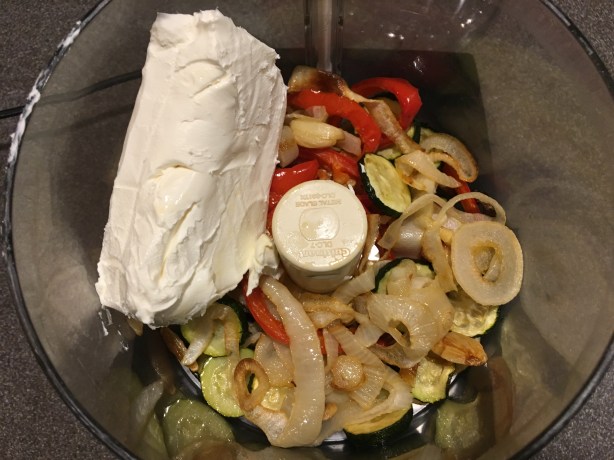
Place the veggies in a food processor, along with eight ounces of cream cheese, and pulse to combine.

IMG_0325

Roasted vegetables in the food processor with cream cheese.

IMG_0329

Alton’s vegetable spread, served with bread slices.

Alton recommends serving his spread on soft bread (see sandwich rule number 1 above). This spread has a sweet veggie flavor from the caramelized vegetables. While I would not be able to identify zucchini in this spread, the flavors of red bell pepper, onion, and garlic are easily identifiable. I did feel that the spread could use a bit more Kosher salt, though. We enjoyed this as an appetizer on sliced bread, though I can attest it is also good on crackers. This is a recipe that would be great to keep in mind for when you are cleaning out your produce drawer, as you could roast a variety of leftover vegetables and have a different spread each time. I plan to make this again the next time we have leftover veggies.

Scrap Iron Chef’s Bacon

I was super excited for the 59th episode of Good Eats. Who wouldn’t be excited at the prospects of making homemade bacon? This episode was a play on the TLC show Junkyard Wars, which I recall seeing several times. I don’t know that this episode would make much sense if you had not seen the original show, but I’m not here to judge production value… I just judge the food!

For Alton’s bacon, you will need a slab of pork belly, preferably from the back end of the pig (it has more fat). How much pork belly will you need? Alton appeared to prep about 10 pounds of pork belly in the episode, while the online recipe calls for five pounds. I, on the other hand, wound up with a 13.5 pound slab of belly. Basically, you can prep as little or as much bacon as you would like; you will just need to adjust the amount of brine you make accordingly. My pork belly was frozen, so I had to allow a couple extra days for it to thaw in the refrigerator. Even if your pork is not frozen, you will need to brine your pork belly for three days before smoking it.

IMG_4537

Ingredients for bacon brine: Kosher salt, sugar, molasses, black pepper, & apple cider. Not pictured: water.

To make enough brine for 10 pounds of pork belly, combine 2 C Kosher salt, 2 C sugar, 8 oz blackstrap molasses, 2 T ground black pepper, 2 quarts apple cider, and 2 quarts water in a large pot.

Bring the brine to a simmer and allow it to cool to room temperature. Once the brine is cool enough to use, portion your pork belly into chunks that can be stored in ziplock bags; I cut my pork belly into six sections.

Divide the brine evenly among the bags and refrigerate the pork for three days, turning the bags once per day to ensure even brining.

IMG_4551

Pork belly and brine in bags for three days.

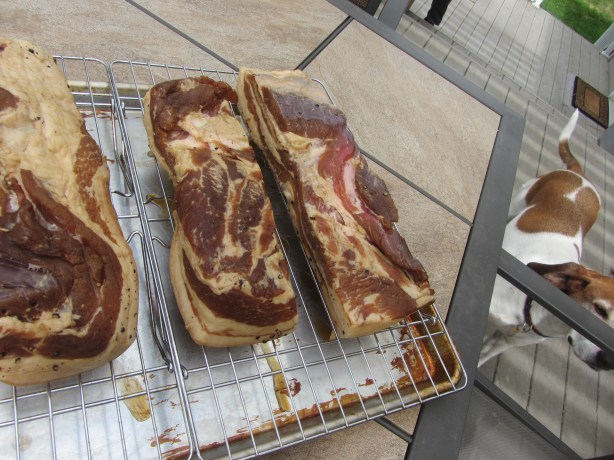
When smoking day has arrived, remove your pork belly chunks from their brine and dry them on a rack over a sheet pan. A fan can help to expedite this process. Dry the pork for ~30 minutes per side. The purpose of drying the pork is to form a pellicle, or a protein layer, to which the smoke particles can adhere.

IMG_4557

Pork belly drying on racks to form pellicle before smoking.

If you are like me and do not own a smoker, you can build an Alton Brown smoker, much like the one I made for the smoked salmon episode. The difference between the bacon smoker and the salmon smoker is that you want to cold smoke the bacon, while the salmon was smoked with hot smoke. To make a cold smoker a la Alton, you will need a large cardboard box to hold your meat/racks, and a smaller cardboard box to hold your electric burner and wood chips.

You will also need a piece of flexible ductwork to connect the two boxes. Duct tape works great for sealing everything up, and you will want to seal the boxes very tightly.

IMG_4570

My smoker. Two cardboard boxes connected with ductwork.

The smoke will be produced in the smaller box before traveling through the ductwork to the meat box; this keeps the smoke cool. If you have a small fan to push the smoke through the ductwork, that helps too. I used a small personal fan that I taped to the inside of the meat box. Alton recommended inserting a probe thermometer in the meat box to be sure the temperature remains below 80 degrees; my temperature never rose above 63 degrees. You will want to smoke your bacon for about six hours, changing the wood chips about every hour.

IMG_4563

My bacon after drying. Ready to smoke!

Be prepared for some awesome aromas to waft around your home. When your bacon has finished smoking, chill it in the freezer for an hour before slicing. In the episode, Alton did not mention whether his pork belly had the skin on, as my pork belly did. I opted to cut the skin off before slicing the bacon. We have a meat slicer, which made slicing pretty easy, and I honestly cannot imagine slicing it all by hand. Regardless of how you slice your bacon, slice it fat side up.

IMG_4574

My sliced bacon. Freezing the bacon for an hour makes slicing easier.

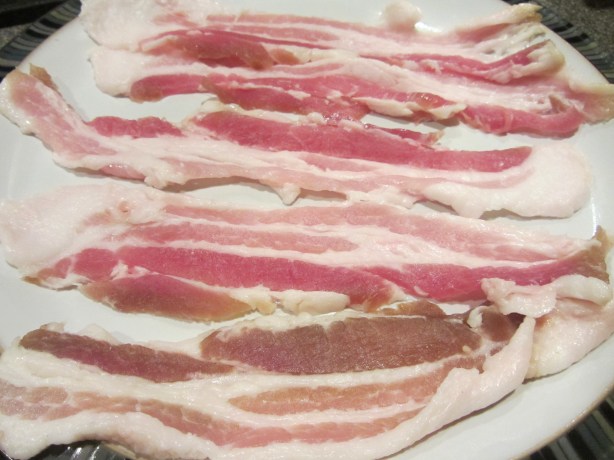
Alton’s bacon can be stored in the freezer for up to a year. How does Alton recommend that you cook bacon? He recommends that you bake bacon on a rack placed over a sheet pan. Start your bacon in a cold oven that is set to 400 degrees, and check the bacon every three minutes until cooked to your liking. Oh, and save the drippings!

We first tried Alton’s bacon on BLT sandwiches with a slice of cheddar and Alton’s party mayo, and they were delicious sandwiches! The bacon is really quite delicious, though it does not have quite as much smoke flavor as I would have expected. We have a freezer full of delicious bacon that we can eat for months to come. Making bacon is certainly a fun weekend project that is worth a try.

Bacon Vinaigrette with Grilled Radicchio

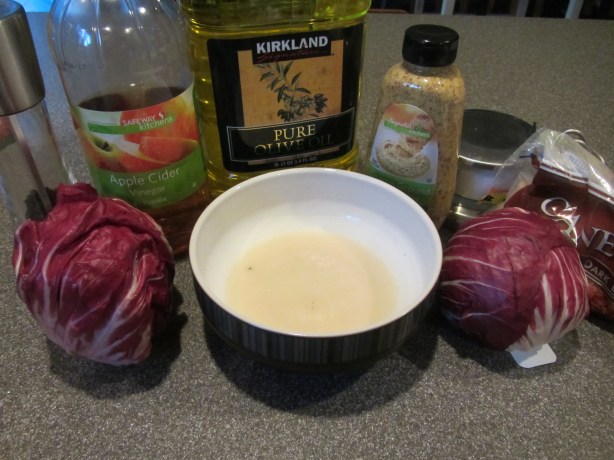
If you are looking for something to use those delicious bacon drippings for, look no further than Alton’s grilled radicchio. For this recipe you’ll need radicchio lettuce, Kosher salt, black pepper, bacon drippings, brown sugar, coarse mustard, cider vinegar, and olive oil.

IMG_4582

Ingredients for Alton’s grilled radicchio: radicchio lettuce, bacon drippings, Kosher salt, pepper, brown sugar, coarse mustard, cider vinegar, and olive oil.

Cut your radicchio into wedges, leaving some of the core in each wedge. Toss the radicchio wedges in bacon drippings to evenly coat, and sprinkle them with Kosher salt and pepper.

Grill the wedges until they are just starting to brown at the edges. Place the warm wedges on a plate and cover with foil.

Set the radicchio aside and allow the steam to cook the wedges while you make the dressing. For the vinaigrette, combine 1 T brown sugar, 1 T coarse mustard, and 1/4 C cider vinegar in a bowl. Whisk in 1/4 C olive oil and 2 T bacon drippings.

Drizzle the grilled radicchio with the bacon vinaigrette.

IMG_4603

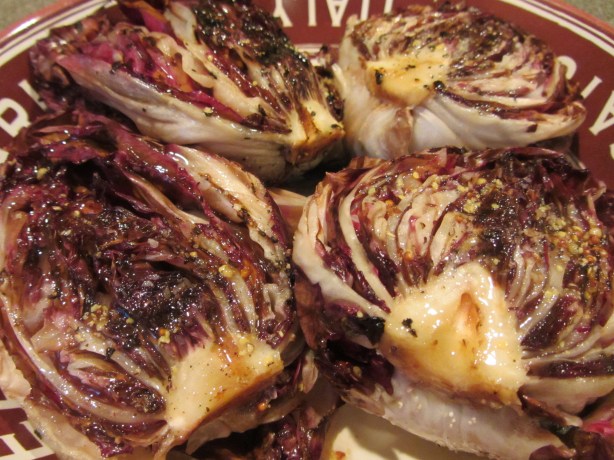
Radicchio wedges served with vinaigrette.

We ate this as a side dish and both thought it was delicious. In fact, we liked it so much that we already plan to have it again. This is an excellent, and different, vegetable side dish that is perfect alongside grilled entrees.