Posts Tagged ‘rice’

I fell behind a little bit in my project, as we went out of town a couple times and our 11-month-old has kept me pretty busy. She is crawling everywhere, standing, and into everything, so I can really only get things done when she is sleeping! Oh, and some days we only take one nap! I also wanted to make some of my favorite summer dishes (gazpacho, caprese, and risotto) before the season is over. Summer has gone by way too quickly for my liking.

This episode, featuring another “flat” food, showcases flounder. Alton claims that flounder is a readily available fish, which is probably true in some areas, but not where I live. I called our local markets and was told that they never have flounder, and that any flounder they would order would be frozen. My only option, it seemed, was to use frozen flounder fillets, so that’s what I did.

Baked Stuffed Flounder

The first flounder recipe is for flounder fillets stuffed with a vegetable filling. This recipe, as written, makes enough for four to six people, so I halved it for us. To make the full recipe, you’ll first want to cook enough rice to yield three cups of cooked rice. You can set the rice aside until later. To start the filling, melt 2 T butter in a skillet over medium-low heat, adding a chopped medium onion and a pinch of Kosher salt.

IMG_2283(2)

Onion and Kosher salt in skillet with melted butter.

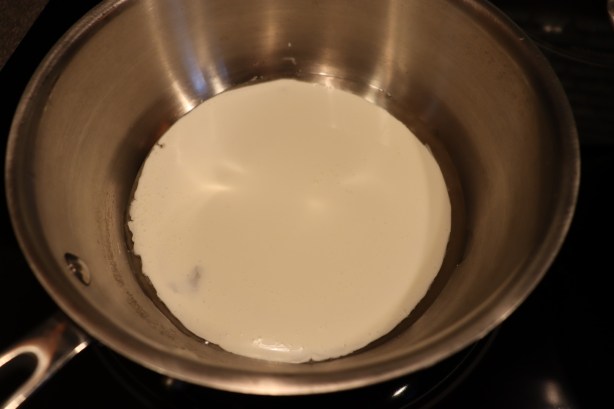
While the onion sweats, pour 1 C heavy cream and 1/4 C white wine into a saucier over medium heat, and whisk as you bring the mixture to a simmer.
IMG_2281(2)

Heavy cream and white wine in saucier.

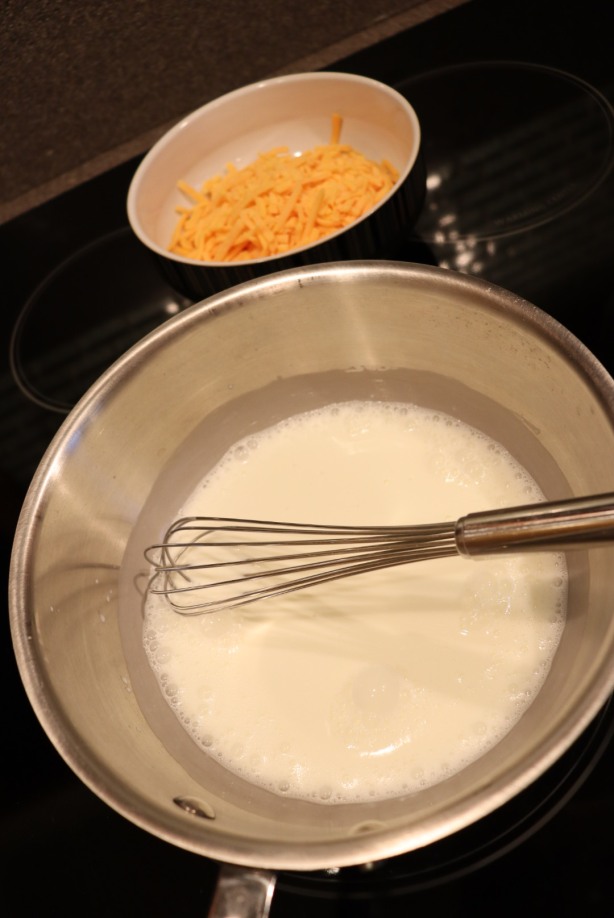
Meanwhile, add 1 minced clove of garlic to the onion and cook for a minute. Once the cream mixture is simmering, slowly whisk in 10 ounces of cheddar cheese, letting each addition of cheese melt before adding more. When all of the cheese is in and the sauce is smooth, remove it from the heat.
IMG_2284(1)

Cheese, ready to add to simmering cream/wine.

To finish the filling, add to the onion pan 10 ounces of chopped frozen spinach that has been thawed and drained, along with the zest of a lemon. Next, add 2 T chopped parsley, 1/2 t Kosher salt, and 1/4 t pepper. Remove the filling from the heat.

Stir the cheese sauce again before placing 1 1/2 to 2 pounds of flounder fillets on a sheet pan. Season the fish liberally with Kosher salt and pepper. Distribute the spinach filling among the fillets, placing a mound at the widest part of each filet.

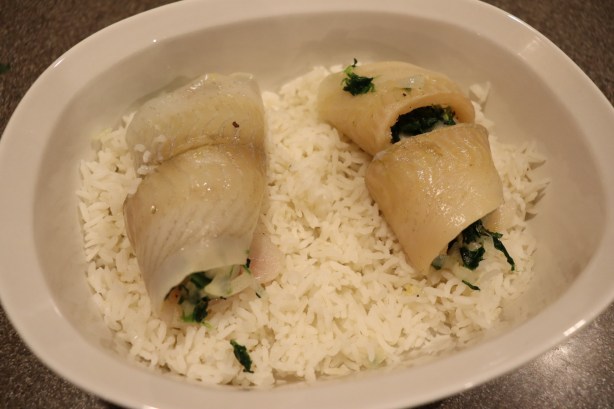
Roll the fish around the filling, bringing the tail end up over the filling and the head portion down, kind of twisting the fish around the filling. Place the fillets seam side down in a 1 1/2 to 2 quart casserole that has been filled with the 3 C of cooked rice from earlier.
IMG_2292(2)

Fillets rolled around filling and placed on rice.

Pour the cheese sauce over the fish and rice and bake the fish for 25 minutes at 350 degrees. Let the fish rest for five minutes before serving.

IMG_2293(2)

Cheese sauce poured over fish and rice.

IMG_2295(2)

Fish after baking for 25 minutes.

IMG_2296(2)

Alton’s stuffed flounder.

Okay, so I instantly cringed at the idea of fish and cheese together when I watched Alton prepare this dish. Cheese and seafood? Well, it turned out that the cheese wasn’t so much of the problem as was my fish. Is all flounder fishy? My flounder smelled super fishy when I opened it and maintained a fishy flavor after cooking. The fish also had a somewhat mushy texture, and we both found it really unappealing. In fact, I just ended up eating the rice with the filling and sauce. I would definitely not make this recipe again as it is written. Maybe this would be better with a different type of fish? Still… fish with cheese. Yeah, I’d recommend skipping this one.

Oil Poached Flounder

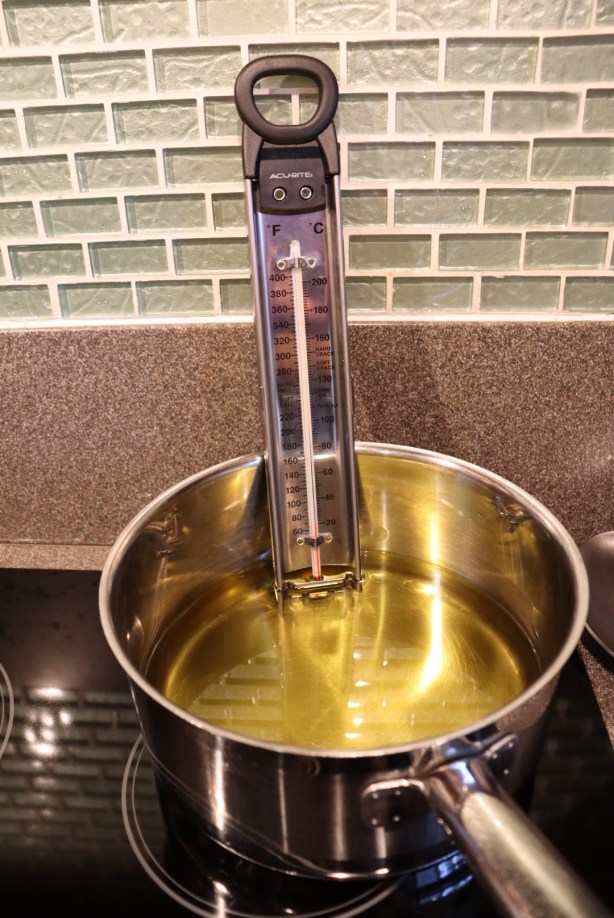
After making Alton’s first flounder dish, I decided to make the remaining to recipes with a different type of fish that I could get fresh locally – salmon. My flounder was just so bad that I could tell it would not taste good in any recipe. Yes, substituting ingredients (especially the main ingredient) goes against the premise of this project, but I chose to do it here in Alton’s oil poached flounder recipe. To poach fish in oil, heat 3 C of olive oil on the stove over low heat until it reaches 300-310 degrees.
IMG_2305(2)

Olive oil heating to 300-310 degrees.

While the oil heats, heat the oven to 350 degrees and season 1 1/2 to 2 pounds of fish fillets with Kosher salt and pepper.

IMG_2307(2)

Salmon, seasoned with Kosher salt and pepper and cut into fillets.

Thinly slice a lemon and line the bottom of a cast iron skillet with the lemon slices. Top the lemon slices with a few sprigs of fresh parsley.

IMG_2304(2)

A layer of lemon slices and parsley in a cast iron skillet.

Place the fish fillets on top of the parsley and top the fish with another layer of thinly sliced lemon and a few more sprigs of parsley. Make sure your parsley is not wet.

Place the skillet in the preheated oven and carefully pour the hot oil over the fish.

IMG_2318(1)

Skillet placed in oven and hot oil poured over.

Let the fish cook for 10 minutes before removing it from the oven. Let the fish rest for five minutes before serving.

IMG_2321(1)

Fish after poaching for 10 minutes in the oven.

IMG_2322(1)

Alton’s oil poached fish.

You can strain and save the oil for later fish cooking. If you plan to make the next recipe, which uses leftovers from this recipe, be sure to save 1/2 C of the cooking oil and two of the lemon slices. My salmon turned out moist and flavorful, yet not greasy. I do think my fish was slightly overcooked, so I would be tempted next time to cut the cooking time by several minutes. I did like this method of cooking fish and I did save the oil, so I think I’ll try this again. I suppose you could always mix up the fresh herbs; since I used salmon, I think dill would pair well.

Flounder Fish Salad

Leftover fish is typically pretty gross, so I wasn’t sure what to think when I saw Alton making a leftover fish salad. To make this salad, whisk together in a bowl:  3 T white wine vinegar, 1 T lime juice, 1/2 t Kosher salt, 1/8 t pepper, and 8-10 drops of hot sauce.

IMG_2327(1)

White wine vinegar, lime juice, Kosher salt, pepper, and hot sauce.

Slowly whisk in 1/2 C of the strained leftover cooking oil from the previous recipe until you have an emulsion.

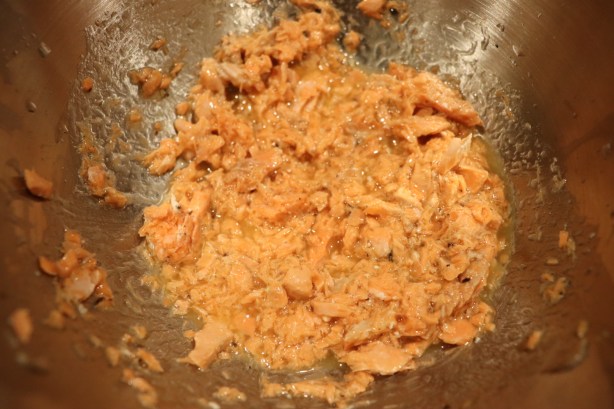
Fold a pound of leftover cooked fish from the previous recipe into the dressing.
IMG_2332(1)

Leftover poached fish added to vinaigrette.

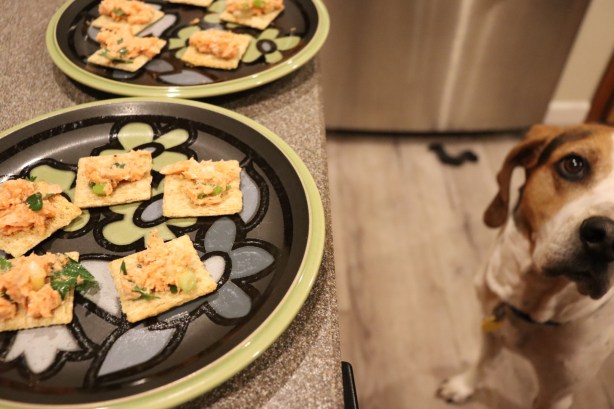
Finally, add two diced  leftover lemon slices from the previous recipe, 2 T parsley, and 2 T scallions. Serve the fish salad with crackers.

IMG_2333(1)

Diced lemon, parsley, and scallions added to fish.
IMG_2334(1)

Alton’s fish salad on crackers.

I used my leftover salmon from the previous recipe and thought this turned out to be surprisingly good. We ate this as an appetizer on crackers. The fish didn’t taste fishy and the vinaigrette had a nice pep to it. The leftover diced lemon added both texture and a bit of tart citrus. I found this to be a very summery dish. While I never would have considered eating leftover fish before, I may make this salad again in the future if we have good leftover fish. I can assuredly say that this recipe would have been awful if I had used the frozen flounder that I used in the first recipe, so if you do decide to try this one, be certain that you are using good fish!

I have had the best intentions with my blog, but somehow it has been two months since I last posted. I guess it’s true what they say – “parenthood is a time warp!” Our little baby is now four months old, which is hard to believe. At her four month check-up yesterday, our pediatrician recommended that we start introducing solid food now, which is something I thought we’d wait a couple more months for. My sister-in-law gave me an awesome baby food cookbook that I can’t wait to try out, as it introduces babies to all sorts of interesting flavors; the goal is to avoid having a picky eater. Before I know it, she’ll be in the kitchen with me, and I can’t wait for that!

The recipes in this post are sushi recipes. With being pregnant, this was the first sushi I had eaten in a good year! Alton recommends the following ingredients and tools to make up a basic home sushi kit:  soy sauce, rice wine vinegar, short grain rice, Nori, a rice spoon, a sushi mat, wasabi, and pickled ginger. With those basic tools and ingredients, you should be set to try making sushi.

Sushi Rice

The first step in making sushi is preparing the rice. Ideally, for sushi rice, you want to use short grain rice. Surprisingly, my grocery store did not have any short grain rice, so I had to settle for medium grain rice. Place 2 C of rice in a sieve and rinse it three times with water, or until the water runs clear.

Place the rice in a medium saucepan with 2 C of water, stirring. Bring the rice to a boil over high heat. Once boiling, place a cover on the pan, decrease the heat to low, and cook the rice for 15 minutes. After 15 minutes, let the rice stand for 10 more minutes.

While the rice sits combine 2 T sugar, 1 T Kosher salt, and 2 T rice vinegar in a microwave safe bowl. Microwave the vinegar mixture for 30-45 seconds or until the salt is mostly dissolved.

IMG_0929(1)

Sugar, Kosher salt, and rice vinegar microwaved until nearly dissolved.

Next, dump the rice into a large wooden or glass bowl (a wide wooden bowl is ideal). Drizzle the vinegar mixture over the rice, and gently mix the vinegar into the rice, using cutting motions with a spatula. Fan the rice with a paper plate as you cut the vinegar into the rice until the rice has cooled.

IMG_0932(1)

Rice, placed in a large wooden bowl and the vinegar mixture being “cut” into the rice as it cools.

Cover the rice with a moist towel until use, but do not refrigerate the rice. I think this rice tastes pretty darn good on its own, as I love its subtle sweet and vinegary flavor. Alton recommends using this rice for any sushi preparation, such as his California roll, which is up next.

California Roll

If you are new to sushi making, as I am, Alton recommends his California roll recipe for a good place to start. For his California roll, you will need your prepared sushi rice from above, sheets of Nori, a bowl of water, sesame seeds, avocado, imitation crab sticks, cucumber, pickled ginger, soy sauce, and wasabi.

IMG_0933(1)

Nori sheets, cut in half.

IMG_0935(1)

Sliced avocado and cucumber matchsticks.

To begin, cover your sushi rolling mat with plastic wrap; I chose to place my mat into a large Ziplock bag. Tear your Nori in half crosswise, and place one half sheet on your pat, with the rough side up.

IMG_0936(1)

A half sheet of Nori placed rough side up on a plastic-covered sushi mat.

Dampen your fingers slightly and evenly distribute rice on the sheet, leaving about 1/4″ uncovered at one long end. Sprinkle the rice with sesame seeds and flip the whole thing over so the Nori is facing up.

Place 4-5 thin slices of avocado so they overlap down the center of the smooth side of the Nori.

IMG_0940(1)

Avocado placed down center of Nori.

Next, place pieces of imitation crab on top of the avocado, overlapping the pieces to form a solid layer.

IMG_0941(1)

Imitation crab on top of avocado.

Finally, top the crab with cucumber matchsticks (you’ll need about 8 matchsticks).

IMG_0942(1)

Cucumber matchsticks to finish off the roll ingredients.

To finish the roll, use the mat to roll it away from you with even pressure from your hands, trying to roll it as tightly as possible.

Dampen a sharp knife and slice the roll into six pieces, using a sawing motion with your knife. Serve the roll slices with pickled ginger, soy sauce, and wasabi as accompaniments.

IMG_0951(1)

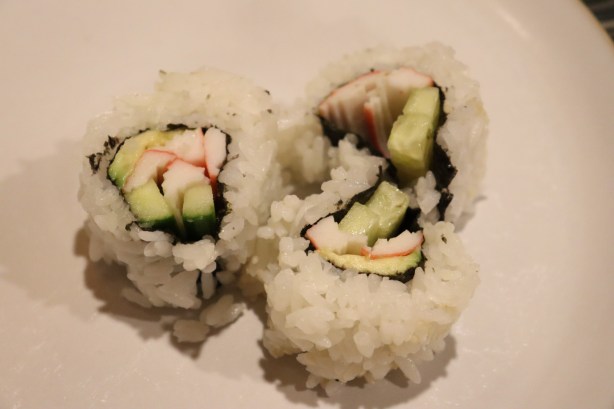
Sliced California rolls.

IMG_0952(1)

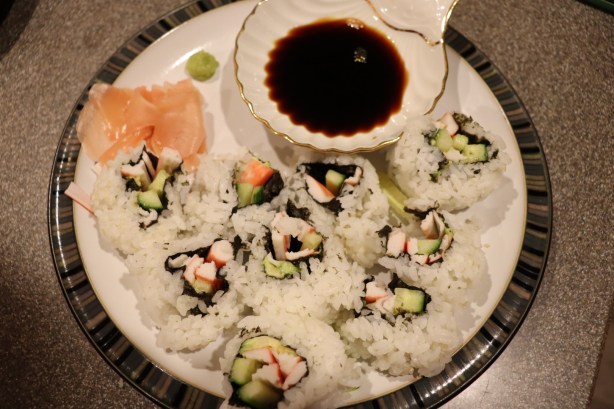
A plate of Alton’s California rolls.

Oh, and when taking sushi from a communal platter, it is polite to always use the large ends of your chopsticks. I have to say that my sushi ended up extremely ugly. I obviously need some serious practice on my rolling technique! This roll recipe is a very easy way to practice, as you do not need many ingredients. You also do not have to worry about the freshness of your seafood, as imitation crab is already cooked. Of course, real crab would certainly be superior! I may make this again, just to try my hand at sushi again. I am determined to make prettier rolls, as mine were embarrassing!

In this episode, Alton also described how to make a tuna roll, though there is no link to this recipe online. To do this, place a half sheet of Nori with its rough side up on your plastic-covered sushi mat. Cut fresh tuna into narrow slices against the grain. Place/press prepared sushi rice to within 1/4″ of the edge of the Nori. Next, place wasabi down the center of the rice, followed by the fish slices. Roll the entire thing up and cut into slices.

Quite a lot has transpired since I last posted on the day I was scheduled to be induced for labor. I had a long induction, beginning September 18th and finally resulting in the birth of our daughter on September 21st. My preeclampsia worsened after giving birth, so I ended up in the hospital for an additional four days. In addition, our daughter was small at birth, so she ended up in the NICU for 11 days. We finally were all home together on October 1st, and we began settling into our new life.

Unfortunately, my father-in-law became very sick a couple weeks later, spending some time in the ICU. He eventually died on October 22nd. We were all in shock; actually, I think we still are.

Granola Bars

I really have not been doing much cooking at all since I had my baby, though I have managed to crank out the three recipes from this episode of Good Eats. Thankfully, this episode was composed of easy recipes that are not time-consuming, as I am strictly working on someone else’s unpredictable schedule now. Still, I was able to find time to whip up Alton’s granola bars. Begin by preheating your oven to 350, and spread the following ingredients on a sheet pan:  8 oz old-fashioned oats, 1.5 oz raw (unshelled) sunflower seeds, 3 oz sliced almonds, and 1.5 oz wheat germ.

IMG_0561(1)

Old-fashioned oats, raw sunflower seeds, sliced almonds, and wheat germ on a sheet pan.

Place the sheet pan in the preheated oven for 15 minutes, stirring the dry ingredients every five minutes. When you remove the sheet pan from the oven, decrease the oven temperature to 300.

IMG_0568(1)

Old-fashioned oats, raw sunflower seeds, sliced almonds, and wheat germ after toasting.

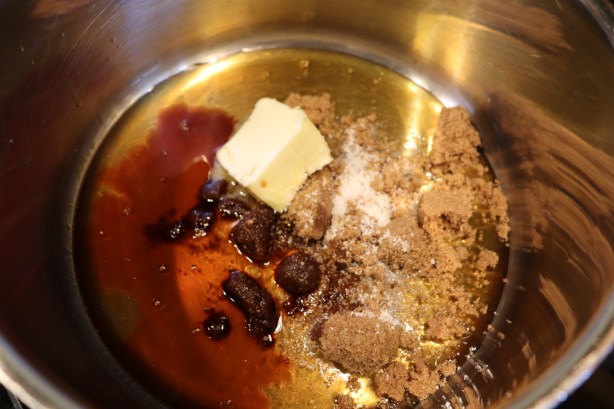
Next it is time to prep the wet ingredients by placing 6 oz honey in a medium saucepan with 1 3/4 oz dark brown sugar, 1 oz unsalted butter, 2 t vanilla, and 1/2 t Kosher salt. Set the saucepan over medium heat and stir until the sugar has completely dissolved.

IMG_0570(1)

Honey, dark brown sugar, unsalted butter, vanilla, and Kosher salt.

Add the oat mix to the liquid mixture, along with 6.5 oz of chopped dried fruit (I used apricots and cranberries). Toss to mix the ingredients thoroughly.

IMG_0573(1)

Oat mixture and dried fruit added to liquid ingredients.

Place the oat mixture in an oiled 9×9 pan, pressing it down with your hands.

IMG_0575(1)

Granola mixture pressed into square pan.

Bake the bars at 300 degrees for 25 minutes.

IMG_0576(1)

Granola mixture after baking.

Let the bars cool completely on a wire rack before turning them out onto a board, and cut the bars into 16 squares.

IMG_0578(1)

Cooled granola bars turned onto a board.

IMG_0580(1)

An Alton granola bar.

The nutrition in each granola bar is:

  • 193 calories
  • 30.5 g carbohydrates
  • 4.5 g protein
  • 6.8 g fat
  • 3.66 g fiber
  • 61.3 mg sodium

My bars crumbled a bit when I cut them, but they tasted really great. They were crunchy and chewy, and had a subtle hint of salt to compliment the sweetness of the fruit. I found myself reaching for these bars as an afternoon snack, and I ate some of the crumbly bits with yogurt for breakfast. This was my favorite recipe of this episode.

Protein Bars

If you’ve ever eaten a protein bar, you know they tend to taste less than stellar. With this recipe, Alton claims to have created the best tasting protein bar you can find anywhere. These bars start with preheating your oven to 350. While the oven heats, combine 4 oz soy protein powder, 2 1/4 oz oat bran, 2 3/4 oz whole wheat flour, 3/4 oz wheat germ, and 1/2 t Kosher salt in a bowl. I could not find soy protein powder even at my local health food store, so I finally ended up subbing whey protein powder.

Next, chop 3 oz each of raisins and dried blueberries, along with 2 1/2 oz each dried cherries and dried apricots.

IMG_0640(1)

Raisins, dried blueberries, dried apricots, and dried cherries.

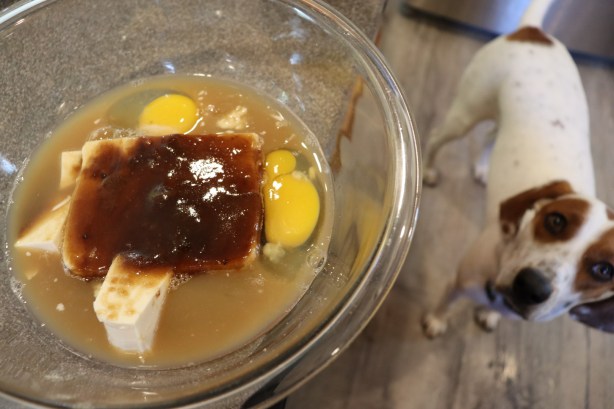
In a second bowl, whisk together a 12.3 oz package of silken tofu, 4 oz dark brown sugar, 2 eggs, 1/2 C unfiltered apple juice, and 2/3 C natural peanut butter. For those who have peanut allergies, you can substitute almond or cashew butter.

IMG_0646(1)

Silken tofu, dark brown sugar, eggs, and apple juice.

IMG_0647(1)

Silken tofu, dark brown sugar, eggs, apple juice, and peanut butter.

Add the wet ingredients to the dry ingredients, followed by the chopped dried fruit.

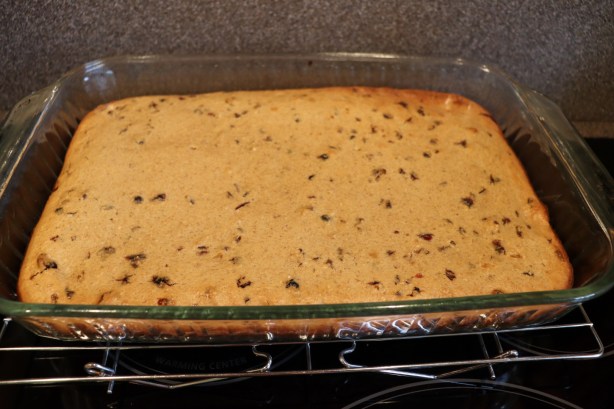
Use your hands to thoroughly mix the batter, and pour/press the finished batter into a 9×13″ pan that has been lined with oiled parchment paper.

Bake the bars at 350 for 35 minutes, or until they have an internal temperature of 205 degrees.

IMG_0654(1)

Bars after baking to an internal temperature of 205.

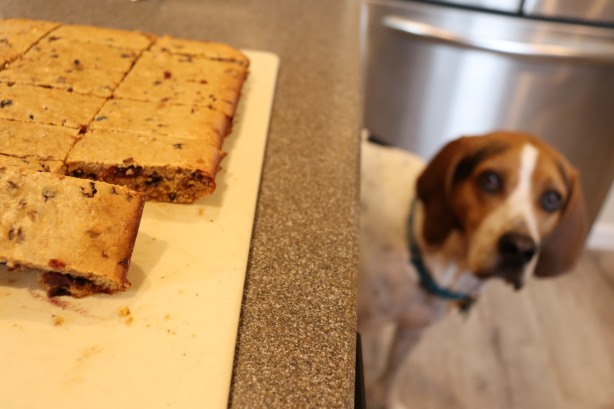
Cool the bars completely on a wire rack before turning them out onto a board, and cut with a pizza wheel into 24 bars.

IMG_0676(1)

Bars, cut into 24 pieces.

IMG_0674(1)

Alton’s protein bars.

These bars can be stored in the refrigerator for a week or in the freezer for up to three months. These bars are dense and cakey, and I really like the flavor/moisture from the dried fruit. They do have a fairly strong peanut butter flavor, so I’d opt for a different nut butter if you do not care for peanut butter. While I wouldn’t say these are a treat, they are pretty tasty for what they are, and I have grabbed them for a quick snack when I haven’t had time to eat. The nutritional breakdown for these bars is:

  • 154 calories
  • 21.1 g carbohydrates
  • 8.4 g protein
  • 4.8 g fat
  • 2.1 g fiber
  • 91.9 mg sodium
  • 17.7 mg cholesterol

Brown Rice Crispy Bar

The last bar Alton tackles in this episode is his take on the classic Rice Krispies treat. For his bars, Alton brings a pot of water to a bare simmer, placing a large metal mixing bowl over the top (my mixing bowls are insulated, so I used a large pot).

IMG_0698(1)

Ingredients for bars: dried fruit, mini marshmallows, honey, flax seed oil, and puffed brown rice. Not pictured: toasted slivered almonds.

To the bowl he adds 1 T honey, 3 T flax seed oil, and 7 oz miniature marshmallows. He stirs the mixture until it is melted and smooth.

Once melted, he turns the heat off, but keeps the marshmallow mixture over the warm water. To this he adds 3 oz puffed brown rice, 3 oz toasted slivered almonds (I toasted my almonds in a skillet), 1 1/2 oz chopped dried cranberries, 1 1/2 oz chopped dried cherries, and 1 oz dried blueberries.

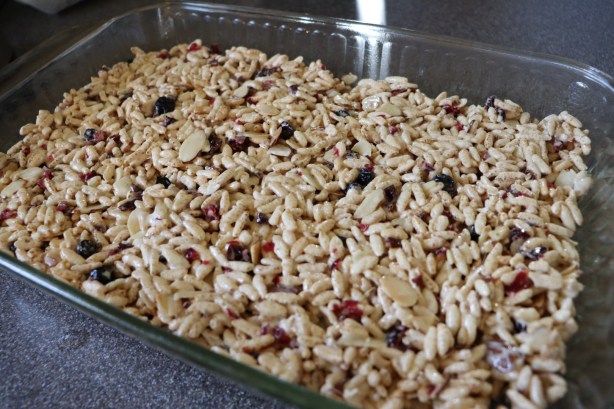
After stirring everything together, he dumps the mixture into a 9×13″ pan (metal is best) that has been oiled with vegetable or canola oil. With oiled hands (I find that using damp hands works just as well) he presses the mixture down into the pan and allows the pan to cool completely before cutting into 24 bars.

IMG_0720(1)

Bar mixture placed in oiled pan.

IMG_0721(1)

Alton’s rice crispy bars.

I had really high hopes for these bars because I am a fan of Rice Krispies treats, but these were super disappointing to me. My biggest grievance with these bars was their texture, which resembled stale cereal. After reading the online reviews of this recipe, I also saw that some people complained of the flax seed flavor, but that didn’t really bother me too much. Honestly, I tried to like these, but just couldn’t get past their unappealing texture. I did, however, like the dried fruit in these, so maybe I’ll add some dried fruit when I next make Rice Krispies treats. Nutrition-wise, these bars have:

  • 93.8 calories
  • 15.1 g carbohydrates
  • 1.16 g protein
  • 3.7 g fat
  • 1 g fiber
  • 4.3 mg sodium

Although we have had a lot of sadness in 2019, we also have some recent and upcoming blessings. A few days after our dog died, we wound up adopting another little hound who has been living with us now for about a month. We named our little Redtick Coonhound Julep, and she has been a funny and busy distraction. Aside from chasing the cat, she has really been quite a good puppy so far. She is only about eight months old, so she has much more energy than we do! We figure this puppy is excellent practice for our baby who is due to arrive in October. Yowza! I think I can safely say that 2019 has already been the greatest year of transition I will likely ever have. Now, onto the cooking.

Wild Mushroom and Asparagus Risotto

My mom was the person who first introduced me to risotto after she had ordered it in a restaurant years ago. She said she instantly thought of me when she ate it, as she was sure it would be something I would love. I have made many risottos over the years, trying various methods and recipes, including a pressure cooker risotto and an almost no-stir recipe. Alton’s risotto is a pretty classical version that requires only about 10 ingredients. You will need some steamed asparagus that is cut into one-inch pieces and some wild mushrooms that you have browned in butter and Kosher salt (you want approximately seven ounces of asparagus and five ounces of mushrooms). You can easily prep the veggies a day in advance, or you can sub any leftover veggies you have on hand. When ready to make the risotto, bring 6 C of chicken broth to a simmer, along with 1 C white wine; Alton likes to use an electric kettle for this, but I just used a saucepan.

IMG_2188

Simmering broth/wine.

You want to keep this liquid at a low simmer for the duration of making the risotto. Next, heat a heavy 3 to 4 quart pan over medium heat and add 2 T butter, 1 C chopped onion, and a pinch of Kosher salt. Sweat the onion until it is soft and add 2 C Arborio rice, which is a short-grain rice.

Stir the rice for 3-5 minutes or until the grains become translucent around their edges.

IMG_2190

Rice stirred until clear at the edges.

Once translucent, add enough of the hot broth to the pan to just cover the rice and shake/stir the rice. Alton’s shaking method was new to me, as the other risotto recipes I have made have called for stirring. Continue to cook the rice, shaking the pan occasionally, at a bare simmer until no liquid remains in the pan when you move the rice with a spatula. At this point, add hot broth/wine again just to cover the rice.

Continue cooking the rice and adding more liquid as needed. When 3/4 of the liquid has been added to the rice, give the risotto a taste; if the rice is tender and creamy, you may not need to add any more liquid. When I tasted my risotto at this point, the rice grains were still quite crunchy, so I ended up adding all of the hot liquid.

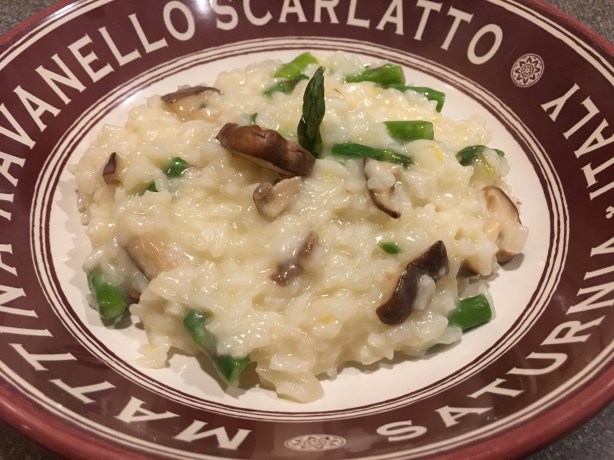
When the risotto has reached a creamy texture, give it another taste and adjust the salt, as needed. To finish the risotto, add the cooked mushrooms and asparagus to the pan, along with 2 ounces of grated Parmesan, 1 t lemon zest, and 1/2 t nutmeg.

IMG_2207

A bowl of Alton’s risotto.

Alton’s risotto is a very classic recipe that works very well. Yes, it does take some time for all of the liquid to be absorbed by the rice, but risotto is really not a difficult thing to make and you can get creative with the additions you make. If you are new to risotto, I can say that Alton’s recipe is a fool-proof introduction.

Brown Rice Salad

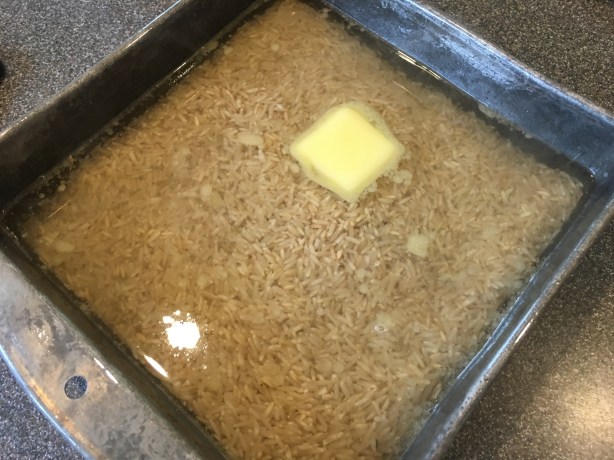
I have always been really comfortable cooking white rice, but have never had a great way to cook brown rice. For this brown rice salad, Alton shares his preferred method for cooking brown rice, which is an oven method. To cook brown rice Alton’s way, put 1 1/2 C short or medium grain brown rice in an 8-inch square pan. Add 2 1/2 C of water just off the boil, 1 T butter, and 1 t Kosher salt, and give it all a stir.

IMG_2146

Brown rice, hot water, butter, and Kosher salt in an 8-inch pan.

Cover the pan tightly with foil and place it in a 375 degree oven for one hour. After an hour, remove the foil and fluff the rice with a fork. Voila – perfect brown rice!

To make Alton’s brown rice salad, heat a 10-inch pan over medium heat and fry six pieces of bacon until crispy. Remove the bacon from the pan and add 1/2 C diced red onion.

When the onion is golden, add 1/2 C white wine vinegar, 1/2 C chicken broth, 2 t Dijon mustard, 1 t sugar, 1 t Kosher salt, and 1/2 t pepper.

IMG_2155

White wine vinegar, chicken broth, Dijon mustard, sugar, Kosher salt, and pepper added to the cooked red onion.

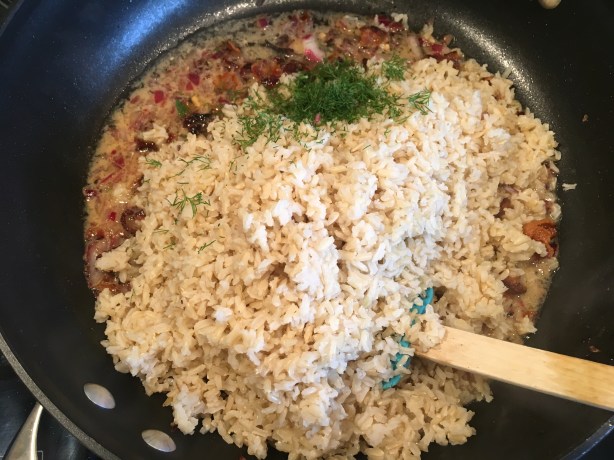
Crumble the bacon into the pan, along with the cooked brown rice and 1 T chopped fresh dill. Stir the mixture until the liquid is absorbed.

IMG_2156

Cooked brown rice, bacon, and fresh dill stirred into liquid.

You can eat the salad immediately or you can refrigerate it for up to a week.

IMG_2158

Alton’s brown rice salad.

I fixed this rice salad for lunch for us and we thought it was great. The rice is perfectly cooked and the salad is super tangy and zesty. I highly recommend this salad for a side dish or light meal. And, Alton’s brown rice cooking method is awesome!

In case you are curious about different types of rice, Alton explained the differences in grain lengths in this episode. Short-grain rices, like Arborio, contain a lot of amylopectin, so they release a lot of starch and have a sticky, creamy texture. Medium-grain rices have a soft texture when cooked and have a mixture of amylose and amylopectin; they have less amylopectin than short-grain rices have, but more amylopectin than long-grain rices do. Finally, long-grain rices have the most amylose and the least amylopectin, so they release less starch and cook up with a fluffy texture.


I was not overly stoked for an entire episode of pudding recipes. I mean, pudding is fine, but it’s not exactly exciting. I did, however, get very happy when I was a kid and my mom would leave pudding in the refrigerator for an after-school snack; chocolate pudding was my brother’s favorite, while I always preferred butterscotch. Speaking of butterscotch pudding, if you have not tried the butterscotch pudding in Alton’s latest book, it is a must-make. Here is my rundown of Alton’s pudding recipes, and I must say that two out of three wowed me.

Indian Rice Pudding

Indian rice pudding is the first recipe in this episode. The ingredients in this recipe are 1 C cooked rice, 1 C milk, 1/2 C heavy cream, 3/4 C coconut milk, 2 ounces sugar, 1/4 t ground cardamom, 1 1/2 ounces golden raisins, and 1 1/2 ounces chopped unsalted pistachios.

IMG_1429

Rice pudding ingredients: cooked rice, milk, heavy cream, coconut milk, sugar, cardamom, golden raisins, and pistachios.

For the pudding, put the milk and rice in a large skillet and bring to a boil over medium heat, stirring.

Once boiling, decrease the heat to low and simmer the milk/rice until it has thickened slightly, which should take about five minutes; if you run a spatula along the bottom of the pan, the liquid should be thick enough to part and stay parted.

IMG_1432

Rice and milk after coming to a boil and simmering.

When you have achieved this desired consistency, increase the heat to medium and add the cream and coconut milk, followed by the sugar and cardamom (use a whisk to incorporate the cardamom).

When the mixture has reached a boil again, decrease the heat to low and cook for five more minutes.

IMG_1439

Pudding cooked for 5 more minutes.

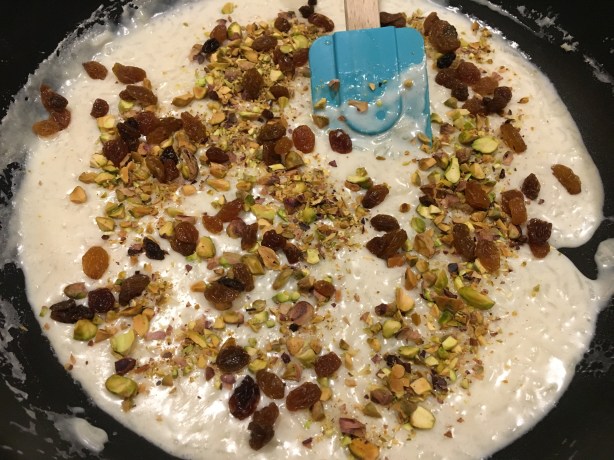
Remove the pan from the heat and stir in the raisins and nuts.

IMG_1440

Raisins and pistachios added to pudding off the heat.

Transfer the pudding to your desired serving vessel(s) and enjoy immediately, or you can chill the pudding overnight, which is how Alton prefers it. If you do opt to chill the pudding, press plastic wrap on the surface of the pudding to prevent formation of a skin.

IMG_1442

Alton’s rice pudding.

I tasted the rice pudding when it was warm, but chose to refrigerate it overnight before eating a full serving. This rice pudding is delicious. The pudding is thick, rich, creamy, and indulgent. The subtle flavor of coconut milk is in the background, while pistachio flavor is predominant. The raisins add little punches of fruit flavor, while the nuts add a little crunch. This is great for dessert or for breakfast, or for both! I fully intend to make this again soon. In fact, I am really wishing I had some right now! Excellent recipe.

Tapioca Pudding

I do not recall ever having tapioca pudding prior to making this recipe. I asked my parents about tapioca pudding the other day and my mom said she remembers her mother making it, while my dad did not think he had ever had tapioca pudding. Tapioca, by the way, is a starch from the cassava plant. Tapioca is sold in several forms, but this recipe calls for large pearl tapioca. The recipe begins by soaking 3 1/2 ounces of tapioca in a pint of cold water overnight; you can do this at room temperature.

After the soak, drain the pearls and put them in a crock pot, along with 2 1/2 C milk, 1/2 C heavy cream, and a pinch of Kosher salt. Stir the pudding, put the lid on the cooker, and let the pudding cook on high for two hours.

After the two hour cook time, beat one egg yolk with 1/3 sugar in a bowl – this will form a paste.

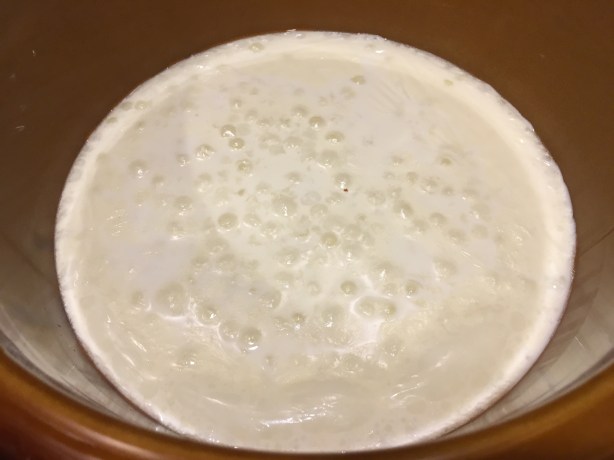
IMG_1513

Tapioca after cooking for two hours.

Temper the egg yolk mixture by slowly whisking 1 – 1 1/2 C of the warm tapioca into the eggs.

Once tempered, add the egg mixture back to the crock pot of tapioca and whisk to combine. Add the zest of a lemon to the cooker, place the lid back on, and let the pudding cook for 15 more minutes.

Transfer the tapioca to an airtight container, pressing plastic wrap directly onto its surface. Let the pudding cool to room temperature before refrigerating until it is thoroughly chilled.

IMG_1521

Pudding after cooking for 15 more minutes.

IMG_1558

Chilled tapioca pudding.

This pudding was good, but not amazing like the rice pudding. Since I am not a tapioca pudding expert I cannot say for sure, but I felt like the texture of this pudding was maybe a little thinner than it should be. I liked the added texture from the slightly chewy tapioca pearls, but the base was a little on the soupy side. As for flavor, it was just sort of creamy with subtle lemon overtones. I may make this again, simply because I have half a bag of tapioca pearls remaining, but I won’t add this one to the permanent recipe vault.

Chocolate Pudding

What pudding episode would be complete without a recipe for chocolate pudding? This is a two-step recipe, in which you first make a dry pudding mix, and then use the mix to make the pudding. To make the dry mix, in a lidded container combine 1 1/2 ounces non-fat dry milk, 2 ounces cornstarch, 1 t salt, 3 ounces Dutch cocoa powder, and 6 ounces powdered sugar. Shake the container to combine the ingredients.

To make the pudding, put 1 3/4 C of the dry pudding mix in a saucier. Whisk 2 C milk and 2 C heavy cream into the dry pudding mix.

Bring the mixture to a boil over medium heat, whisking occasionally. Once boiling, decrease the heat to low and simmer for four minutes, whisking.

Remove the pan from the heat and stir in 1 t vanilla.

IMG_1458

Adding vanilla off the heat.

Pour the pudding through a sieve and into a serving bowl. Press plastic wrap directly on the surface of the pudding to prevent the formation of a skin, and refrigerate the pudding for at least four hours before eating.

IMG_1481

Alton’s chocolate pudding.

This is the best chocolate pudding I have ever eaten. The pudding is super rich and creamy in both texture and flavor. It is smooth and chock full of chocolate flavor, and a little goes a long way. I am going to whip up another batch of this pudding shortly. It is super good.