Posts Tagged ‘chocolate’

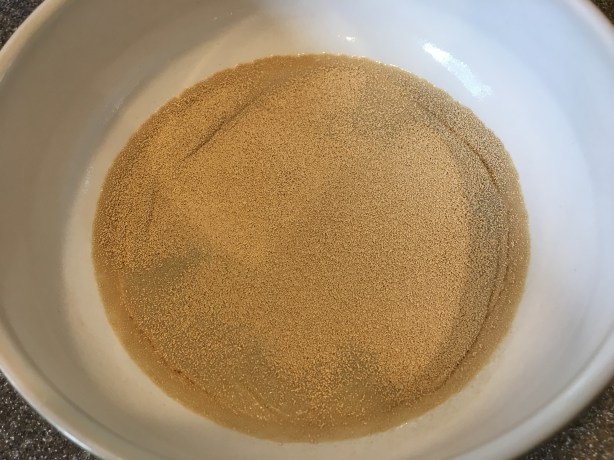
My quest appears now be to complete a blog post during nap time. Will it happen this time? I’m guessing not, but we’ll give it a shot. We’re all still in isolation as we wait for this pandemic to be deemed as safely past. Since we can’t go out to eat, we may as well cook, right? We have been trying to support some of our local restaurants by getting takeout here and there, but I’m also cooking as much as I can with a six month old baby. Lately, I’ve been futzing with sourdough, as I have my mom’s old starter and a new one I picked up from a local eatery. This episode has nothing to do with sourdough, though. Instead, it deals with pocket pies. The recipes from this episode are all contained in one link, which is here.

Well, I did not successfully finish a blog post during nap time. In fact, it’s now nap time again two days later! Let’s give this another go.

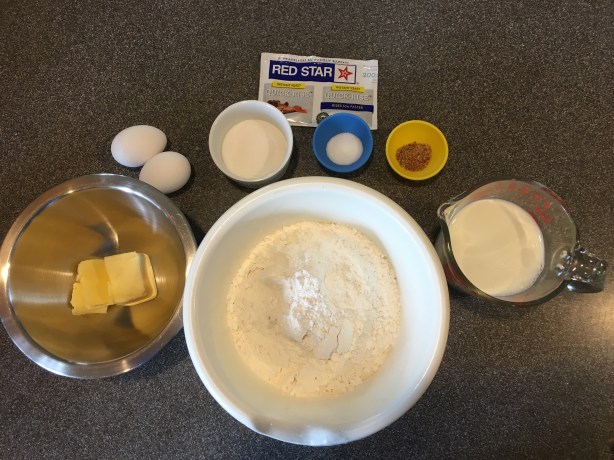
Alton’s pocket pies have numerous iterations, so you can play with fillings, cooking methods, etc. The online link contains recipes for his pocket pie dough and for two fillings. To make the dough, pulse together in a food processor:  2 t baking powder, 3/4 t Kosher salt, and 9.5 ounces flour; this will “sift” and aerate the flour.

IMG_1837(1)

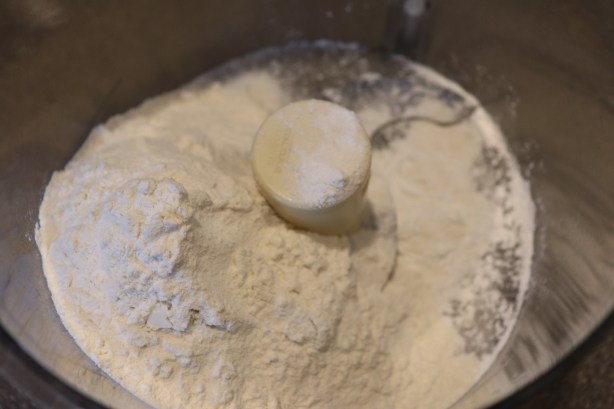
“Sifting” flour, Kosher salt, and baking powder in the food processor.

Place 2.5 ounces of shortening in ice water to chill for a few minutes. Once chilled, remove the shortening from the water and place it in a large bowl.

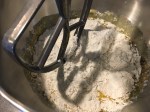
Add the flour mixture to the shortening and use your fingertips to work the shortening into the flour. Make a well in the center of the flour and pour in 3/4 C milk, stirring well (you want gluten development here).

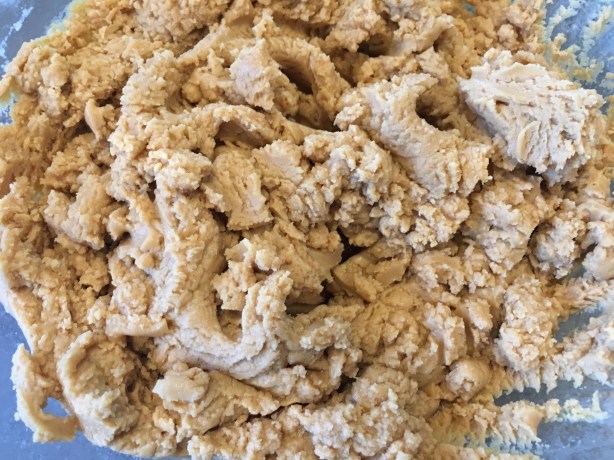
Turn the dough onto a counter and knead it 10-20 times with your hands.

IMG_1846(1)

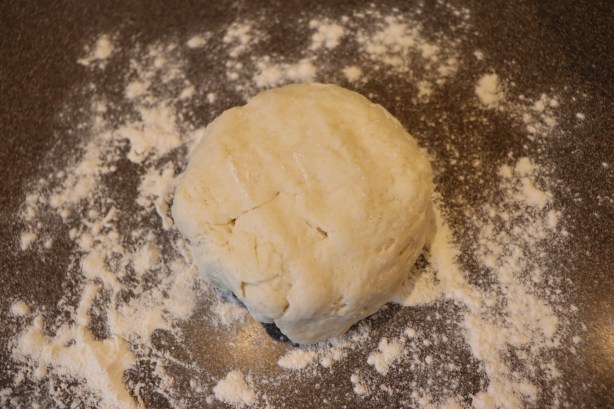
Finished dough after kneading.

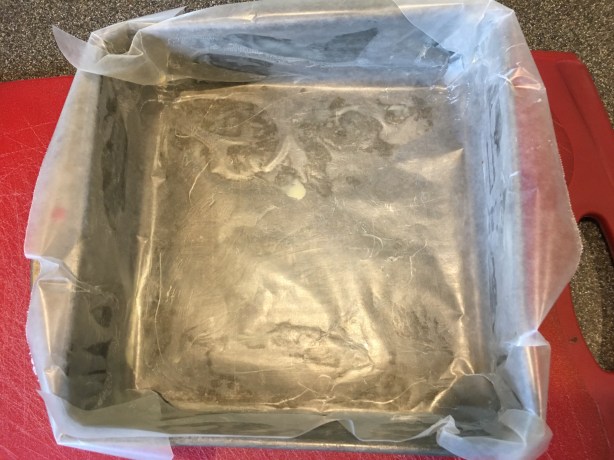
Roll the dough until it is 1/2″ thick and cut rounds with a 2.5 inch circular cutter. Roll each round until it is a thin disc measuring 5-6 inches in diameter. Place the dough rounds between sheets of wax paper and let them chill in the refrigerator for 1-2 hours before forming pies.

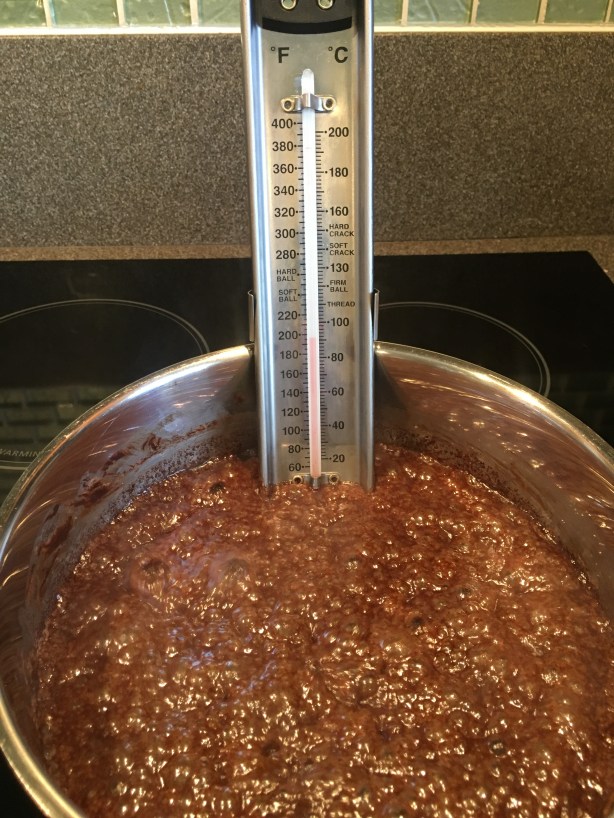
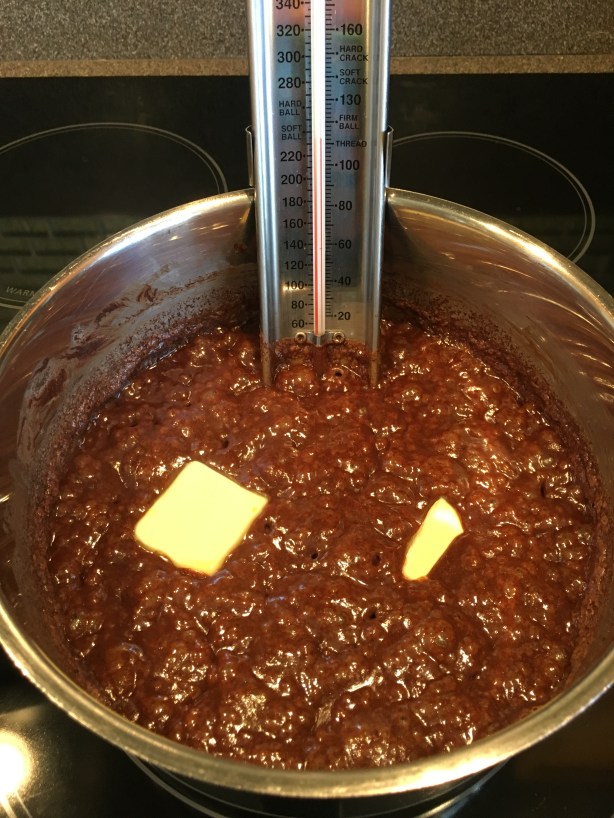
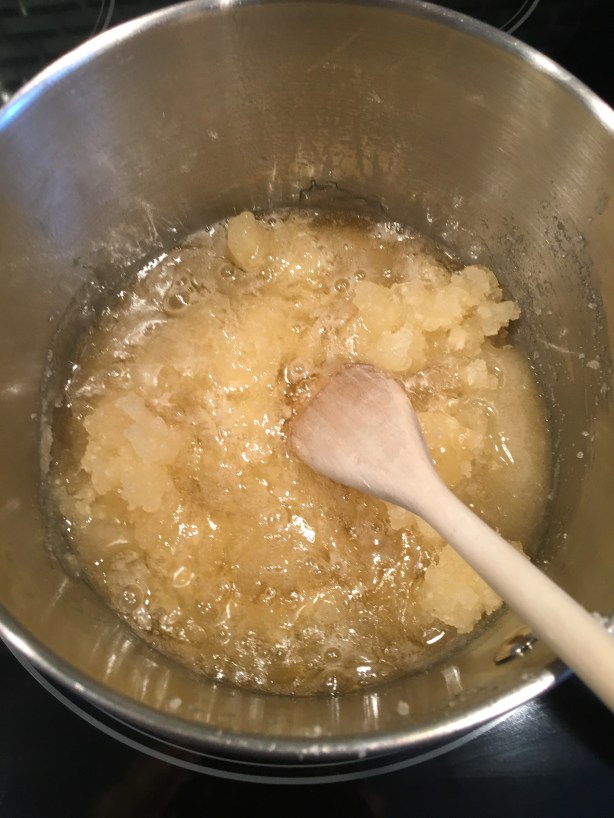
Alton’s favorite fruit filling for hand pies is a curried mango filling. You want this filling to be chilled before you use it, so you’ll want to make it several hours ahead. Peel and dice four mangoes, and place them in a large saucepan. Add 1/2 C brown sugar, 1/2 C cider vinegar, 2 t curry powder, and 1/4 C fresh lime juice to the pan.

IMG_1830

Mangoes, brown sugar, cider vinegar, curry powder, and lime juice in a large saucepan.

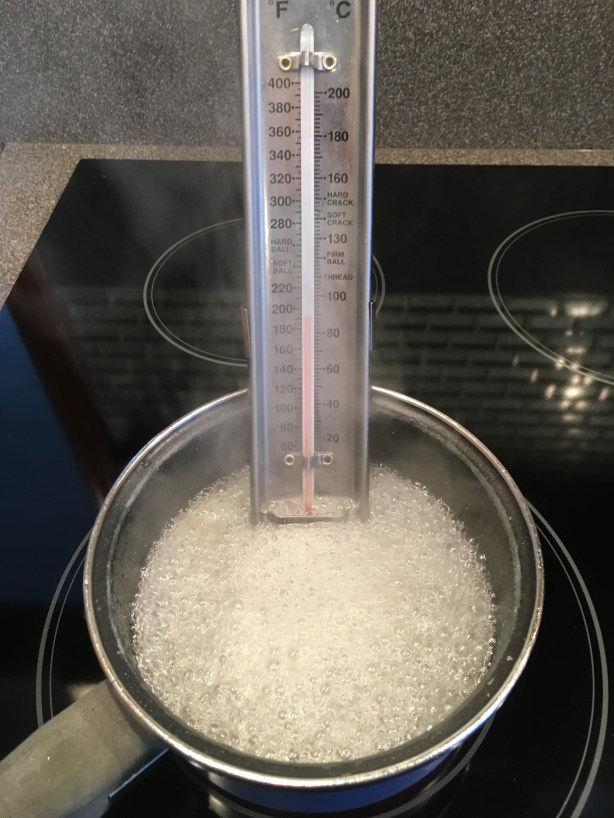
Bring the mixture to a boil over high heat, place a lid on the pan, and decrease the heat to a simmer. Let the filling simmer for 30 minutes.

Cool the filling at room temperature for an hour, and then place it in the refrigerator for 3-4 hours; a metal bowl will speed up the chilling.

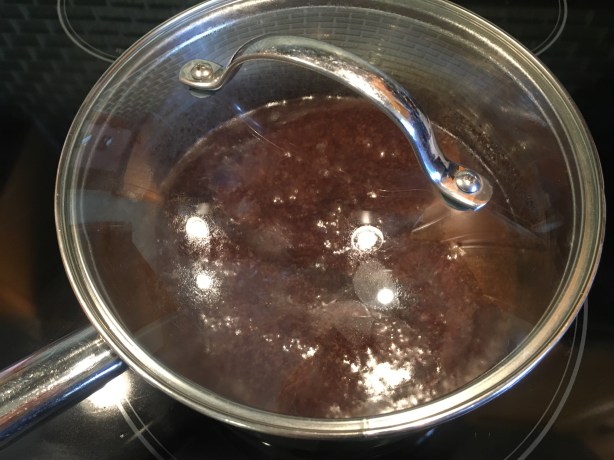
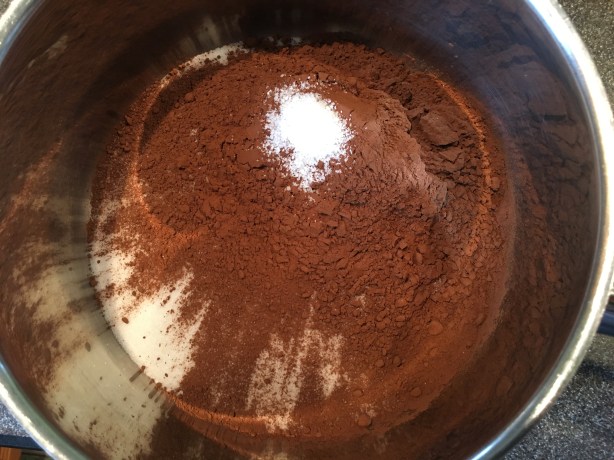
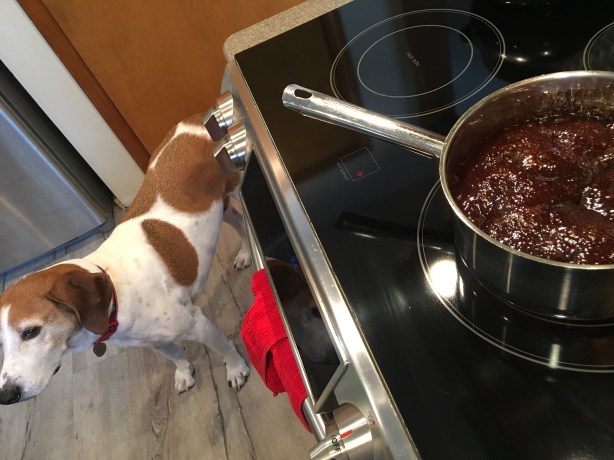
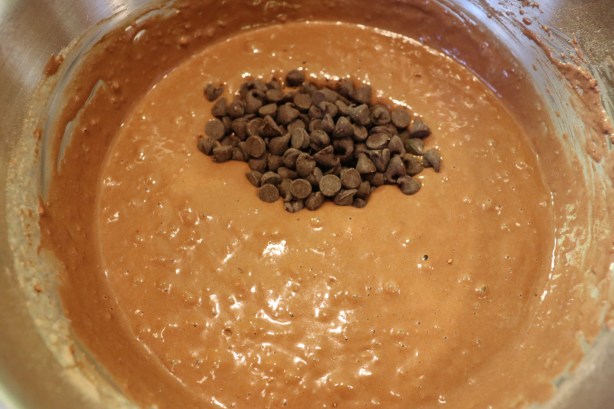
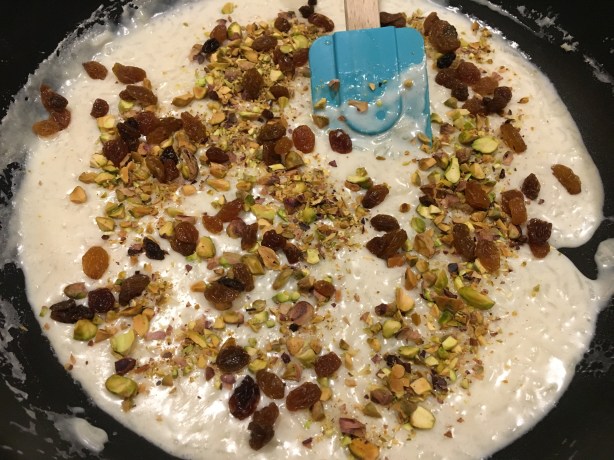
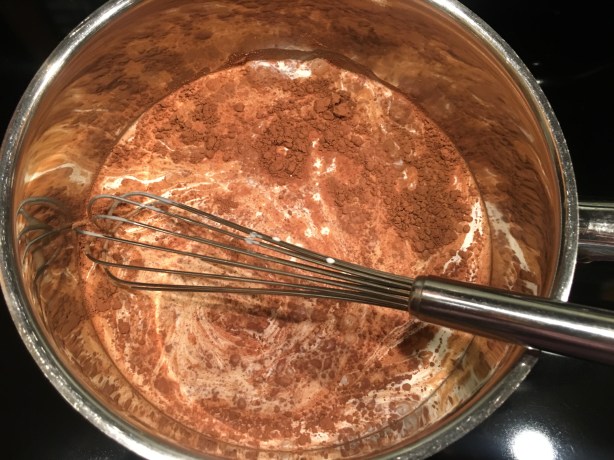
Alternatively, for dessert pies, you can make Alton’s favorite chocolate filling. To do this, put 10 ounces of softened butter in a large ziplock bag. Add 2 1/2 C sugar, 1/4 C + 1 T cocoa powder, and a pinch of Kosher salt.

IMG_1851(1)

Chocolate filling ingredients in a large plastic bag: butter, sugar, cocoa powder, and Kosher salt.

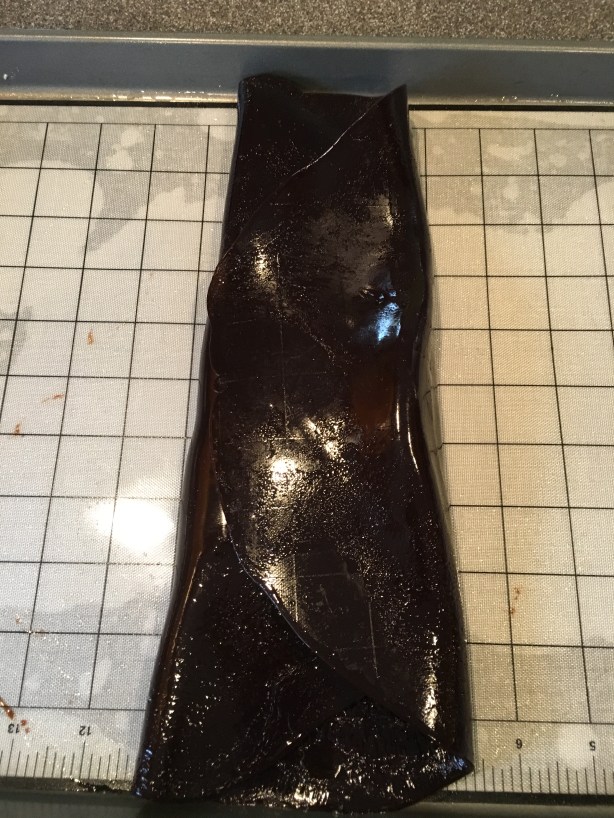
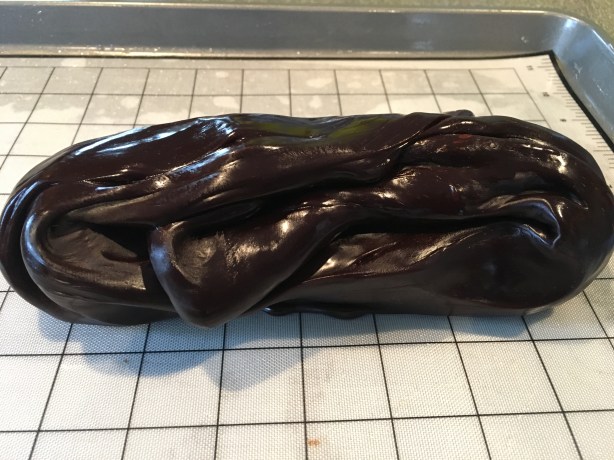
Seal the bag and mash the filling with your hands until it is combined. When you are ready to fill pies, you can simply snip one of the bottom corners off of the bag and pipe the filling directly onto the dough.

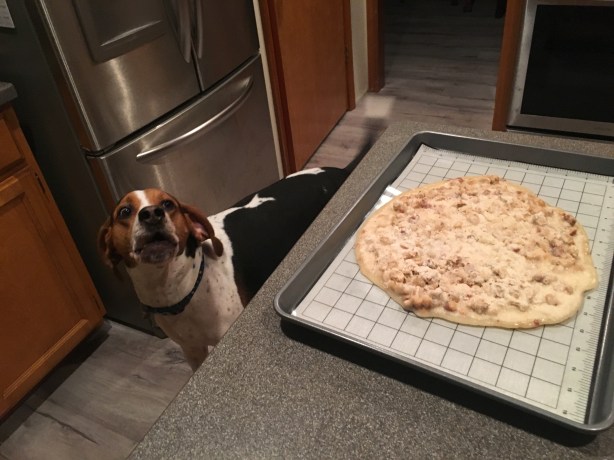
Although there are no real recipes for other fillings in this episode, Alton did mention some other filling possibilities. For example, you could use leftover beef stew as a pie filling. Or, you could make mini pizza pies by filling the dough with pizza sauce, cheese, and toppings.

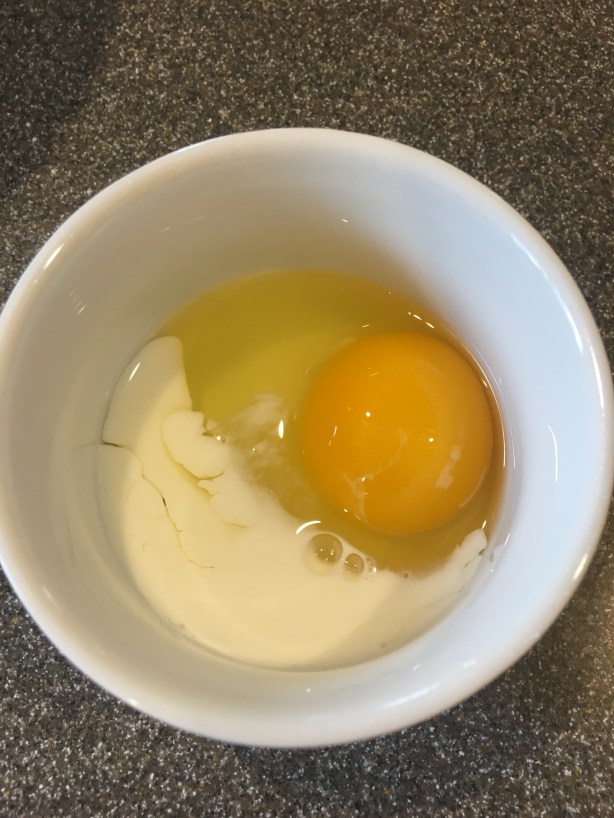
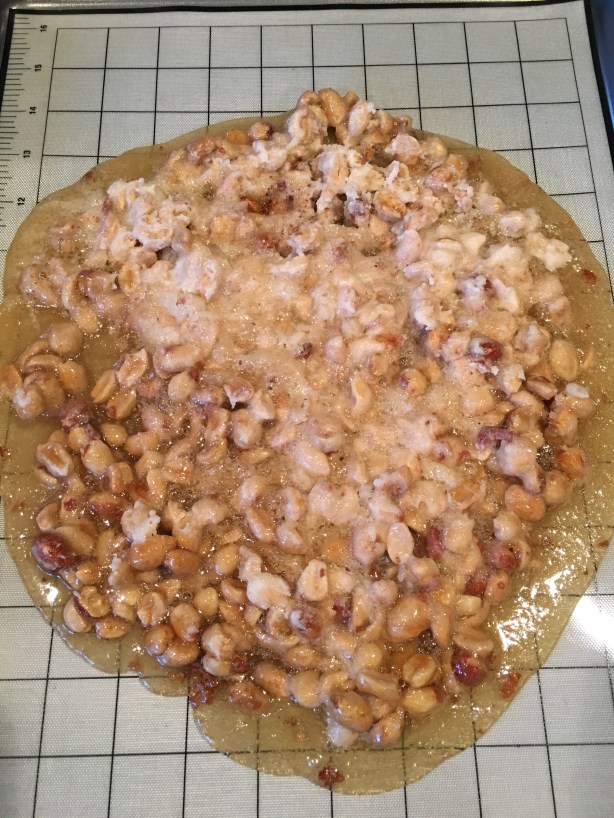
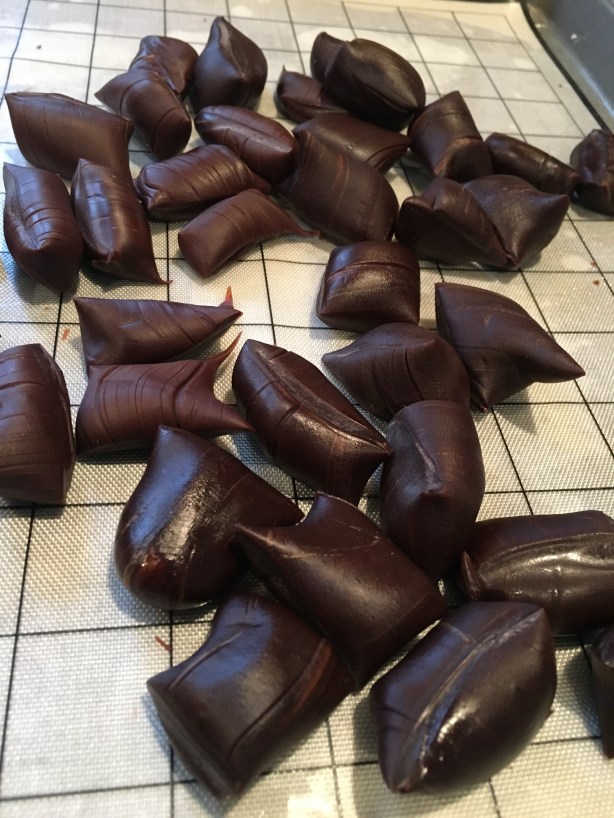
Regardless of which fillings you utilize, to form the pies place a large spoon of filling on one side of each chilled dough circle. Rub the edges of the circle with egg wash (1 egg plus 2 t water). Fold the dough over the filling to form a half moon, and press any air out with your fingers. Press the edges together with your fingers to seal them well, and use a fork to crimp the edges together. Place the sealed pies on a parchment-lined sheet pan and cut three small steam vents in the top of each pie with kitchen shears. Doh! Nap time appears to be over again!

Fast forward to another nap time a day later, and here we are. Now, back to baking the hand pies. Bake the pies at 350 for 25-30 minutes, or until golden brown. Let the pies cool for several minutes before eating. I baked some mango pies and some chocolate pies, and some of them leaked a little bit, especially the chocolate ones.

The crust here was very pie-like, though I think the crust would have been better if it had a little more flakiness to its texture. The mango filling was sweet, but not overly so, so you could easily eat these for breakfast or a snack. I had to use a slotted spoon when I placed the mango filling on the dough, as the filling was pretty thin and seemed to run all over the dough. The curry flavor was definitely evident, but it wasn’t completely overpowering.

Pan frying is another option for cooking hand pies. To do this, heat a heavy skillet over medium-low heat, adding a pat of butter. Once the butter has melted, place two hand pies in the pan, jiggling the pan to be sure the pies do not stick.

Flip the pies once they are golden brown. I pan fried some chocolate hand pies for dessert and they leaked less than the baked chocolate pies. The pies came out looking a little flat – like pressed sandwiches, but I liked the richness of cooking the pies in butter.

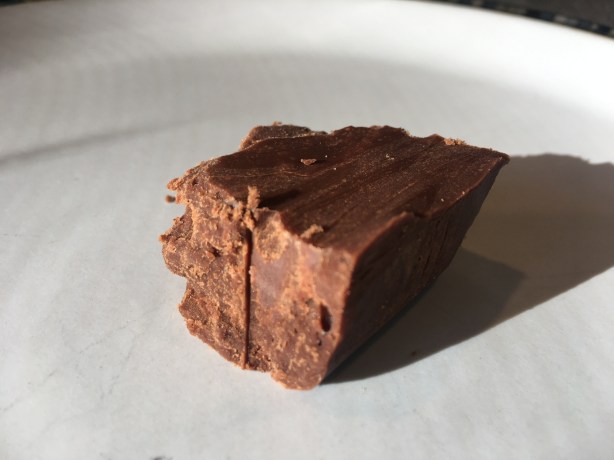
These pies seemed much more indulgent than the baked ones. The chocolate filling was very rich and had a slight grittiness to its mouthfeel from all of the sugar. I’m sure the grittiness could be remedied by making the filling in a mixer, but it’s certainly more fun to mash it together in a plastic bag!

If you want to get super indulgent, you could always try deep frying your hand pies. To do this, heat two quarts of canola oil to 375 degrees in a Dutch oven. For hand pies that will be deep fried, do not cut steam vents in the tops, but rather use a fork to dock the dough a few times. Fry the pies, a few at a time, until they float and are golden brown. Transfer the fried pies to an inverted cooling rack on newspaper, and allow them to cool for at least five minutes before eating. I did not end up deep frying any of my hand pies, as I just ran out of time to try this application. I imagine that these would be the crispiest pies.

You can store cooked fruit or chocolate pies at room temperature for up to a week. Pies with meat fillings can be refrigerated/reheated for up to a week. You can also freeze uncooked pies on a baking sheet, throwing them in a 350-degree oven for 30 minutes when you are ready to eat them.

In addition to his baked, pan-fried, and deep-fried pies, Alton also made homemade toaster pastries in this episode. Yep, you can make pop-tarts at home. To make these, make a full batch of dough as for the hand pies above, but divide the dough in half after kneading. Roll each of the two dough pieces into a 12″ x 10″ rectangle, using a knife to trim the edges. Divide each dough rectangle into six 4″ x 5″ rectangles, cutting them with a pizza cutter.

IMG_1883(1)

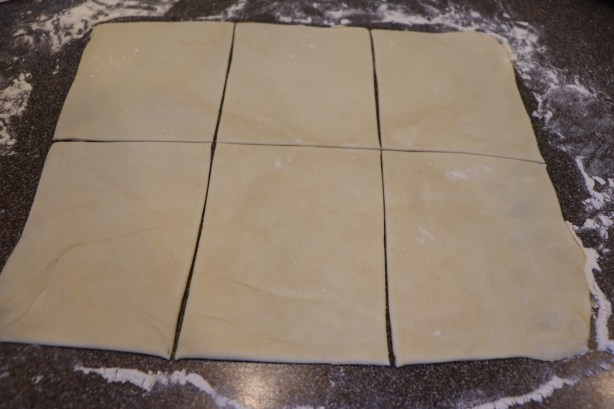
Half of the dough rolled into a 12″ x 10″ rectangle and cut into six 4″ x 5″ rectangles.

Rub egg wash (1 egg plus 2 t water) all around the edges of six of the 12 smaller rectangles. Spoon a couple tablespoons of your desired filling (Alton used fruit preserves) onto the center of each egg-washed rectangle, spreading it with a spoon.

IMG_1887(1)

Egg wash rubbed around edges and filling spooned onto rectangles.

Use a fork to dock the remaining six dough rectangles and place these rectangles on top of the filled/egg-washed rectangles. Use your fingers to press any air out of the pastries and to seal the edges tightly.

Crimp the edges with a fork and bake the finished pastries for 20 minutes at 350 degrees.

IMG_1892(1)

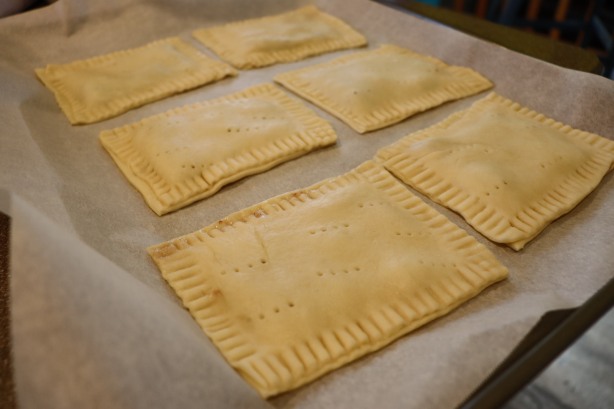
Crimped pastries placed on parchment-lined sheet pan.

IMG_1893(1)

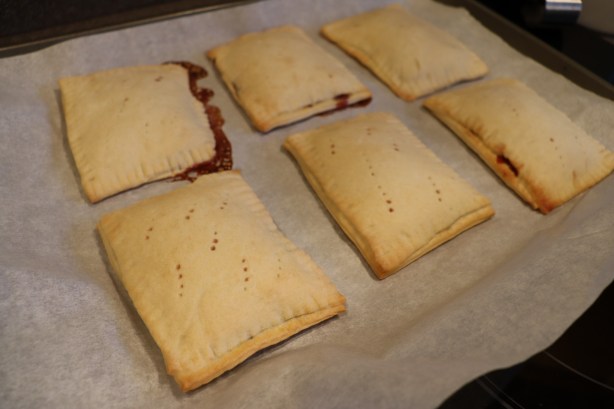
Toaster pastries after baking for 20 minutes.

Cool the pastries, storing them in plastic for a week or freeze for a month. Reheat the pastries by toasting them in a toaster on the lowest setting.

IMG_1902(1)

One of Alton’s toaster pastries.

These were fun and easy to make, and were my favorites of all of Alton’s hand pies. Kids would really enjoy eating these, and you could fill them with any number of fillings. The resulting dough was crispy at the edges and tender in the center.

I have made many empanadas and hand pies (usually savory) over the years. I do have a dough recipe that I overall prefer over Alton’s, as it is easier to work with and results in a very flaky crust, but Alton’s crust is pretty good too. For dessert, I’d opt for pan-fried chocolate pies and for breakfast I’d certainly make Alton’s toaster pastries. Regardless of how you cook them or which fillings you choose, hand pies are equally fun to make and eat.


Since we are all on lockdown for the Coronavirus, hopefully I’ll have some more time to cook and write. I also threw my back out two days ago, so I guess we may as well try to make the best of it. We are actually supposed to be on a cruise ship as I type, but instead I am perched in our family room. So, what does one eat during the apocalypse? How about waffles?

Basic Waffle

Alton touts the waffle as one of his favorite things, explaining that waffles are essentially a fried food, as the batter is cooked between oiled plates. I had never really thought of waffles as fried, but that explains why I like them so much. I’ll nearly always choose waffles over pancakes. Alton’s basic waffles are made by whisking together in a medium bowl 4 3/4 oz flour, 4 3/4 oz whole wheat flour, 3 T sugar, 1 t Kosher salt, 1/2 t baking soda, and 1 t baking powder.

In a larger bowl, beat three eggs until smooth and whisk in 2 oz melted butter.

Next, whisk in 16 oz of buttermilk at room temperature.

Preheat your waffle iron and add the wet ingredients to the dry ingredients, folding everything together with a spatula until just combined; the batter will have some lumps, but that is okay.

Let the batter rest for five minutes. Spray the plates of your waffle iron with nonstick spray, which will aid in browning and release of the waffles. Pour about three ounces of batter in the iron and cook until golden and crispy.

IMG_1678(1)

Batter on hot oiled iron.

IMG_1682(1)

Alton’s basic waffle, served here with butter and boiled cider syrup.

You can keep the waffles warm by covering them with foil and placing them in a warm oven. For later use (such as when a pandemic hits), you can freeze the waffles and reheat them in a toaster. I am picky about waffles, as I really don’t care for them when they are at all soggy. I like my waffles to be extra crispy on the outside. This is a really good waffle recipe, resulting in waffles that are crispy on the outside and tender on the inside. I ate my waffles with butter and some homemade boiled apple cider syrup, while Ted enjoyed his with some maple syrup straight from his aunt’s maple trees.

Chocolate Waffle

If plain ol’ waffles are too boring for you, or you’re looking for more of a dessert waffle, Alton has you covered with his chocolate waffle recipe. As with the basic waffle recipe from above, you will need two mixing bowls for this recipe. In the first bowl, whisk together 7 oz flour, 1 3/4 oz sugar, 1 1/2 oz cocoa powder, 1 t salt, 1 t baking powder, and 1/2 t baking soda.

In the second bowl, whisk three eggs until they are smooth and add in 2 oz melted butter. Follow that with 16 oz of room temperature buttermilk and 1 t vanilla extract.

Add the wet ingredients to the dry ingredients, folding with a spatula to barely combine.

Finally, fold in 4 oz of chocolate chips.

IMG_1802(1)

Chocolate chips to be folded in.

Add about 3 oz of batter to a standard waffle iron that has been preheated and sprayed with nonstick spray. Cook until crispy on the outside.

IMG_1805(1)

Waffle after cooking on a hot iron.

We first ate these waffles for breakfast with butter as a topping. We subsequently had the leftover waffles for dessert with vanilla ice cream.

IMG_1808(1)

Alton’s chocolate waffle, served with butter.

We were pretty surprised with how much we liked these waffles. Ted, in particular, does not really like anything sweet for breakfast, but he said he thoroughly enjoyed these. The waffles are actually not very sweet, as they contain quite a lot of cocoa powder, but you get little pockets of sweetness when you bite a chocolate chip. I personally liked these best served with ice cream, and I think kids would find these super fun for a special breakfast or dessert.

I am partially writing this post to distract me because I am heading to the hospital this evening to be induced for labor. I was actually scheduled to be induced yesterday, exactly at 37 weeks, but they called about 90 minutes before my scheduled time to tell me there was not a single room open in Labor and Delivery. Let’s hope there will be a room open this evening because I’m ready to get off this roller coaster.

While I’ve been pregnant, people always tend to ask me what my primary food cravings are. Honestly, I have not had any cravings beyond foods that I tend to like to eat anyway. The only real thing I have noticed is that my sweet tooth is definitely more noticeable than normal, and one thing that seems to taste particularly good is ice cream. I can, in all actuality, say that I have eaten more ice cream this year than I have ever consumed before, and I have a bowl nearly every evening as dessert. I was, therefore, not disappointed at all to see that a second Good Eats ice cream episode was next in my lineup. Three flavors of ice cream to make? Yes, please.

Vanilla Ice Cream

The first ice cream flavor in this episode is a classic vanilla. The basic formula for all of the recipes in this episode can be remembered by the following sequence of numbers:  9, 8, 3, 2, 1. Nine stands for 9 oz of sugar, eight is for 8 egg yolks, three is for 3 C of half and half, two is for 2 t of vanilla, and one is for 1 C of heavy cream.

IMG_0086

Ingredients for Alton’s ice cream: heavy cream, egg yolks, vanilla extract, sugar, and half and half.

For the vanilla ice cream, Alton prefers you to use vanilla sugar, if possible, which can be made by leaving a vanilla pod in the sugar for a week or more. I was ready to make my vanilla ice cream the day I watched the episode, so I made my vanilla ice cream with plain sugar. Alton’s ice cream begins with placing a medium saucepan over medium heat, adding the cup of cream and the three cups of half and half. Bring the dairy to a bare simmer.

IMG_0087

Cream and half and half placed over medium heat, and being brought to a simmer.

While the dairy heats up, whisk the eight egg yolks in a medium bowl until light and creamy. Slowly add the sugar to the yolks, whisking as you add. The resulting mixture should be very thick, light yellow, and should fall from the whisk’s tip in a thick ribbon.

When the dairy has begun to simmer, remove it from the heat. It is now time to temper the eggs by very slowly whisking 1/3 of the dairy mixture into the yolks; don’t rush this process or your egg yolks will curdle.

IMG_0094(1)

Ready to temper the egg yolks by slowly whisking in the simmered dairy.

Once you have added about a third of the dairy to the yolks, it is safe to add the rest of the dairy all at once.

IMG_0095(1)

Egg mixture (right) after adding about 1/3 of the dairy.

Pour the entire mixture back in the medium saucepan and place it over low heat, stirring as you bring it to 170 degrees.

IMG_0097(1)

Custard back in saucepan and heated over low heat to 170.

Once at 170, remove the custard from the heat – it should be thick enough to coat the back of a metal spoon. When you run your finger across the back of the spoon, a clear line should remain in the custard; this is called nape.

IMG_0099(1)

Nape: thick enough to coat the back of a spoon and stay parted.

Transfer the custard to a bowl and place it in the freezer until it has cooled to room temperature. Stir in the 2 t of vanilla.

IMG_0101(1)

Vanilla stirred into cooled custard.

Cover the bowl with plastic and refrigerate it until it is below 40 degrees, which will take several hours. I made my custard a day prior to churning.

IMG_0103(1)

Custard to be chilled overnight.

When your custard has sufficiently chilled, churn it in any ice cream maker you prefer.

Place the finished ice cream in an air-tight container and let it freeze for six to eight hours before serving.

IMG_0118(1)

Alton’s vanilla ice cream.

I was really happy with this basic vanilla ice cream recipe. The custard was rich, creamy, and had a bit of an egg flavor to it, along with a slight yellow hue. Sure, you could improve this recipe by adding some vanilla pulp from a vanilla bean, but this is a great standard recipe for just utilizing vanilla extract.

Mint Chip Ice Cream

Apparently, mint chip ice cream is (or at least was) Alton’s favorite ice cream flavor, so he included a mint chip recipe in this episode. This recipe follows the same 9 (oz of sugar), 8 (egg yolks), 3 (C of 1/2 and 1/2), 2 (t of vanilla), and 1 (C of cream) formula as outlined in the vanilla recipe above.

IMG_0119(1)

Mint chip ice cream ingredients: 1/2 and 1/2, sugar, egg yolks, mint oil, and cream.

Again, begin by pouring the 3 C of 1/2 and 1/2 and the cup of cream into a medium saucepan over medium heat.

IMG_0120(1)

1/2 and 1/2 and cream in a medium saucepan.

Meanwhile, whisk the eight egg yolks in a bowl until they have lightened. Slowly whisk the nine ounces of sugar into the yolks until you have a thick mixture that falls in a ribbon from your whisk.

When your dairy has reached a bare simmer, remove it from the heat. Slowly temper the cream into the eggs, gradually whisking about a third of the dairy into the eggs. It is then safe to add the remaining dairy all at once.

Pour the egg/cream mixture back into the medium saucepan over low heat, stirring until the temperature hits 170 degrees and coats the back of a spoon.

Remove the pan from the heat and pour the mixture into a freezer-safe bowl. Place the bowl in the freezer until the mixture has cooled to room temperature. Stir in 1 t of mint oil instead of the vanilla extract used for the vanilla ice cream recipe.

IMG_0135(1)

Adding the mint oil to the cooled custard.

Place the custard in the refrigerator to cool until it is below 40 degrees, which will take hours; I always just do this part overnight. The following day, or when you are ready to churn, chop three ounces of Andes mints.

Add the mints right after you begin churning the custard, as Alton says the mints will contribute more flavor if added earlier in the churning process.

IMG_0142(1)

Andes mints added at the beginning of the churn.

Once churned, transfer the ice cream to an air-tight container and place it in the freezer for 6-8 hours before serving.

IMG_0144(1)

Alton’s mint chip ice cream.

IMG_0154(1) 
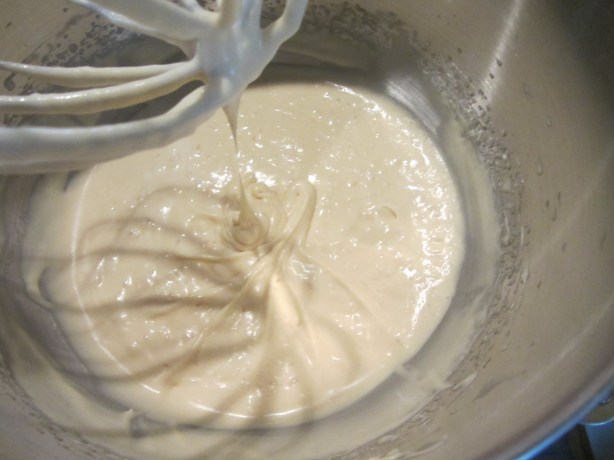
This is a really good mint chip ice cream. The addition of Andes mints gives an extra kick of mint, as opposed to just using chopped chocolate. The basic custard is rich and slightly eggy in flavor, and the mint oil manages somehow to make an ice cream that is simultaneously indulgent and refreshing. I’m actually wishing right now that I still had a little bit of this in the freezer right now because it sounds really good. This was probably our favorite ice cream recipe of this episode.

Chocolate Ice Cream

Last in this episode is Alton’s chocolate ice cream. This recipe uses the same formula as in the vanilla and mint chip recipes, but the first step is to place 1.5 ounces of cocoa powder (preferably Dutch process) and 1/2 C of 1/2 and 1/2 in a medium saucepan, whisking until the cocoa powder has dissolved.

Once the cocoa powder has dissolved, the formula continues as in the vanilla ice cream recipe. Add the remaining 2 1/2 C of 1/2 and 1/2 to the pan, along with 1 C cream.

IMG_0158(1)

The remaining 1/2 and 1/2 and a cup of cream added to the chocolate paste.

Place the saucepan over medium heat and bring it to a simmer. While the dairy heats, whisk eight egg yolks until lightened and slowly whisk nine ounces of sugar into the yolks, forming a light, thick mixture.

When the dairy just begins to bubble, remove it from the heat and temper the yolks by slowly whisking about 1/3 of the chocolate/cream into the yolks.

Once 1/3 of the warm dairy has been added, you can add the remaining dairy to the yolks. Place the pan back on low heat and stir until the custard reaches 170 degrees and will coat the back of a spoon.

Transfer the custard to a freezer-safe bowl and let the mixture cool in the freezer until it is about room temperature. Once chilled, stir 2 t of vanilla extract into the chocolate custard and place the custard in the refrigerator to chill overnight, or until it is below 40 degrees. When the custard has chilled, you can churn your ice cream.

IMG_0191(1)

Custard after chilling overnight.

Place the churned ice cream in the freezer for 6-8 hours before serving.

IMG_0194(1)

Alton’s chocolate ice cream.

Alton’s chocolate ice cream is rich and packed with chocolate flavor. If you are a chocolate ice cream lover, this is a quick, easy chocolate ice cream recipe that is sure to satisfy. Chocolate ice cream has never been my absolute favorite flavor, but I sure wouldn’t turn down a bowl of this.


I was not overly stoked for an entire episode of pudding recipes. I mean, pudding is fine, but it’s not exactly exciting. I did, however, get very happy when I was a kid and my mom would leave pudding in the refrigerator for an after-school snack; chocolate pudding was my brother’s favorite, while I always preferred butterscotch. Speaking of butterscotch pudding, if you have not tried the butterscotch pudding in Alton’s latest book, it is a must-make. Here is my rundown of Alton’s pudding recipes, and I must say that two out of three wowed me.

Indian Rice Pudding

Indian rice pudding is the first recipe in this episode. The ingredients in this recipe are 1 C cooked rice, 1 C milk, 1/2 C heavy cream, 3/4 C coconut milk, 2 ounces sugar, 1/4 t ground cardamom, 1 1/2 ounces golden raisins, and 1 1/2 ounces chopped unsalted pistachios.

IMG_1429

Rice pudding ingredients: cooked rice, milk, heavy cream, coconut milk, sugar, cardamom, golden raisins, and pistachios.

For the pudding, put the milk and rice in a large skillet and bring to a boil over medium heat, stirring.

Once boiling, decrease the heat to low and simmer the milk/rice until it has thickened slightly, which should take about five minutes; if you run a spatula along the bottom of the pan, the liquid should be thick enough to part and stay parted.

IMG_1432

Rice and milk after coming to a boil and simmering.

When you have achieved this desired consistency, increase the heat to medium and add the cream and coconut milk, followed by the sugar and cardamom (use a whisk to incorporate the cardamom).

When the mixture has reached a boil again, decrease the heat to low and cook for five more minutes.

IMG_1439

Pudding cooked for 5 more minutes.

Remove the pan from the heat and stir in the raisins and nuts.

IMG_1440

Raisins and pistachios added to pudding off the heat.

Transfer the pudding to your desired serving vessel(s) and enjoy immediately, or you can chill the pudding overnight, which is how Alton prefers it. If you do opt to chill the pudding, press plastic wrap on the surface of the pudding to prevent formation of a skin.

IMG_1442

Alton’s rice pudding.

I tasted the rice pudding when it was warm, but chose to refrigerate it overnight before eating a full serving. This rice pudding is delicious. The pudding is thick, rich, creamy, and indulgent. The subtle flavor of coconut milk is in the background, while pistachio flavor is predominant. The raisins add little punches of fruit flavor, while the nuts add a little crunch. This is great for dessert or for breakfast, or for both! I fully intend to make this again soon. In fact, I am really wishing I had some right now! Excellent recipe.

Tapioca Pudding

I do not recall ever having tapioca pudding prior to making this recipe. I asked my parents about tapioca pudding the other day and my mom said she remembers her mother making it, while my dad did not think he had ever had tapioca pudding. Tapioca, by the way, is a starch from the cassava plant. Tapioca is sold in several forms, but this recipe calls for large pearl tapioca. The recipe begins by soaking 3 1/2 ounces of tapioca in a pint of cold water overnight; you can do this at room temperature.

After the soak, drain the pearls and put them in a crock pot, along with 2 1/2 C milk, 1/2 C heavy cream, and a pinch of Kosher salt. Stir the pudding, put the lid on the cooker, and let the pudding cook on high for two hours.

After the two hour cook time, beat one egg yolk with 1/3 sugar in a bowl – this will form a paste.

IMG_1513

Tapioca after cooking for two hours.

Temper the egg yolk mixture by slowly whisking 1 – 1 1/2 C of the warm tapioca into the eggs.

Once tempered, add the egg mixture back to the crock pot of tapioca and whisk to combine. Add the zest of a lemon to the cooker, place the lid back on, and let the pudding cook for 15 more minutes.

Transfer the tapioca to an airtight container, pressing plastic wrap directly onto its surface. Let the pudding cool to room temperature before refrigerating until it is thoroughly chilled.

IMG_1521

Pudding after cooking for 15 more minutes.

IMG_1558

Chilled tapioca pudding.

This pudding was good, but not amazing like the rice pudding. Since I am not a tapioca pudding expert I cannot say for sure, but I felt like the texture of this pudding was maybe a little thinner than it should be. I liked the added texture from the slightly chewy tapioca pearls, but the base was a little on the soupy side. As for flavor, it was just sort of creamy with subtle lemon overtones. I may make this again, simply because I have half a bag of tapioca pearls remaining, but I won’t add this one to the permanent recipe vault.

Chocolate Pudding

What pudding episode would be complete without a recipe for chocolate pudding? This is a two-step recipe, in which you first make a dry pudding mix, and then use the mix to make the pudding. To make the dry mix, in a lidded container combine 1 1/2 ounces non-fat dry milk, 2 ounces cornstarch, 1 t salt, 3 ounces Dutch cocoa powder, and 6 ounces powdered sugar. Shake the container to combine the ingredients.

To make the pudding, put 1 3/4 C of the dry pudding mix in a saucier. Whisk 2 C milk and 2 C heavy cream into the dry pudding mix.

Bring the mixture to a boil over medium heat, whisking occasionally. Once boiling, decrease the heat to low and simmer for four minutes, whisking.

Remove the pan from the heat and stir in 1 t vanilla.

IMG_1458

Adding vanilla off the heat.

Pour the pudding through a sieve and into a serving bowl. Press plastic wrap directly on the surface of the pudding to prevent the formation of a skin, and refrigerate the pudding for at least four hours before eating.

IMG_1481

Alton’s chocolate pudding.

This is the best chocolate pudding I have ever eaten. The pudding is super rich and creamy in both texture and flavor. It is smooth and chock full of chocolate flavor, and a little goes a long way. I am going to whip up another batch of this pudding shortly. It is super good.

This chocolate episode came at a good time, allowing me to share some of Alton’s chocolate goodness with friends and relatives at the holidays. There is really no way we could have eaten all of this chocolate without help! It’s really too bad that my mom doesn’t live closer to me because, though she is tiny, she can pretty much eat her weight in chocolate. Somehow, we persevered and the recipes from this episode have been devoured. All of the recipes in this episode are ganache-based, meaning they are composed of a mixture of chocolate and cream. First up is Alton’s:

Ganache Frosting

This ganache is composed of only two ingredients:  chocolate and cream.

IMG_0594

Only two ingredients for this frosting: bittersweet chocolate and heavy cream.

The recipe starts with heating a pint of heavy cream (which is also a pound) in a microwave for 3-4 minutes, or until simmering. Note:  when heating milk products in the microwave, use a vessel twice the original volume of dairy to prevent overflow. While the cream heats, chop a pound of bittersweet chocolate with a serrated knife.

IMG_0595

A chopped pound of chocolate.

Place the chopped chocolate in the bowl of a food processor and pour the warm cream over the chocolate. Let the cream/chocolate sit for two minutes.

When the two minutes are up, pulse the chocolate and cream three times, or until smooth.

IMG_0601

Chocolate and cream after pulsing 3x.

Transfer the ganache to a bowl. You can use the ganache immediately as a pourable cake glaze.

IMG_0604

Ganache transferred to a bowl.

Or, you can let the ganache cool for an hour and whip it in a stand mixer to make a cake frosting.

This ganache will keep for two weeks if kept tightly covered and refrigerated. For later use, bring the ganache to room temperature before whipping with a stand mixer. I first used this ganache frosting to frost a simple sheet cake, which we ate for multiple days.

IMG_0617

A slice of sheet cake with Alton’s ganache frosting.

I actually prefer this frosting cold because I like the dense mouthfeel of the cold chocolate in contrast with soft, light cake. After frosting a 9×13″ sheet cake, I still had enough frosting for two dozen cupcakes, which I frosted for my in-laws’ Christmas party. I will say that the frosting is best aesthetically when used after the first whipping. This frosting is quite rich, so you only need a thin layer of frosting for a good punch of chocolate. This is about the easiest chocolate frosting you could ever make, and it is so much better than anything you could buy in the store.

Chocolate Truffles

When we headed to my sister-in-law’s house for Thanksgiving, I decided to bring Alton’s truffles to share. I made the truffles two days before turkey day. To make Alton’s truffles, place 10 ounces of chopped bittersweet chocolate in a microwaveable bowl and add 3 T of unsalted butter.

Set the chocolate aside while you bring 1/2 C cream and 1 T light corn syrup to a simmer in a saucepan over medium heat.

IMG_0541

Heavy cream and light corn syrup.

While the cream heats, place the chocolate/butter in the microwave for 30 seconds; stir the mixture and put it in the microwave for another 30 seconds or until the chocolate starts to melt.

Pour the simmering cream over the chocolate and let it sit for two minutes.

IMG_0552

Cream poured over chocolate/butter.

After two minutes, stir 1/4 C brandy into the chocolate, stirring until smooth.

IMG_0554

Brandy being stirred into chocolate mixture.

Pour the chocolate mixture into an 8×8″ baking dish and place it, uncovered, in the refrigerator for one hour.

After an hour of chill time, use a melon baller to portion the ganache into rough balls, transferring them to a parchment-lined sheet pan; do not worry about shaping the truffles at this time. When all of the truffles have been portioned, place them back in the refrigerator for 30 minutes.

IMG_0560

Portioned ganache.

This is the point of the recipe where things get a little more technical, as Alton used a heating pad to melt eight ounces of bittersweet chocolate, keeping the chocolate between 90 and 94 degrees; it is critical not to go above 94 degrees, as this will change the crystalline structure of the chocolate. I found that I had very uneven heating with my heating pad, so I gradually melted my chocolate in the microwave, stirring and checking the temperature after every 15-20 seconds.

Once your chocolate is melted and between 90 and 94 degrees, roll your truffles into smooth balls with gloved hands. Dip an ice cream scoop into the melted chocolate and place a truffle ball into the scoop, using your gloved fingers to coat the center with melted chocolate.

IMG_0564

Coating a truffle center in melted bittersweet chocolate.

Once coated in chocolate, place the coated truffle into a topping of your choice:  chopped pistachios, cocoa powder, powdered sugar, or toasted coconut. It is ideal to let each truffle sit in the topping until the next truffle is done being coated with chocolate.

Transfer the finished truffles to a wax paper-lined airtight container. Store the truffles in the refrigerator, but serve them at room temperature.

I ended up with 32 truffles, and I used toppings of powdered sugar, cocoa powder, and chopped pistachios.

IMG_0569

Truffles.

Oh my, these truffles are super rich. If you are able to keep your coating chocolate in the ideal temperature range, your truffles will have a crispy chocolate shell surrounding their dense, rich filling. The filling is creamy, rich, slightly bitter, and intensely full of chocolate. These are absolutely worth the time and effort of making, as well as the calories. They pair fantastically with bourbon or with coffee, depending on the time of day. This is a wonderful recipe.

Good Eats Fudgepops

This episode finishes up with Alton’s version of a fudgecicle.

IMG_0657

Ingredients for fudgepops: bittersweet chocolate, vanilla extract, cocoa powder, heavy cream, and whole milk.

Start by putting 2 T cocoa powder into a medium saucepan, and add 12 ounces of heavy cream and eight ounces of whole milk.

IMG_0662

Cocoa powder combined with milk and cream.

Bring the milk and cocoa to a simmer over medium heat, whisking to combine.

IMG_0663

Cocoa powder combined with milk and cream, and brought to a simmer.

When the dairy is simmering, pour it over eight ounces of chopped bittersweet chocolate, letting it sit for two-three minutes.

Whisk the chocolate mixture until smooth and add 2 t vanilla extract.

Using a turkey baster, equally distribute the chocolate mixture among popsicle molds.

IMG_0671

Chocolate distributed among popsicle molds.

Place the fudgepops in the freezer for four hours, or until set.

IMG_0729

Alton’s fudgepop.

Conversely, if you are craving hot chocolate, Alton says you can melt one of his fudgepops in the microwave. I chose to halve this recipe since I was just making the fudgepops for two of us, and I ended up with four fudgepops. These fudgepops are full of rich chocolate flavor and they are pretty creamy. They did have a very slight icy texture, but I thought these were pretty good. They were very hard to get out of the molds, but that may have been more of a function of my popsicle molds than due to the recipe itself. I don’t know that I would go out of my way to make these again, but I’ve also never been the biggest fudgepop fan.

I watched the first episode of Good Eats: Reloaded, which aired Monday. I wasn’t sure what I would think of Alton revamping his classic episodes, as I felt that he might be diminishing the integrity of his original work. That being said, I feel that Alton did a good job of intertwining new techniques/technology with his original content. Plus, he’s only reloading a small number of episodes – those which he feels need to be revisited and improved upon. How can I argue with that when it is his body of work?

Certain Good Eats episodes are about food topics I am super excited to get in the kitchen and make. Episode 108 was all about doughnuts, a food item I had never before made, but that had always been on my list. Once again, this project gave me the incentive to get in the kitchen and scratch another food off my to-do list.

Yeast Doughnuts

Alton’s doughnut recipe is for yeast doughnuts, which are much lighter than their cake counterparts. Yeast doughnuts are obviously leavened with yeast, while cake doughnuts are leavened with baking powder. While yeast doughnuts are light and airy, cake doughnuts tend to be heavier and more dense, and I happen to think both are fantastic. The first step for Alton’s doughnuts is to put 2 1/2 ounces shortening in a bowl and heat 1 1/2 C milk until the milk is just hot enough to melt the shortening (I heated my milk in the microwave). Once hot, pour the milk over the shortening and set aside.

In a small bowl, sprinkle two packages of instant yeast over 1/3 C warm water and set this aside while you gather the other ingredients.

IMG_9612

Yeast sprinkled in warm water.

You will also need 2 eggs, 1/4 C sugar, 1 t fresh nutmeg, 1 1/2 t salt, 1-1 1/2 gallons vegetable or peanut oil, and 23 ounces flour.

IMG_9609

Ingredients for doughnuts: yeast, eggs, sugar, salt, nutmeg, shortening, flour, and milk.

Next, pour the yeast and shortening mixtures into the bowl of a stand mixer, along with the eggs, salt, nutmeg, sugar, and half of the flour.

Stir the dough on low speed with the paddle attachment. Once the flour is incorporated, increase the speed and mix the dough thoroughly.

Next, add the rest of the flour, mixing at low speed until incorporated. Increase the speed and mix the dough thoroughly again.

Now it is time to knead the dough, so replace the paddle attachment with the dough hook. Let the hook knead the dough on medium speed until the dough begins to pull away from the sides of the bowl.

Transfer the dough to an oiled bowl, cover it with plastic, and let it sit for an hour, or until doubled.

When the dough has risen, sprinkle flour liberally on a smooth surface and turn the dough out onto the flour. Sprinkle the top of the dough with flour also.

IMG_9631

Dough turned out onto floured surface, and liberally dusted with flour.

Fold the dough in quarters a couple times, pressing out any gas bubbles with each fold.

Next, use a rolling pin to roll the dough to 3/8″ thick; the dough will be quite sticky, so you may need to consistently dust it with flour.

Cut the dough into doughnuts using either a 2 1/2 inch doughnut cutter, or, as Alton prefers, a 2 1/2 inch pastry ring for the outsides and a 7/8″ pastry ring for the centers.

Transfer the doughnuts to a floured sheet pan, cover them with a tea towel, and let them rise for 30 minutes (this is called “bench proofing”).

IMG_9640

Doughnuts transferred to floured baking sheet to proof.

You can set excess dough aside, covered, for an hour and re-roll/cut more doughnuts. I ended up with a total of 25 doughnuts. Once proofed, heat the vegetable or peanut oil in a Dutch oven until it reaches 365 degrees.

Add doughnuts to the hot oil, avoiding overcrowding them. Cook the doughnuts for one minute per side, transferring them to a rack over a sheet pan to drain/cool. Tip:  use chopsticks or skewers to flip and transfer the doughnuts.

IMG_9648

Doughnuts frying for 1 minute per side.

IMG_9651

Alton’s yeast doughnuts.

Allow the doughnuts to cool completely before glazing with one, or both, of the recipes below. I did have to sample an unglazed doughnut, and I can report that it was lightly crispy on the outside and super airy on the inside. The dough was just lightly sweet with a hint of nutmeg. Now, on to those glazes…

Doughnut Glaze

Alton’s first doughnut glaze recipe is super simple, coming together in just a few minutes. Combine 1/4 C milk and 1 t vanilla in a saucier over medium heat.

IMG_9668

Milk and vanilla in a saucier over medium heat.

In the episode Alton specified that you want the milk to reach 150 degrees, but I just heated it until it was pretty warm. Once warm, whisk in 2 C sifted powdered sugar until smooth.

Remove the glaze from the heat and dip the doughnuts into the warm glaze.

IMG_9674

Alton’s glaze.

IMG_9676

Glazed doughnuts.

If you are glazing a lot of doughnuts, you may need keep the glaze warm by setting it over a bowl of warm water, but I did not need to do that. Let the glaze set up for a few minutes before eating. This glaze is great, giving the doughnuts a sweet vanilla flavor and a pretty sheen.

Chocolate Doughnut Glaze

If you happen to be a chocolate fan, Alton has you covered with his chocolate doughnut glaze. The chocolate glaze begins in the same way as the original doughnut glaze, combining 1/4 C milk and 1 t vanilla in a saucier over medium heat.

Heat the milk until warm and whisk in 2 C sifted powdered sugar.

Once the sugar is incorporated, add an additional teaspoon of vanilla, 1/2 C butter cut in pats, 1 T corn syrup, and 4 ounces chopped bittersweet chocolate.

When half of the chocolate has melted, remove the pan from the heat and continue stirring until the glaze is smooth.

IMG_9692

Glaze stirred until smooth.

Dip the doughnuts into the glaze, allowing it to set before eating.

IMG_9694

Alton’s chocolate glaze.

This glaze is also quite outstanding and results in super pretty doughnuts. The glaze sets up, but is still smooth and creamy. It gives the doughnuts a punch of chocolate flavor, though you can still taste the flavor of the doughnuts themselves.

IMG_9697IMG_9703
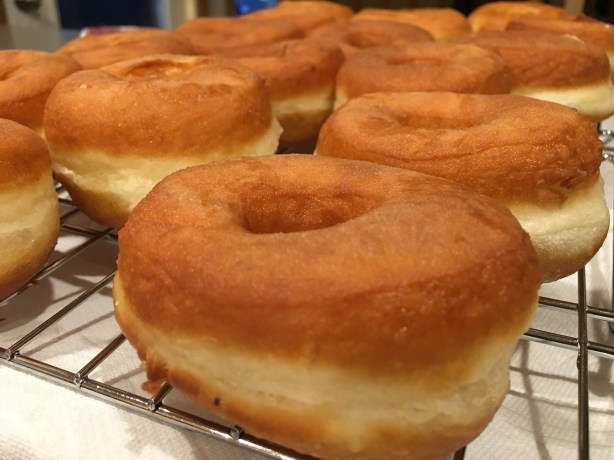
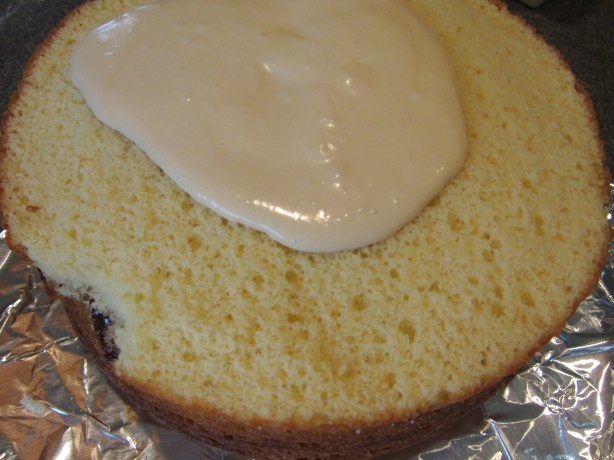
I really enjoyed this episode, and doughnuts will be made in my kitchen again. They really are quite easy and much better than what you can buy at the store. Personally, I think I liked the vanilla glaze more than the chocolate one, but I really liked both. I gave some doughnuts away and also froze some for later glazing. I think I know what we’ll be eating for breakfast Saturday!


With having completed Alton’s fudge recipes, I have officially cooked my way through the first 100 episodes of Good Eats. How many recipes has that been? Honestly, I haven’t counted. Fudge is something I have a favorite standby recipe for, which my mom received years ago, handwritten on an index card, from an old woman she met at church. Though I don’t make fudge often, I know which recipe I always reach for. Did Alton’s chocolate fudge recipe dethrone Mom’s? Read on to find out.

Chocolate Fudge

For Alton’s chocolate fudge, butter an 8×8-inch square pan and line it with wax paper. For an easy way to line the pan, place the pan on top of a large piece of wax paper and use a sharp knife to cut the paper diagonally from each corner of the pan. Place the paper in the buttered pan and the corners will magically fold/overlap perfectly, and you can trim any excess with scissors.

In a two-quart saucepan combine 2 3/4 C sugar, 4 ounces unsweetened chocolate, 2 T unsalted butter, 1 T corn syrup (helps to prevent crystal formation), and 1 C half-and-half.

Stir the mixture over medium heat until you are certain the sugar has dissolved and the chocolate has melted.

Once the sugar has dissolved, increase the heat and bring the mixture to a boil. Once boiling, reduce the heat to medium-low and place a lid on the pan for three minutes; this helps to remove any crystals that have formed on the sides of the pan.

IMG_7228

Lid placed on pan for three minutes.

After three minutes, remove the lid and clamp on a candy thermometer, letting the mixture cook until it reaches 234 degrees; if you have high humidity, Alton says you will want to go a few degrees higher.

IMG_7231

Bringing fudge to 234 degrees.

As soon as you hit 234, turn off the heat and add 2 T butter to the top of the pan, but do not stir the mixture. The butter will keep the surface of the fudge from drying out while it cools. Be careful not to agitate the pan at all during the cooling process, as this could cause large sugar crystals to form in your fudge.

IMG_7233

Butter added at 234 degrees.

Once your fudge hits 110 degrees, use a wooden spoon to stir it very quickly. Stir the fudge until its surface becomes matte and it falls from the spoon in clumps. Finally, add 1 T vanilla extract and roasted/chopped nuts, if desired; I opted to leave my fudge plain.

IMG_7237

Quickly stirring fudge with a wooden spoon.

Spread the fudge into your prepared pan and let it cool at room temperature for two hours. This particular fudge should be stored at room temperature.

IMG_7239

Fudge poured into prepped pan.

IMG_7245

A piece of Alton’s fudge.

While Alton’s fudge had a very rich chocolate flavor, it lacked the dense creaminess I like in fudge. Instead, this fudge seemed to have a dry, slightly crumbly texture. Some online reviewers complained of this fudge being gritty, but that was not a problem with my fudge. I simply like my fudge to be a bit less dry. Don’t get me wrong… this fudge is certainly good, but it still can’t top my mom’s.

Peanut Butter Fudge

Unfortunately, there is no online link to Alton’s recipe for peanut butter fudge, though there appears to be a video. To make his peanut butter fudge, place two sticks of butter (cut in pieces) and 1 C smooth peanut butter in a large glass bowl. Cover the bowl with plastic wrap, poking a few holes in the top to release steam.

Microwave the butter/peanut butter on high for two minutes. While the bowl is in the microwave, prepare an 8×8-inch pan by buttering it and lining it with wax paper (see chocolate fudge recipe above).

IMG_7307

Buttered/lined pan.

After microwaving, remove the plastic and stir the mixture with a wooden spoon.

Cover the bowl with plastic again and microwave for two more minutes on high.

Remove the plastic and stir in 1 t vanilla and 16 ounces of powdered sugar, sifted (I sifted the sugar straight into the bowl).

Stir the fudge with a wooden spoon until it is dull and thick, and then switch to a potato masher to get the sugar all mixed in.

IMG_7325

Blended fudge, ready to go in pan.

Press the fudge into the lined pan, top it with additional wax paper, and refrigerate for a couple hours, or until set. Store this fudge in the refrigerator.

Unfortunately, I somehow never got a photo of a piece of this fudge. If I’m going to go for fudge, I typically reach for chocolate, but Alton’s peanut butter fudge is pretty fantastic. This fudge tastes like the peanut butter filling of a peanut butter cup, and is really quite addictive. Of the two fudge recipes in this episode, this is the one I would surely do again because it is super delicious and very easy to make.

The 96th episode of Good Eats originally aired in December, hence the Christmas cookie theme. I say, however, that Christmas cookies deserve to be eaten at any time of the year, and March seemed like a perfect time to crank some cookies out of my kitchen. First up?

Sugar Cookies

This is a recipe that I actually made years ago (maybe in 2005?) for Christmas at my parents’ house. It was the first Christmas Ted spent with my family and I remember decorating the cookies on Christmas Eve prior to Ted’s arrival. My brother and I were going to head to Christmas Eve mass with our parents, and we somehow ended up with two martinis in our systems prior to church. Let me just say that mass was a little more entertaining than usual, and I ended up with very brightly (and abstractly) decorated cookies. The cookies were a hit then, so I knew they would be good when I made them this time around. This recipe begins by sifting together 3 C flour, 1/4 t salt, and 3/4 t baking powder.

Also, in a small bowl, combine 1 egg and 1 T milk.

IMG_6626

Wet ingredients – egg and milk.

Oh, and place a sheet pan in the freezer. Next, in a stand mixer with the paddle attachment, cream together 1 C butter and 1 C sugar until light and fluffy.

Slowly add the wet ingredients to the mixer until mixed in.

IMG_6629

Wet ingredients added to mixing bowl.

Then, slowly add the sifted dry ingredients on low, mixing until the dry ingredients are incorporated and the dough forms a ball.

Divide the dough in half, patting each half into a flat slab. Wrap the dough in plastic or wax paper and place it in the refrigerator for two hours.

IMG_6633

Dough, divided into two equal slabs, and ready to head into refrigerator.

When you are ready to cut out your cookies, sprinkle your work surface with powdered sugar (Alton prefers sugar to flour because flour causes the dough to develop more gluten). Roll the dough to 1/4″ thick, lifting the dough every so often to be sure it isn’t sticking; I found that I needed quite a lot of powdered sugar to keep the dough from sticking to my counter.

Remember that frozen sheet pan from earlier? Place it on your rolled dough for 10 minutes to re-chill the dough before cutting.

IMG_6638

Cold sheet pan placed on top of rolled dough.

Use cookie cutters (FYI Alton likes plastic ones) to cut cookies from your dough, transferring them to parchment-lined baking sheets.

Bake the cookies for four minutes at 375, rotate the pans, and bake them for four to five more minutes. I found that my cookies needed a little more time than this. Let them cool completely on racks before frosting.

IMG_6643

Cookies, after baking.

This sugar cookie recipe is fantastic. The dough comes together super quickly and is very easy to work with. The resulting cookies are crispy on the outside and slightly tender on the inside, and they have a rich, buttery flavor. I highly recommend this one! Oh, and how should you decorate said cookies? With Alton’s recipe for royal icing, of course! See below.

Royal Icing

If you are looking for a way to decorate your sugar cookies, look no further than Alton’s royal icing recipe. To make his icing, beat four egg whites or three ounces of pasteurized egg whites (I used pasteurized egg whites) with 1 t vanilla, using the whisk attachment of a stand mixer.

Gradually add 4 C of sifted powdered sugar until you have a smooth, lump-free icing.

Divide the icing among small bowls, adding coloring as you desire. As far as coloring goes, Alton prefers powdered food coloring because it lasts the longest and has no additives. I only had liquid food coloring, so that is what I went with.

IMG_6650

Royal icing, divided and colored.

Frost your cookies and let them sit until the frosting has set up. Oh, and if you end up with a bad color, Alton recommends adding cocoa powder until you have covered it up.

IMG_6651

My decorated sugar cookies.

This icing could not be easier to make and it sets up beautifully. Since royal icing is thin, it can be a bit messy to deal with, but it looks and tastes great. This is a fool-proof royal icing recipe that pairs perfectly with Alton’s sugar cookies. I threw a bunch of my frosted cookies in the freezer for later enjoyment, so you can always make these ahead.

Chocolate Peppermint Pinwheel Cookies

Last in this episode was Alton’s recipe for chocolate peppermint pinwheel cookies. I actually made this recipe years ago also, but for a cookie exchange when I was in graduate school. I remembered liking these cookies then. These cookies start with a batch of Alton’s sugar cookies.

Divide the sugar cookie dough in half (it is best to do this by weight), and place the dough in two bowls.

IMG_6576

Dividing sugar cookie dough in half by weight.

One half of the dough will become peppermint dough, while the other half will become chocolate dough. Add 1 t vanilla to one of the bowls of dough, and add 1 t peppermint extract to the other.

To the peppermint dough, add 1/2 C crushed candy cane (or peppermint candy).

To the dough with vanilla extract, add 3 ounces of melted unsweetened chocolate (you can melt it in the microwave, stirring until melted).

Use gloved hands to mix the peppermint and chocolate into the two doughs. Additionally, add 1 egg yolk to the peppermint dough, mixing it in by hand.

IMG_6584

Crushed peppermint and egg yolk added to dough with peppermint extract.

Chill the two doughs for five minutes. Roll out the two doughs to 1/3-1/4″ thick rectangles, using powdered sugar to keep the dough from sticking. You want your chocolate rectangle to be slightly longer and thinner than your peppermint rectangle. Place the chocolate dough on a non-stick mat or a pliable cutting board (I rolled my dough out on a non-stick mat, so I wouldn’t have to transfer it).

Place the peppermint dough on top of the chocolate dough, pressing the doughs together.

IMG_6594

Peppermint dough placed on top of chocolate dough and the two are pressed together.

Use the edge of the non-stick mat or cutting board to roll the doughs into a log. Wrap the log in wax paper and refrigerate it for at least two hours.

When ready to bake, slice the log into 1/2″ slices, placing them on parchment-lined sheets.

IMG_6602

Dough sliced into rounds.

Bake the cookies for 12-13 minutes at 375-degrees, rotating the pans once during baking. Cool the cookies for two minutes on the baking sheets before transferring them to racks.

These cookies are chewy and dense, and have little pockets of crunchy peppermint. They are pretty and fun to make, and they definitely have a seasonal feeling to them. That being said, though, why is peppermint only popular at the holidays? Peppermint ice cream is one of my very favorite flavors, but you can only find it for a couple months each year. Anyway, these cookies are worth a bake, and, yes, you can freeze these too!


As someone who likes to cook regularly, my dad came up with a great Christmas gift for me in December. He and I do not live in the same town anymore, but he called a gentleman where I live and arranged to have all of our kitchen knives sharpened. I dropped the knives off at the knife sharpener’s house one morning and had them back a few hours later. He sharpened 13 items, including our serrated knives and two pairs of kitchen shears. Our knives are just like new again! If you know someone who cooks a lot, keep the knife sharpening idea in mind as a gift! FYI:  The knife sharpener told me to never try to sharpen my knives at home, nor to hone them with a steel. Instead, he told me to use a strop to hone our knives prior to each use; a strop is a piece of leather that was traditionally used to sharpen straight-edge razors in barber shops. Now, onto the 94th episode of Good Eats, which was all about candy.

Peanut Brittle

I have made some candy in the past, such as fudge, divinity, and caramels. Peanut brittle was the first type of candy Alton made in this episode. For this recipe, you will need a heavy saucier with a lid, a wooden spoon, and two half-sheet pans; line one pan with a silicone mat, and lube the back side of the other pan liberally with vegetable oil.

IMG_6124

Two half-sheet pans, one with its back oiled and the other lined with a silicone mat.

Begin by rubbing the sides of your saucier with a vegetable oil-coated paper towel, as this will help with crystal formation on the sides of the pan.

IMG_6128

Saucier with its sides oiled.

Next, put 3 C of sugar and 1 1/2 C water in the saucier.

IMG_6130

Sugar and water placed in saucier.

Place the pan over high heat. Note:  If you are worried about your stove producing uneven heat, Alton suggests placing a cast iron skillet between your saucier and your burner to diffuse heat. Stir the sugar/water mixture occasionally, bringing it to a boil. Once boiling, cover the pan and set a timer for three minutes. This will allow the steam in the pan to wash down any crystals from the sides of the pan.

After three minutes, remove the lid and decrease the heat to medium. Meanwhile, toss 1 1/2 C lightly salted peanuts with 1/2 t cinnamon and 1/2 t cayenne pepper.

Continue cooking the syrup until it reaches a light amber color and has slow bubble formation, which Alton says is at 350 degrees; Alton says you really do not need a thermometer to make this brittle, as you can just eyeball it. I decided to use the thermometer, as “light amber” seems subjective to me. Yeah, so Alton’s temperature of 350 degrees is COMPLETELY WRONG, and will result in scorched syrup. I had to discard my syrup and begin again.

This time, I decided to eyeball the light amber color.

IMG_6142

Second attempt at syrup – this is what I determined to be light amber.

Once you have reached light amber, turn off the heat and dump in the peanuts, stirring.

Immediately pour the mixture onto the prepared silicone mat, distributing the nuts evenly with a spatula. Press the mixture down with the lubed backside of the second prepared pan. Set the brittle aside to cool completely. Once the brittle has hardened, place the second half-sheet pan, this time inverted, on top of the brittle pan. By shaking the brittle between the two pans, you can easily break it into pieces. So, my verdict of this recipe is not that favorable. I have no idea how Alton recommended 350 degrees for the syrup, as it was just way too high. The second time I made my syrup, I think I probably pulled it off the heat too early, as my brittle did this weird foaming thing when I poured it onto the mat.

IMG_6145

Brittle poured onto mat and beginning to foam.

My resulting brittle was opaque, somewhat gritty, and had an odd white hue. The candy tasted fine, but it wasn’t what I think of as brittle, which is normally caramel-colored, shiny, and clear.

IMG_6150

Even my dog thought my brittle looked weird.

I think this recipe would have been much more successful if Alton had provided the correct temperature for the syrup, which a Google search says is around 300 degrees. In theory, the eyeballing technique could work for someone who makes candy often, but candy making requires more precision than eyeballing. I’d follow a different peanut brittle recipe next time for sure.

Acid Jellies

When we were kids, our parents would give us each a box of chocolates for Valentine’s Day. I preferred nut-free candy (still do), so my box was typically a mix of caramels, creams, and jellies. It had been years since I had last had a jelly, so I was pretty stoked to see jellies appear in this episode.

To make Alton’s version of jellies, combine in a saucepan 1/2 C fresh lemon juice, 1/4 C fresh lime juice, 1/2 C water, and 8 packages of gelatin. Set this saucepan aside with no heat.

IMG_6159

Gelatin, lemon juice, lime juice, and water combined in a saucepan off of heat.

IMG_6161

Gelatin mixture after sitting.

In a second small saucepan, place 1 C sugar and 3/4 C water, and place the pan over high heat. Again, you can use a cast iron skillet as a diffuser, if you wish.

IMG_6160

Sugar and water placed in small saucepan over high heat.

Stir this mixture until the sugar dissolves and bring it to a boil. Once boiling, place a lid on the pan and set a timer for 3 minutes. As with the recipe for brittle above, the steam in the pan will serve to wash crystals down that may have formed on the sides of the pan. After 3 minutes, remove the lid from the pan and attach a candy thermometer. Cook the syrup until it reaches 300 degrees.

IMG_6162

Sugar syrup cooking to 300 degrees.

Once at 300 degrees, remove the pan from the heat and pour the syrup into the gelatin mixture, stirring constantly.

IMG_6163

Sugar syrup being poured into gelatin mixture.

Place the mixture over low heat, continuing to stir until the gelatin dissolves. I had some difficulty with this phase of the process, as a solid mass of sugar seemed to form in the bottom of my pan. I am guessing this was because my sugar syrup cooled too much too quickly. I opted to increase the heat under my pan, allowing the sugar to dissolve again, which worked.

IMG_6164

Gelatin mixture placed over low heat to dissolve.

Once you have a smooth, clear mixture, add 2 T lemon zest and 2 T lime zest, and pour the mixture into an oiled 8-inch square pan.

IMG_6165

Completed jellies, poured into greased pan.

Let the jellies sit at room temperature for four hours. Once set, turn the jellies out and cut them into 1-inch squares with a pizza cutter.

IMG_6175

Jellies, cut into cubes.

Transfer the cubes to a bowl and toss them with the remaining 1/4 C sugar until coated.

Move the cubes to a cooling rack placed over a sheet pan, and allow them to dry for 24 hours at room temperature before eating.

IMG_6183

Alton’s jellies.

Alton’s jellies had intense citrus flavor and a great balance of sweetness and tartness. I did find them to be a bit more rubbery than I would have liked, but that could have perhaps been due to my difficulties with combining my two mixtures. I am tempted to try these again to see if I can get a better result, as they were pretty and their flavor was great. My only other complaint with these candies was that they remained very sticky and damp on the outside, and they never really dried out as Alton said they would; I found that this was a common complaint in the online recipe reviews, and I am not sure how to fix that issue.

Chocolate Taffy

I suppose you couldn’t really have a candy episode without including something chocolate, so that’s where chocolate taffy comes in. This recipe requires only a few ingredients, beginning with combining 1/2 t salt, 2/3 C Dutch cocoa, and 2 C sugar in a large saucepan.

IMG_6210

Salt, sugar, and cocoa.

Stir this mixture with a whisk to combine, and add 1 C light corn syrup, 1 t white vinegar, and 1/4 C + 1 T water. Stir the pot over medium heat to dissolve the sugar, and then increase the heat to bring the chocolate to a boil. Once boiling, decrease the heat to low and attach a candy thermometer.

Cook the chocolate until it reaches 260 degrees, and then stir in 1 1/2 T butter.

IMG_6218

Chocolate cooking to 260 degrees.

Pour the taffy onto a silicone mat-lined pan, smoothing it with a spatula, and set it aside to cool for 10 minutes.

After 10 minutes, don latex gloves and lube them with butter. It is time to pull the taffy. First, use the mat to fold the taffy into thirds.

IMG_6224

Taffy, folded in thirds.

Next, fold the taffy in thirds again, but in the opposite direction. Knead the taffy with your hands, as if working with dough. The chocolate will still be quite warm.

IMG_6225

Taffy, folded in thirds the other direction.

Pull the taffy from both ends, folding them back into the middle.

IMG_6226

Pulling ends of taffy back to the middle.

Then, pick the taffy up and continue to twist and pull the taffy until it has striations in the middle and is very hard to pull.

Roll the taffy into a log on the silicone mat and cut it into four pieces with kitchen shears.

Roll each piece of taffy into a snake, cutting each log into 1-inch pieces. If the candy becomes too hard to cut, you can place it in the microwave for about five seconds to soften it. Keep the taffy pieces separate while you work, or they will stick to each other.

IMG_6235

Taffy cut into individual pieces.

Roll each piece of taffy in a piece of wax paper and place them in an air-tight container. This one was disappointing for me because my taffy came out rock hard, while Alton described something like a Tootsie Roll. I am guessing that my taffy was not pulled enough to reach the desired texture, but I did pull it until it felt like it was solidifying. Maybe I needed to soften my taffy again, and pull it more? Or, maybe the “T-Rex” nickname my brother gave me as a teenager was more justified than I realized? Either way, I don’t think I will do this one again. All-in-all, this episode was pretty “meh” for me.

If last episode of Good Eats was all about cake, I suppose it is only fitting that this episode dealt with icing. Alton made the point that store-bought cake mixes are generally quite good, and, in fact, they are sometimes better than the cakes we can make at home. For this reason, a cake mix was used in this episode, and Alton used it to make two round layers. Once his cakes were baked, it was onto the icing.

IMG_6383

One of my two cake mix layers.

Buttercream

First up, Alton made his version of buttercream. To make this recipe, you will need to have 10 ounces of softened butter, so you will need to set your butter out in advance. In a small saucepan, combine 1/2 C sugar and 1/2 C dark corn syrup, bringing this mixture to a boil over high heat. When your sugar syrup has large bubbles, turn off the heat and set the syrup aside for a few minutes.

While the syrup cools, beat 4 eggs with a whisk attachment until they are thick and have lightened in color.

It is ideal to use a metal turkey baster to add the hot syrup to the eggs, as you can drizzle the syrup into the edge of the mixing bowl, avoiding the whisk (the syrup will solidify upon hitting the whisk). You will, however, want to oil your baster first by drawing vegetable oil into the baster, and then pushing it out again. Using your lubed baster, and with the mixer running on low speed, drizzle the hot syrup into the eggs, trying to get it in the space between the bowl and the whisk.

Continue this process until all of the syrup has been added. When all of the syrup is in, increase the speed to high and beat until the side of the bowl is warm, but not hot, to the touch; this should take about two minutes.

IMG_6424

Buttercream after adding all of the syrup.

Next, piece by piece, slowly add your softened butter, only adding a new piece of butter when the previous piece has been completely mixed in. Your resulting buttercream should be smooth, creamy, and thick enough to frost a cake. The key word here is “should.” Mine was not. My buttercream had turned into sort of a broken soup at this point.

I attempted to save my buttercream by first heating it on the stove to get the tiny lumps of butter incorporated.

I then tried beating it again, and it was smoother, but it still was not thickening properly.

IMG_6453

Beating the buttercream again.

I decided to try chilling it and beating it again, which resulted in a slightly thicker consistency, but it still was inadequate. My last hope was to try chilling it even longer, but this still did not solve the problem.

IMG_6455

Beating the buttercream after chilling.

After working on this buttercream for a couple hours, I finally pulled the plug. My buttercream tasted fantastic – rich, buttery, and sweet, but it just was too runny. I did use it for a pseudo crumb coat on my cake, but it just did not work well. Oh, and did I mention that while I was having my buttercream fiasco, my dog decided to sample my cake? Yep, he took a bite right out of the side.

IMG_6456

Using the buttercream for a crumb coat.

I have successfully made buttercream in the past, using a sugar syrup. The recipes I have had success with in the past have all used a candy thermometer and specific temperatures for the syrup. I wonder if my syrup was not hot enough, or if I did not add it quickly enough. I also wonder if my butter was too soft. After reading the online reviews of this recipe, I see that I was not the only person to struggle with this particular recipe. Honestly, I wouldn’t bother with this recipe again, as I know that there are other buttercream recipes out there that work, while this one did not for me. When all was said and done, I wound up frosting my cake with store-bought buttercream, which is just not the same.

IMG_6460

Giving in and frosting my cake with store-bought buttercream.

Oh, but if you choose to make this buttercream and it works for you, you do also have the option of adding flavor. For chocolate buttercream, melt 4 ounces of chopped dark chocolate, letting it cool for a few minutes. Add the melted chocolate to the finished buttercream. For coffee buttercream, dissolve 1 t of instant espresso in 2 t coffee liqueur. Or, you can add any extract or food coloring of your choosing. Store buttercream in an airtight container with an additional layer of plastic wrap. If you make the buttercream in advance, bring it to room temperature and re-whip it before frosting your cake.

Ganache

For his cake, Alton opted to make a ganache to use as a filling between cake layers. To make the ganache, heat 6 ounces of heavy cream with 3 T corn syrup in a small saucepan.

Add 12 ounces of chopped dark chocolate and stir until the chocolate is melted and smooth.

IMG_6391

Chopped dark chocolate.

Remove the pan from the heat and add 1/2 t vanilla extract.

IMG_6395

Ganache after chocolate was melted and smooth. Adding vanilla off the heat.

Let the ganache cool before using. Spread the ganache between cake layers, using a spatula to spread it almost to the cake edge.

Unlike the buttercream, this ganache recipe was super fast and easy, and it tasted great. I typically use a regular frosting between cake layers, rather than a filling, but I really liked the contrast of dark chocolate between layers. And, if you refrigerate your cake, the ganache becomes fudge-like and dense, adding a level of richness. Oh, and my suggestion if you happen to have leftover ganache is to refrigerate it until set. You can form balls with the firm ganache, rolling them in cocoa powder or powdered sugar to form truffles. Or, you can just eat it with a spoon like I did.

Writing Chocolate

A recipe for writing chocolate was last in this episode. For this one, combine 1 C chocolate chips and 2 t canola oil in a microwave-safe container, stirring to coat the chips with the oil.

Microwave the chocolate for one minute on high. Stir the chocolate until it is completely smooth. For decorating, transfer the chocolate to a piping bag or a plastic bottle.

This recipe also worked very well and was super easy. It is certainly an easy way to add some writing to a cake. It tastes much better than the artificial writing icing you can buy in the store too.

Cake Assembly

Though not a recipe per se, Alton did go over some of his cake assembly/decorating basics.

  1. He opts for a lazy susan for cake decorating, placing it on top of an upturned cake pan.
  2. To level his cakes, Alton uses two wooden yard pickets, placed on their sides in a V-shape. He places his cake inside the V and slices along the top of the pickets with a bow saw blade.
  3. He also uses the pickets for splitting cake layers, turning them onto their shorter sides. Again, using a bow saw blade, he slices across the top of the pickets, slicing the cake into two layers.
  4. When frosting a cake, place the layers in the following order from base to top:  bottom of cake 1, top of cake 1, top of cake 2, and bottom of cake 2.
  5. When you have the filling between your layers, first frost the cake with a thin crumb coat of icing (about 1/4 of your icing) and refrigerate. This crumb coat will make it easier to apply a smooth layer of icing.
  6. When frosting a cake, apply more icing than you think you need to the top of the cake. Spread the icing, working out to the edges and down the sides. It is always better to remove excess icing than to add more.