If last episode of Good Eats was all about cake, I suppose it is only fitting that this episode dealt with icing. Alton made the point that store-bought cake mixes are generally quite good, and, in fact, they are sometimes better than the cakes we can make at home. For this reason, a cake mix was used in this episode, and Alton used it to make two round layers. Once his cakes were baked, it was onto the icing.

One of my two cake mix layers.
Buttercream
First up, Alton made his version of buttercream. To make this recipe, you will need to have 10 ounces of softened butter, so you will need to set your butter out in advance. In a small saucepan, combine 1/2 C sugar and 1/2 C dark corn syrup, bringing this mixture to a boil over high heat. When your sugar syrup has large bubbles, turn off the heat and set the syrup aside for a few minutes.


While the syrup cools, beat 4 eggs with a whisk attachment until they are thick and have lightened in color.


It is ideal to use a metal turkey baster to add the hot syrup to the eggs, as you can drizzle the syrup into the edge of the mixing bowl, avoiding the whisk (the syrup will solidify upon hitting the whisk). You will, however, want to oil your baster first by drawing vegetable oil into the baster, and then pushing it out again. Using your lubed baster, and with the mixer running on low speed, drizzle the hot syrup into the eggs, trying to get it in the space between the bowl and the whisk.


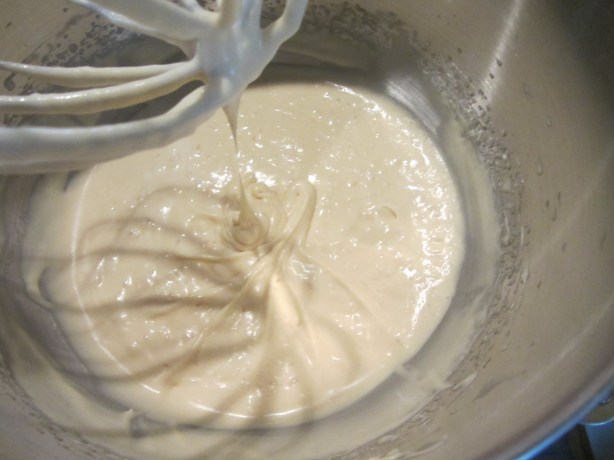
Continue this process until all of the syrup has been added. When all of the syrup is in, increase the speed to high and beat until the side of the bowl is warm, but not hot, to the touch; this should take about two minutes.

Buttercream after adding all of the syrup.
Next, piece by piece, slowly add your softened butter, only adding a new piece of butter when the previous piece has been completely mixed in. Your resulting buttercream should be smooth, creamy, and thick enough to frost a cake. The key word here is “should.” Mine was not. My buttercream had turned into sort of a broken soup at this point.


I attempted to save my buttercream by first heating it on the stove to get the tiny lumps of butter incorporated.


I then tried beating it again, and it was smoother, but it still was not thickening properly.
Beating the buttercream again.
I decided to try chilling it and beating it again, which resulted in a slightly thicker consistency, but it still was inadequate. My last hope was to try chilling it even longer, but this still did not solve the problem.

Beating the buttercream after chilling.
After working on this buttercream for a couple hours, I finally pulled the plug. My buttercream tasted fantastic – rich, buttery, and sweet, but it just was too runny. I did use it for a pseudo crumb coat on my cake, but it just did not work well. Oh, and did I mention that while I was having my buttercream fiasco, my dog decided to sample my cake? Yep, he took a bite right out of the side.
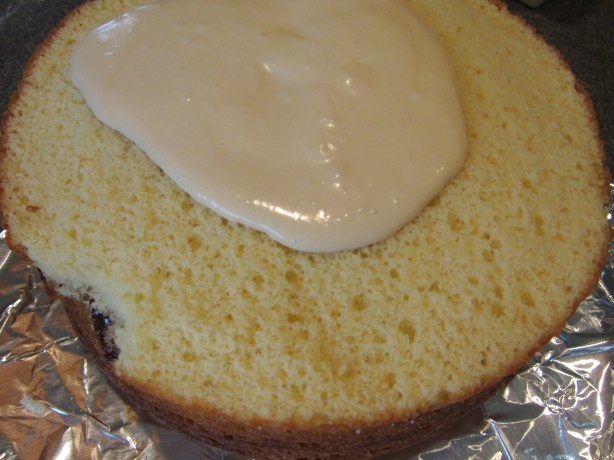
Using the buttercream for a crumb coat.


I have successfully made buttercream in the past, using a sugar syrup. The recipes I have had success with in the past have all used a candy thermometer and specific temperatures for the syrup. I wonder if my syrup was not hot enough, or if I did not add it quickly enough. I also wonder if my butter was too soft. After reading the online reviews of this recipe, I see that I was not the only person to struggle with this particular recipe. Honestly, I wouldn’t bother with this recipe again, as I know that there are other buttercream recipes out there that work, while this one did not for me. When all was said and done, I wound up frosting my cake with store-bought buttercream, which is just not the same.

Giving in and frosting my cake with store-bought buttercream.
Oh, but if you choose to make this buttercream and it works for you, you do also have the option of adding flavor. For chocolate buttercream, melt 4 ounces of chopped dark chocolate, letting it cool for a few minutes. Add the melted chocolate to the finished buttercream. For coffee buttercream, dissolve 1 t of instant espresso in 2 t coffee liqueur. Or, you can add any extract or food coloring of your choosing. Store buttercream in an airtight container with an additional layer of plastic wrap. If you make the buttercream in advance, bring it to room temperature and re-whip it before frosting your cake.
Ganache
For his cake, Alton opted to make a ganache to use as a filling between cake layers. To make the ganache, heat 6 ounces of heavy cream with 3 T corn syrup in a small saucepan.


Add 12 ounces of chopped dark chocolate and stir until the chocolate is melted and smooth.

Chopped dark chocolate.
Remove the pan from the heat and add 1/2 t vanilla extract.

Ganache after chocolate was melted and smooth. Adding vanilla off the heat.
Let the ganache cool before using. Spread the ganache between cake layers, using a spatula to spread it almost to the cake edge.


Unlike the buttercream, this ganache recipe was super fast and easy, and it tasted great. I typically use a regular frosting between cake layers, rather than a filling, but I really liked the contrast of dark chocolate between layers. And, if you refrigerate your cake, the ganache becomes fudge-like and dense, adding a level of richness. Oh, and my suggestion if you happen to have leftover ganache is to refrigerate it until set. You can form balls with the firm ganache, rolling them in cocoa powder or powdered sugar to form truffles. Or, you can just eat it with a spoon like I did.
Writing Chocolate
A recipe for writing chocolate was last in this episode. For this one, combine 1 C chocolate chips and 2 t canola oil in a microwave-safe container, stirring to coat the chips with the oil.


Microwave the chocolate for one minute on high. Stir the chocolate until it is completely smooth. For decorating, transfer the chocolate to a piping bag or a plastic bottle.


This recipe also worked very well and was super easy. It is certainly an easy way to add some writing to a cake. It tastes much better than the artificial writing icing you can buy in the store too.


Cake Assembly
Though not a recipe per se, Alton did go over some of his cake assembly/decorating basics.
- He opts for a lazy susan for cake decorating, placing it on top of an upturned cake pan.
- To level his cakes, Alton uses two wooden yard pickets, placed on their sides in a V-shape. He places his cake inside the V and slices along the top of the pickets with a bow saw blade.
- He also uses the pickets for splitting cake layers, turning them onto their shorter sides. Again, using a bow saw blade, he slices across the top of the pickets, slicing the cake into two layers.
- When frosting a cake, place the layers in the following order from base to top: bottom of cake 1, top of cake 1, top of cake 2, and bottom of cake 2.
- When you have the filling between your layers, first frost the cake with a thin crumb coat of icing (about 1/4 of your icing) and refrigerate. This crumb coat will make it easier to apply a smooth layer of icing.
- When frosting a cake, apply more icing than you think you need to the top of the cake. Spread the icing, working out to the edges and down the sides. It is always better to remove excess icing than to add more.
