Posts Tagged ‘vegetable’

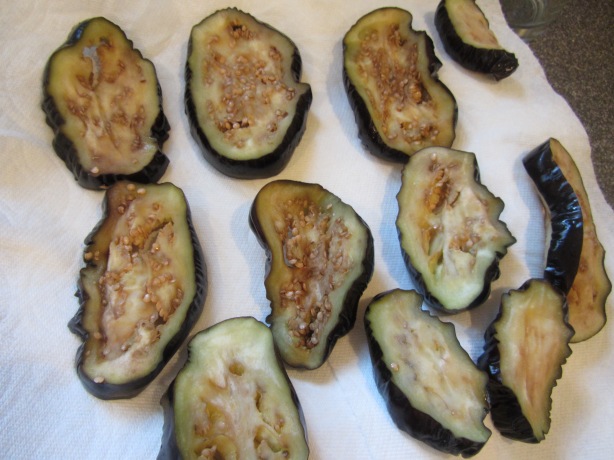
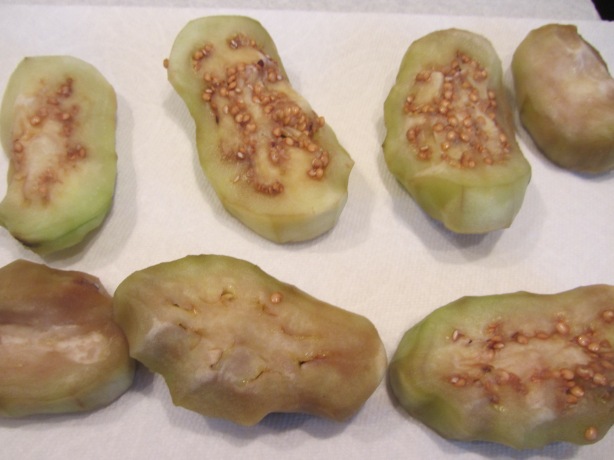
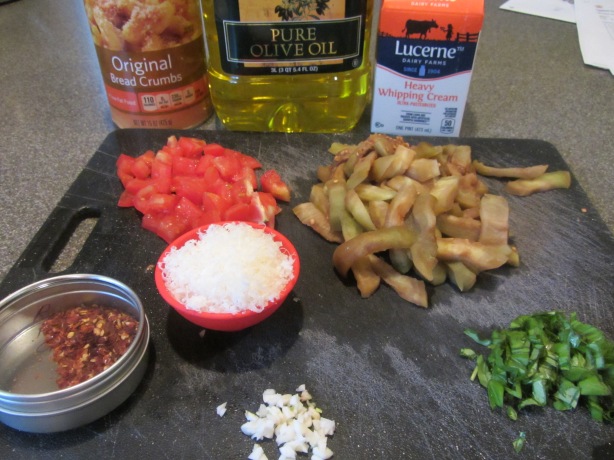
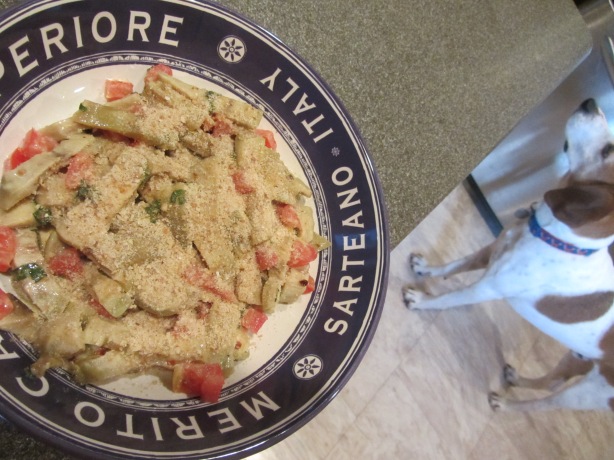
This January has given 2019 a little bit of a rough start for me. I had a short, nasty stomach bug for the first two days of the year, which was followed up with back pain for several days. After that, I traveled to be with my dad while he had cancer surgery. Two days after I returned home from my trip, I came down with a nasty flu-like bug that knocked me out for 10 days. Whew! Good riddance, January!

Turkey with Stuffing

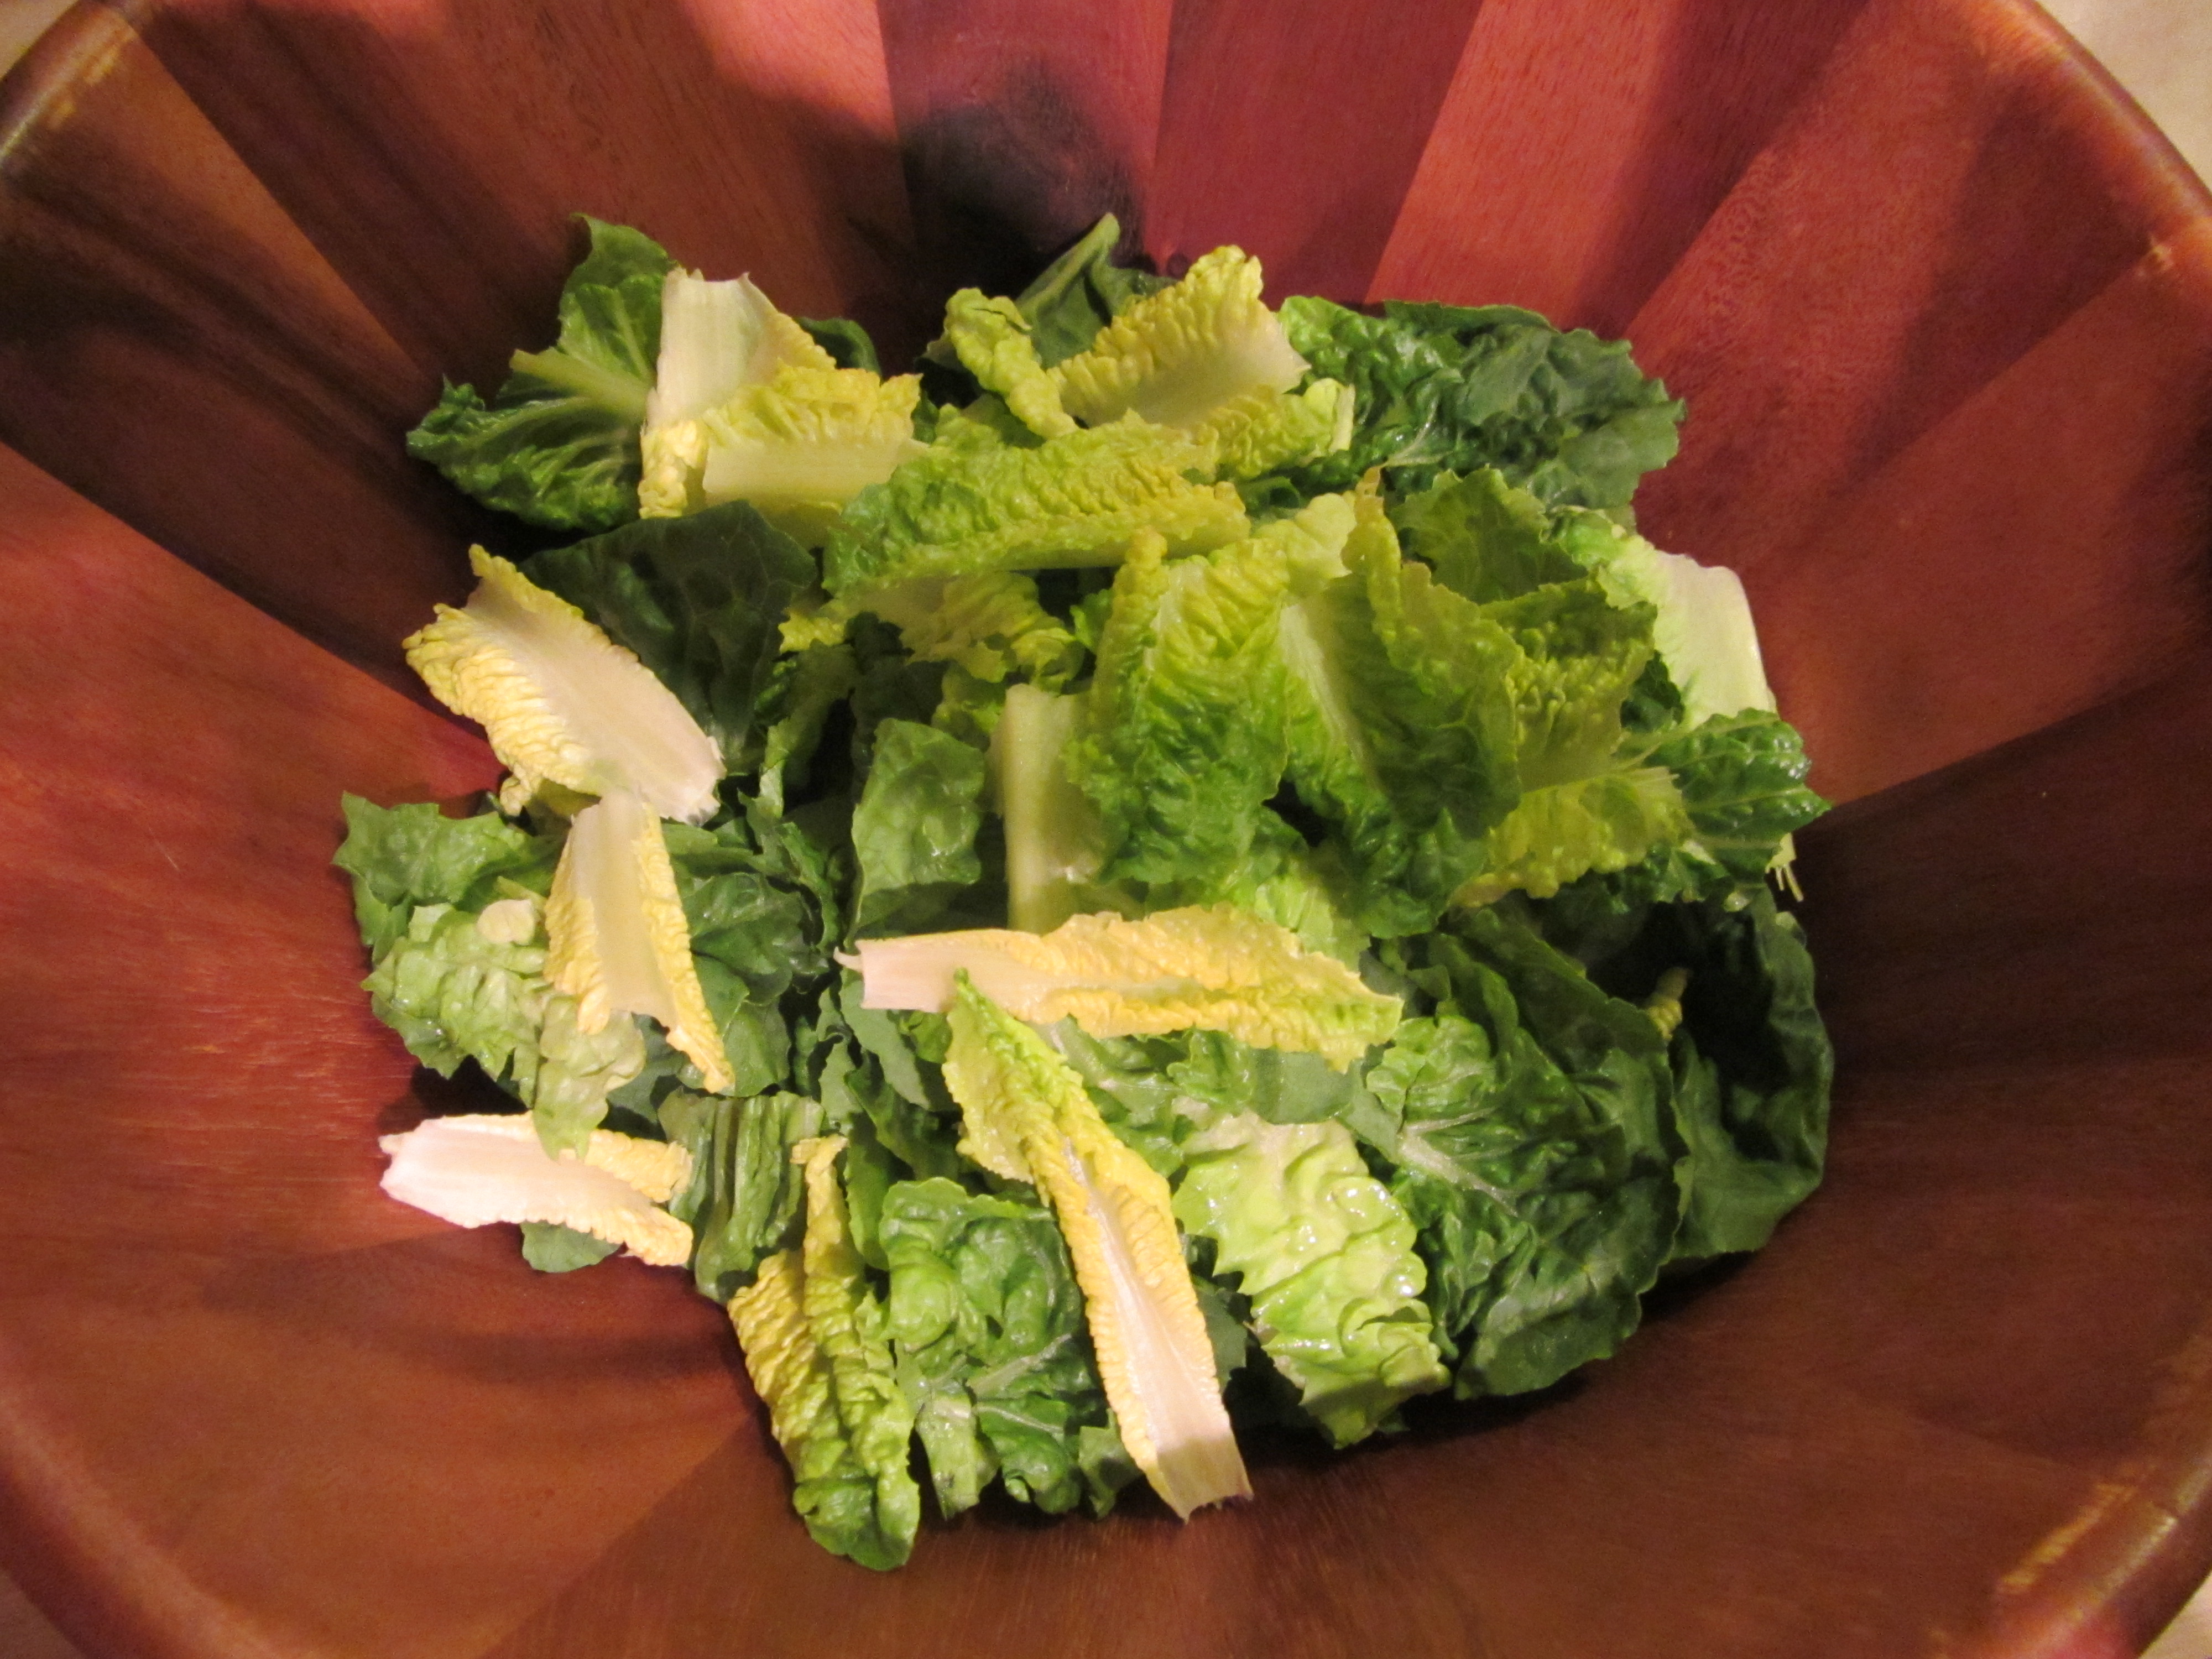
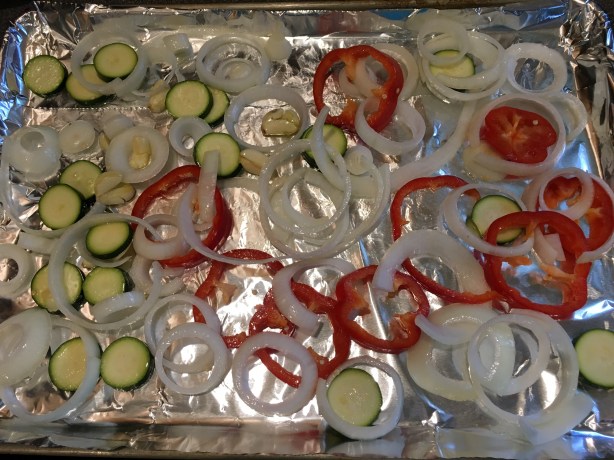
Although the holidays are long gone, this recipe certainly has a holiday feel to it. While Alton’s other turkey recipes have really featured the turkey itself, this one is all about the stuffing. In the episode, Alton actually goes into very little detail about prepping/cooking the turkey, so I opted to brine my turkey, using the brine recipe from the original Good Eats Thanksgiving special. The premise of this recipe is that Alton can make a well-balanced stuffing that will cook inside the turkey, and that the turkey and stuffing will reach their desired temperatures at nearly the same time. To make the stuffing, chop 1 C each of onion, celery, and green bell pepper.

img_0953

A cup each of celery, onion, and green bell pepper.

Toss the chopped vegetables with 1 T vegetable oil and 1 T Kosher salt. Spread the vegetables on a sheet pan and roast them for 25 minutes at 400.

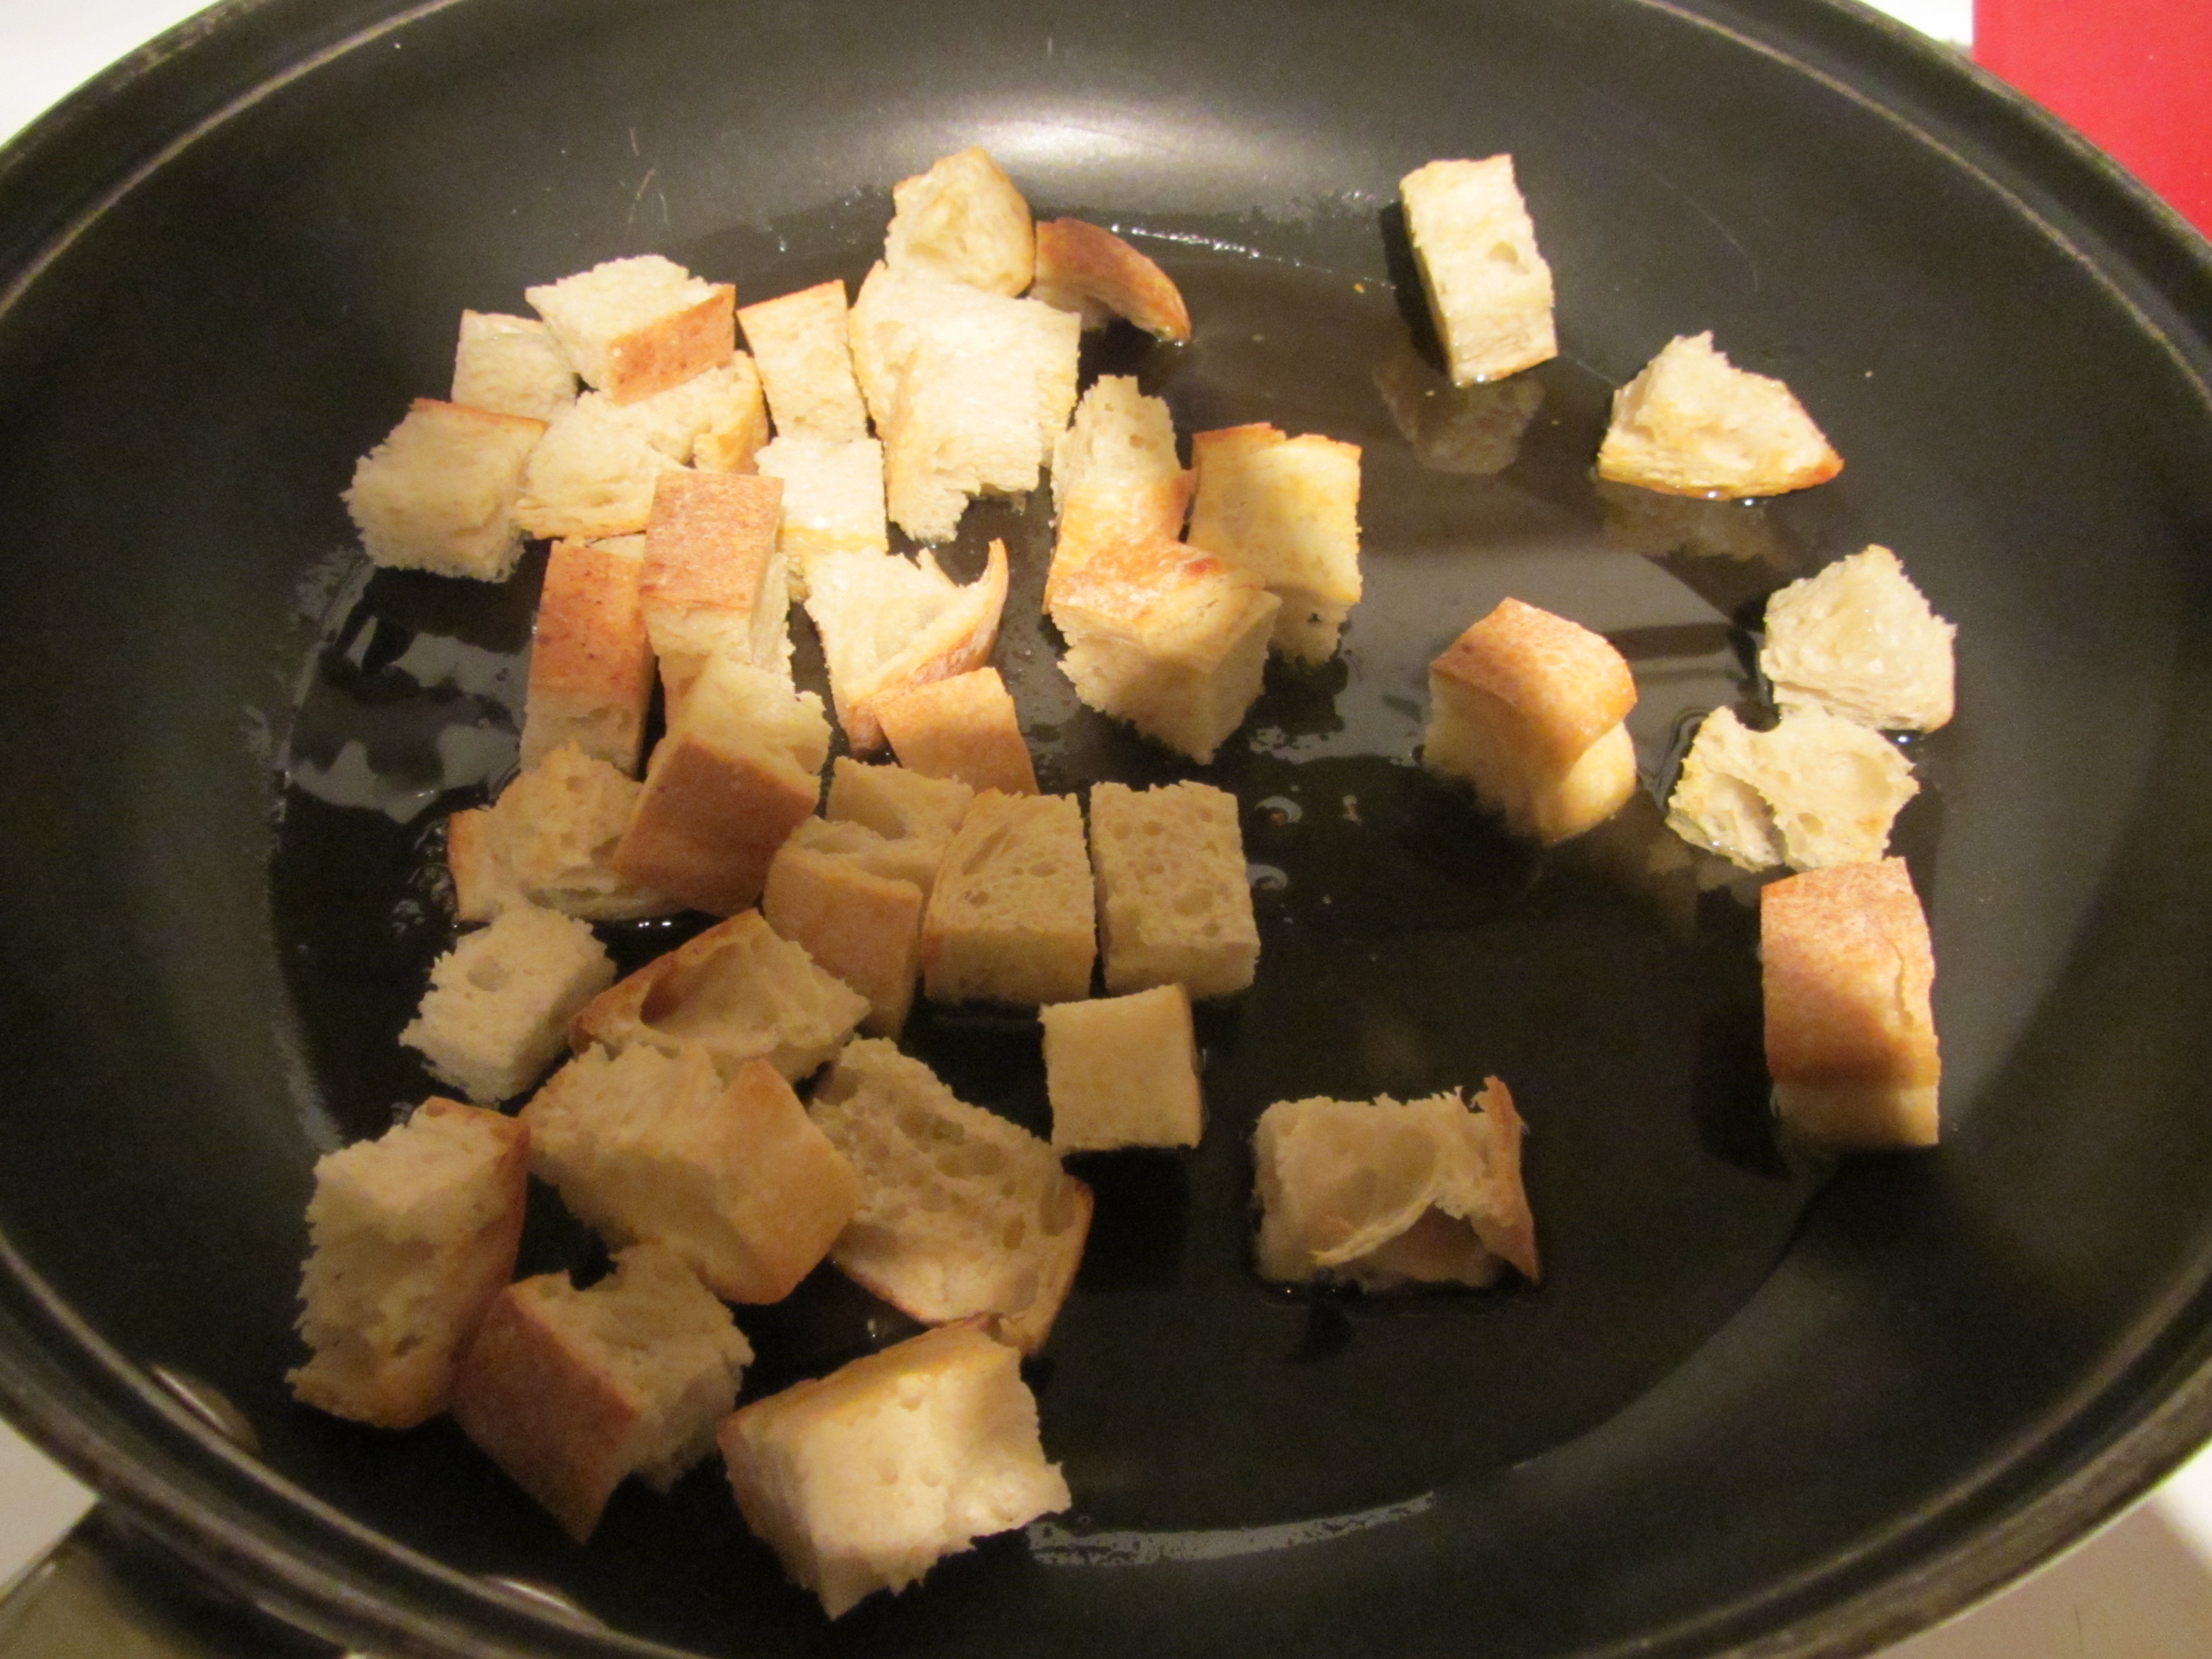
After 25 minutes, add 3 C cubed Challah bread (I made my own) to the vegetables, give everything a toss, and continue roasting for 10 more minutes.

img_0957

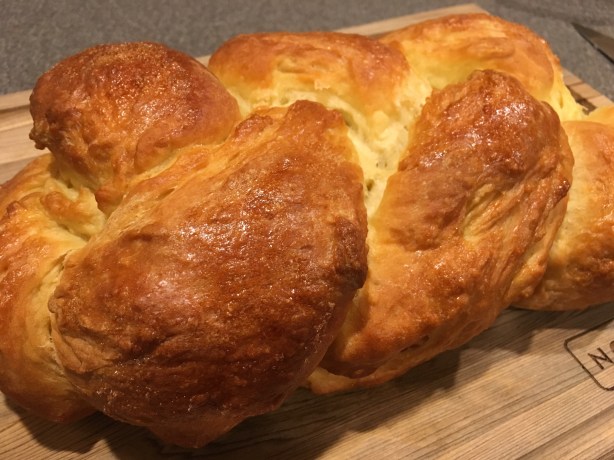
My Challah bread, ready to be cubed.

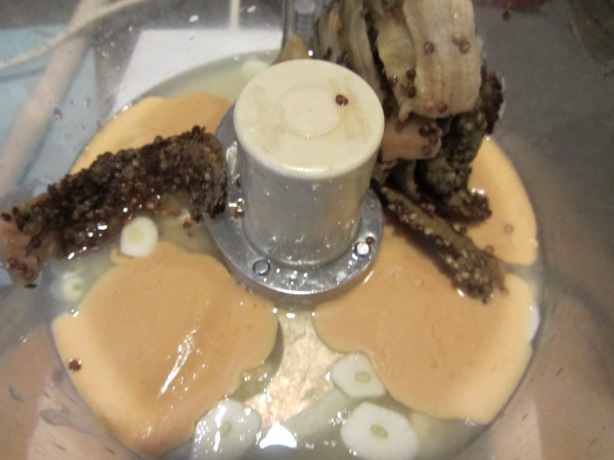
Next, place two ounces of dried mushrooms (porcini, morels, or shiitakes) in a bowl and pour a quart of boiling chicken stock over them. Let the mushrooms rehydrate for about 30 minutes.

img_0958

Shiitake mushrooms, soaking in boiling chicken broth.

When the mushrooms have finished their soak, drain them (reserving their liquid), chop them, and place them in a large bowl, along with 4 ounces dried cherries, 2 ounces chopped pecans, 2 beaten eggs, 2 t dry rubbed sage, 2 t dry parsley, the roasted vegetables and bread, and 1/2 t pepper.

img_0961

Dried cherries and chopped pecans.

img_0968

Chopped mushrooms added to cherries and pecans.

img_0970

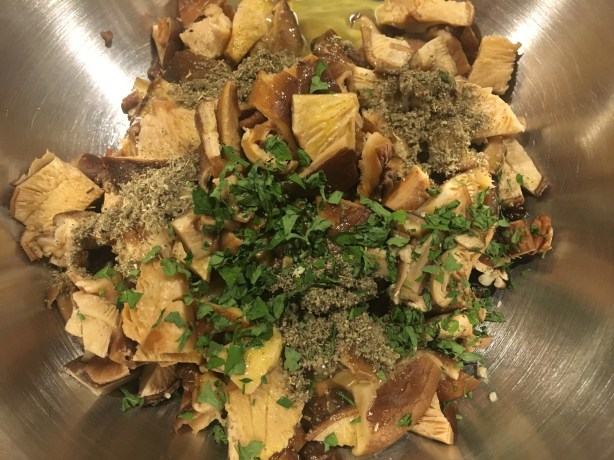
Chopped mushrooms added to cherries and pecans, along with eggs, rubbed sage, and dry parsley.

Add enough of the reserved mushroom liquid to moisten, but not saturate, the mixture; I used about a cup, though Alton was vague about this in the episode and it actually appeared as if he added all of the reserved liquid.

img_0972

Challah, vegetables, pepper, and mushroom liquid added to mixture.

Place the stuffing in a cotton produce bag, or use cheesecloth to make one – you can seal it with butcher’s twine. Place the bag of stuffing in a microwave-safe bowl and microwave it on high for six minutes. Also, preheat the oven to 400 degrees.

To put the stuffing in the turkey, prop the open end of the turkey up on the side of a bowl and use tongs to plunge the bag of stuffing into the bird. If you have a plastic cutting board, you can form it into a tube shape, insert the tube-shaped cutting board into the cavity, and push the bag through the tube.

img_0975

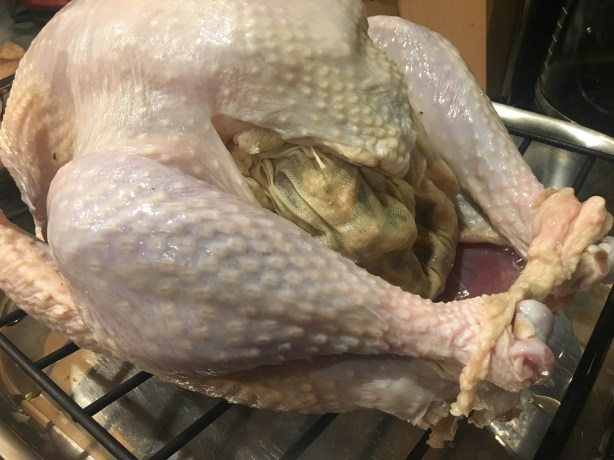
Microwaved stuffing placed inside turkey.

For this recipe, you will ideally want two thermometers – one inserted in the thigh and one inserted into the center of the stuffing; I only have one oven-safe thermometer, so I placed that in the thigh and checked the stuffing periodically with an instant read thermometer. Place the bird in a roasting pan and roast it for 45 minutes at 400 degrees. After 45 minutes, decrease the oven temperature to 350 and cook until both the stuffing and the thigh meat are about 170 degrees. When done cooking, remove the stuffing bag with tongs and place the stuffing in a serving bowl.

img_0977

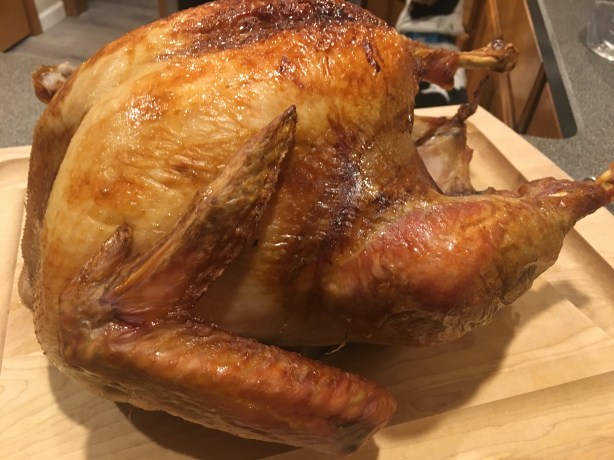
Turkey after cooking to thigh temperature of 170.
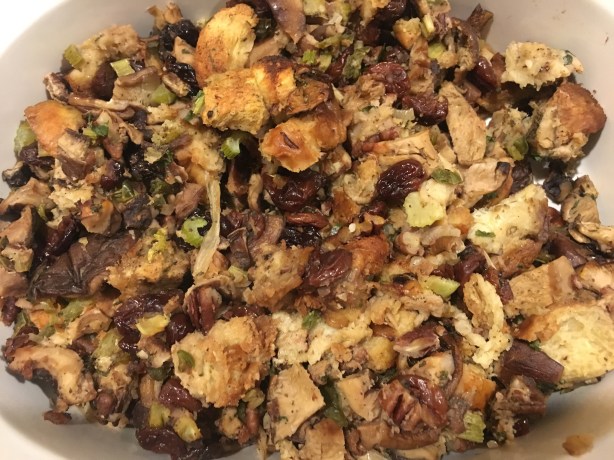
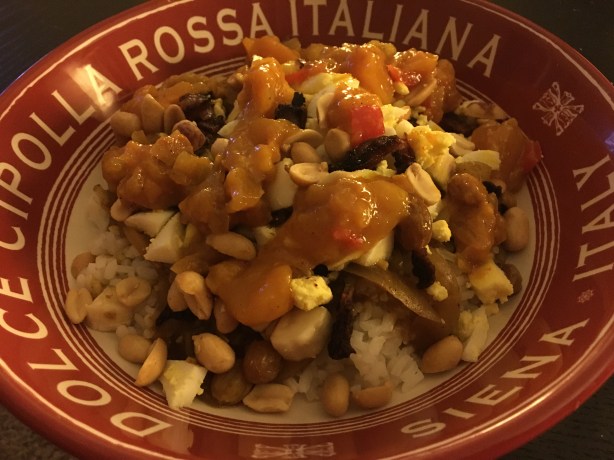
img_0983

Alton’s stuffing.

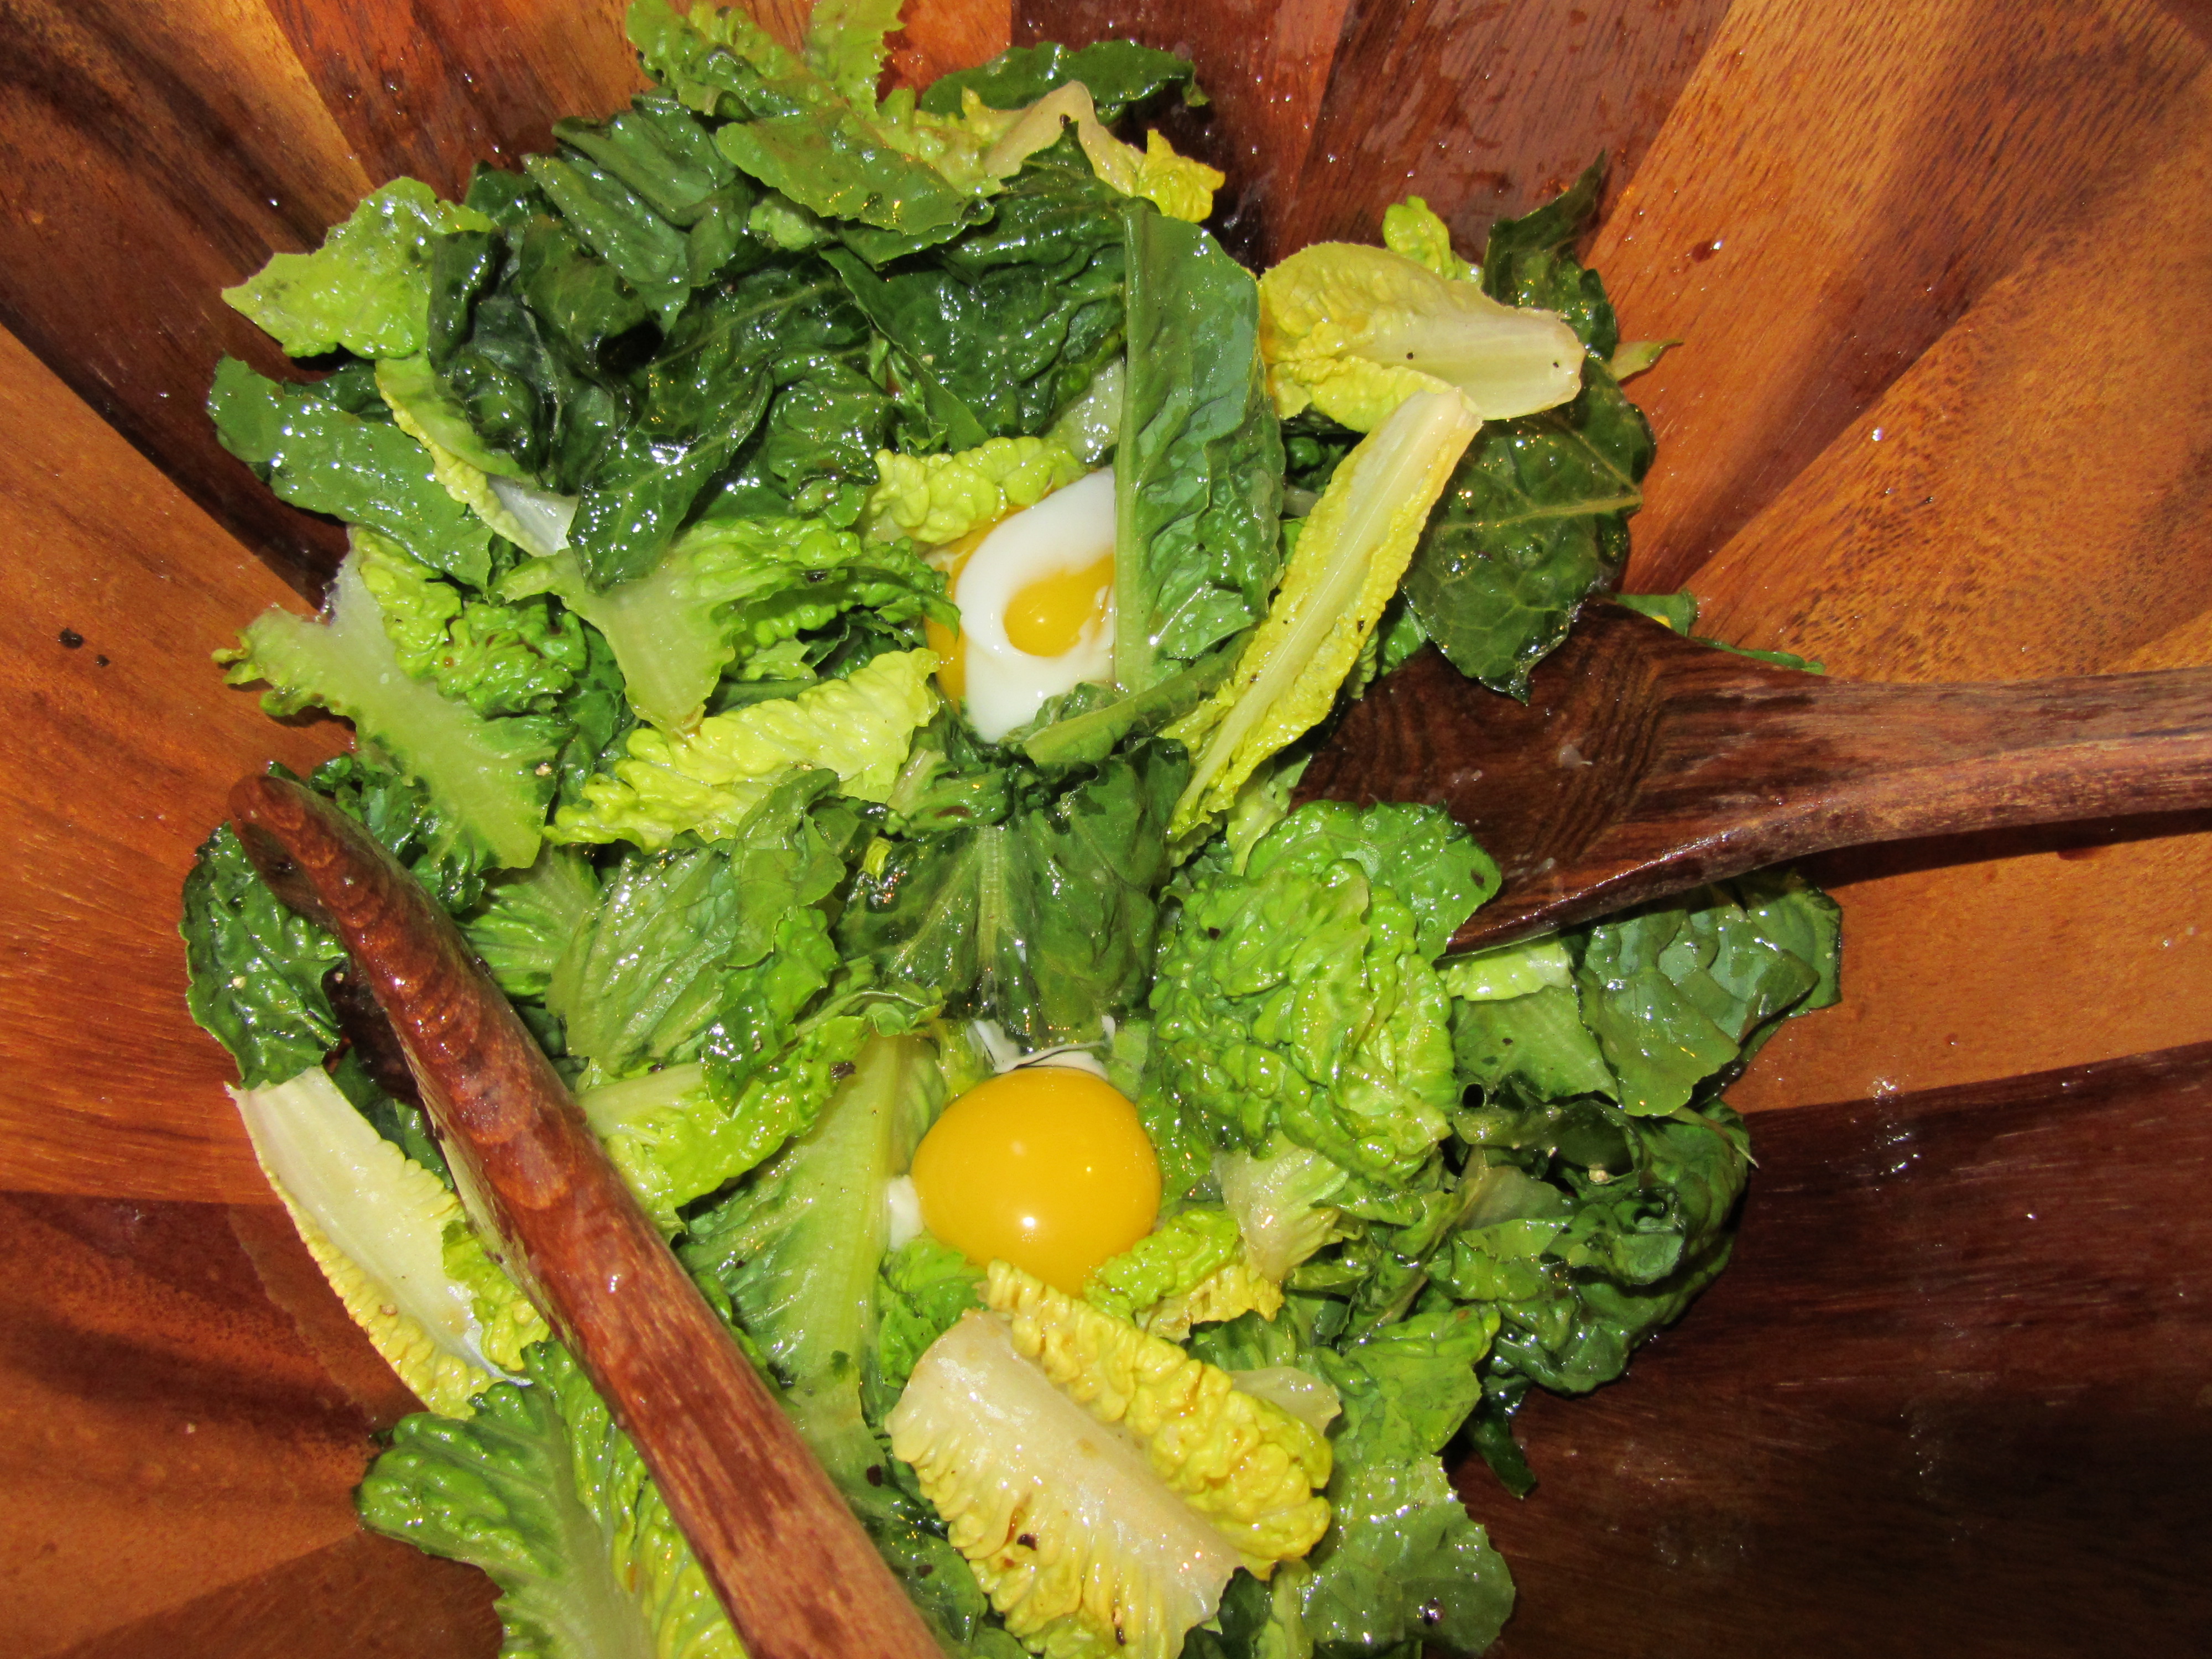
Tent the turkey with foil and let it rest for 15-20 minutes before carving. Okay, so there were some good things about this recipe and some bad things. This stuffing has a wide variety of both flavors and textures, with flavors ranging from sweet/tart to umami, and textures that range from slightly crunchy to moist and soft. I will say that the stuffing would have been too wet, and probably overpowered with mushroom flavor, if I had added all of the mushroom liquid as Alton appeared to do in the show. My biggest problem with this recipe was that it didn’t achieve the goal of having the stuffing and turkey finish cooking at the same time. For me, the stuffing was done cooking long before the turkey was, so I ended up pulling the stuffing out early while I had to continue cooking the bird for a good 20 minutes. In my mind, that makes this recipe a failure. Also, I think the bird could have done with a little less cooking. While I would consider making the stuffing again, I would not attempt to cook it in the bird again. Instead, I would opt for either the original Good Eats roast turkey or the butterflied, dry brined turkey.

Stuffed Squash

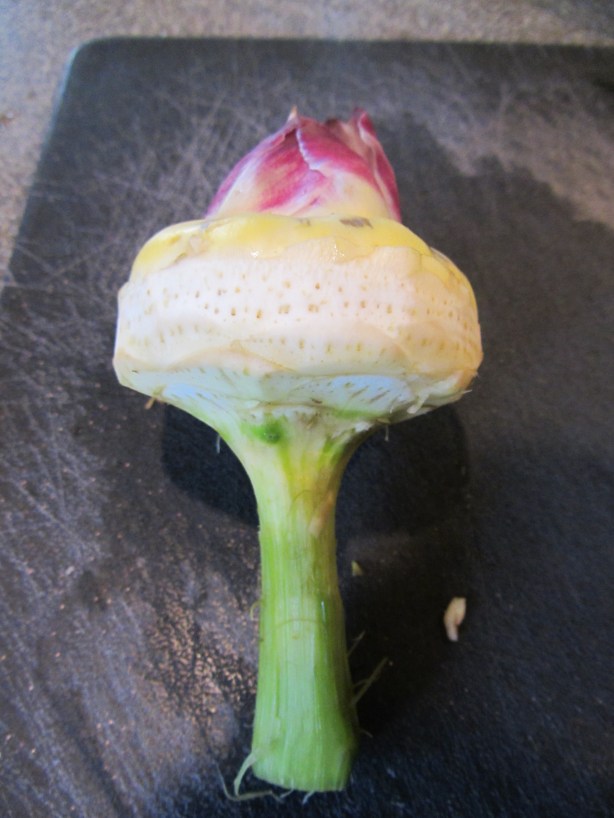
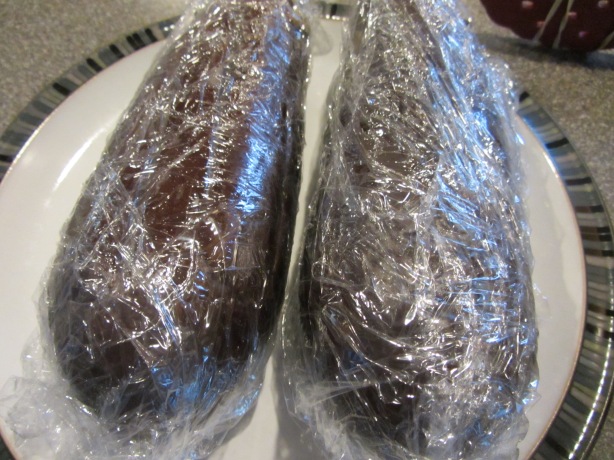
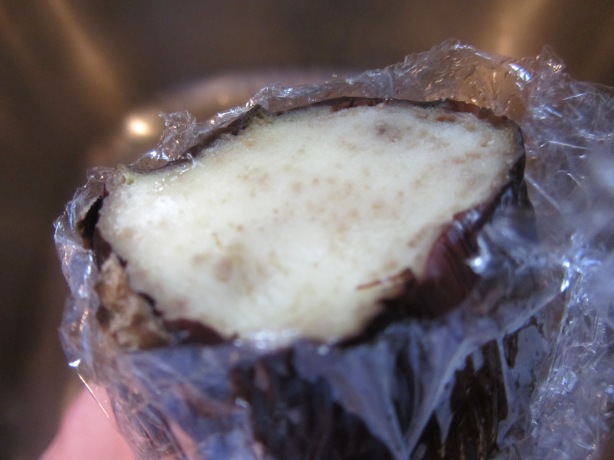
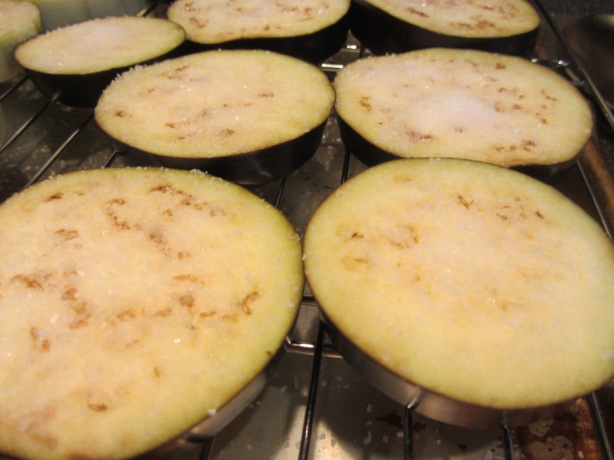
Since the tendency with stuffing is to stuff vegetables into meat, Alton decided to formulate a recipe where a meat filling is stuffed into squash. Acorn squash are the squash of choice for this recipe, as they are perfect for individual servings. To make four servings (I only made two), cut the lids off of four acorn squash and scoop out their seeds; be very careful when doing this, as I discovered it is very easy to poke a hole in the bottom of the squash! Be sure to save the lids for later. If your squash will not sit flat, you can also cut off part of the bottoms to make them level.

img_0914

My two acorn squash, ready to be prepped.

img_0915

Lids off and scooping out seeds.

Set the prepared squash on a parchment-lined sheet pan. To make the filling, cook 1/2 pound ground pork in a large skillet over medium heat until the pork is no longer pink. Transfer the pork to a small bowl and set it aside.

Return the pan to the burner, but decrease the heat slightly. Add 1 T olive oil to the pan, along with 1/4 C chopped carrots, 1/4 C chopped celery, 1/4 C chopped onion, and a pinch of Kosher salt. Cook the vegetables until they have softened a bit.

img_0924

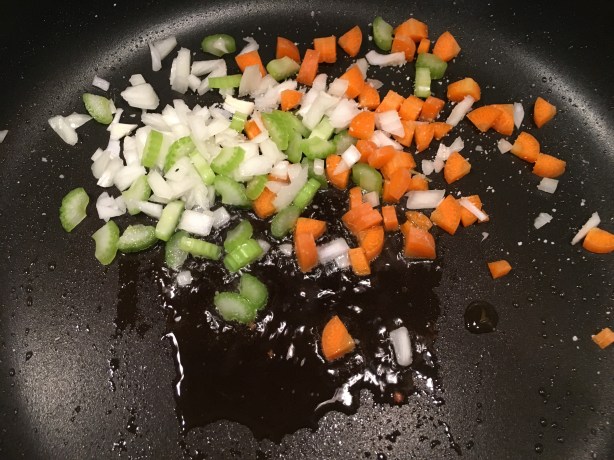
Celery, onion, and carrot added to hot oil, along with a pinch of Kosher salt.

Deglaze the pan by adding 1/2 C white wine and scraping up any browned bits.

img_0927

Wine added to deglaze the pan.

Follow the wine with 10 ounces of thawed/drained/chopped frozen spinach, 1 1/2 C cooked rice, 1 1/2 t dried oregano, the cooked pork, and 1/2 C toasted pine nuts.

img_0932

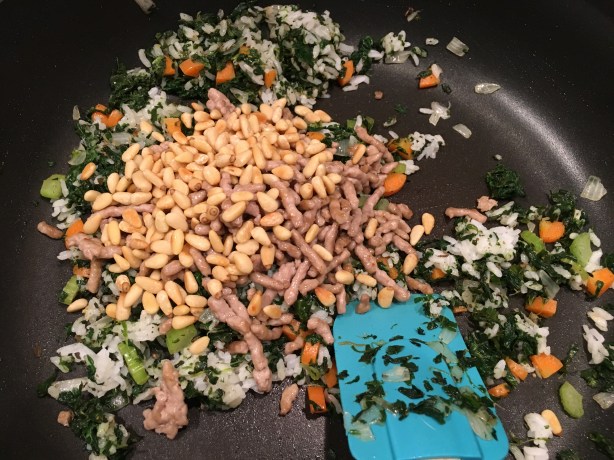
Spinach, rice, oregano, pork, and pine nuts added to the skillet.

Stir the filling until it is heated through and add a few grinds of black pepper. Remove the filling from the heat and place 1/2 T butter in the bottom of each prepared squash.

Spoon the stuffing into the squash, avoiding tightly packing the stuffing.

img_0936

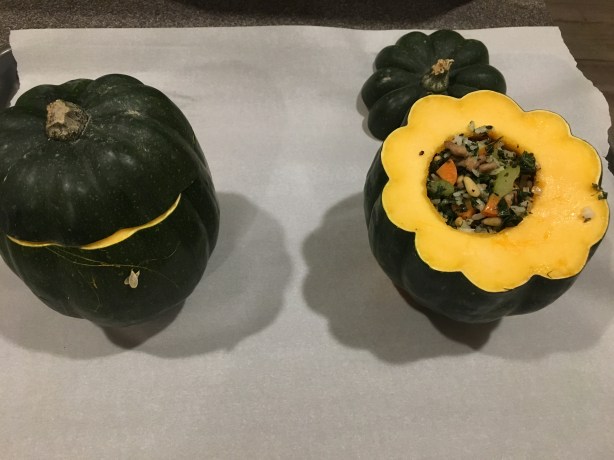
Filling spooned into prepped squash and lids placed on top.

Place the lids on the squash and cook them for one hour at 400 degrees, or until the squash are just fork tender.

img_0941

Alton’s stuffed squash.

We ate these squash as our dinner entrée and were pretty happy with them. Ted really does not care for squash, in general, but he agreed that the sweetness of the squash paired well with the very savory pork filling. This is a an easy meal that really gives you both your protein and veggies in one, and the individual squash “serving dishes” are sort of fun. The squash also did not become mushy, as some squash are wont to do. I could see making the filling ahead of time for these, and on a busy weeknight you would only have to fill the squash and put them in the oven. Super easy!


Garden Vegetable Soup

As with the last episode of Good Eats, Alton’s goal in this episode was to develop kid-friendly recipes; this time, though, he tackled soup. The first soup he made was a vegetable soup. This soup starts by heating 4 T olive oil in a soup pot over medium-low heat. Add to the oil 2 C chopped leeks (be sure to wash them well), 2 T minced garlic, and a pinch of Kosher salt.

IMG_0139

Leeks, garlic, and salt added to hot oil.

Cook the leeks and garlic until they have softened.

IMG_0141

Leeks and garlic after sweating.

Next, add 2 C peeled/chopped carrots, 2 C peeled/diced potatoes, and 2 C green beans, broken into bite-sized pieces.

Increase the heat under the vegetables, cooking them for 4-5 minutes. Pour in 2 quarts of chicken or vegetable broth; Alton says he is fine with using purchased broth here. Of course, homemade would always be better, though!

Once the broth is in the pot, increase the heat to high, bringing the broth to a simmer. When simmering, add 4 C peeled/seeded/chopped tomatoes, 2 ears of corn kernels, and a few grinds of black pepper.

IMG_0147

Corn, tomatoes, and pepper added to the soup.

Turn the heat to low, place a lid on the pot, and simmer the soup for 25-30 minutes, or until the vegetables are fork tender.

To finish the soup, stir in 1/4 C parsley and 1-2 t fresh lemon juice.

IMG_0163

Lemon juice and parsley stirred in.

IMG_0169

A bowl of Alton’s vegetable soup.

This is a pretty basic vegetable soup recipe, and I have to admit that I assumed it would be quite bland. I also was unsure of whether Ted would like it, as he is not a huge tomato fan. Ted and I, however, were both pleasantly surprised at the amount of flavor in this soup! The individual vegetables maintained their textures and vibrant colors, and the soup had a bright, fresh vegetable flavor. The lemon gave the soup a perfect pop of much-needed acidity. The only thing you may need to adjust is the amount of salt, depending on how much you sprinkle in when sweating the leeks and garlic. This is a super easy, healthy recipe that you easily could make with kids in the kitchen, and it is a great way to eat a bunch of fresh vegetables.

Grape Gazpacho

Now that the weather is cooling off, we really aren’t in gazpacho season anymore. The ingredients needed for Alton’s grape gazpacho, though, are available year-round. Gazpacho is always better if allowed to sit for a few hours before eating, so plan to make this a few hours ahead.

IMG_0196

Tomatillos, cucumber, and Granny Smith apple.

The soup begins with seeding and chopping one cucumber.

IMG_0198

Seeded cucumber.

Place half of the cucumber in a food processor and the other half in a large bowl. Next, peel, seed, and chop a Granny Smith apple, placing half of it in the food processor and the other half in the large bowl.

IMG_0199

Peeled apple.

Chop 1 C husked tomatillos, and do the same as with the cucumber and apple, placing half of the tomatillos in the food processor and half in the large bowl.

Add the following ingredients to the food processor:  1 pound green grapes, 1 C toasted walnuts, 1 C plain yogurt, 1 C white grape juice, 1 t rice wine vinegar, and 6 mint leaves.

Pulse the ingredients in the food processor nine or ten times, until blended but still maintaining some texture.

IMG_0209

Mixture after pulsing 9-10 times.

Pour the mixture from the food processor into the large bowl with the cucumber, apple, and tomatillos, stirring to combine.

IMG_0212

Blended mixture added to bowl of fruit/vegetables.

Cover the soup with plastic wrap and refrigerate it for two-three hours before eating.

IMG_0242

Green grape gazpacho.

As with most cold soups, this one comes together super quickly, and it is super convenient since you can make it ahead of time. This soup was just okay for me, though it did have some interesting flavors. I found that it really called for the addition of some Kosher salt. The soup was certainly light and refreshing, and the walnuts gave it some body. I would definitely prefer this soup in warmer weather, as it has a slightly sweet and tart flavor from the grapes and tomatillos. This is another healthy and easy recipe that kids could certainly aid in making, but this wasn’t a favorite for me.

This episode of Good Eats sees Alton in the kitchen with his “nephew,” striving to whip up some kid-friendly sandwiches. Alton has four rules for making sandwiches:

  1. Soft fillings and spreads pair best with soft breads.
  2. A barrier (mayo, butter, oil, etc.) should be used to keep bread from getting water-logged from wet ingredients.
  3. The order of sandwich ingredients matters – slippery ingredients are not to be placed next to each other.
  4. Quality of bread is crucial, and you should only utilize bread that you would happily consume plain. Pre-sliced bread tends to be loaded with preservatives, so should be avoided.

Pan Bagnat

The first sandwich Alton makes is a pan bagnat, which translates to “wet bread.” What is a pan bagnat? Basically, it is a French version of a sub sandwich, consisting of several layers of ingredients. This sandwich is designed to be made a couple hours before consumption, as it is best to let the flavors mingle. This sandwich starts with a vinaigrette made by placing 1/2 t Dijon mustard in a bowl, and whisking in 1 T red wine vinegar, 1/2 t Kosher salt, and several grinds of pepper. While continuing to whisk, drizzle in 3 T olive oil to form an emulsion. Set the dressing aside while you build the sandwich.

This sandwich serves four people, and I only needed enough for two, so I cut the recipe in half. Bread-wise, for four servings, you want to get a 16-inch baguette. Slice the loaf in half horizontally and use your fingers to dig out trenches in the center of each half of bread, as if you are creating bread canoes. You can discard the removed bread, or use it to make bread crumbs.

Fill the trench in the bottom half of bread with 12 ounces of drained tuna fish (you can use either oil or water-packed tuna).

IMG_0225

Bottom bread trench filled with tuna fish.

Next, add a layer of 1/3-inch thick green bell pepper slices, followed by a layer of 1/3-inch thick red onion slices.

Next, add two hard boiled eggs, thinly sliced.

IMG_0228

Tuna topped with green bell pepper, red onions, and hard boiled eggs.

On top of the eggs, sprinkle on 1 C of pitted/chopped Kalamata olives.

IMG_0229

Tuna topped with green bell pepper, red onions, hard boiled egg, and Kalamata olives.

Top the olives with 4-5 slices of very ripe tomato and drizzle on the red wine vinaigrette, letting the dressing drizzle down between the ingredient layers.

Place the top bread on top of the sandwich. Wrap the sandwich very tightly in plastic wrap; you will need to overlap sheets of plastic to have a sheet wide enough for the length of the sandwich. Once wrapped, let the sandwich sit at room temperature for two hours before slicing and eating.

I made this sandwich last Friday, as we were taking a short road trip out of town. The sandwich sat in the car for the duration of our drive, and was then ready to eat for dinner when we arrived at our vacation rental.

IMG_0240

Alton’s pan bagnat. Excuse the poor lighting in this photo, as our vacation rental had horrible lighting.

Personally, I really liked this sandwich, but Ted doesn’t like canned tuna, so he was not a huge fan. He did, however, say that he would really like this sandwich if it were made with a different protein. Basically, if you’ve ever had a niçoise salad, this sandwich is that salad in sandwich form. Alton did not follow his second sandwich rule of using a moisture barrier with this recipe, so I wondered if the sandwich would end up soggy from the tuna, tomato, olives, and dressing, but it really was not soggy at all. What I liked most about this sandwich were its contrasting flavors, colors, and textures. The veggies gave the sandwich a crunch, the tomato and dressing kept the sandwich from being dry, and the eggs gave a slight creamy texture. Flavor-wise, the vinaigrette and olives were tangy, bright and salty, while the red onions gave a bit of spice/heat. The tomato added fruitiness and the tuna contributed a slight fishy flavor. It was also convenient to be able to make this sandwich ahead. I will definitely make a version of this sandwich again, though I likely will substitute something else (chicken salad?) for the tuna unless I am the only one eating it.

Cuban Sandwich

The second sandwich recipe in this episode is for Alton’s take on the classic Cuban sandwich. To make Cuban sandwiches, slice hoagie rolls in half horizontally and liberally spread yellow mustard on both halves of the rolls.

Top the mustard with a thin layer of baked ham, followed by a thin layer of roast pork (I made a small pork roast for these sandwiches).

Top the pork with two slices of provolone or Swiss cheese (I used Swiss) and two long, thin slices of Kosher dill pickle.

You can wrap the sandwiches in plastic and save them for later, or you can cook them right away. To cook the sandwiches, brush/spread them with butter and press them in a panini press for about 10 minutes.

If you do not have a panini press, you can still press the sandwiches by wrapping three fireplace bricks in foil. Place the bricks on a sheet pan. Place three more bricks (they do not need to be wrapped in foil) on a second sheet pan. Place the two sheet pans of bricks in a 500-degree oven for an hour. Remove the sheet pans from the oven and brush the foil-covered bricks with butter. Place the sandwiches on the foil-covered bricks and brush the sandwich tops with butter. Place the sheet pan of unwrapped bricks on top of the sandwiches and let the sandwiches press between the bricks for about 10 minutes.

IMG_0176

Alton’s Cuban sandwich.

I really enjoy Cuban sandwiches because I love their zesty flavor, and I thought this was a great, fast version to make at home. If you don’t want to go to the trouble of roasting pork for this recipe, you could always substitute sliced turkey, or at least that is what Alton says. I’m sure some Cuban sandwich classicists would pooh-pooh Alton’s version with provolone and turkey, but if it tastes good (and it does), who cares?

Roasted Vegetable Spread

The last recipe in this episode is for a vegetarian spread that you could use on any sandwich, or just on crackers or bread. Preheat your oven to 400. While the oven heats, toss the following vegetables with 1-2 T olive oil:  1 sliced zucchini, 1 sliced (into rings) red bell pepper, 1 sliced (into rings) onion, and 4-5 crushed cloves of garlic.

Spread the veggies on a foil-lined sheet pan and sprinkle them with Kosher salt. Roast the vegetables for 45 minutes, stirring them occasionally.

IMG_0319

Zucchini, red bell pepper, onion, and garlic tossed with olive oil, spread on a sheet pan, and sprinkled with Kosher salt.

Remove the vegetables from the oven and let them cool to room temperature.

IMG_0323

Vegetables after roasting for 45 minutes.

Place the veggies in a food processor, along with eight ounces of cream cheese, and pulse to combine.

IMG_0325

Roasted vegetables in the food processor with cream cheese.

IMG_0329

Alton’s vegetable spread, served with bread slices.

Alton recommends serving his spread on soft bread (see sandwich rule number 1 above). This spread has a sweet veggie flavor from the caramelized vegetables. While I would not be able to identify zucchini in this spread, the flavors of red bell pepper, onion, and garlic are easily identifiable. I did feel that the spread could use a bit more Kosher salt, though. We enjoyed this as an appetizer on sliced bread, though I can attest it is also good on crackers. This is a recipe that would be great to keep in mind for when you are cleaning out your produce drawer, as you could roast a variety of leftover vegetables and have a different spread each time. I plan to make this again the next time we have leftover veggies.

From herbs in the last episode, the Good Eats trail takes us to spices in episode 98. So, what is the difference between a spice and an herb? An herb is a leaf, while a spice is a different part of a plant. If you want to keep your spices fresh longer, it is ideal to purchase spices in their whole forms, grinding them in a spice-only coffee grinder just prior to use. I remember that my dad began grinding his spices after watching this episode when it aired in 2004. Read on for Alton’s spice-friendly recipes.

Dried Pear and Fig Compote

A fruit compote is the first thing Alton made in this episode.

IMG_6924

Ingredients for fruit compote: white wine, dried figs, dried pears, vanilla bean, lemon zest, star anise, cinnamon stick, cloves, Kosher salt, lemon juice, and honey.

To make his compote, place 4 ounces dried figs, 4 ounces dried pears, 2 T honey (Alton used orange blossom), 1/2 a vanilla bean, 1 C apple cider, 1 C white wine, a 1-inch strip of lemon zest, 1 T lemon juice, 6 whole cloves, 1 cinnamon stick, 1 star anise pod, and 1/2 t Kosher salt in a medium saucepan.

IMG_6926

All of the compote ingredients placed in a medium saucepan over medium heat.

Bring the mixture to a simmer over medium heat, decrease the heat to low, and continue to simmer the compote for 1 to 1 1/2 hours. I found that it took the full 1 1/2 hours of simmering for my compote to thicken as Alton’s had.

IMG_6928

The compote, brought to a simmer and left for 1 1/2 hours.

After simmering, remove the cloves, cinnamon, star anise, and lemon zest; good luck finding the cloves – we didn’t find some of them until we ate the compote!

IMG_6929

The compote after simmering.

Serve the compote warm over ice cream or you can refrigerate it for later use. We ate the compote over vanilla ice cream and it was very flavorful and spicy.IMG_6930

IMG_6934

Compote over ice cream.

All of the spices seemed to be well-balanced, though clove was perhaps the most dominant spice. The compote was pretty sticky in texture and had little pops of crunch from the dried fig seeds, which were quite prevalent. Due to the rich color of the compote, and its spices, the compote seems to me like a good dish to make in the fall. This would also be great over a pork tenderloin. This is a recipe that truly shows how spices can contribute to a sweet dish.

Vegetable Curry

For a weeknight vegetarian dinner, consider giving Alton’s vegetable curry a try.

IMG_6946

Spices for Alton’s vegetable curry: coriander, onion powder, turmeric, cinnamon, cumin seed, mustard seed, and fennel seed.

IMG_6947

Spices, divided for their addition in the recipe. Yellow bowl has cumin seed, fennel seed, and mustard seed. Red bowl has coriander, onion powder, cinnamon, and turmeric. Green bowl has Kosher salt, sugar, and pepper.

The recipe begins with poking holes in a frozen bag of mixed vegetables. Microwave the veggies on high for 2-3 minutes, or until thawed.

Next, heat a large skillet over medium-high heat, adding 2 T vegetable oil to coat the pan. To the oil, add 1 t cumin seed, 1/2 t mustard seed, and 1/2 t fennel seed. If you have a splatter guard, Alton recommends that you use it now.

IMG_6954

Cumin seed, mustard seed, and fennel seed added to hot oil in skillet.

Meanwhile, whisk together in a bowl 2/3 C plain yogurt and 1 t cornstarch, setting the bowl aside.

When the mustard seeds begin to pop in your skillet, add 1/2 t freshly ground coriander, 1/2 t onion powder, 1/8 t ground cinnamon, and 1 t ground turmeric.

IMG_6957

Coriander, onion powder, cinnamon, and turmeric added to skillet once mustard seeds began to pop.

It is also time now to add two crushed cloves of garlic and three dried red chilies with their stems and seeds removed.

Cook this mixture until the garlic begins to turn golden, but watch it very carefully as the spices could easily burn. When the garlic begins to brown, add the thawed bag of vegetables to the pan, along with 1/2 t Kosher salt, 1/4 t sugar, and black pepper to taste.

IMG_6959

Thawed frozen veggies, stirred in, along with Kosher salt, sugar, and pepper.

Stir the vegetables until they are heated through and coated with the spice mixture. Finally, quickly stir the vegetables into the bowl of yogurt.

IMG_6961

Spiced vegetables added to yogurt.

In the episode, Alton appeared to serve his vegetable curry as a side dish, but I opted to serve his curry over rice for a main course.

IMG_6966

Vegetable curry served over rice.

We thought this curry was pretty impressive, though the chilies really didn’t make it very hot. I would prefer to have more heat in my curry, but that is just personal preference. Otherwise, this curry had a nice combination of spices and came together in a matter of minutes. To get some protein, you could always add some tofu or meat. I would not say this recipe wowed me, but it is good for what it is – an easy weeknight vegetable dinner. And, it does have lots of spice flavor.

Broiled Salmon with AB’s Spice Pomade

Alton’s third spice recipe features salmon. It begins by placing an oven rack in the top third of the oven and preheating the broiler. Brush a sheet pan with canola oil, placing a skinless three-pound side of salmon on the pan; I opted for a smaller piece, or really two pieces, of salmon since there were only two of us eating.

IMG_6912

My salmon.

Sprinkle the fish all over with 1 to 1 1/2 t Kosher salt and with 1 t black pepper.

IMG_6913

My salmon, sprinkled with Kosher salt and pepper.

In a blender combine 2 t onion powder, 1 t garlic powder, 1/2 t cayenne pepper, 1 t whole cumin seed, 1 T whole fennel seed, 1 T whole coriander seed, and 1 star anise pod.

Blend all of the spices and pour in 1/3 C canola oil while the blender is running.

Brush this spice “pomade” all over the fish and let the fish sit at room temperature for 30 minutes.

IMG_6915

Salmon, brushed with pomade and left to sit for 30 minutes.

After resting, broil the fish for 15 minutes and check it for doneness. To check fish for doneness, look for three things:  1- the fish should be firm and bounce back when touched, 2 – the fish should flake easily when scraped with a fork, and 3 – the fish should be at 131 degrees in its thickest part.

IMG_6921
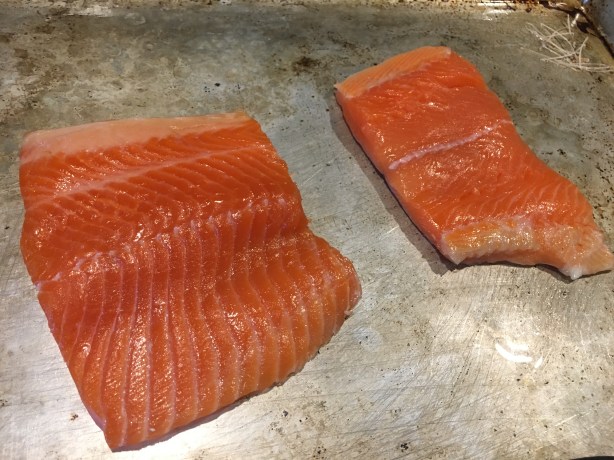
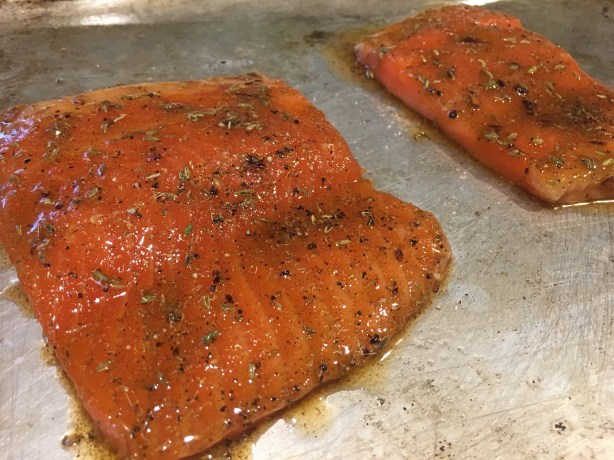
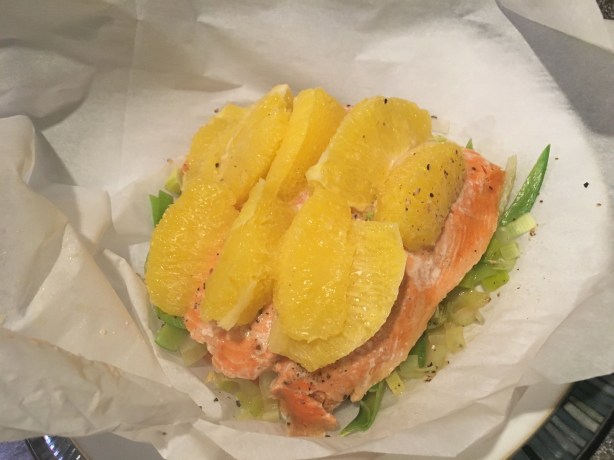
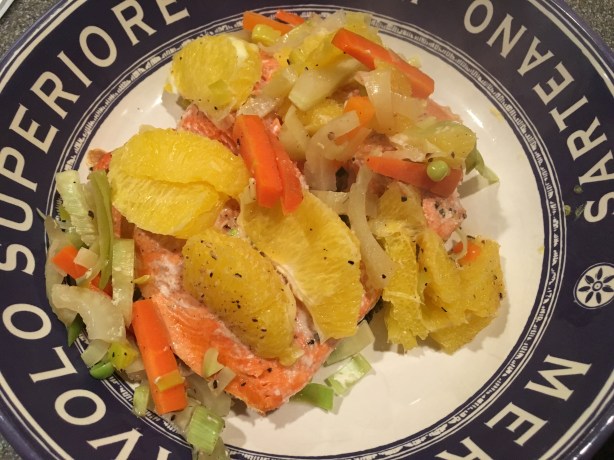
Keep in mind that Alton’s cooking time is for three pounds of fish, so you will need to modify cooking time for a smaller piece of fish. My salmon was honestly overdone on the edges. To me, a good salmon recipe is one that does not overpower the fish, yet enhances it. I think this recipe does that. The fish is flavorful and moist, but has the added flavor pop from the combination of spices.

Curry Powder Blend

The last recipe in this episode is for Alton’s curry powder. I have a lidded tin in my basement that contains nothing but curry powders. For as long as I can remember, my parents used this tin to house their curry powders, and I inherited it a couple years ago. We have sweet curry powder, Thai curry powder, hot curry powder, and maharaja curry powder. Never, though, had I made my own curry powder… until now.

For Alton’s curry powder, in a lidded container combine 2 T cumin seed, 2 T cardamom seed (I had to use ground), 2 T coriander seed, 1/4 C ground turmeric, 1 T dry mustard, and 1 t cayenne pepper.

Shake the mixture to combine. Since Alton’s curry powder contains lots of whole spices, you can grind the curry powder just prior to use.

IMG_6999

Alton’s curry powder.

I never knew my paternal grandmother, but my dad began serving me her curry recipe when I was very young, and it has always been one of my favorite things. It is fun to alter the curry by mixing different curry powders each time. To really test Alton’s curry powder, I used it exclusively in Grandma’s curry and it passed the test very well.

IMG_0392

A bowl of my grandma’s curry made with Alton’s curry powder.

Alton’s curry powder is a mixture of sweetness, nuttiness, citrus, bitterness, and moderate heat. I would call this a very good all-around curry powder, and it has been added to the tin for future batches of curry goodness.

Red Snapper en Papillote

When watching all of these Good Eats episodes, certain recipes really jump out at me. In this episode, the recipe for snapper en papillote was the one that made me super enthusiastic. I really loved the red snapper in a salt dome that I made way back in episode 10, so another snapper recipe made me excited. Unfortunately, the seafood store where I previously found whole red snapper has closed, so I had to turn to the grocery store; the fish monger was unable to get a whole red snapper, so I wound up with some other type of snapper (honestly, I don’t know exactly what it was). My fish was also not cleaned, so I had to do that myself, with a little help from my husband. If you do happen to be shopping for a whole red snapper, be sure to check the eyes of the fish, as true red snappers will have red eyes. If, like me, you cannot find red snapper in your area, Alton says you can substitute whole trout, tilapia, arctic char, or tilefish in this recipe. Regardless of the type of fish you use, for this recipe, a 1-2 pound fish will work best. Start by rinsing 1 C of couscous in cold water; sprinkle it with Kosher salt and set it aside while you prep the fish.

Prep the fish by rinsing your whole fish under cold water, scraping it with a knife to remove any remaining scales. Trim off all fins, but leave the tail intact. Pat the fish dry, including inside the fish, and line a large sheet pan with parchment paper, leaving a long overhang (the parchment needs to be large enough to fold over the whole fish). Place the fish diagonally across the parchment, sprinkling it all over (including inside the cavity) with Kosher salt and black pepper.

IMG_5759

My whole fish, sprinkled with salt and pepper.

Place a handful of fresh oregano and parsley inside the fish, along with a few slices of lemon and red onion. You can stick anything extra under the fish.

IMG_5760

My fish, stuffed with fresh oregano, parsley, red onion, and lemon.

Sprinkle the rinsed couscous all around the fish, along with 1 C of drained/quartered artichoke hearts, 1 C halved cherry tomatoes, and 2 t garlic. Place lemon slices and sliced red onion along the top of the fish, and drizzle everything with 1/2 C white wine. Finally, dab 1 T of butter along the top of the fish.

IMG_5762

Couscous, artichoke hearts, tomatoes, garlic, lemon, red onion, wine, and butter added to fish.

Fold the parchment paper over the fish, creasing the three open sides of the packet. Staple the whole package shut, placing staples about every inch.

IMG_5765

Parchment folded and stapled over fish.

Place the fish in an oven preheated to 425 degrees for 30 minutes.

IMG_5766

Fish packet in 425-degree oven.

Once out of the oven, cut the parchment packet open and serve the fish.

IMG_5767

Fish after cooking for 30 minutes.

Unfortunately, this recipe didn’t wow me as much as I hoped it would, but some of that may have been due to my fish, which was kind of “blah.” I am open to trying this again with a different whole fish. I did like that this recipe is a one-pan dinner with built-in sides of couscous and vegetables, and the fish was nicely cooked. My couscous did end up being slightly gummy, but the combination of flavors in the dish was great, and I did like the presentation. If you can get whole red snapper where you live, I think this might be a great recipe to try.

Salmon Fillet en Papillote with Julienned Vegetables

The second recipe in this episode is super easy and is made in individual servings, making it easily adaptable for any number of guests. As with the snapper recipe above, parchment paper is used here to create a pouch, but this time there is one pouch per person. Start with a fairly large rectangle of parchment, folding it in half. Use scissors or a knife to cut a large half-heart shape from the creased side of the parchment. Unfold the parchment to reveal your full parchment heart. Ahhh… takes me right back to 3rd grade.

On the right side of the parchment heart place 1/3 C carrot strips, 1/3 C fennel strips, 1/3 C snow pea strips, and 1/3 C leek strips.

Place an 8-ounce salmon fillet (skin side down) on top of the vegetables and season everything with Kosher salt, pepper, and 1/8 t ground coriander.

IMG_5696

Salmon fillet placed on top of vegetables. Seasoned with salt, pepper, and coriander.

Place the wedges of a small peeled orange on top of the fish and sprinkle the whole mound with a “wee shot” of vermouth.

Fold the parchment over the fish, creasing the edge at the top of the heart, and folding the edge up. Go halfway down the length of the fold, make a crease, and fold again, sort of like sealing a calzone. Continue creasing and folding all the way around the heart, twisting the parchment tip and folding it under.

IMG_5700

Parchment folded over fish and sealed by creasing/folding all the way around.

Place the whole packet in the microwave and cook on high for 4 minutes, or cook for 12 minutes in a 425-degree oven. Since there were two of eating Alton’s salmon packets, I opted, for comparison’s sake, to cook one packet in the microwave and the other in the oven. My microwaved fish was moist and flaking easily after 4 minutes, but my oven fish needed several more minutes to be cooked.

IMG_5703

Fish after cooking in the microwave.

I found this to be a successful recipe, resulting (in the microwave case) in nicely cooked fish. The orange wedges paired nicely with the fish and contributed a lot of moisture, and the whole dish had just a hint of vermouth.

IMG_5711

Salmon en papillote with oranges and vegetables.

Once again, this was a nice one-packet meal, as each packet included the fish and accompanying veggies. Plus, you can have this on the table in less than 30 minutes and it is healthy.

Ramen Shrimp Pouch

The third recipe in Alton’s series of pouch recipes is for shrimp lovers and is definitely a quickie that could be prepped any day of the week. As with the salmon pouches above, you can make as few or as many of these packets as you need to suit your number of diners. To make this one, preheat the oven to 400 degrees and lay out a large square of foil for each diner. On the center of each foil square, layer in this order:  1/2 of a block of noodles from a ramen package, 2 T chopped dried mushrooms, 5 large shrimp that have been peeled and deveined, 2 T chopped onions, 2 T chopped scallions, a pinch of red pepper flakes, and a pinch of Kosher salt.

Ball the foil up around the top of the shrimp, leaving a small opening at the top. Use the opening in each foil packet to pour in 1 T vegetable broth, 1 T mirin, 2 t soy sauce, and 1 t sesame oil.

Crimp the foil closed tightly, leaving a tiny steam porthole in the top of each packet. Place the packets in the preheated oven for 15 minutes; you may want to place them on a baking sheet, just in case they leak.

IMG_5647

Shrimp packets in the oven.

IMG_5649

Shrimp packet after 15 minutes in the oven.

Though I am not a shrimp lover, I thought this was a very clever and tasty dish. The shrimp were perfectly cooked after 15 minutes and you could taste all of the flavors in the pouch. I will say that some of my noodles were a bit chewy, so I would suggest breaking the noodles up slightly before putting them on the foil, and maybe adding a bit more liquid directly over the noodles. With a little tweaking, I think this could be an outstanding weeknight shrimp recipe.

Stone Fruit Pouches

Alton finished up his pouch cookery with a dessert. For each person eating, lay out a large double layer square of foil. In the center of each square, place 1/2 C crumbled gingersnaps, 1 quartered plum, 1 sliced apricot (8 pieces), 2 t sugar, 1 t lime zest, a pinch of Kosher salt, and 1 T cubed butter. I had no choice but to adapt this recipe a little bit, as it was certainly not stone fruit season when I made them. I opted to use mango and quince in my pouches.

Fold up the foil, leaving an opening at the top, and pour in the juice of half a lime and a shot of brandy.

Seal up the packets, leaving a tiny porthole. These packets can be cooked in a 500-degree oven or on a grill. If using a grill, they should be done in 10 minutes, or after 15-20 minutes in the oven. Serve the warm fruit with vanilla ice cream.

IMG_5733

Warm fruit served with vanilla ice cream.

The gingersnaps almost caramelize, the fruit softens, and you taste hints of lime and brandy. I bet these pouches would be good with peaches or pineapple too, and they would make for a super easy prep-ahead dessert during grilling season. Yes, this is one to keep in your back pocket.

It is always fun in this project when I get to watch an episode of Good Eats that I have not previously seen; episode 80 was one I had definitely not seen before. The premise of this episode is that Alton goes on a local, schlocky morning show to discuss coleslaw. When the other scheduled guest fails to show, Alton becomes the main attraction, continuing on with recipes for other types of slaw. Now, I’ll be honest that I don’t get too overly excited about slaw, but Alton did make some slaws in this episode that looked pretty tasty. So, how did they turn out?

Coleslaw

A classic coleslaw was first in this episode. This recipe requires some forethought because the prep needs to begin a couple hours in advance. Start by combining 1/2 a head of green cabbage, 1/2 a head of red cabbage, and lots of Kosher salt in a colander. Leave the cabbage for a couple hours to drain any excess moisture.

For the dressing, combine 1/2 C buttermilk, 2 fluid oz mayo, 2 fluid oz plain yogurt, and 1 T pickle juice.

Whisk the dressing thoroughly, adding 1 t dry mustard and 1 T chopped chives.

When the cabbage has drained, rinse it very well with cold water and give it a few whirls in a salad spinner.

Add the cabbage to the prepared dressing, along with one sliced carrot, and toss to coat.

IMG_6306

A bowl of Alton’s coleslaw.

This coleslaw was good, but not exciting. I did like how the powdered mustard contributed a slight kick of heat, while the pickle juice added some tang. Otherwise, though, it was really just a classic coleslaw that you could buy in any deli. It would, however, make a nice condiment for a pulled pork sandwich.

Beet Slaw

After watching the episode, I was most excited about Alton’s beet slaw because I love anything with beets… and Asian pears… and goat cheese. Yep, this one appeared to be right up my alley. Before you do anything else in this recipe, you will want to steam a few beets until they are tender (it took about 15 minutes for my beets to be tender).

To make the dressing, combine in a large bowl 1/4 C red wine vinegar, 2 T lemon juice, 2 T honey, 1/4 t Kosher salt, and 1/2 t pepper.

Whisk in 1/4 C olive oil until emulsified.

To the dressing, add 2 C of jicama, peeled and cut into matchsticks.

Next, thinly slice 3 C of fennel; this is easiest on a mandolin. Add the fennel to the slaw, along with 1/4 C of grated onion.

Again with the mandolin, if you have one, thinly slice one Asian pear and add it to the mix.

Finally, peel and spiralize your beets until you have 4 C. Add the spiralized beets to the bowl.

Toss all of the vegetables with the dressing and crumble in 6 ounces of goat cheese to finish.

IMG_6334

Goat cheese added to slaw.

IMG_6335

Beet slaw.

I happened to make this slaw when my brother was visiting, and he declared that he really liked this slaw despite not typically liking beets. Ted and I thought this was great also. This recipe is a fantastic marriage of flavors and textures. The jicama, fennel, and Asian pear are light and crispy, while the beets and onion are tender, and the goat cheese adds a lovely creaminess. Flavorwise, the earthy sweetness of the beets was great with the sweet Asian pear, nutty jicama, and spicy onion. The fennel added subtle anise hints. The dressing was tangy with a hint of sweetness, and the goat cheese gave a creamy tartness. All-in-all I was really happy with this one and will make it again. I will say that it is most aesthetically pleasing the day it is made, as the beets turn everything purple as the slaw sits.

Marinated Slaw

I actually started this blog a couple days ago, but am only just now finishing it. As I type, I am sandwiched between our two Coonhounds. Brixie, our beloved little “dogter,” had a rough day today, having a lump removed from her paw that could potentially be malignant. We’re all crossing our fingers and paws that we get a good biopsy report in the next few days. Now, back to the food.

If you are looking for a make-ahead slaw, Alton’s marinated slaw may be the one for you. Essentially, this is a pickled slaw that develops flavor for three days before you eat it. I don’t know about you, but I love anything pickled. For this slaw, grate 1/2 a head of Napa cabbage, and julienne 2 red bell peppers and 2 green bell peppers (I used yellow peppers, instead of green). Alton tells you to drain the vegetables in a colander for two hours, though this is really quite pointless without adding salt to the vegetables, as nothing drains away.

Once your vegetables are prepped, bring to a boil 3/4 C cider vinegar, 1 C sugar, 2 T Kosher salt, 1 t celery seeds, and 1 T mustard seeds; I found that this recipe did not yield enough marinade, so I had to make a second batch of marinade.

Pack your vegetables tightly in a mason jar (as tightly as possible, or they will float to the top), and pour in the hot marinade. Refrigerate the slaw for three days before eating.

IMG_6346

Hot marinade poured over slaw.

I made this slaw before leaving town for a few days, and it was ready just when I returned home.

IMG_6380

Alton’s marinated slaw.

The flavor of this slaw reminds me of bread and butter pickles, as the marinade is both sweet and tangy. The mustard seeds add some great pops of crunch and zest, and the peppers retain a lot of their crispy texture. This is a bright slaw that would be a good addition for a barbecue or picnic, or just as a side dish to dinner.

Asian Slaw

After making a coleslaw, a beet slaw, and a marinated slaw, what other type of slaw could you possibly make? Asian slaw is the final recipe from this episode, and it piqued my interest the most (along with the beet slaw) when I watched the episode. Alton also happened to mention that this Asian slaw is a favorite of his.

IMG_6347

Dressing ingredients: soy sauce, lime juice, sesame oil, rice wine vinegar, and peanut butter.

In a large bowl, whisk together 1 T soy sauce, the juice of a lime, 2 T sesame oil, 1/2 C rice wine vinegar, and 1/2 C peanut butter.

With tongs, add the following items to the dressing, tossing to coat:  2 T minced ginger, 2 minced serrano peppers, 1 shaved carrot (use a vegetable peeler), 1 julienned red bell pepper, 1 julienned yellow bell pepper, 2 T chopped mint, 2 T cilantro, 3 chopped green onions, 1 head of shredded Napa cabbage, and 1/2 t pepper.

Toss everything together until well-coated.

IMG_6377

Asian slaw, tossed to coat.

We both liked this slaw a lot, and it had fantastic Asian flavor from the ginger, sesame oil, lime, and peanut butter.

IMG_6379

Alton’s Asian slaw.

We ate this only as a side dish, but I would like to make it again, taking Alton’s suggestion of serving it as an entree; for a vegetarian entree, this slaw could be served with noodles or tofu, while you could serve it with flank steak for meat lovers. Personally, I can totally picture us eating this with steak as a summer entree on the deck.

Alton did a good job in this episode of demonstrating the diversity within the realm of slaw. Most of us probably see the word “slaw” and think of one thing:  coleslaw. For me, the standouts in this episode were the beet slaw and the Asian slaw.


Artichokes were the star of the 70th episode of Good Eats. Alton first prepped artichokes in a traditional way, serving them cooked whole. There is no online link to this particular recipe, but I will spell it out as well as I can. This was my first time eating a whole artichoke in quite a long time, as my parents went through quite a phase with artichokes when I was a teenager. Seriously, we ate steamed artichokes a couple times a week for quite a while, and my brother and I were eventually completely burnt out. Having Alton’s version of the whole artichoke has rekindled my adoration for the thistle (FYI artichokes are thistles), and I will be serving them periodically as a side dish.

When selecting artichokes to eat whole, pick ones that are about the size of a large orange, are heavy for their size, and that have tight, crisp leaves.

img_5431

Whole artichokes.

Alton recommends storing them in the refrigerator in a 2-liter soda bottle that has been cut in half and placed back together to form a capsule. Prior to cooking your artichokes, dip them upside down in cold water, swirling them to release any debris in their leaves. Using an electric knife, cut off the tops and bottoms of the artichokes, saving the stems. Peel the stems prior to cooking and cook them with the artichokes; cooking the stems was new to me, but definitely worth it.

img_5432

Artichokes, tops and bottoms cut off, and stems peeled.

To cook the chokes, put 2 t Kosher salt in a wide stainless steel of anodized aluminum pot (artichokes can react with other metals, producing off-flavors and colors). Add the artichokes, stem side up and cover them with cold water by at least an inch.

The artichokes will float, but you can weigh them down with a steamer basket insert and a weight.

img_5436

Artichokes, weighed down with a steamer basket insert and weight.

Bring the water, uncovered, to a boil over high heat. Don’t forget to throw in the stems! Artichokes contain both chlorophyll and acids, which are normally separate. However, when you cook an artichoke, the acids and chlorophyll combine, producing compounds that will turn artichokes brown; these compounds are volatile, so you can let them evaporate by keeping your pot uncovered. If you do not want to watch the pot, you can insert your probe thermometer, setting the alarm for 210 degrees. Once your water is boiling, decrease the heat and let the artichokes simmer for 10 minutes. Test the artichokes by inserting a sharp paring knife into the stem end – if the knife goes in with little resistance and comes out clean, the artichokes are done.

img_5437

Artichokes, after being brought to a boil and simmering for 10 minutes.

Drain your cooked artichokes in a foil-covered colander for at least five minutes before serving. To eat the artichokes, serve them next to lemon butter, dipping each leaf and scraping the “meat” with your teeth.

img_5441

Cooked artichokes, served with lemon butter.

Once you only have tiny leaves remaining, pull the leaves apart, exposing the hairy choke inside.

Pressing down on the choke with one hand, use a sharp paring knife to cut around the base, just under the dark green line.

img_5447

Using a sharp knife to cut around beneath dark green line.

Pull the top off and discard, and remove any remaining hairy tufts. Eat the remaining base of the artichoke, dipping it in lemon butter.

We really enjoyed Alton’s preparation of whole artichokes, especially since neither of us had eaten on in years. In fact, we liked them so much that we cooked them a second time last week. And, the bases and stems are totally worth eating – good eats for sure!

Broiled Chokes

Alton’s second artichoke preparation is for broiled chokes. For this recipe you will need a grapefruit spoon, a serrated knife (preferably electric), a vegetable peeler, two containers of acidulated water (water with lemon juice added), and a cutting board. Holding a whole artichoke, first pull off and discard all of its leaves until you have just a purple interior remaining.

Run a vegetable peeler down the sides of the choke and the stem. Also run the peeler around the outside until you have a smooth surface. To help prevent browning, dip your utensils in one container of acidulated water between uses.

img_5453

Artichoke, after being cleaned up with a vegetable peeler.

Once your choke is clean, use an electric knife to cut it in half. Use a grapefruit spoon to pry out the hairy choke, which will probably take a few tries. Place the cleaned choke in the second container of lemon water while you clean the others.

When ready to use, drain the chokes and wrap them tightly in paper towels. Toss them with olive oil, Kosher salt, and pepper, and broil them, face-up, on a rack 5-6 inches below the heat for five minutes. Flip the chokes and broil for three minutes on the second side.

Eat the chokes as they are, or do as Alton did in the episode and marinate them in his herb oil, which I will write up below.

Herb Oil

According to what he says in this episode, Alton prefers to marinate his broiled chokes (above) in herb oil. His oil can be made by heating to 200 degrees a pint of canola oil with a cup of olive oil in a saucepan. While the oil heats, add to a mason jar:  the zest from half an orange, 1/2 C fresh parsley, 1/2 C fresh thyme, 1/2 C fresh basil, 1/2 C fresh oregano, 1 dried arbol chile, and 1 t black peppercorns.

img_5424

Ingredients for Alton’s herb oil: fresh thyme, black peppercorns, fresh oregano, fresh parsley, orange zest, fresh basil, and a dried arbol chile.

Pour the warm oil over the herbs, letting the oil sit overnight; my oil got a little cloudy overnight, but later cleared again.

The following day, strain the herb oil by pouring it through cheesecloth into a jar containing your broiled chokes. Let the chokes marinate for a couple days before using.

And, what is Alton’s preferred use for his marinated chokes?

img_5472

Broiled chokes, after marinating for a couple days.

He prefers to make a pasta salad with bowtie pasta, the marinated chokes, some of the herb oil, red wine vinegar, small tomatoes, herbs, Parmesan, and pepper (he did not actually prep a pasta salad in the episode). I took his advice and tried his marinated, broiled chokes in such a pasta salad.

img_5473

A pasta salad made with Alton’s marinated chokes.

While the chokes were good, I cannot say that they were honestly worth all the effort. Honestly, I think the bottled, marinated artichokes from Costco are just as good as Alton’s, and for zero effort. While I am glad I now know how to prep an artichoke, I won’t be making these again.

The main star of the 60th episode of Good Eats was none other than eggplant. Eggplant, which is technically a berry, is a food that I have had limited experience with. My mom has an eggplant recipe that she still swears by, which was the only exposure I had to eggplant when I was young; I did not like it. Her version was sliced, breaded, cooked in butter, and coated with Parmesan cheese. A few years ago, I made a batch of Eggplant Parmesan for Ted and me; we did not care for it, opting for frozen pizza, or the like, instead. Still, I figured, if anyone could make me like eggplant, it likely would be Alton Brown.

Baba Ghannouj

First up in Alton’s eggplant repertoire was his take on Baba Ghannouj. For this recipe, you’ll need two eggplants.When selecting eggplants at the store, opt for ones that have a green stem and smooth skin, and that are heavy for their size. Larger eggplants tend to be more bitter than smaller ones. Also, when possible, choose male eggplants instead of females. Who knew there were male and female eggplants? Male eggplants have a small circle on their non-stemmed end, while females have a larger oval shape. Apparently, female eggplants have more seeds and are more bitter (insert bitter female joke here). Oh, and store eggplants on your kitchen counter for 1-2 days, or wrapped in plastic in the refrigerator for longer storage. To make this recipe, prick your eggplants a few times with a fork and roast them on a grill over indirect heat for about a half hour, turning them every 7-8 minutes.

Wrap the hot eggplants in plastic wrap and let sit until cool enough to touch.

IMG_4668

Hot eggplants wrapped in plastic wrap.

When the eggplants have cooled, keep them in their plastic wrap and cut off their stem ends with kitchen scissors. Squeezing the eggplants like a toothpaste tube, squeeze their flesh into a strainer and discard the skins. Note:  this tip sounded cool when I watched the episode, but it did not work for me at all.

IMG_4669

Cut the stem end off of your eggplants and squeeze out their flesh. Didn’t work for me.

I wound up cutting my eggplants completely open with shears and scraped the flesh out with my hands. You will want to have about 2 C of eggplant for this recipe. Let the eggplant drain for about 30 minutes to get rid of its bitter liquid. I also pressed on the surface of my eggplant with paper towels to absorb any excess liquid.

IMG_4670

My eggplant flesh, draining.

Once your eggplant is ready, combine it in a food processor with 2 cloves of sliced garlic, 3/4 t salt, 5 T lemon juice, and 4 T tahini (Alton used twice as much tahini in the episode as in the online recipe).

IMG_4673

Eggplant combined with garlic, salt, tahini, and lemon juice.

Process the mixture until smooth, and add salt and pepper if needed. If your dip tastes too bitter, add some honey.

IMG_4677

Honey, salt, and pepper added to the mixture.

Finally, add 1/2 a sprig of parsley and pulse a few times.

IMG_4678

Fresh parsley added.

Serve the Baba Ghannouj with pita chips.

IMG_4680

My Baba Ghannouj with pita chips.

Honestly, neither Ted or I expected to care for this much, but we actually quite liked it. I did have to add a little bit of honey to my dip to cut the bitterness. Sadly, I think the reason I liked this was because it really did not taste like eggplant to me. It had a bright, lemony flavor and hummus-like texture, with only the faintest hint of bitterness. Hmmm… maybe this Alton guy can make me like eggplant afterall?

Eggplant Steaks

I bravely made Alton’s eggplant steaks for dinner one night last week. Afterall, when Alton cooked them on Good Eats they looked rather appetizing. He explained in the show that eggplant is like a sponge, so it is first necessary to get the eggplant to purge its liquid. To do this, slice your eggplant into 1/2″ slices, place the slices on a rack over a sheet pan, and sprinkle the slices liberally with Kosher salt.

IMG_4615

Eggplant slices, sprinkled with Kosher salt and left to purge their liquid.

After 15 minutes, flip the eggplant slices over and sprinkle them with more Kosher salt. Allow the eggplant to sit for 1-3 hours. There should be quite a lot of liquid on the sheet pan after the purging period.

IMG_4620

Eggplant after purging for 3 hours.

Thoroughly rinse the salt from your eggplant and wring each slice with your hand, as if wringing a sponge. Finally, wrap your slices in paper towels to dry further. Alton’s eggplant slices magically remained round after he wrung them out with his hand, while mine became ugly, oblong blobs; if you want your slices to be round, I’d suggest skipping the wringing step.

IMG_4625

My eggplant slices after being rinsed and wrung out.

Now that the eggplant has purged, it will no longer absorb liquid, but you can get liquid to stick to its surface. Next, combine with a whisk 1/2 C olive oil, 1/4 C Worcestershire sauce, 1 T cider vinegar, 1/4 C steak sauce, and 2 T honey.

Toss the eggplant slices in the sauce mixture until thoroughly coated, and place them on a rack over a sheet pan.

Broil your eggplant “steaks” for ~3 minutes/side or until they start to char around the edges.

IMG_4640

Eggplant “steaks” after broiling for ~3 minutes/side.

Finally, sprinkle your eggplant slices with shredded hard cheese of your choosing (I used Parmesan) and stick them back under the broiler until the cheese has melted.

I went into this recipe pretty optimistic. It turns out my optimism was unfounded. We really did not care for this recipe at all. The eggplant steaks had a texture that sort of reminded me of mushrooms, and their skin was slightly chewy. And, quite frankly, we just didn’t like the taste of this at all. Perhaps we just don’t like eggplant?

Eggplant Pasta

The third (and final, thank God) recipe of this episode was for eggplant pasta. For this recipe, you will need one medium-large eggplant and you will want to peel it before slicing. As in the recipe above for eggplant steaks, you will need to purge the liquid from your eggplant by slicing the eggplant, sprinkling both sides of the slices with Kosher salt, and allowing them to sit for 1-3 hours.

You will then want to rinse the slices, wring them out, and dry them in paper towels.

IMG_4627

Wrung out eggplant slices.

You can complete this purging process ahead of time and store your eggplant slices in the refrigerator for about a week. If you do that, this recipe comes together in no time. In addition to your eggplant, you will need olive oil, garlic, red pepper flakes, a small tomato, cream, fresh basil, Parmesan cheese, and breadcrumbs.

IMG_4651

Ingredients for Alton’s eggplant pasta: red pepper flakes, tomato, Parmesan, garlic, basil, eggplant, bread crumbs, olive oil, and cream.

You will first want to cut your eggplant slices into thin strips. Next, heat 1 T olive oil in a skillet. Once the oil is hot, add 1/4 t minced garlic and a pinch of red pepper flakes.

IMG_4653

Garlic and red pepper flakes added to olive oil in skillet.

Add your eggplant to the skillet next, followed by 1 small tomato, seeded and diced.

Stir in 3 T heavy cream and 1 T basil chiffonade.

Finally, stir in 1-2 T shredded Parmesan cheese.

IMG_4659

Shredded Parmesan to top it off.

Serve the eggplant with breadcrumbs, as desired.

IMG_4662

Alton’s eggplant pasta, topped with breadcrumbs. Even the dog is indifferent about eggplant.

I had high hopes for this recipe, but we did not like this one at all. The texture and flavor of the eggplant were completely unappealing. After completing this episode of eggplant recipes, I think it is safe to say that we just do not like eggplant. I would be curious to know what a true eggplant lover would think of the recipes from this episode, as I do not feel that I can fairly judge them. It is safe to say that this has been my least favorite episode thus far. Thank goodness for the Baba Ghannouj recipe, or this entire episode would have been a dislike in our household! On the plus side, we now know not to order eggplant at a restaurant.


Shred, Head, Butter and Bread

Cabbage is not a vegetable we eat often in our house, aside from the occasional slaw to accompany fish tacos or the like. I was curious to see what we would think of Alton’s cabbage preparations in the 40th Good Eats episode. Alton says that the first recipe in this episode originated from his mother.

Ingredients:  butter, seasoned croutons, dry mustard, caraway seed, green cabbage, Kosher salt, and sugar.

Ingredients: butter, seasoned croutons, dry mustard, caraway seed, green cabbage, Kosher salt, and sugar.

5-6-2015 074 To make Alton’s mom’s cabbage, fill your biggest pot 3/4 full with water and bring to a boil over high heat.

Big pot of water over high heat.

Big pot of water over high heat.

Meanwhile, in a large skillet, melt 1/2 a stick of butter and add 1/2 C pulverized seasoned croutons.

Half a stick of butter in a large skillet.

Half a stick of butter in a large skillet.

Melted butter.

Melted butter.

Pulverized seasoned croutons.

Pulverized seasoned croutons.

Pulverized croutons added to butter.

Pulverized croutons added to butter.

To this crouton mixture, add two big pinches of dry mustard and 1 t caraway seeds.

Dry mustard and caraway seed added to butter/crouton mix.

Dry mustard and caraway seed added to butter/crouton mix.

Continue to cook this mixture, stirring over medium heat until the butter browns and you have a nutty aroma. When you have reached this point, take the pan off the heat, but leave the mixture in the pan for later.

Stirred until browned and nutty.

Stirred until browned and nutty.

Next, you want to shred a small head of green cabbage. Alton explains that he prefers small heads of cabbage because they are sweeter. To shred your cabbage, cut the head into quarters and cut the hard white core out of each quarter. Lay the cabbage quarters on your cutting board (curved side out), and slice perpendicularly to the board. If this is tough to visualize, there are lots of videos online.

Whole head of green cabbage.

Whole head of green cabbage.

Cabbage cut into halves.

Cabbage cut into halves.

Cabbage cut into quarters.

Cabbage cut into quarters.

Shredded cabbage.

Shredded cabbage.

When your cabbage is shredded, add 1 T Kosher salt and 1 T sugar to your pot of boiling water.

1 T Kosher salt added to boiling water.

1 T Kosher salt added to boiling water.

1 T sugar added to water.

1 T sugar added to water.

Why cook your cabbage in a lot of sugared/salted water? The large volume of water dilutes acid that seeps from the cabbage. The sugar preserves the cabbage’s cellular structure, while the salt increases the boiling point of the water to promote faster cooking. Add the shredded cabbage to the boiling water. You will notice an immediate color change in the cabbage, as it becomes a more brilliant shade of green; this is because the cabbage is releasing gas as it cooks, allowing the true color of the chlorophyll to show.

Cabbage added to water for 2 minutes.

Cabbage added to water for 2 minutes.

Cook the cabbage for a scant two minutes and drain. Alton used a salad spinner to drain his cabbage, but a colander works fine too.

Cabbage drained after cooking for 2 minutes.

Cabbage drained after cooking for 2 minutes.

Add the cabbage to the butter/crumb mixture in the skillet and toss to coat with tongs.

Cabbage added to skillet with butter/crouton mixture.

Cabbage added to skillet with butter/crouton mixture.

Final cabbage.

Final cabbage.

We ate this cabbage as a side dish and we both really liked it. The cabbage maintained a nice texture and color, avoiding looking like a “wet Army Jeep,” as Alton described. The caraway seed’s flavor came through, but was not overpowering, and the overall dish had a buttery, slightly sweet flavor. We both agreed that we would make this again as a vegetable side dish.

Home of the Braise

Alton’s second cabbage preparation uses red, rather than green, cabbage. This recipe involves braising the cabbage in acidic liquid, which the purple pigments (anthocyanins) in red cabbage love.

Ingredients for braised cabbage:  canola oil, Granny Smith apple, apple juice, caraway seed, Kosher salt, black pepper, red cabbage, lemon juice, and butter.

Ingredients for braised cabbage: canola oil, Granny Smith apple, apple juice, caraway seed, Kosher salt, black pepper, red cabbage, lemon juice, and butter.

To make this cabbage, heat a large skillet over medium heat, adding 2 T canola oil to coat the pan.

2 T canola oil heating in a pan.

2 T canola oil heating in a pan.

Add 1 Granny Smith apple, peeled, cored, and cubed, and toss.

Granny Smith apple added to the pan.

Granny Smith apple added to the pan.

Once the apple is lightly browned, add 1 pint of apple juice, preferably unfiltered. The acid from the apple and apple juice serves to keep the final cabbage red, rather than blue.

A pint of apple juice added to the apple.

A pint of apple juice added to the apple.

Increase the heat and add 1/4 t caraway seed, 1 1/2 t Kosher salt, several grinds of black pepper, and 1/2 a head of shredded red cabbage.

Caraway seed, Kosher salt, and black pepper added to the apple mixture.

Caraway seed, Kosher salt, and black pepper added to the apple mixture.

Cabbage halved, and ready to be shredded.

Cabbage halved, and ready to be shredded.

Shredded red cabbage.

Shredded red cabbage.

Shredded cabbage added to the pan.

Shredded cabbage added to the pan.

Put the lid on the pan, shake the pan to get everything coated, decrease the heat to low, and cook for 20 minutes.

Lid on the pan, heat turned to low, and left to cook for 20 minutes.

Lid on the pan, heat turned to low, and left to cook for 20 minutes.

To boost the pigment of the final dish, sprinkle lemon juice over the cabbage just before serving.

Lemon juice added to boost pigment.

Lemon juice added to boost pigment.

Alton also likes to add a pat of butter to cut the acid from the lemon.

A pat of butter melted into the cabbage.

A pat of butter melted into the cabbage.

The finished cabbage.

The finished cabbage.

5-6-2015 135

Why is caraway seed so often paired with cabbage? Aside from pairing well flavor-wise, caraway seed helps to limit cabbage’s production of hydrogen sulfide gas, which is what can make your house smell like cabbage for days. We ate this cabbage as a side dish last night and we liked it even better than the first cabbage recipe. While the first recipe was sweet, buttery, and mild, this dish was much more tangy and bold. Again, Alton showed that cooking cabbage properly can maintain the texture, flavor, and color of a vegetable that so often gets a bad rap. You cannot go wrong with either of Alton’s cabbage recipes.

Hail Caesar Salad

I am a salad person, and I love a good Caesar salad. My mom makes a fantastic Caesar salad, and I knew Alton’s recipe from Good Eats was going to have its work cut out for it to rival Mom’s recipe. In both watching the episodes and reading the online recipes from the show, I have learned that subtle differences often exist between how Alton prepares the dishes on the show and the recipes posted online. I choose to follow what Alton does on the show when there are any differences.

My mom often made homemade croutons when we were growing up, so I am slightly biased when it comes to store-bought versus homemade croutons. Really, there is no comparison. For my croutons in the Caesar, I used a store-bought loaf of Pugliese bread.

Pugliese bread cubes.

Pugliese bread cubes.

It was not day-old bread, but the croutons still managed to dry sufficiently in the oven. Alton was right… tossing the crispy bread cubes with the hot garlic-flavored olive oil definitely made my mouth water!

Garlic, olive oil, and salt.

Garlic, olive oil, and salt.

Hot garlic oil.

Hot garlic oil.

Croutons tossed in garlic oil.

Croutons tossed in garlic oil.

I used two hearts of Romaine that were pre-washed and bagged, as our salad spinner (the same one Alton recommends on Good Eats) died in a tragic accident on a hot stove years ago. Note:  Do not place your clean plastic salad spinner on the stove to air dry without checking the burners first.

Hearts of Romaine.

Hearts of Romaine.

Following Alton’s recipe, I cooked my eggs for one minute, and gradually added the dressing ingredients to my lettuce, tossing after each addition. I did like the flavor of the Worcestershire sauce in the dressing, though I’ll admit I have also had Caesar salads with anchovies that I have enjoyed. Adding the barely cooked eggs to the dressing made a creamy dressing that thoroughly coated the greens and paired nicely with the crunchy garlic croutons.

Gradually adding dressing ingredients.

Gradually adding dressing ingredients.

Worcestershire and lemon juice.

Worcestershire and lemon juice.

Adding the one-minute eggs.

Adding the one-minute eggs.

The final Caesar.

The final Caesar.

All in all, I thought this was a very good Caesar salad. Was it as good as Mom’s? Sorry Alton, but I think hers still wins.

Veni Vedi Vinaigrette

I tend to like my salad dressings on the savory, tangy, acidic side. Fruity, sweet salad dressings just usually are not my favorites. Often, I just drizzle olive oil, vinegar, salt, and pepper straight onto my greens. Alton’s vinaigrette recipe reminds me somewhat of my grandmother’s spinach salad dressing, so I knew I would like this salad dressing before I even tried it. Per Alton’s instructions, I first combined my vinegar, mustard, garlic, salt, and pepper.

Gathering vinaigrette ingredients.

Gathering vinaigrette ingredients.

Combination of vinegar, mustard, garlic, salt, and pepper.

Combination of vinegar, mustard, garlic, salt, and pepper.

I then added my olive oil and shook the dressing until it was well emulsified. I left mine at room temperature for a few hours before having it on a lunch salad I made with tomato, marinated artichoke hearts, cucumber, kalamata olives, walnuts, avocado, and fresh parmesan.

Olive oil added to other ingredients.

Olive oil added to other ingredients.

Final emulsified vinaigrette.

Final emulsified vinaigrette.

The result was a bright, acidic, tangy dressing that would brighten up any plate of greens, and you can throw it together in a matter of minutes. Why buy salad dressing when you can make something so much better at home?