Posts Tagged ‘cumin’

Well, it took a while, but I finally completed all of Alton’s recipes for an entire butchered beef tenderloin. In “Tender is the Loin I,”  Alton showed how to butcher a whole tenderloin into cuts to be used in five different recipes. You cut the loin into four filets, a center cut roast, a head roast, a tip portion, and a chain.

In addition to the butchering in that first tenderloin episode, he also demonstrated a recipe for the filets from the tenderloin. As I mentioned before, for some reason, a cocktail episode aired in between the two tenderloin episodes, which was an odd decision. Here are the recipes for the remaining cuts from the beef tenderloin.

Center Cut Tenderloin Roast

The center cut roast from the tenderloin is used first in the second episode. This cut of meat should weigh 1 to 1 1/4 pounds. For this recipe, place 1 1/2 t Kosher salt, 1 1/2 t pepper, and 1 t cumin in a loaf pan.
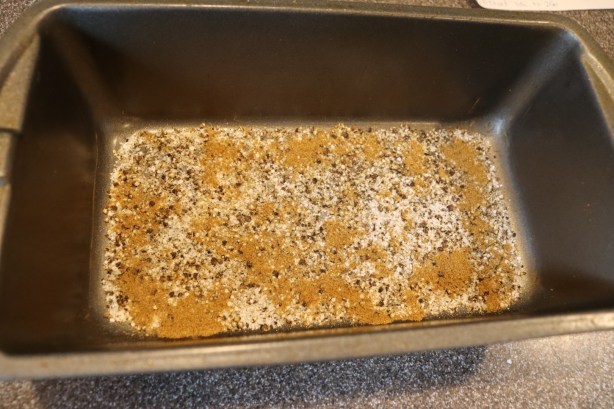
IMG_2154(2)

Kosher salt, pepper, and cumin.

Set the roast in the spices and toss it around to coat on all sides. Let the roast sit at room temperature for 30 minutes to one hour.

After resting, place a grill pan over high heat for five to seven minutes. Sprinkle the pan with Kosher salt, as this will make it easier to clean later. Sprinkle vegetable oil over the roast and turn it with tongs to coat. Place the roast at the front of the grill pan and gradually roll the roast from the front to the back of the pan, searing for about eight minutes total on all sides.

Transfer the roast from the grill pan to a metal baking pan and let it sit for 10-15 minutes.

IMG_2172(2)

Seared roast placed in metal pan.

While the roast sits, preheat the oven to 250 degrees. Place the roast back on the grill pan place it in the oven with a probe thermometer in its center. Cook the roast until the probe thermometer says 135 degrees.

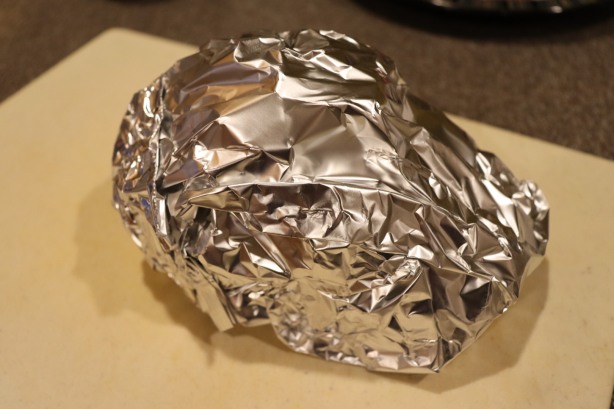
Remove the roast from the oven, wrap it in foil, and let it rest for 30 minutes before slicing.
IMG_2176(1)

Roast wrapped in foil for 30 minutes.

IMG_2185(2)

Alton’s center cut tenderloin roast.

This roast was so easy and was perfectly cooked. I typically use some sort of sauce with beef, but I found that this roast was flavorful enough on its own. The outside of the roast had a spice-filled crust, while the inside of the roast was juicy and tender. This is a roast you could easily make any day of the week and any meat-eater would certainly enjoy this.

Stuffed Roast

To follow the center cut roast, Alton prepped his recipe for the small head roast (1 to 1.5 lb) portion of the loin. I prepared this for dinner on Father’s Day. To begin, slice open the head roast, creating a pocket. Open the roast and place a few more slices internally, slicing it “like a book.” Brush the inside of the roast with olive oil and season it with Kosher salt and pepper.

Sear the roast on both sides on a hot grill pan that has been sprinkled with Kosher salt. Let the roast rest for 15 minutes after searing.

IMG_2239(1)

Head roast on hot grill pan to sear.

Stuff the roast with three ounces of blue cheese, roll the roast up, and secure it with butcher’s twine.

Place a probe thermometer in the center of the roast and cook the roast in the oven at 450 degrees until the thermometer reaches 125 degrees.

IMG_2246(1)

Head roast in 450 degree oven until reaching 125 in the center.

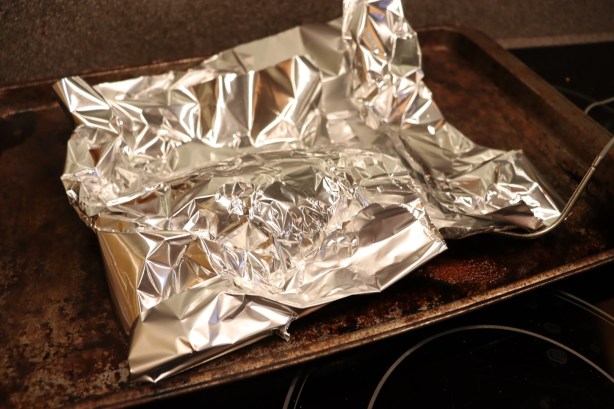
Remove the roast from the oven, cover it with foil, and let it rest for 15 minutes before slicing.
IMG_2248(1)

Head roast resting in foil for 15 minutes.

IMG_2249(1)

Head roast, ready to be sliced.

IMG_2251(1)

Alton’s stuffed tenderloin.

This was delicious, especially if you like blue cheese. As Alton said, the idea with this recipe was to put the sauce on the inside of the meat… and it works. The meat came out pink and juicy and the cheese was melting in the center. This is another fantastic roast recipe that requires very little effort and produces great results.

Carpaccio

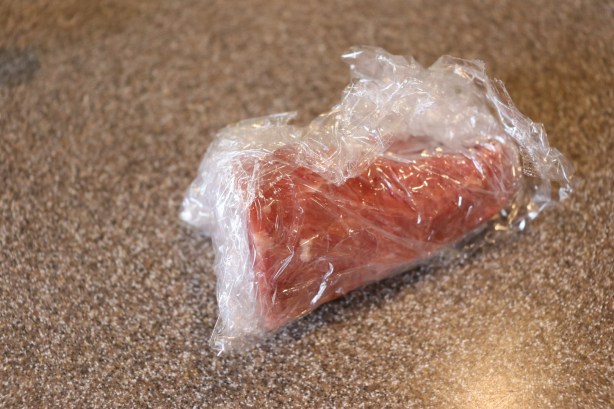
I love carpaccio. Although the idea of raw meat may scare some people, I encourage you to give it a try. I had previously only had carpaccio in restaurants, and I likely would never have made it at home if were not for this project. To make Alton’s carpaccio, you will need a small tip portion from a beef tenderloin. Wrap the meat in plastic and place it in the freezer for two hours, or until it is quite firm.
IMG_2151(1)

Tenderloin tip wrapped in plastic and heading to freezer for 2 hours.

Leaving the plastic on, slice the meat as thinly as possible with a very sharp knife; I actually removed the plastic for slicing, as I found that the plastic really got in the way.

IMG_2157(2)

Slicing meat after freezing.

Spritz a counter top with water and place a layer of plastic wrap down. Spritz the top of the plastic and add the meat slices, overlapping them slightly to form a “disc of meat.” Spritz the meat again and fold the plastic over the top of the meat, sandwiching the meat between the plastic layers.

Spritz the top layer of plastic one final time. Set a pie tin on top of the plastic and pound it with a mallet until the meat is very thin.

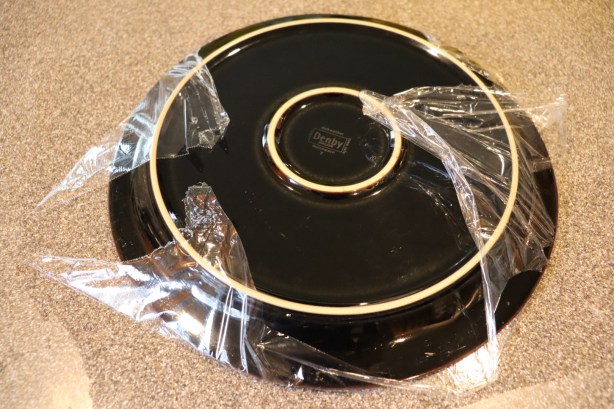
Remove the top layer of plastic and invert a plate on top of the meat. Slide your hand under the meat and invert the meat back onto the top of the plate.
IMG_2165(2)

Inverting meat onto plate.

Peel off the remaining plastic, leaving the meat on the plate. Chill the meat until eating.

IMG_2166(2)

Carpaccio, inverted onto plate.

To serve the carpaccio, dress it with good olive oil, Kosher salt, pepper, lemon juice, shaved Parmesan, and greens. I also added some capers for good measure.

IMG_1707(1)

Alton’s carpaccio.

I served the carpaccio with good crackers. I honestly did not think homemade carpaccio would measure up to what I’ve had in restaurants, but Alton’s carpaccio was just as good as anything I’ve eaten out. Now, of course, this was using high-quality beef. This would make a great appetizer to serve to guests, as it is really quite simple to prepare, but is a restaurant-quality dish. Great recipe!

Chain of Bull Cheese Steaks

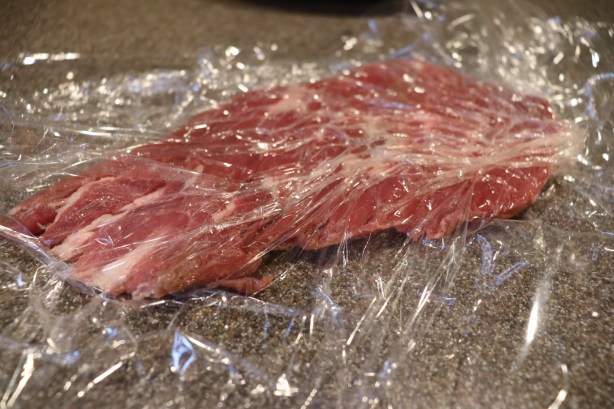
The final recipe of the tenderloin recipes uses the “chain” part of the loin to make cheesesteak sandwiches. We ate these sandwiches just last night for dinner. I had frozen my chain and pulled it out to thaw a couple days ago. To make these sandwiches, trim the chain of any excess fat and place it between sheets of plastic wrap that have been spritzed with water.

Pound the meat with a mallet until it is even in thickness for its whole length.
IMG_2256(2)

The chain portion placed in plastic and pounded until thin.

Place the meat in a bowl and add olive oil, Kosher salt, and pepper. Toss the meat to coat.

IMG_2257(2)

Chain placed in bowl and seasoned with olive oil, Kosher salt, and pepper.

Heat a grill pan until it is hot and sear the meat on all sides for about eight minutes total.

IMG_2260(1)

Seared chain.

Remove the hot meat from the pan and wrap it tightly in foil. Add some additional olive oil to the grill pan and add one julienned onion. Cook the onion until is golden brown and soft.

Finely chop the cooked meat and pack it onto hoagie rolls.

IMG_2264(1)

Chopped chain meat.

Top the meat with shredded Mimolette cheese and the warm onions. I could not find Mimolette cheese locally, so I opted for shredded Cheddar. And, we added a little bit of hot Giardiniera.

IMG_2267(2)

Alton’s cheese steak sandwich.

I know people are picky about their cheesesteak sandwiches, and I am a complete novice. All I can say is that the meat was very tender and the warm onions melted the cheese just enough to kind of bind everything together. I did appreciate the little punch of heat from the Giardiniera, so I would personally opt for that again, though some may view that as sacrilegious. I found this to be a really tasty sandwich. Is it a true Philly-style cheesesteak sandwich? Well, that’s a question for those more experienced than I.


When I began this project, I had to purchase the first couple seasons of Good Eats through Amazon. Shortly after beginning this blog, I set our DVR to record any and all episodes that were airing, building a stockpile. I currently have 135 episodes recorded. Needless to say, I had a little bit of a panic yesterday morning when I discovered that the clock on our DVR was stuck at 2:41 and it was emitting an odd whirring sound. Oh, and the DVR refused to power off. Thankfully, it rebooted just fine after being unplugged for a few minutes. Whew!

Episode 110 is very seasonally appropriate, as chili, to me, is perfect for fall and winter. I got a kick out of this episode because Alton played the role of a cowboy, and remained in character for the duration of the show; I cannot recall another episode in which he did this.

AB’s Chili Powder

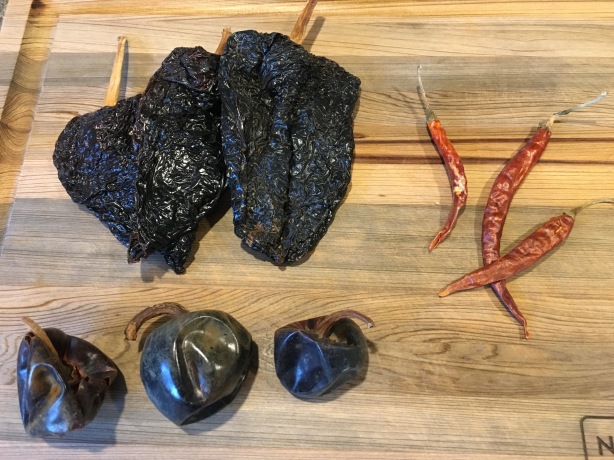
If you want to make good chili, you have to start with great chili powder. Thankfully, Alton has a chili powder recipe that you can whip up easily at home. His chili powder starts with three types of dried chiles:  ancho chiles, cascabel chiles, and arbol chiles. While I had no trouble finding the ancho and arbol chiles at my regular grocery store, I had to take a trip to our local Mexican grocery store to find the dried cascabels. For a batch of chili powder, you will need three of each type of chile.

IMG_9880

Ancho chiles, arbol chiles, and cascabel chiles.

Using scissors, cut the tops off the dried peppers, shaking out the seeds and discarding them; you don’t want the seeds because they add bitterness. Use the scissors to cut the chiles into strips; you can do this straight into a large skillet.

IMG_9882

Chiles cut into strips and placed in skillet.

Add 2 T cumin seeds to the pan, setting the pan over medium-high heat. Roast the peppers and cumin seeds until they are fragrant and the cumin seeds begin to pop.


When making this chili powder, your kitchen will smell amazing from the toasted chiles and cumin seeds! Remove the skillet from the heat and allow the chiles/seeds to cool. While the chiles cool, combine 2 T garlic powder, 1 t smoked paprika, and 1 T dried oregano in a blender.

IMG_9885

Garlic powder, smoked paprika, and dried oregano in blender carafe.

Add the cooled chile/cumin mixture to the blender and blend the mixture to a fine powder. Be sure to let the powder settle for a couple minutes before removing the lid of the blender.


IMG_9889

Alton’s chili powder.

The finished chili powder is very fragrant and honestly made my mouth water. It has a rich, deep aroma that far surpasses that of store-bought chili powder. Use Alton’s chili powder in any recipe calling for chili powder, such as his chili recipe below.

Pressure Cooker Chili

Alton uses his homemade chili powder to make his version of chili. Yes, Alton uses a pressure cooker to make his chili, but he also gives instructions in the episode for how to adapt this recipe if you do not have a pressure cooker.

IMG_9890

Ingredients for Alton’s chili: beer, tomato paste, tortilla chips, chipotles and adobo sauce, salsa, cumin, and chili powder.

Three pounds of stew meat go into this chili, and Alton prefers a blend of beef, lamb, and pork. I could not find lamb stew meat at my store, so I used half beef and half pork. Heat a pressure cooker over high heat until hot.

IMG_9894

Heating the pressure cooker.

While the pot heats up, put the stew meat in a large bowl with 1 1/2 t Kosher salt, and toss to coat.

IMG_9892

Three pounds of stew meat being tossed with Kosher salt.

Add 2 t peanut oil to the meat, and toss again to coat.

IMG_9893

Three pounds of stew meat being tossed with Kosher salt and peanut oil.

Brown the meat in the hot pot, removing it after browning; you will want to do this in three batches, so the pan does not get overcrowded.

When all the meat has been browned, put the empty pot back on the heat and add 12 ounces of medium-bodied beer (I used one of Alton’s beers), scraping to deglaze the pan.

Add 1 T tomato paste to the beer, along with 1 T chili powder, 1 t ground cumin, 3 big handfuls of crumbled tortilla chips, 16 ounces salsa, 2 chopped canned chipotles, 1 T adobo sauce from the chipotles, and the 3 pounds of browned meat.

Put the lid on the cooker and bring it up to low pressure. Maintain low pressure for 25 minutes before releasing the pressure and serving.

IMG_9908

Lid put on pressure cooker.

IMG_9911

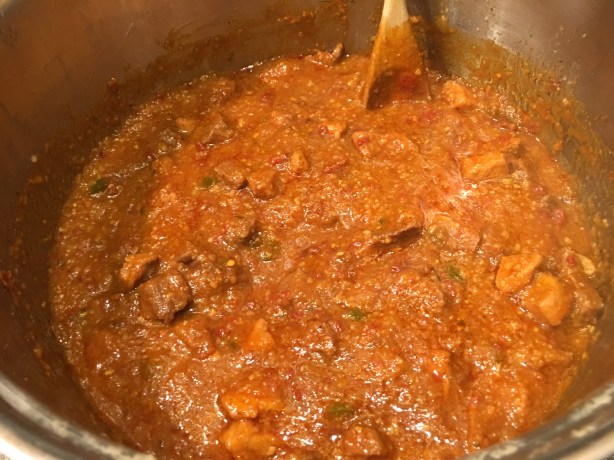
Chili after cooking for 25 minutes.

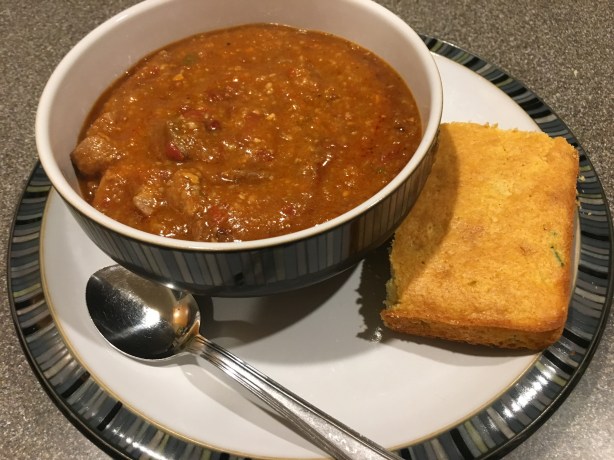
Alton thinks this chili is perfect as it stands, requiring no extra toppings, so I served it his way. I served my chili with a slice of cornbread on the side.

IMG_9912

A bowl of Alton’s chili.

Oh, and for those who do not have a pressure cooker, you can make Alton’s chili in a Dutch oven, letting the chili cook, covered, in a 350-degree oven for 6-24 hours. The flavor of Alton’s chili is pretty fantastic, having just the right amount of heat. The flavor from the toasted chiles blends beautifully with the saltiness of the chips, the sweetness of the tomato paste, and the freshness of the salsa. I found that the beef stew meat was more tender than the pork stew meat, which was slightly chewy. Perhaps a little longer cook would tenderize the pork more. I happen to love lamb, so I wish I could have added some of that to my chili. I also happen to really like beans in my chili, so I would probably opt to add them next time, but that’s really a matter of personal preference. This chili is super flavorful, and if you happen to have a pressure cooker, you get the flavor of a long simmer with a very short cook time. The true hero of this recipe, though, is the homemade chili powder.


From herbs in the last episode, the Good Eats trail takes us to spices in episode 98. So, what is the difference between a spice and an herb? An herb is a leaf, while a spice is a different part of a plant. If you want to keep your spices fresh longer, it is ideal to purchase spices in their whole forms, grinding them in a spice-only coffee grinder just prior to use. I remember that my dad began grinding his spices after watching this episode when it aired in 2004. Read on for Alton’s spice-friendly recipes.

Dried Pear and Fig Compote

A fruit compote is the first thing Alton made in this episode.

IMG_6924

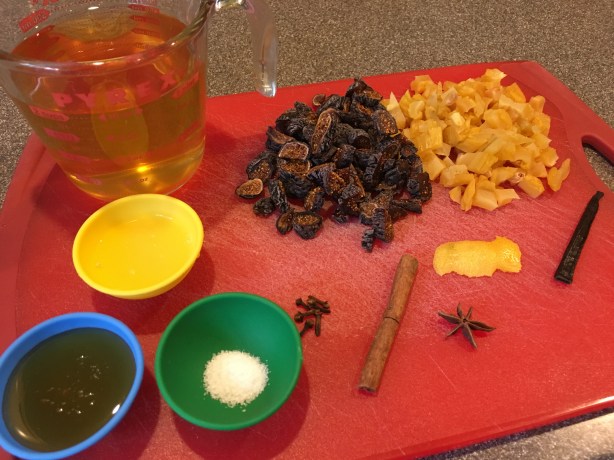
Ingredients for fruit compote: white wine, dried figs, dried pears, vanilla bean, lemon zest, star anise, cinnamon stick, cloves, Kosher salt, lemon juice, and honey.

To make his compote, place 4 ounces dried figs, 4 ounces dried pears, 2 T honey (Alton used orange blossom), 1/2 a vanilla bean, 1 C apple cider, 1 C white wine, a 1-inch strip of lemon zest, 1 T lemon juice, 6 whole cloves, 1 cinnamon stick, 1 star anise pod, and 1/2 t Kosher salt in a medium saucepan.

IMG_6926

All of the compote ingredients placed in a medium saucepan over medium heat.

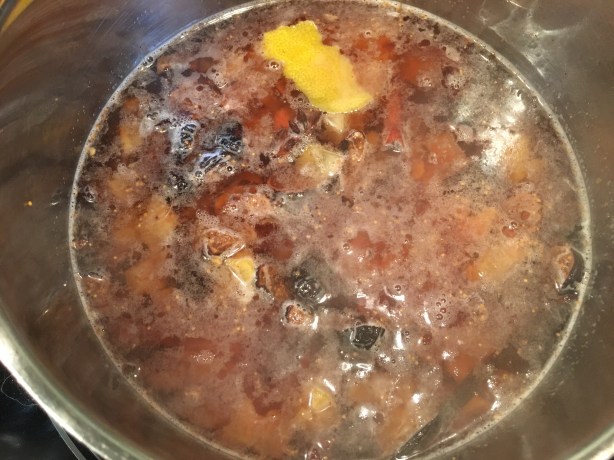
Bring the mixture to a simmer over medium heat, decrease the heat to low, and continue to simmer the compote for 1 to 1 1/2 hours. I found that it took the full 1 1/2 hours of simmering for my compote to thicken as Alton’s had.

IMG_6928

The compote, brought to a simmer and left for 1 1/2 hours.

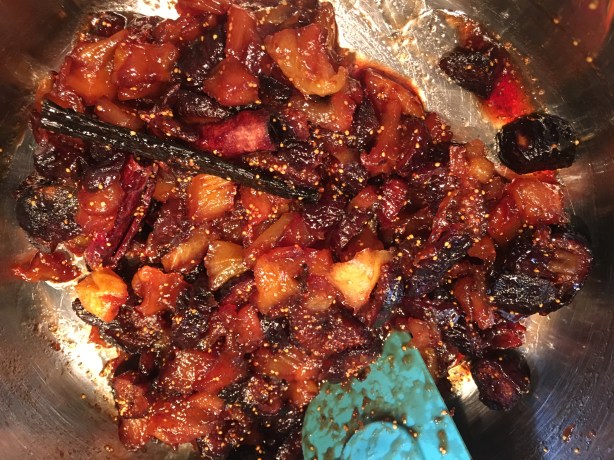
After simmering, remove the cloves, cinnamon, star anise, and lemon zest; good luck finding the cloves – we didn’t find some of them until we ate the compote!

IMG_6929

The compote after simmering.

Serve the compote warm over ice cream or you can refrigerate it for later use. We ate the compote over vanilla ice cream and it was very flavorful and spicy.IMG_6930

IMG_6934

Compote over ice cream.

All of the spices seemed to be well-balanced, though clove was perhaps the most dominant spice. The compote was pretty sticky in texture and had little pops of crunch from the dried fig seeds, which were quite prevalent. Due to the rich color of the compote, and its spices, the compote seems to me like a good dish to make in the fall. This would also be great over a pork tenderloin. This is a recipe that truly shows how spices can contribute to a sweet dish.

Vegetable Curry

For a weeknight vegetarian dinner, consider giving Alton’s vegetable curry a try.

IMG_6946

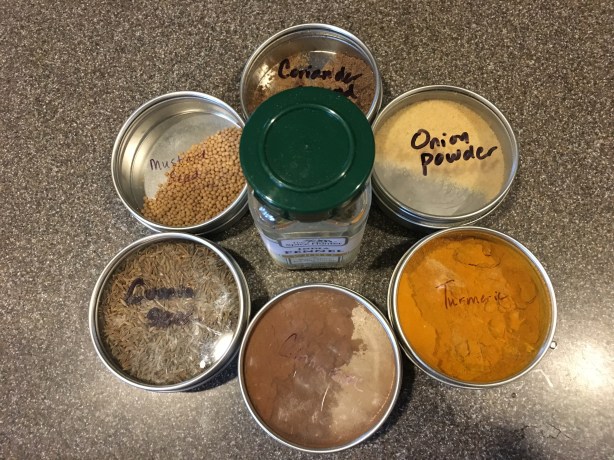
Spices for Alton’s vegetable curry: coriander, onion powder, turmeric, cinnamon, cumin seed, mustard seed, and fennel seed.

IMG_6947

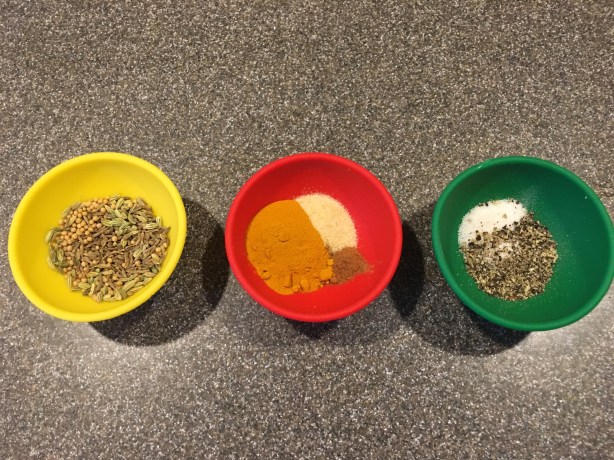
Spices, divided for their addition in the recipe. Yellow bowl has cumin seed, fennel seed, and mustard seed. Red bowl has coriander, onion powder, cinnamon, and turmeric. Green bowl has Kosher salt, sugar, and pepper.

The recipe begins with poking holes in a frozen bag of mixed vegetables. Microwave the veggies on high for 2-3 minutes, or until thawed.

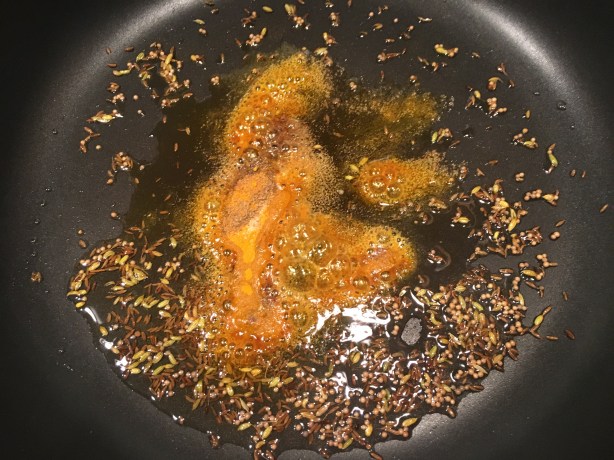
Next, heat a large skillet over medium-high heat, adding 2 T vegetable oil to coat the pan. To the oil, add 1 t cumin seed, 1/2 t mustard seed, and 1/2 t fennel seed. If you have a splatter guard, Alton recommends that you use it now.

IMG_6954

Cumin seed, mustard seed, and fennel seed added to hot oil in skillet.

Meanwhile, whisk together in a bowl 2/3 C plain yogurt and 1 t cornstarch, setting the bowl aside.

When the mustard seeds begin to pop in your skillet, add 1/2 t freshly ground coriander, 1/2 t onion powder, 1/8 t ground cinnamon, and 1 t ground turmeric.

IMG_6957

Coriander, onion powder, cinnamon, and turmeric added to skillet once mustard seeds began to pop.

It is also time now to add two crushed cloves of garlic and three dried red chilies with their stems and seeds removed.

Cook this mixture until the garlic begins to turn golden, but watch it very carefully as the spices could easily burn. When the garlic begins to brown, add the thawed bag of vegetables to the pan, along with 1/2 t Kosher salt, 1/4 t sugar, and black pepper to taste.

IMG_6959

Thawed frozen veggies, stirred in, along with Kosher salt, sugar, and pepper.

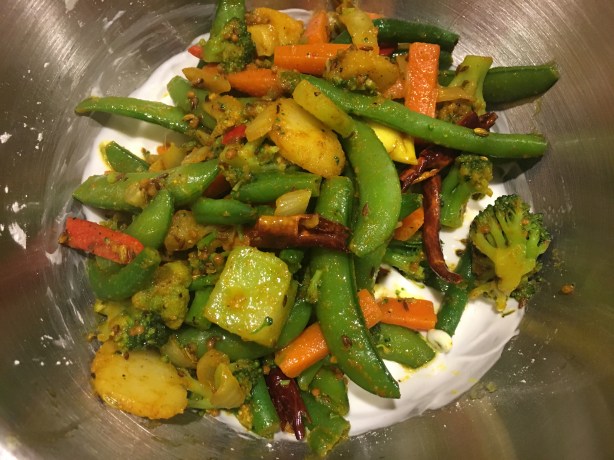
Stir the vegetables until they are heated through and coated with the spice mixture. Finally, quickly stir the vegetables into the bowl of yogurt.

IMG_6961

Spiced vegetables added to yogurt.

In the episode, Alton appeared to serve his vegetable curry as a side dish, but I opted to serve his curry over rice for a main course.

IMG_6966

Vegetable curry served over rice.

We thought this curry was pretty impressive, though the chilies really didn’t make it very hot. I would prefer to have more heat in my curry, but that is just personal preference. Otherwise, this curry had a nice combination of spices and came together in a matter of minutes. To get some protein, you could always add some tofu or meat. I would not say this recipe wowed me, but it is good for what it is – an easy weeknight vegetable dinner. And, it does have lots of spice flavor.

Broiled Salmon with AB’s Spice Pomade

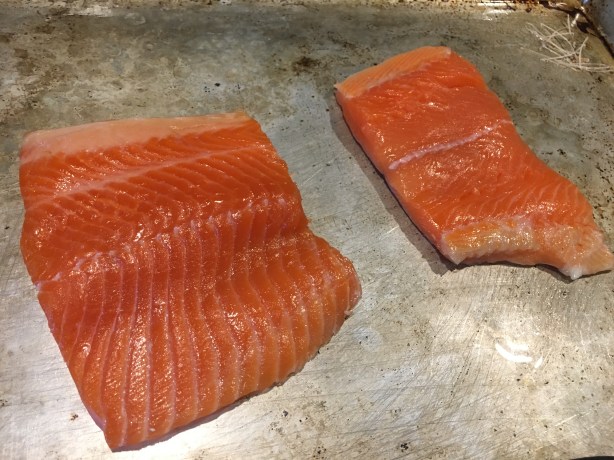
Alton’s third spice recipe features salmon. It begins by placing an oven rack in the top third of the oven and preheating the broiler. Brush a sheet pan with canola oil, placing a skinless three-pound side of salmon on the pan; I opted for a smaller piece, or really two pieces, of salmon since there were only two of us eating.

IMG_6912

My salmon.

Sprinkle the fish all over with 1 to 1 1/2 t Kosher salt and with 1 t black pepper.

IMG_6913

My salmon, sprinkled with Kosher salt and pepper.

In a blender combine 2 t onion powder, 1 t garlic powder, 1/2 t cayenne pepper, 1 t whole cumin seed, 1 T whole fennel seed, 1 T whole coriander seed, and 1 star anise pod.

Blend all of the spices and pour in 1/3 C canola oil while the blender is running.

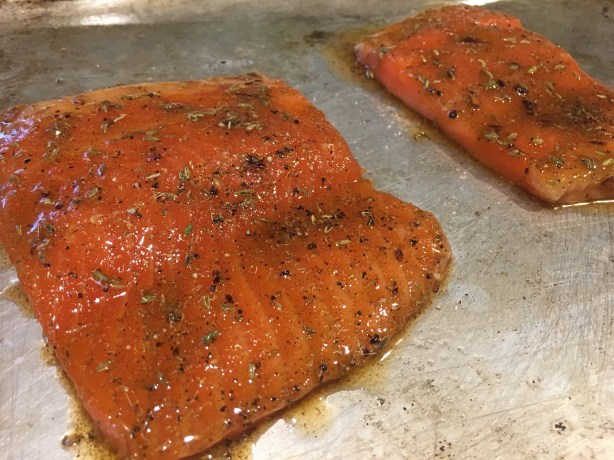
Brush this spice “pomade” all over the fish and let the fish sit at room temperature for 30 minutes.

IMG_6915

Salmon, brushed with pomade and left to sit for 30 minutes.

After resting, broil the fish for 15 minutes and check it for doneness. To check fish for doneness, look for three things:  1- the fish should be firm and bounce back when touched, 2 – the fish should flake easily when scraped with a fork, and 3 – the fish should be at 131 degrees in its thickest part.

IMG_6921Keep in mind that Alton’s cooking time is for three pounds of fish, so you will need to modify cooking time for a smaller piece of fish. My salmon was honestly overdone on the edges. To me, a good salmon recipe is one that does not overpower the fish, yet enhances it. I think this recipe does that. The fish is flavorful and moist, but has the added flavor pop from the combination of spices.

Curry Powder Blend

The last recipe in this episode is for Alton’s curry powder. I have a lidded tin in my basement that contains nothing but curry powders. For as long as I can remember, my parents used this tin to house their curry powders, and I inherited it a couple years ago. We have sweet curry powder, Thai curry powder, hot curry powder, and maharaja curry powder. Never, though, had I made my own curry powder… until now.

For Alton’s curry powder, in a lidded container combine 2 T cumin seed, 2 T cardamom seed (I had to use ground), 2 T coriander seed, 1/4 C ground turmeric, 1 T dry mustard, and 1 t cayenne pepper.

Shake the mixture to combine. Since Alton’s curry powder contains lots of whole spices, you can grind the curry powder just prior to use.

IMG_6999

Alton’s curry powder.

I never knew my paternal grandmother, but my dad began serving me her curry recipe when I was very young, and it has always been one of my favorite things. It is fun to alter the curry by mixing different curry powders each time. To really test Alton’s curry powder, I used it exclusively in Grandma’s curry and it passed the test very well.

IMG_0392

A bowl of my grandma’s curry made with Alton’s curry powder.

Alton’s curry powder is a mixture of sweetness, nuttiness, citrus, bitterness, and moderate heat. I would call this a very good all-around curry powder, and it has been added to the tin for future batches of curry goodness.

Fresh Yogurt

Yogurt is one of those things that I always feel I should eat more of than I do. I tend to go in spurts with yogurt, eating it frequently for a while, and then not at all. Alton’s yogurt episode began with homemade yogurt. I made homemade yogurt once years ago when I was in grad school, as part of my food microbiology lab course. All I really remember from that experience was that I had a lab partner from Mongolia who called himself “Woody,” I could barely understand a word he said, and our yogurt was very pink. Needless to say, I was hopeful that my Woody-less yogurt would be more successful. When making Alton’s yogurt, you can use any type of milk that you choose, but Alton opted for organic 2% milk in the episode of Good Eats. Alton did say that whole milk will result in looser yogurt, while skim milk will yield yogurt with a grainy texture. In addition to a quart of milk, you will need 1/2 C of powdered milk, 2 T honey, and 1/2 C of plain yogurt, containing live cultures.

img_5475

Ingredients for homemade yogurt: plain yogurt with live cultures, dry milk, honey, and milk.

Begin by pouring your milk into a saucepan, adding the powdered milk and honey.

Meanwhile, allow your yogurt to come to room temperature.

img_5482

Plain yogurt, being brought to room temperature.

Using a probe thermometer, heat the milk mixture to 120 degrees over medium heat. Remove the milk from the heat, and pour it into a clean cylindrical container, allowing it to cool to 115 degrees.

Once the milk has cooled, whisk about a cup of the warm milk into the yogurt.

img_5488

About 1 C of warm milk whisked into yogurt.

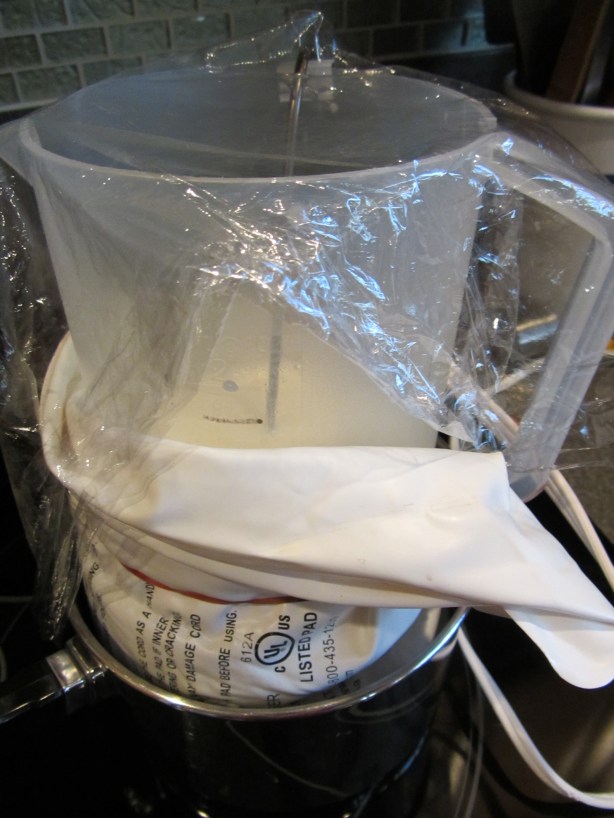
Then, whisk the yogurt/milk mixture back into the cylinder of milk. Wrap the cylinder in a heating pad that will maintain the yogurt’s temperature between 100 and 120 degrees; you can test your heating pad first by filling your cylinder with water.

img_5489

Yogurt added to milk and wrapped with heating pad to ferment for 6 hours.

Allow your yogurt to ferment for three to 12 hours, depending on how you like the texture of your yogurt; a shorter fermentation will yield looser yogurt, while a longer fermentation will give thicker yogurt. Alton did an even six hours in the episode.

img_5491

Yogurt, after fermenting for 6 hours.

Refrigerate your yogurt overnight before using.

img_5493

Alton’s homemade yogurt.

I thought this yogurt was fine, but really nothing special. If anything, I would have liked this yogurt to have had a thicker texture, so I would possibly ferment it a little longer if I were to make it again. Honestly, I wouldn’t go to the trouble of making this again when I can easily buy yogurt that I like just as much.

Thousand Island Dressing

So, really, Alton calls this dressing “Million Island Dressing” in the episode, and it is a good use for some of his homemade yogurt. To make his dressing, whisk together 1 C plain yogurt, 2 T vegetable oil, and 2 T tomato sauce.

img_5523

Yogurt, tomato sauce, and vegetable oil.

Once combined, add 2 t lemon juice, 2 t dry mustard, and 2 t sugar.

img_5525

Lemon juice, dry mustard, and sugar added to dressing.

Next, whisk in 1 t Kosher salt and 1/2 t pepper.

img_5526

Kosher salt and pepper added to dressing.

Finally, fold in 1/2 C diced onion, 1 T relish, 1 T chopped green olives, and 1 minced jalapeno.

I enjoyed this dressing more than I thought I would. It has a really good kick from the jalapeno, tang from the yogurt and lemon, and bite from the onion. It also adds a lot of texture to a salad. We actually liked this enough that I made it a couple times in one week for us to eat on our lunch salads. This is a really good salad dressing.

Tarragon Yogurt Sauce

If you are looking for another savory application for plain yogurt, this tarragon sauce is one to try. This sauce is very versatile and could be served over many things, including fish, eggs, and vegetables; in the episode, Alton says that his favorite use of this sauce is over braised carrots, so that is how I opted to use mine. For this sauce, begin by heating a saucier over medium heat, adding 2 T olive oil, 1/2 t Kosher salt, 1/2 C finely chopped onion, and 1 1/2 t minced garlic.

img_5530

Olive oil, Kosher salt, onion, and garlic in saucier.

I did not have a saucier until recently, but I inherited my parents’ copper-bottomed Calphalon saucier when my brother and I finished sorting through our parents’ belongings; thankfully, my parents are still living, but they really do not cook anymore. Yes, I have learned that a saucier is a very nice tool to have for a job such as this tarragon sauce. While your onion and garlic saute, combine 2 T cornstarch and 1 C chicken stock in a lidded container, and shake to combine. This slurry will help to thicken the sauce, and will also prevent over-coagulation of proteins, AKA curdling. Cream-based sauces have enough fat to prevent curdling, but yogurt-based sauces do not. Anyway, add the slurry to the pan, increase the heat, and add 1 1/2 T dried tarragon, whisking.

Remove the pan from the heat and temper 1 C of plain yogurt by gradually whisking in some of the sauce mixture. Finally, add the tempered yogurt to the pan, whisking.

Heat the sauce over low heat, just until warmed through. As I said before, we ate this sauce over carrots as a side dish.

The tarragon flavor in this sauce is quite strong, giving a real anise-like flavor, and you also really taste the yogurt. This is a sauce you could make with other herbs too; I think a dill version would pair terrifically with salmon. Either way, this is an easy sauce to dress up veggies or protein.

Yogurt Cheese

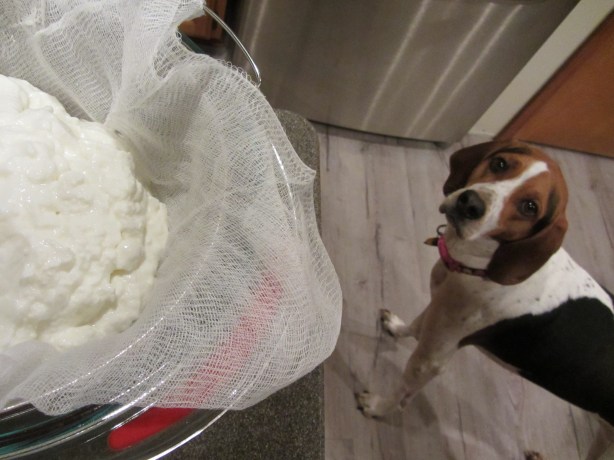
What is yogurt cheese? Yogurt cheese is yogurt that has been allowed to drain, removing whey. While cheese has had its whey removed, regular yogurt has not. Allowing yogurt to drain results in a thick yogurt that has a consistency similar to cream cheese. To make yogurt cheese, line a strainer with two layers of cheesecloth, setting the strainer over a bowl. Add a quart of plain yogurt to the strainer, folding the cheesecloth over the top.

img_5593

A quart of plain yogurt in a cheesecloth-lined strainer.

Weigh the yogurt down with the lid of a pot and a can, refrigerating it for four hours.

Yogurt cheese can be used plain as a spread, or in Alton’s recipe for frozen yogurt, which I will write about below. I tasted the plain yogurt cheese, but opted to use it for Alton’s other recipe; it tasted like plain yogurt… just much, much thicker.

Herb Spread

This herb spread is basically the same recipe as the one for yogurt cheese above, but with added seasonings. To a quart of plain yogurt (I used homemade) add 1 1/2 t cumin, 2 T chopped parsley, 1 t Kosher salt, and 1/2 t pepper.

img_5497

Cumin, parsley, Kosher salt, and pepper added to a quart of plain yogurt.

As with the yogurt cheese above, place a cheesecloth-lined strainer over a bowl and add the yogurt mixture.

img_5499

Seasoned yogurt poured in cheesecloth-lined strainer to drain.

Weigh the yogurt down with a pan lid and can, allowing it to drain for four hours in the refrigerator.

The resulting spread is tangy and has a punch of cumin, and it is great with crackers or on sandwiches.

img_5504

Herb spread with crackers.

Talk about an easy hors d’oeuvre, and it is even easier if you use store-purchased yogurt!

Lemon-Ginger Frozen Yogurt

This recipe is the perfect use for Alton’s yogurt cheese. Combine in a bowl 4 C plain yogurt cheese, 3/4 C sugar, 1/2 C light corn syrup, 2 t lemon zest, 1 T minced fresh ginger, and 3 T lemon juice.

Whisk the yogurt mixture until smooth and freeze in an ice cream mixture per the manufacturer’s instructions.

In the last few minutes of churning, add 1/4 C chopped crystallized ginger.

Freeze the frozen yogurt in the freezer until firm.

img_5606

Alton’s lemon-ginger frozen yogurt.

This frozen yogurt is super refreshing and reminds me of warmer weather (as I type this, it is snowy outside and the Christmas tree is illuminated). The first time we ate this frozen yogurt, the crystallized ginger seemed too chewy, but after freezing the yogurt for a longer period, the chewiness went away. I definitely foresee making this again, as it is packed with ginger and lemon flavor, and is a relatively healthy treat. This is worth making.