I didn’t really become a beer drinker until I was in my 20s. Growing up, the only beer I was really exposed to was what my dad drank, and he got on the microbrew bandwagon at the very beginning. I was pretty shocked when I had my first Budweiser at a wedding, as it was so thin and flavorless compared to the beer I had always known. I guess you could say I was destined to be a beer “snob” from the beginning. Since then, I have developed my beer palate substantially, and I enjoy quite a few styles of beer today.
Ted got into homebrewing before we were ever a couple. Over the years we have made several batches of beer together, some of which have been pretty good. Our worst homebrew was a blueberry beer that was my idea, and it involved infusing the beer with pounds of fresh blueberries. The beer was pretty terrible, and a complete waste of fantastic blueberries. Our kitchen was also a sticky, purple mess after bottling that beer, but the dog seemed to enjoy that part.
We also brewed a beer years ago for a local homebrew competition. This particular beer was infused with apricot kernels (again, my idea). We came home late one evening to find that the airlock on our glass carboy had become clogged with apricot kernels, leading to a beer explosion all over our bedroom. Yes, we kept the beer in our bedroom; our bedroom was the right temperature and we could keep the animals away from it. We spent hours that night cleaning beer and apricot kernels off of every surface. Our poor hardwood floors were just never the same.
Good Brew
Alton’s homebrew recipe from this episode of Good Eats was to be my first time brewing beer on my own (though Ted did help with some heavy lifting). This particular beer is made using malt extract, as opposed to all-grain brewing. All-grain brewing is more complicated because you convert the starches to sugars, while that step is done for you if you use malt extract. For this recipe, you will need to have the following hardware: a 3+ gallon pot (actually, more like 5 gallon), a probe thermometer, a pair of nesting colanders/strainers, two lidded 7-gallon buckets with airlock holes (preferably with spigots), an airlock, plastic tubing, a bottle filler, bleach, bottles, and caps and a capper, if you are using them. For ingredients, you will need liquid pitchable yeast (I used a California ale yeast), 7 pounds of malt extract, 1/2 pound milled barley, 1 3/4 ounces of Kent Goldings hops, 1 ounce of Cascade hops, 7 pounds of ice, 4 gallons of spring water, and an additional pint of spring water. Note: one gallon of the water, along with the pint, should be kept cold, while the rest of the water can be room temperature.

Malt extract, milled barley, Cascade hops, Kent Goldings hops, and pitchable yeast.
To begin the brewing process, you will want to sterilize all of your equipment by pouring two ounces of bleach into your bucket, filling it with cold water. Dump all of your equipment (for today you will need your strainers, bucket lid, and airlock) into the bleach solution, letting it sit. The bathtub is a great place for this.

Bucket and equipment being sterilized with bleach water.
Meanwhile, you can begin brewing by pouring two gallons of bottled water into your pot.


Add 1/2 pound of milled barley and turn the heat to high. Using your probe thermometer, monitor the temperature of your barley solution; you will want to bring the heat to ~150 degrees, then decrease the heat, allowing the temperature to continue to rise to 155 degrees. Maintain 155 degrees for 30 minutes. This part of the brewing process is called “mashing.”


When your timer has gone off, add another gallon of bottled water to the pot, along with your seven pounds of malt extract. Note: Malt extract has the consistency of honey, so it is helpful to warm the malt extract in warm water to make it easier to remove from its container.


Increase the heat to high, bringing the mixture to a boil. If the mixture foams badly, decrease the heat until the foam settles, and raise it again.


Once you have reached a boil, decrease the heat to a simmer. Now it is time to add your flavoring hops, so add 1 ounce of Cascade hops and 3/4 ounce of Kent Goldings hops, cooking for 10 minutes.


After the flavoring hops, it is time to add the aroma hops (this is called dry hopping), so add the remaining ounce of Kent Golding hops. Turn off the heat, cover the pot, and let the mixture sit for five minutes.


While your brew is sitting, thoroughly rinse your bucket and all of your equipment to get rid of any bleach. Dump your seven pounds of ice, along with your cold water (1 gallon plus 1 pint) into your bucket.


Nesting your strainers over the top of your bucket, strain your mash into the ice/water in your bucket. This strained mash is called “wort,” which is young beer.


Take the temperature of your wort with a clean thermometer. Your yeast packet will tell you the temperature at which it can be added to your wort. In the episode, Alton’s wort was cool enough that he could add his yeast right away, but this was not the case for me. Since I was brewing late in the evening, I had to wait until the following morning to add my yeast. In any case, when your wort is cool enough for your yeast, mix the yeast and pour it into the wort – there is no need to stir or shake.

Adding my yeast the following morning once my wort was cool enough.
Place the lid on the bucket, fill the airlock with water, and place your bucket in a cool, dark place. The airlock allows the fermenting beer to release pressure, so your fermenter will not explode.

Airlock filled with water.
After seven days, time the bubbles in your airlock; if they are more than a minute apart, you are ready for the next step. I proceeded to the next step after eight days. On this day, you will need to sterilize your second bucket and its lid, your plastic tubing (if using), and your bottle filler, which you can do again with bleach/water. You will also need to sterilize your bottles, which I did by running them through the dishwasher with some bleach. If you are using bottle caps, you can sterilize them by boiling them in water in a saucepan.

Bottle caps being sterilized by boiling them in water.
When all of your equipment is ready to go, bring a pint of water and 3/4 C sugar to a boil, allowing it to cook for five minutes.

Sugar and water to be boiled for five minutes.
Pour the sugar solution into the bottom of your clean bucket. Using your plastic tubing, or a spigot if your bucket has one, transfer your beer from its original fermenter to your clean bucket that is holding the sugar solution.
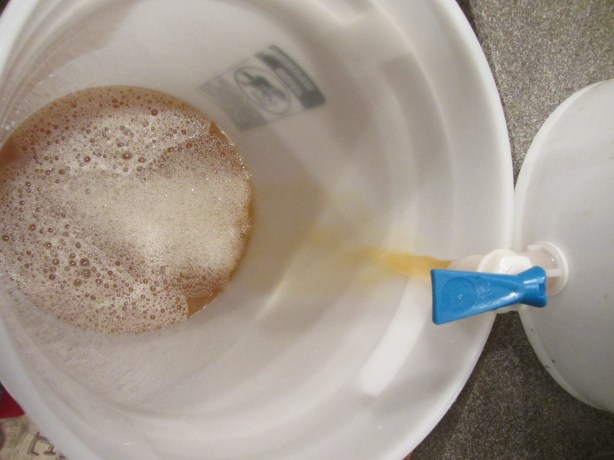
Beer being transferred to second bucket containing sugar solution.
Finally, transfer the beer to your clean bottles, using your bottle filler.
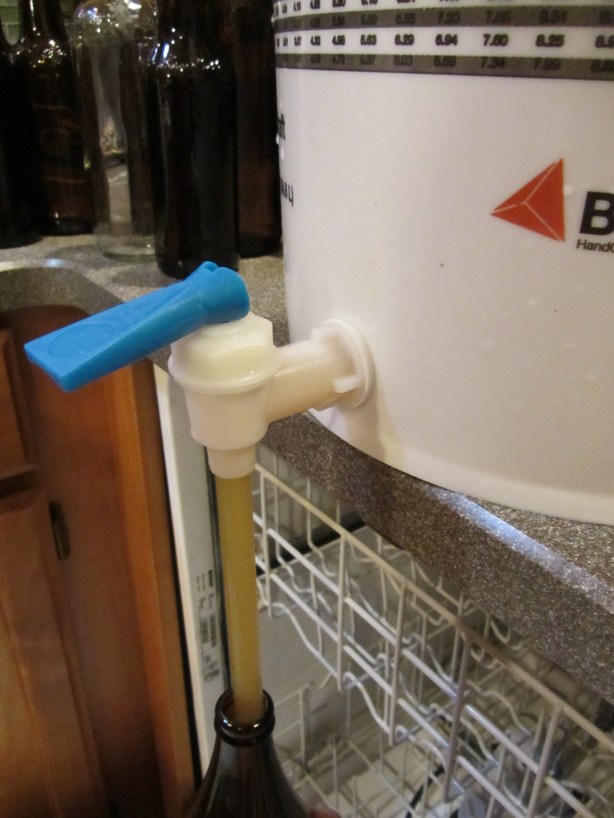
Beer being transferred from bucket to bottles, using bottle filler.
Cap the bottles and place them in a cool place for 7-14 days before trying.


I first tried my beer seven days after bottling, splitting a 22-ounce bottle with my brother. As I poured it, I was concerned that it would not have enough carbonation, but it was actually fine.
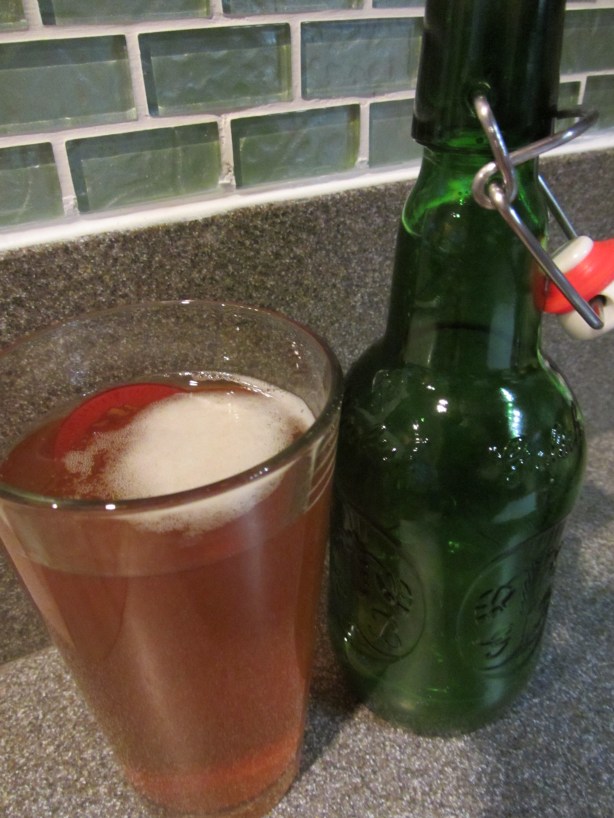
A bottle of Alton’s homebrew.
This beer is a sure-fire easy-drinking beer that could be enjoyed by beer drinkers of all types. This beer is golden in color, light, and has citrus notes that would make it refreshing on a hot day. And, the carbonation seems to be just about right. Overall, I am pretty pleased with this homebrew, and I would recommend Alton’s method for anyone looking to try homebrewing for the first time.

[…] my beer was fermenting from last episode, I got busy prepping the four recipes from the 75th episode of Good Eats. The main player in this […]
[…] browned, put the empty pot back on the heat and add 12 ounces of medium-bodied beer (I used one of Alton’s beers), scraping to deglaze the […]