Posts Tagged ‘steak’

Well, it took a while, but I finally completed all of Alton’s recipes for an entire butchered beef tenderloin. In “Tender is the Loin I,”  Alton showed how to butcher a whole tenderloin into cuts to be used in five different recipes. You cut the loin into four filets, a center cut roast, a head roast, a tip portion, and a chain.

In addition to the butchering in that first tenderloin episode, he also demonstrated a recipe for the filets from the tenderloin. As I mentioned before, for some reason, a cocktail episode aired in between the two tenderloin episodes, which was an odd decision. Here are the recipes for the remaining cuts from the beef tenderloin.

Center Cut Tenderloin Roast

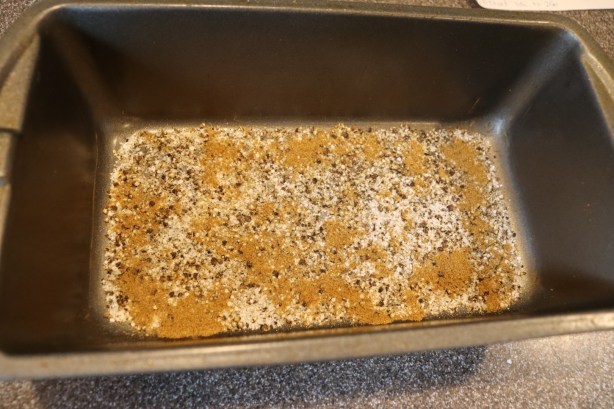
The center cut roast from the tenderloin is used first in the second episode. This cut of meat should weigh 1 to 1 1/4 pounds. For this recipe, place 1 1/2 t Kosher salt, 1 1/2 t pepper, and 1 t cumin in a loaf pan.
IMG_2154(2)

Kosher salt, pepper, and cumin.

Set the roast in the spices and toss it around to coat on all sides. Let the roast sit at room temperature for 30 minutes to one hour.

After resting, place a grill pan over high heat for five to seven minutes. Sprinkle the pan with Kosher salt, as this will make it easier to clean later. Sprinkle vegetable oil over the roast and turn it with tongs to coat. Place the roast at the front of the grill pan and gradually roll the roast from the front to the back of the pan, searing for about eight minutes total on all sides.

Transfer the roast from the grill pan to a metal baking pan and let it sit for 10-15 minutes.

IMG_2172(2)

Seared roast placed in metal pan.

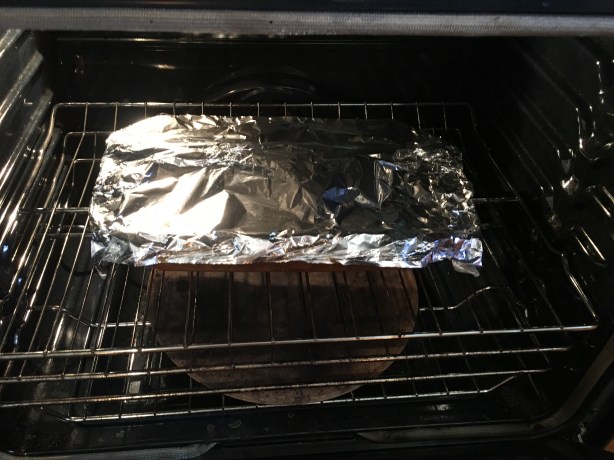
While the roast sits, preheat the oven to 250 degrees. Place the roast back on the grill pan place it in the oven with a probe thermometer in its center. Cook the roast until the probe thermometer says 135 degrees.

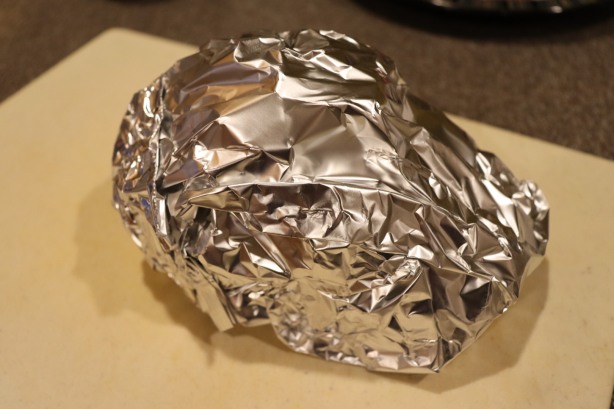
Remove the roast from the oven, wrap it in foil, and let it rest for 30 minutes before slicing.
IMG_2176(1)

Roast wrapped in foil for 30 minutes.

IMG_2185(2)

Alton’s center cut tenderloin roast.

This roast was so easy and was perfectly cooked. I typically use some sort of sauce with beef, but I found that this roast was flavorful enough on its own. The outside of the roast had a spice-filled crust, while the inside of the roast was juicy and tender. This is a roast you could easily make any day of the week and any meat-eater would certainly enjoy this.

Stuffed Roast

To follow the center cut roast, Alton prepped his recipe for the small head roast (1 to 1.5 lb) portion of the loin. I prepared this for dinner on Father’s Day. To begin, slice open the head roast, creating a pocket. Open the roast and place a few more slices internally, slicing it “like a book.” Brush the inside of the roast with olive oil and season it with Kosher salt and pepper.

Sear the roast on both sides on a hot grill pan that has been sprinkled with Kosher salt. Let the roast rest for 15 minutes after searing.

IMG_2239(1)

Head roast on hot grill pan to sear.

Stuff the roast with three ounces of blue cheese, roll the roast up, and secure it with butcher’s twine.

Place a probe thermometer in the center of the roast and cook the roast in the oven at 450 degrees until the thermometer reaches 125 degrees.

IMG_2246(1)

Head roast in 450 degree oven until reaching 125 in the center.

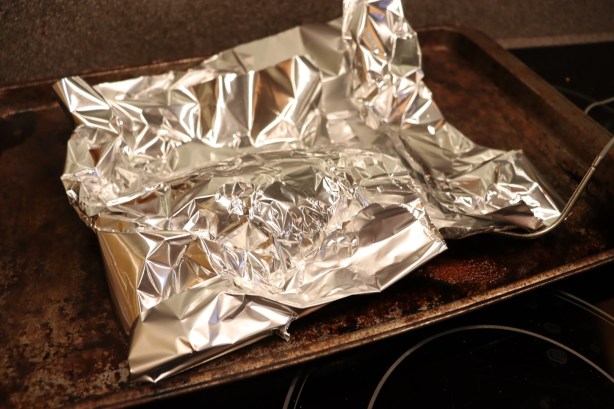
Remove the roast from the oven, cover it with foil, and let it rest for 15 minutes before slicing.
IMG_2248(1)

Head roast resting in foil for 15 minutes.

IMG_2249(1)

Head roast, ready to be sliced.

IMG_2251(1)

Alton’s stuffed tenderloin.

This was delicious, especially if you like blue cheese. As Alton said, the idea with this recipe was to put the sauce on the inside of the meat… and it works. The meat came out pink and juicy and the cheese was melting in the center. This is another fantastic roast recipe that requires very little effort and produces great results.

Carpaccio

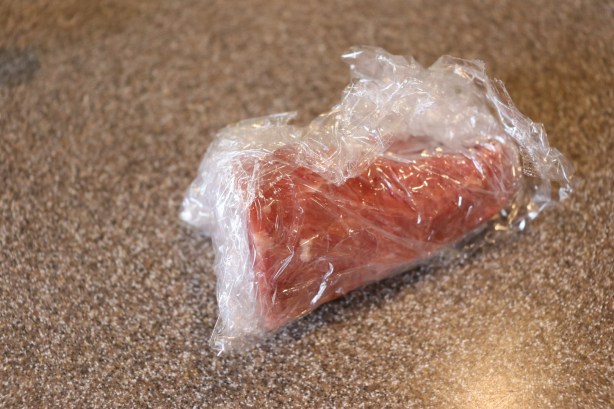
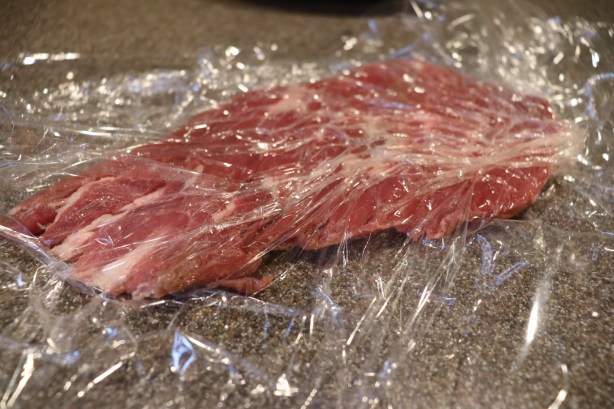
I love carpaccio. Although the idea of raw meat may scare some people, I encourage you to give it a try. I had previously only had carpaccio in restaurants, and I likely would never have made it at home if were not for this project. To make Alton’s carpaccio, you will need a small tip portion from a beef tenderloin. Wrap the meat in plastic and place it in the freezer for two hours, or until it is quite firm.
IMG_2151(1)

Tenderloin tip wrapped in plastic and heading to freezer for 2 hours.

Leaving the plastic on, slice the meat as thinly as possible with a very sharp knife; I actually removed the plastic for slicing, as I found that the plastic really got in the way.

IMG_2157(2)

Slicing meat after freezing.

Spritz a counter top with water and place a layer of plastic wrap down. Spritz the top of the plastic and add the meat slices, overlapping them slightly to form a “disc of meat.” Spritz the meat again and fold the plastic over the top of the meat, sandwiching the meat between the plastic layers.

Spritz the top layer of plastic one final time. Set a pie tin on top of the plastic and pound it with a mallet until the meat is very thin.

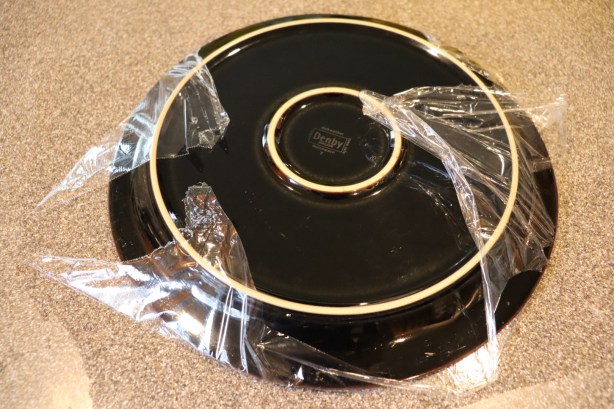
Remove the top layer of plastic and invert a plate on top of the meat. Slide your hand under the meat and invert the meat back onto the top of the plate.
IMG_2165(2)

Inverting meat onto plate.

Peel off the remaining plastic, leaving the meat on the plate. Chill the meat until eating.

IMG_2166(2)

Carpaccio, inverted onto plate.

To serve the carpaccio, dress it with good olive oil, Kosher salt, pepper, lemon juice, shaved Parmesan, and greens. I also added some capers for good measure.

IMG_1707(1)

Alton’s carpaccio.

I served the carpaccio with good crackers. I honestly did not think homemade carpaccio would measure up to what I’ve had in restaurants, but Alton’s carpaccio was just as good as anything I’ve eaten out. Now, of course, this was using high-quality beef. This would make a great appetizer to serve to guests, as it is really quite simple to prepare, but is a restaurant-quality dish. Great recipe!

Chain of Bull Cheese Steaks

The final recipe of the tenderloin recipes uses the “chain” part of the loin to make cheesesteak sandwiches. We ate these sandwiches just last night for dinner. I had frozen my chain and pulled it out to thaw a couple days ago. To make these sandwiches, trim the chain of any excess fat and place it between sheets of plastic wrap that have been spritzed with water.

Pound the meat with a mallet until it is even in thickness for its whole length.
IMG_2256(2)

The chain portion placed in plastic and pounded until thin.

Place the meat in a bowl and add olive oil, Kosher salt, and pepper. Toss the meat to coat.

IMG_2257(2)

Chain placed in bowl and seasoned with olive oil, Kosher salt, and pepper.

Heat a grill pan until it is hot and sear the meat on all sides for about eight minutes total.

IMG_2260(1)

Seared chain.

Remove the hot meat from the pan and wrap it tightly in foil. Add some additional olive oil to the grill pan and add one julienned onion. Cook the onion until is golden brown and soft.

Finely chop the cooked meat and pack it onto hoagie rolls.

IMG_2264(1)

Chopped chain meat.

Top the meat with shredded Mimolette cheese and the warm onions. I could not find Mimolette cheese locally, so I opted for shredded Cheddar. And, we added a little bit of hot Giardiniera.

IMG_2267(2)

Alton’s cheese steak sandwich.

I know people are picky about their cheesesteak sandwiches, and I am a complete novice. All I can say is that the meat was very tender and the warm onions melted the cheese just enough to kind of bind everything together. I did appreciate the little punch of heat from the Giardiniera, so I would personally opt for that again, though some may view that as sacrilegious. I found this to be a really tasty sandwich. Is it a true Philly-style cheesesteak sandwich? Well, that’s a question for those more experienced than I.


I’ve mentioned previously that my dear dad was a big Good Eats fan also, but he primarily watched for education. He would adopt a lot of Alton’s kitchen hacks along the way, and occasionally an episode would grab his attention enough that he would actually run to the store and try his hand at a recipe or two. Well, the 141st episode is one that got Dad really excited because it involves purchasing a whole beef tenderloin and butchering it at home into several cuts; as a surgeon, Dad was obviously proficient at such things, and he also really enjoyed learning new skills for himself. It’s also cheaper to do the butchering at home.

There is only one recipe in this episode, but prior to doing any cooking, Alton took to his demonstrations of butchering a tenderloin. When purchasing a whole tenderloin from a store such as Costco, you will want to look for a loin that has been peeled of extra fat and has the side muscle on. Apparently, this is called a PSMO (pronounced “pismo”) in the butchery world. It took a couple weeks for us to be able to find a whole tenderloin at Costco, as there was a bit of a meat shortage for a while, and when we did find one it was more expensive than normal.

When ready to begin cutting, rinse the whole tenderloin under water and let it drain in the sink for a few minutes.

IMG_2145(1)

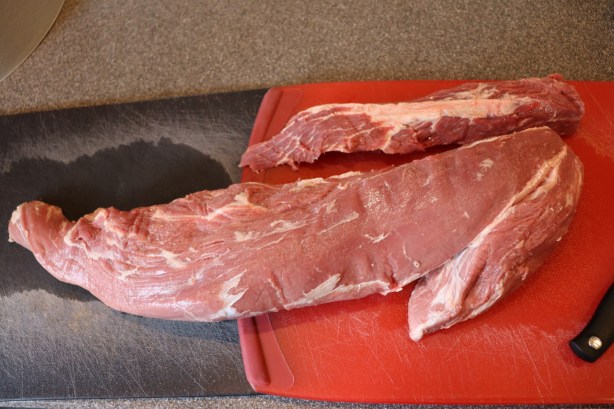
Whole beef tenderloin.

Place the loin on a long cutting board (I had to overlap two boards) with the vertebral/rough side down and the wide end away from you. If there is a large white membrane visible on the top of the meat, tear/peel/cut the membrane away to expose the tenderloin underneath. My tenderloin did not have much of this membrane.

Next, you will notice that the meat is composed of three distinct portions – the long tenderloin in the center and two additional muscles that are attached. The long thin muscle on the side of the tenderloin will come off next; it is easiest to do this by cutting from the thin end to the wide end. Once removed, set this “chain” muscle aside. This meat will be used to make Philly cheesesteak sandwiches in the next tenderloin episode.

IMG_2146(1)

Whole beef tenderloin. You can see the chain muscle running along the top and the small head muscle at the bottom of the wide end of the loin.

IMG_2147(1)

Here, the chain has been removed – to be used later for cheesesteak sandwiches. The head muscle will be cut off next – you can see it starting to separate now.

Flip the tenderloin over and remove any excess fat, shaving it off with a sharp knife running toward you. Your loin will have some silver skin on it, which is the tough, shimmery band of connective tissue that is inedible. If you have a boning knife, insert its tip under the band of silver skin, perpendicular to the loin, and lift the silver skin up. Place your finger under the silver skin and pull it tight as you slide the knife away from you to remove the silver skin. Discard all of the silver skin.

Since you have now removed the “chain” muscle from the loin, you will notice that you now have the main tenderloin and a small muscle that attaches to the wide end of the loin. Remove this small “head” muscle, setting it aside. This muscle will be used to make a stuffed tenderloin roast in the next tenderloin episode.

To portion the remaining meat, you will want to use a long slicing knife. Alton prefers to use a Granton knife, which has a long dimpled blade. I don’t have a Granton knife, so I used my sharpest chef’s knife. Without sawing through the meat, slice off the tip portion of the narrow end of the loin. Set this piece aside to make beef carpaccio later. Still working from the narrow end of the loin, use a ruler to cut a three-inch portion; this will be a butterflied filet because it is cut from a skinnier part of the tenderloin. To butterfly this piece, cut it almost all the way through at its center and fold it open to bring the sides together – you should now have a filet that is about 1.5 inches thick. The cut sides will now form the flat top of the filet.

IMG_2152(1)

Butterflied filet at the top and other filet below.

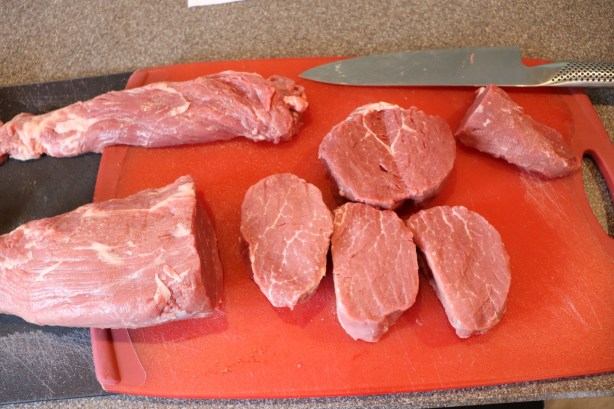
Next, cut three more filets, each 1.5 inches thick. We’ll get to cooking the filets soon here.

IMG_2148(1)

Butchered tenderloin. Top left is chain muscle for cheesesteak sandwiches. Below that is a portion that will be used for a stuffed roast. Then there are the four filets (the top one is the butterflied one), and the small piece of meat in the upper right corner is for carpaccio.

You should be left with a remaining center hunk of tenderloin that is about 1-1.5 pounds. This piece will also be used later in the next tenderloin episode to make a center cut tenderloin roast.

At this point, if you plan to use the meat soon, you can double wrap it in plastic and store it in your refrigerator. For longer storage, vacuum seal the meat and stick it in the freezer.

Steak au Poivre

After portioning that entire tenderloin, this episode only provides a recipe for the four filet portions of the loin. The remaining cuts of meat will be used in the second tenderloin episode, which, oddly, is not the next episode. Instead, there is a cocktail episode that separates the two tenderloin episodes. It seems really silly to me that the two tenderloin episodes didn’t air back-to-back since the second episode is a continuation of the first. So, yeah, I froze most of the meat I cut from my tenderloin. The filets, though, I did not freeze, but rather used to make Alton’s steak au poivre. I only cooked two filets, though, instead of four. For four filets, you want to first grind 2 T of black pepper; you want this pepper to be very coarsely ground. If your pepper mill doesn’t do a very coarse grind, place the whole peppercorns in a pie tin, top them with a towel, and crush them with a mallet. Season your four room temperature filets with Kosher salt on both sides.

IMG_2204(1)

Filets (the right filet is the larger butterflied one) seasoned with Kosher salt.

Then, press the filets into the ground pepper on both the top and bottom sides.

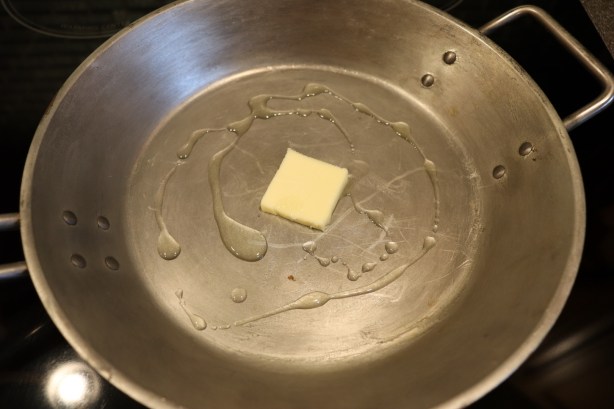
Place a 10″ skillet (NOT non-stick) over medium-high heat, adding 1 T butter and 1 t olive oil (not extra virgin).

IMG_2202(1)

Butter and olive oil in pan.

When the fat just starts to color and you see a tiny bit of smoke, add the steaks to the pan, cooking them for four minutes per side for medium rare. I did not do the best job with butterflying my one filet, so it ended up being considerably larger than my other three filets. Since Ted likes his steak a little less cooked than I do, I figured I would cook the larger one for Ted simultaneously with a smaller filet for me, and they would be done around the same time.

Transfer the steaks to a warm plate on a heating pad and cover them with foil.

Pour any remaining fat out of the pan (my pan had none), leaving the solids. Set the pan over high heat.

IMG_2216(1)

Pan after removing steaks.

Turn the burner OFF and add 1/3 C of Cognac to the pan. Use a lighter to carefully ignite the alcohol.

IMG_2223(1)

Cognac added to pan and ignited.

When the flames have dissipated, place the pan back over medium heat and scrape the solids off the bottom of the pan with a whisk. Add 1 C heavy cream, bringing it to a boil over medium-high heat. Cook the sauce over low heat until it has thickened to your desired consistency. Taste the sauce and adjust for seasoning with Kosher salt and pepper. Stir in 1/2 to 1 t additional Cognac.

Add the warm steaks back to the pan and turn them to coat with the sauce.

Serve the steaks immediately.

IMG_2234(1)

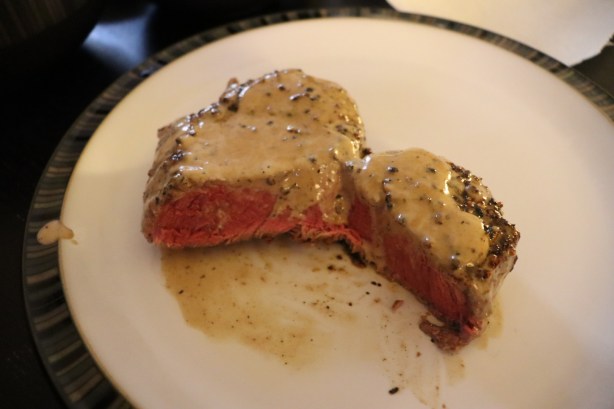
Alton’s steak au poivre.

I don’t cook steaks often, and I always really worry about overcooking them, especially when they are good cuts of meat. I cooked my steaks for four minutes on each side and they ended up being a bit underdone, unfortunately. I chose to use a pan of my parents’ that I really am not familiar with, so maybe I should have gone with my cast iron instead? I think an extra minute of cooking on each side would probably have worked very well in the pan I used. The pepper crust on the meat was fantastic and the meat almost melted in your mouth. The sauce was rich without being heavy, and the Cognac gave the sauce a little sweetness to contrast with the heat of the black pepper. This really was quite delicious. If only I had cooked my steaks just a tiny bit longer…

This episode of Good Eats is unique because Alton does not actually cook anything. Instead, this episode serves to prove or debunk five culinary myths. Through a series of kitchen experiments, Alton evaluates each myth and concludes whether each is true or false.

Myth #1 – The juices of meat are sealed in by searing.

For this myth, Alton weighed two steaks prior to cooking. The steaks were both oiled, but no salt was added, as salt pulls out liquid. One steak was seared on both sides in a hot skillet, while the other steak was not seared. The seared and unseared steaks were placed in a 400-degree oven at the same time, and a probe thermometer was placed in the center of each steak; the thermometers were set to beep when the steaks reached a temperature of 140 degrees. The seared steak reached 140 degrees faster than the unseared steak, so the seared steak was removed from the oven and allowed to rest for five minutes. After four additional minutes in the oven, the unseared steak reached 140 degrees, and was removed from the oven/allowed to rest.

After both steaks had rested, they were weighed a second time. The unseared steak lost 13% of its raw weight, while the seared steak lost 19% of its original weight. Based on these results, Alton concluded that searing does not seal in meat juices, and declared this myth to be “SMASHED.”

Myth #2 – Birds can be killed from the toxic fumes of nonstick pans.

In all honesty, Alton did not conduct any actual experiment for this myth. Instead, he simply talked about the conclusions that have been made by studies conducted on this topic. It has been found that nonstick pans release toxic fumes when they hit a temperature above 500 degrees, and especially when they are empty. These fumes can kill birds and can also cause humans to have flu-like symptoms. Alton opts to avoid all high-heat cooking in nonstick pans, including searing, frying, broiling, and even sautéing. This myth is “TRUE.”

Myth #3 – Mushrooms should not be washed because they absorb water.

The method for this experiment was to place four ounces of mushrooms in a hand sieve, which was then placed inside a glass bowl; four of these mushroom/sieve/bowl combos were set up. A liter of water was poured over the mushrooms in three of the four bowls, while the final bowl of mushrooms were left dry. The first bowl of mushrooms was allowed to sit in the water for 10 minutes before removing and draining the mushrooms. The second bowl of mushrooms was allowed to sit in the water for 20 minutes before removing and draining the mushrooms. The third bowl of mushrooms sat in the water for 30 minutes before removing and draining the mushrooms. The final bowl of mushrooms was rinsed thoroughly under running water and allowed to drain.

After all of the mushrooms were drained, the mushrooms from each sieve were weighed to analyze how much water they had absorbed. The mushrooms soaked for 10 minutes had gained 0.2 ounces of water, or about one teaspoon. The 20 minute mushrooms had gained 0.25 ounces of water, or about a teaspoon. Thirty minutes of soaking resulted in the mushrooms gaining 0.15 ounces of water, or about a teaspoon. The mushrooms rinsed under running water had gained 0.2 ounces of water, or about a teaspoon.

This experiment demonstrated that mushrooms absorb a small amount of water regardless of length of exposure to water. Since mushrooms tend to have a fair amount of grit and dirt on them, Alton concluded that he will thoroughly wash his mushrooms. This myth was “SMASHED.”

Myth #4 – Adding oil to pasta water keeps noodles from sticking together.

To test this myth, Alton added a gallon of water, 1 T of olive oil, and a pinch of Kosher salt to a pasta pot. The pot was covered and placed over high heat until the water reached a boil. Once the water was boiling, Alton added a half pound of pasta to the water, decreased the heat to medium-high, and cooked the pasta until it was al dente.

After cooking, Alton drained the pasta, allowing the liquid to drain into a long, clear tube beneath the strainer. After several minutes, the drained liquid had separated into its oil and liquid phases, with the oil rising to the top of the tube. Alton calculated the drained amount of oil to be 0.43 ounces, which was about 85% of the original tablespoon of oil added to the pasta water.

Since only 15% of the olive oil remained on the surface of the drained pasta, Alton concluded that not enough oil coated the pasta to prevent the noodles from adhering to each other. This myth was hereby “SMASHED.” Alton did, however, state that adding oil to pasta water can prevent the water from foaming by oiling the bonds of the starch released from the noodles. Or, you can just use a larger vessel with more water.

Myth #5 – Water can explode when microwaved.

The experiment for this myth involved placing a tall, narrow, glass bottle (picture a Snapple bottle) full of water in a microwave. The water was microwaved for three minutes on high power, which resulted in water spraying all over the inside of the microwave. This “explosion” of water is called spontaneous boiling, which occurs when the temperature rises above the boiling point without the formation of any bubbles. Since the inside of the glass bottle was perfectly smooth, there were no nucleation sites, which are spots where bubbles can form. In addition, the small opening of the bottle kept the water still, so when the heat energy built up within the bottle, one large bubble was formed and the water sprayed everywhere. To avoid this, when microwaving, use a container with a large opening and stir the contents regularly. This final myth was deemed to be “TRUE.”

This episode of Good Eats is all about sauces and their power to take a dish to new levels. Alton gives some basic tips about thickening sauces and soups, stating that his preferred thickener is arrowroot starch. If you need to thicken a hot soup or sauce, first dissolve arrowroot starch in cold liquid (such as broth), and add the cold liquid to your warm sauce/soup. A good starting amount of starch is one tablespoon of starch per cup of liquid you wish to thicken. I always try to stash these sorts of tips in the library in the back of my brain!

Strip Steak with Pepper Cream Sauce

A pepper cream sauce is first in this episode, and Alton serves this sauce over strip steaks. In the episode he does not show how he cooks the steaks, but it is stated that the steak recipe accompanies the sauce recipe online. I cooked my steaks per the online recipe, and kept them warm in the oven while I made the sauce.

For the sauce, you will need beef broth, cognac, green peppercorns (these come in a brine and can be found near capers in the store), and cream.

IMG_8866

Ingredients for pepper cream sauce: beef broth, green peppercorns, cognac, and cream.

The first step of this sauce is deglazing the pan in which the steaks were cooked, which is done by adding 3/4 C of beef broth to the pan and scraping up any browned bits in the pan.

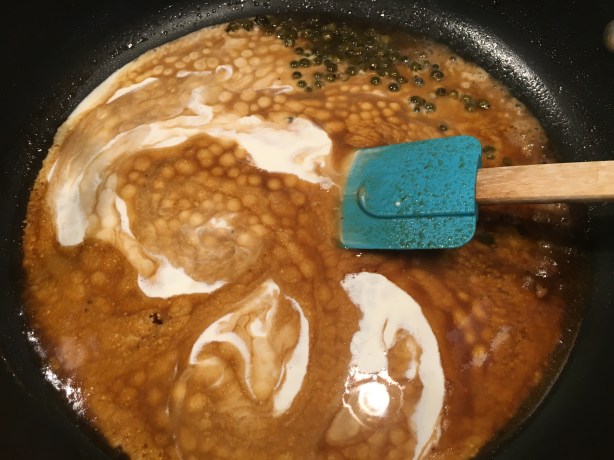
Let the broth reduce for a few minutes over high heat. Next, add 3 T cognac to the pan (this is about one miniature bottle), along with 1 T green peppercorns, drained and lightly crushed. Follow the peppercorns up with 3/4 C cream.

IMG_8878

Cognac, green peppercorns, and cream stirred into broth.

Let the sauce reduce until it is thick enough to coat the back of a spoon.

IMG_8879

Reducing the sauce.

Spoon the sauce over your cooked steaks and enjoy!

IMG_8882

Strip steak with pepper cream sauce.

This is sauce is really quite delicious. It is indulgent without being heavy, and the spice from the green peppercorns is excellent with meat. The cognac gives the sauce a sweet, fruity character and the cream makes the sauce rich and smooth. You could pair this sauce with any meat, really. I would be quite happy to be served this sauce in a high-end steakhouse. The next time you serve steak, whip up a batch of this sauce to kick your steak game up a notch.

Hollandaise

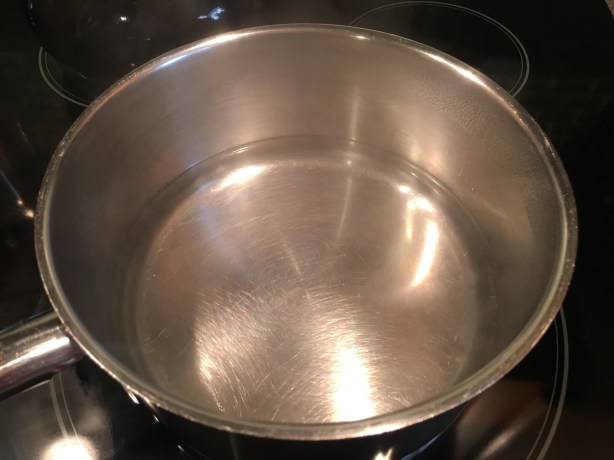
Hollandaise sauce was something my mom made fairly regularly, usually serving it over asparagus or broccoli. While I knew Hollandaise could be a bit finicky, my mom did not solely reserve her Hollandaise efforts for holidays. We are so fortunate to have a mom who was such a good cook, and who served us things like Hollandaise! I have only made Hollandaise a couple of times myself, and making Alton’s recipe made me realize it is something to make more regularly. For Alton’s Hollandaise, you will need a heavy saucepan with about an inch of water, and a mixing bowl that comfortably nests on top of the saucepan. I’m sure a double boiler would also work. Begin by bringing the water in the saucepan to a simmer.

IMG_8899

Simmering water.

While the water heats, place three egg yolks and 1 t water in the bowl and whisk – do this off of the heat. Whisk the yolks until they are lighter in color, which will take a minute or two.

Add 1/4 t sugar to the yolks and whisk for another 30 seconds.

IMG_8898

Sugar added to yolks.

Place the yolks over the simmering water and whisk them continuously for three to five minutes, or until they thicken, lighten in color, and fall from the whisk in a ribbon.

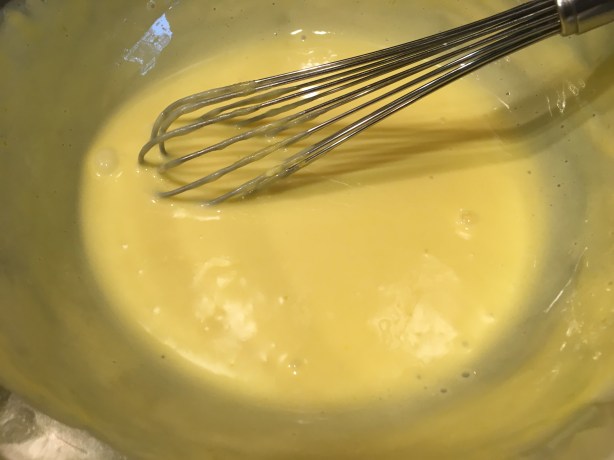
At this point, remove the bowl from the heat and whisk in 12 T unsalted butter, one tablespoon at a time; you will need to place the bowl back over the simmering water occasionally to melt the butter.

IMG_8905

Sauce after adding all butter.

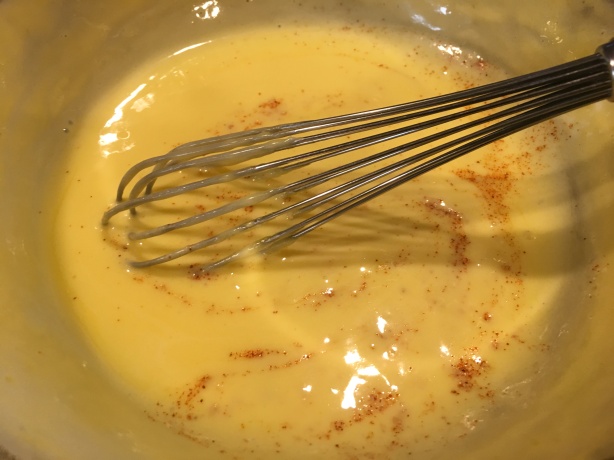
When all of the butter has been incorporated, add 1/2 t Kosher salt, 2 t lemon juice, and 1/8 t cayenne pepper.

IMG_8906

Kosher salt, lemon juice, and cayenne pepper added to sauce.

Serve the Hollandaise immediately, or store in a thermos until you are ready to use it. I served my Hollandaise for dinner over Eggs Benedict and steamed asparagus.

IMG_8908

Alton’s Hollandaise, served over asparagus and Eggs Benedict.

First off, we should all eat Eggs Benedict for dinner more often! Alton’s version of Hollandaise seems pretty foolproof to me, and is rich, creamy, and buttery. My only complaint about his Hollandaise is that I prefer my Hollandaise to have a bit more lemon. Otherwise, his Hollandaise hits all the marks of this classic sauce.

Skirt Steak

The 91st episode of Good Eats strives to provide recipes that elevate lesser cuts of meat to higher levels, starting with skirt steak. When purchasing skirt steak, it is ideal to get an “inside skirt steak,” though I could not find a steak labeled this way. In fact, I had to visit three grocery stores to find any skirt steak.

IMG_5551

My skirt steak.

Since Alton uses his skirt steak to make fajitas (my grandma used to pronounce fajitas “fa-jy-tas,” which I always thought sounded like a venereal disease), a 2 1/2 pound steak will serve eight people. Skirt steak is ideal for marinades, and it really only needs to marinate for an hour or so. For Alton’s skirt steak marinade, combine in a blender 1/2 C olive oil, 1/3 C soy sauce, 4 scallions, 2 big cloves of garlic, the juice of two limes, 1/2 t red pepper flakes, 1/2 t cumin, and 3 T dark brown sugar.

Place your steak in a large ziplock bag and add the marinade, massaging it into the meat. Place the steak in the refrigerator for an hour.

IMG_5554

Steak and marinade in plastic bag for an hour.

To cook a skirt steak, Alton recommends using a charcoal grill, but the odd part of his cooking method is that he has you cook the steak directly on the charcoal for 60 seconds per side (he recommends using a hair dryer to blow off any ash prior to grilling). Once cooked, wrap your steak in a double layer of heavy foil and let it rest.

Meanwhile, place a cast iron skillet on your charcoal, allowing it to heat up.

IMG_5562

Cast iron skillet placed on coals to heat.

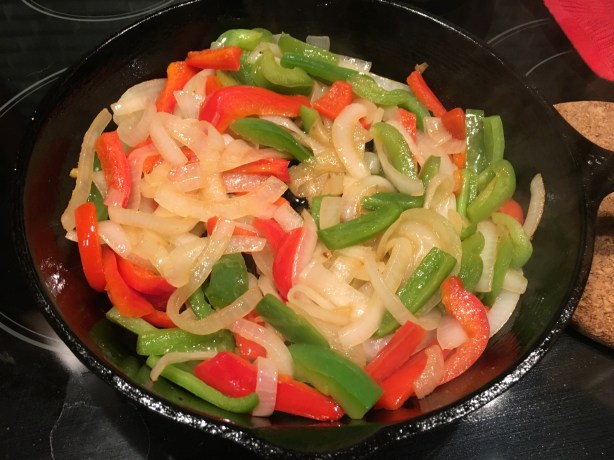
While your skillet heats, chop one red bell pepper, one green bell pepper, and one white onion, tossing them in vegetable oil. Add the oiled vegetables to the heated skillet, cooking them until soft and slightly charred.

IMG_5565

Sautéed veggies.

Next, slice your steak across the grain, as thinly as possible; skirt steak can be chewy and this will help to break up the meat fibers. Place the sliced meat back in the foil packet with its juices, tossing to coat.

IMG_5571

Steak after cooking more in the oven and resting again.

Finally, serve the sliced steak in warmed flour tortillas, along with the sautéed vegetables.

IMG_5572

Steak and veggies in tortillas for fajitas.

I have a few things to say about this recipe. First off, I cooked my steak directly on the charcoal for a minute on each side, and it was completely raw in the center, even after resting. I had to finish my steak in the oven.

IMG_5569

Steak after resting – RAW.

My second criticism is that a fair amount of ash stuck to my steak, which you could somewhat taste (and added a gritty texture). I will say that I did not use high-quality charcoal, which was probably part of the problem. If I did this again, I would use natural, high-quality charcoal. Finally, I still found my skirt steak to be extremely chewy, which was really disappointing. I’m not sure I would try this again, though I will say the marinade was fantastic, imparting the meat with really good flavor. Still, the raw steak, ashy flavor, and chewy meat outweigh the good marinade. Maybe I will try this marinade on a different cut of meat.

Sirloin Steak

After feeling like Alton’s skirt steak was sort of a flop, I was hopeful that his take on sirloin steak would be a bit better. When purchasing sirloin steak, look for cuts that are labeled as “top sirloin,” “top butt steak,” “center cut sirloin,” or “hip sirloin steak.” Essentially, as Alton puts it, the best sirloin steaks are the furthest away from the hooves and horns. For this recipe, you want a steak that is about 1 1/2 pounds. My steak actually came in two pieces.

IMG_5463

My sirloin steak. It came in two separate pieces.

The key with cooking sirloin steak is to start with low heat and finish with high heat. Begin by positioning two oven racks in the lowest two positions, placing a layer of foil, or a sheet pan, on the bottom rack to catch anything that drips. Preheat your broiler. As Alton says, a broiler is nothing but an upside-down grill. While your oven preheats, oil your steak and season it with salt and pepper.

IMG_5465

Steak, oiled and seasoned with salt and pepper.

Once your oven is hot, place your steak directly on the second lowest oven rack, and place a piece of foil in the oven door to keep it slightly ajar; this will keep the broiler from cycling off. Cook the steak for five minutes.

IMG_5466

Steaks, placed directly on second lowest rack for 5 minutes.

After five minutes, flip the steak, place the foil back in the door, and cook it for five more minutes.

IMG_5467

Steaks, flipped over after five minutes. Left to broil for 5 more minutes before moving up to second highest rack position.

Next, flip the steak again, moving its rack up to the second highest position (be sure to move the drip tray up also). Place the foil in the door and cook the steak for three minutes. After three minutes, flip the steak again, place the foil in the door, and cook the steak for a final three minutes. *I failed to get photos of my steak after I moved it to the second highest rack because my dog gets scared whenever the broiler is on, and especially when I open the oven door. Why? I have no idea. Anyway, remove the steak from the oven and let it rest for a few minutes.

IMG_5468

Finished steak, resting.

Slice the steak on the bias and serve.

IMG_5471

Finished steak, sliced on the bias.

I served my steak over a green salad and we were quite happy with this one.

IMG_5475

Finished steak, served over salad.

Alton’s cooking method for this is pretty spot-on, though you may need to adjust the cooking time slightly for your steak size and broiler. My resulting steak was pink in the center and tender. This is about as easy as it gets for cooking a decent, fairly inexpensive, weeknight steak. Alton redeemed himself with this one.

Braciole

When I married into Ted’s family I became privy to his family’s spaghetti recipe, a meal that epitomizes “comfort food.” Their family recipe is for a rich red sauce, flavored with meat and spices, that is served over spaghetti. Included in the red sauce are bracioles, which are miniature rolls of seasoned meat that become incredibly tender as they simmer in the red sauce. When I saw that the final Good Eats episode of the sixth season would involve making a braciole, I was incredibly curious to see how Alton’s version would compare with Ted’s family’s recipe.

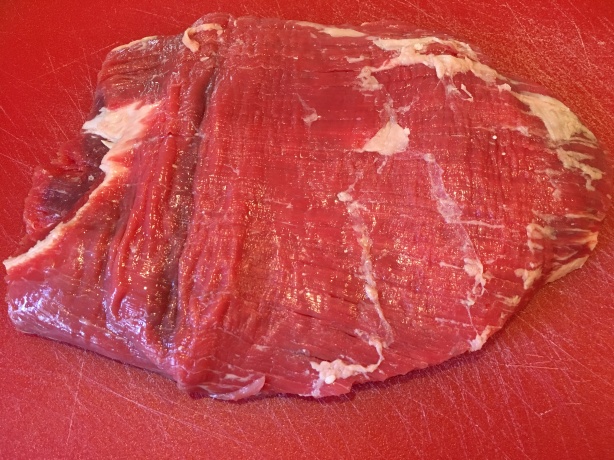
For his braciole, Alton recommends using flank steak, purchasing the thinnest one you can find.

IMG_2913

Flank steak.

Laying the steak on a counter, spritz its surface with water and cover it with plastic wrap. Spritz the surface of the plastic wrap with water also; the water will allow the meat tenderizer to slide as it hits the meat. Using a meat tenderizer (Alton recommends one with a large, flat surface), pound the steak until it is thin.

Next, it is time to make the braciole filling by combining in a food processor 1 clove of garlic, 1 T chopped parsley, 1 T chopped fresh oregano, 1 t chopped rosemary, 1 t chopped thyme, 1/3 C grated Parmesan, 1 1/4 C flavored croutons, and 2 eggs.

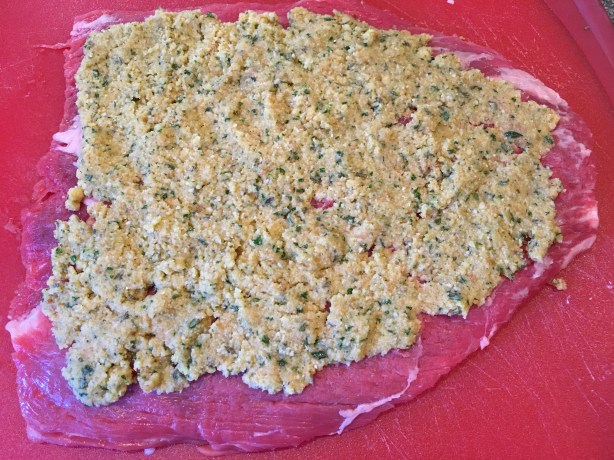
Using a spatula (I found that my hands worked better), spread the filling over the surface of the flank steak, with the wide edge of the steak facing you. Do not go all the way to the edge of the meat, or the roll will not seal well.

IMG_2919

Flank steak topped with braciole filling.

Roll the meat toward you until you have a nice log, and turn the meat 90 degrees, so it is perpendicular to you.

IMG_2921

Flank steak rolled into a log.

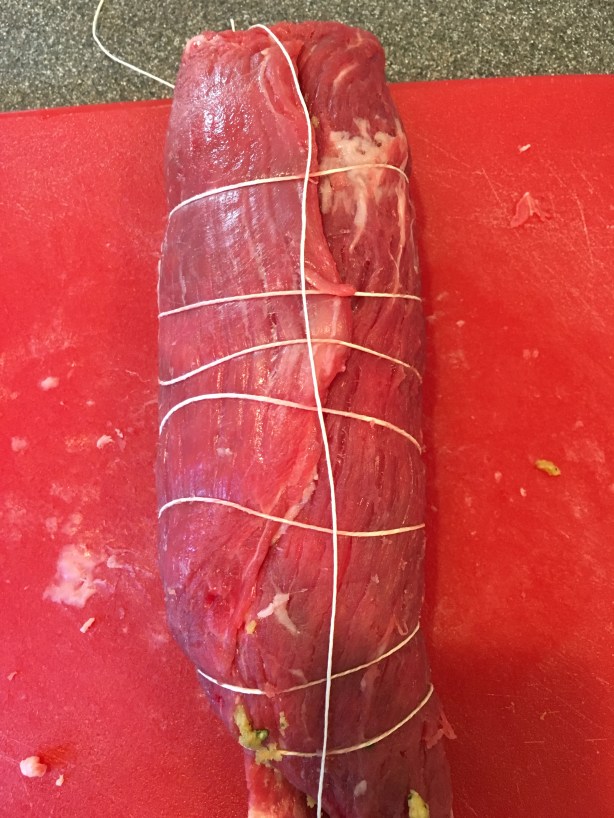
Running cotton butcher’s twine under the far end of the meat, tie a surgeon’s knot near the top of the log by passing the string twice under itself, followed by two more passes the other direction. Be sure to leave at least eight inches of excess twine on the loose end.

Working toward you, twist the twine to form a large loop and wiggle it up the meat.

IMG_2924

A loop formed by twisting the twine and wiggling the loop up the meat.

Continue forming loops, sliding them up the meat until you have a ladder of twine running up the length of the meat.

IMG_2925

Continuous loops formed and wiggled up the meat to form a network of loops.

Flip the log over and bring the twine to the top of the log, crossing it once under the center loop of twine.

IMG_2926

The meat, flipped to its back side. Bringing the string up to the top, crossing it once under the center loop.

Bringing the two ends of twine together, cross them on the back side of the log and flip the meat back to its front, tying another surgeon’s knot and a slip knot to secure. Let the meat sit at room temperature for about 15 minutes. When ready to cook, coat the surface of the meat with canola or peanut oil and a sprinkle of Kosher salt.

IMG_2931

A surgeon’s knot tied on the front of the meat, bringing both ends of the twine together to secure. The meat is oiled and sprinkled with Kosher salt.

Heat a cast iron skillet (I used a large non-stick skillet because we have a glass cook top) on the stove until it is hot enough to sear the meat, and sear the meat on all sides until browned. Meanwhile, preheat your oven to 350 degrees, placing a 9×13″ pan inside with 3 C of tomato sauce (I used the Good Eats tomato sauce here).

IMG_2901

Three cups of tomato sauce to be heated in the oven.

Once the braciole is seared on all sides, place it in the hot tomato sauce, spooning the sauce over the meat.

Tenting the pan with foil, return it to the oven for at least 45 minutes. Alton says you really can cook this all day, if you choose, but my braciole seemed to be perfect after about two hours.

IMG_2940

Pan tented with foil and placed in the oven.

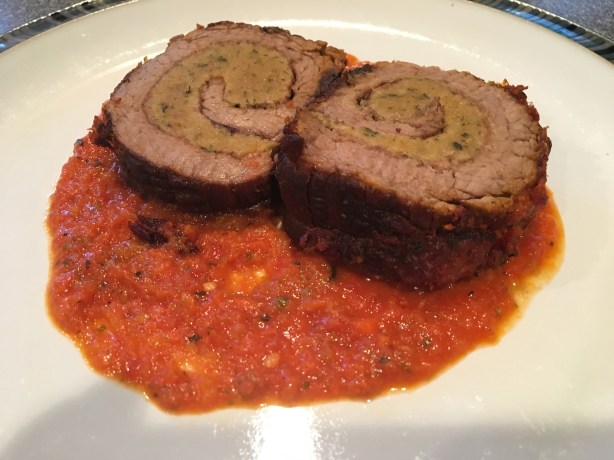
Slice the braciole and serve it over the tomato sauce.

IMG_2951

Alton’s finished braciole with tomato sauce.

I was happy with how this braciole turned out, though it was a bit different from the ones I am used to. Ted and I both really liked the flavor of the filling and how it paired with the meat, but I think it would have been even better if my steak had been thinner. This was really very easy to prepare and it makes for a nice presentation on the plate.

Fish Roll with Compound Butter

In addition to rolling meat, Alton used this episode to show that you can also make a seafood roll. For this seafood roll, you will need three types of seafood:  salmon fillets, flounder fillets, and sea scallops. Depending on where you live, you may need to do some substituting. I could not find flounder where I live, so I had to substitute sole. You will also want to get the thinnest fish fillets you can find. Note that Alton’s recipe makes quite a large roll, so you also may want to modify this if you are only serving a few people because leftover fish=yuck! I was only making this roll for two of us, so I downsized by cutting my fillets. To begin, place a sheet of parchment on your counter, topped with plastic wrap. For the full-sized roll, lay two salmon fillets on the plastic wrap, nearest you, with their tails away from you, and so they are slightly overlapping each other. Next, place three flounder fillets on top of the salmon with their tails facing toward you. The flounder fillets should overlap the salmon about midway.

IMG_3186

Salmon fillet with tail facing away. Sole fillet placed on top with tail facing toward me.

Place a metal skewer through eight sea scallops, being sure to go through their flat sides. Place this skewer at the far end of the flounder fillets. Season all of the fish with Kosher salt, pepper, fresh dill, and fresh parsley.

IMG_3187

Skewered scallops placed on far end of flounder. Fish seasoned with Kosher salt, pepper, fresh dill, and fresh parsley.

Grab the far end of the plastic and roll toward you keeping the skewer in the center of the roll, and avoiding rolling the plastic wrap into the fish roll.

IMG_3188

Pulling the plastic toward me to roll the fish around the scallops.

Once your fish is starting to roll, place the edge of a sheet pan against the fish (on top of the plastic), pressing with the pan as you pull the plastic toward you.

IMG_3189

Using the edge of a sheet pan to press on on the fish roll as I pull the plastic toward me.

Once your roll is complete, you should be able to just slip the plastic off, leaving the roll on the parchment.

IMG_3194

Fish after rolling.

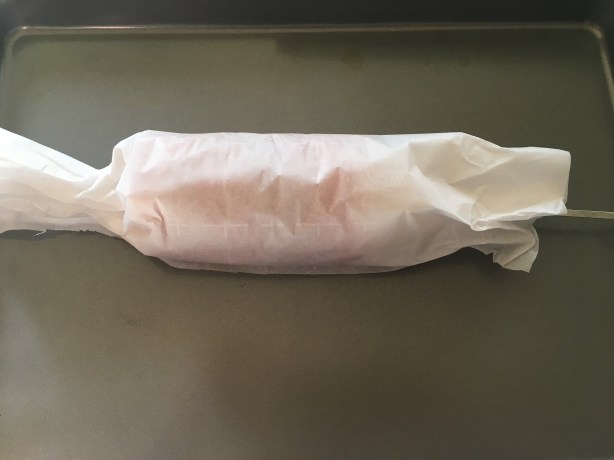
Next, rolling away from you, roll the fish in the parchment, twisting the ends. Refrigerate the fish roll for two hours.

IMG_3195

Plastic removed and fish rolled in parchment. Into the refrigerator for 2 hours.

Once your fish roll has chilled, preheat your broiler and remove the skewer from the fish roll, keeping the fish rolled in parchment. Use a serrated knife to slice the roll into 3/4-1″ rounds. Place the rounds on a sprayed broiler pan and remove their parchment. Brush the fish rounds with canola oil and sprinkle them with Kosher salt.

IMG_3197

Sliced fish roll brushed with canola oil and sprinkled with Kosher salt.

Broil the fish six inches from the heat, checking after three minutes. Alton served his fish with herb butter, which he did not make in the show. I threw an herb butter together by mixing softened butter with the leftover dill and parsley from the fish roll, along with lemon zest and pepper.

IMG_3209

Broiled fish roll served with herb butter.

We thought this fish roll was great. The salmon, white fish, and scallops went very well together and the roll was really pretty. Herb butter is a great accompaniment to the seafood here too. Unfortunately, my fish roll got cold when I realized there was a fire behind our house, so I will have to make this again on a less stressful evening! This is a great recipe to make for an impressive presentation that takes very little effort.