Posts Tagged ‘dessert’

I was not overly stoked for an entire episode of pudding recipes. I mean, pudding is fine, but it’s not exactly exciting. I did, however, get very happy when I was a kid and my mom would leave pudding in the refrigerator for an after-school snack; chocolate pudding was my brother’s favorite, while I always preferred butterscotch. Speaking of butterscotch pudding, if you have not tried the butterscotch pudding in Alton’s latest book, it is a must-make. Here is my rundown of Alton’s pudding recipes, and I must say that two out of three wowed me.

Indian Rice Pudding

Indian rice pudding is the first recipe in this episode. The ingredients in this recipe are 1 C cooked rice, 1 C milk, 1/2 C heavy cream, 3/4 C coconut milk, 2 ounces sugar, 1/4 t ground cardamom, 1 1/2 ounces golden raisins, and 1 1/2 ounces chopped unsalted pistachios.

IMG_1429

Rice pudding ingredients: cooked rice, milk, heavy cream, coconut milk, sugar, cardamom, golden raisins, and pistachios.

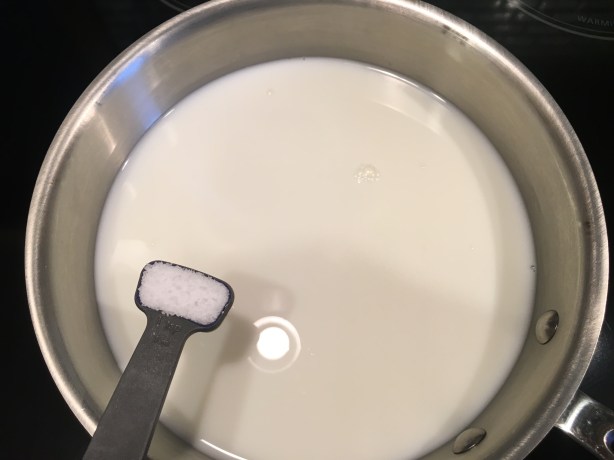
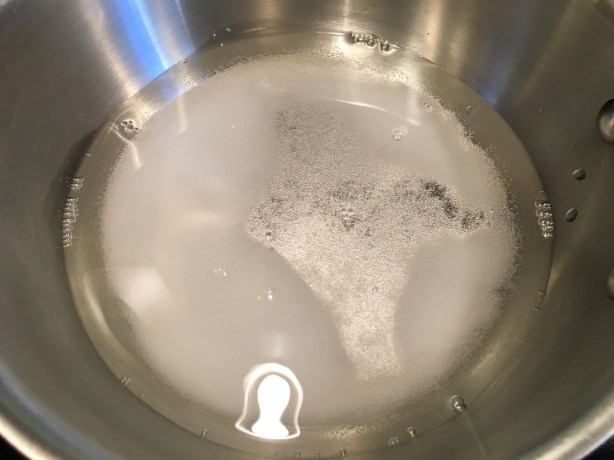
For the pudding, put the milk and rice in a large skillet and bring to a boil over medium heat, stirring.

Once boiling, decrease the heat to low and simmer the milk/rice until it has thickened slightly, which should take about five minutes; if you run a spatula along the bottom of the pan, the liquid should be thick enough to part and stay parted.

IMG_1432

Rice and milk after coming to a boil and simmering.

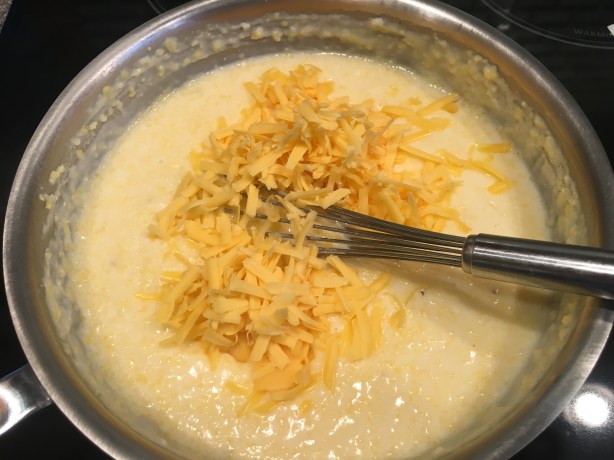
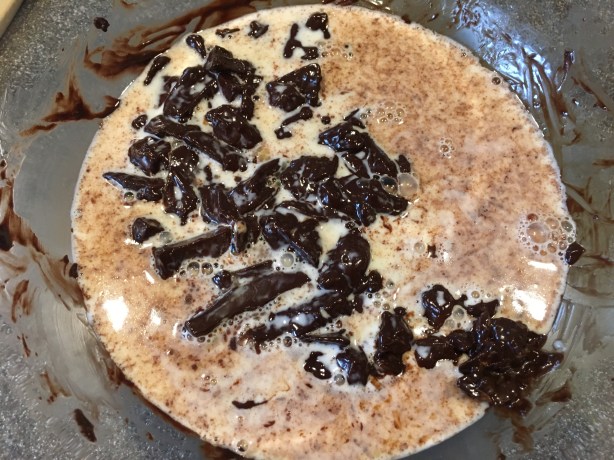
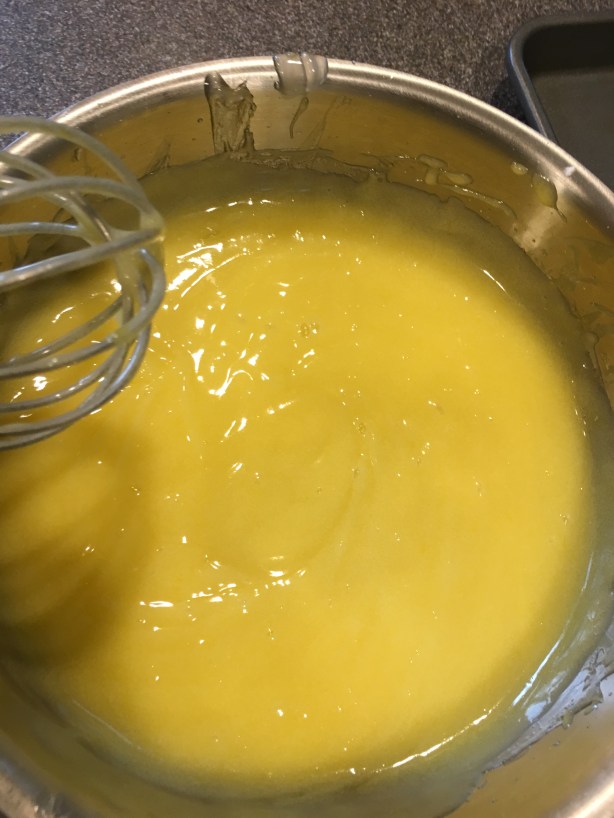
When you have achieved this desired consistency, increase the heat to medium and add the cream and coconut milk, followed by the sugar and cardamom (use a whisk to incorporate the cardamom).

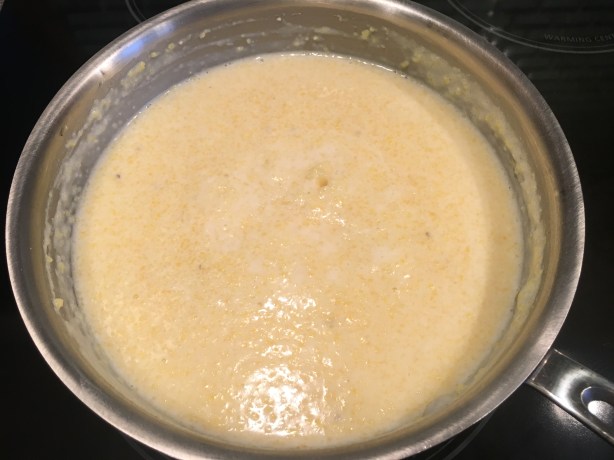
When the mixture has reached a boil again, decrease the heat to low and cook for five more minutes.

IMG_1439

Pudding cooked for 5 more minutes.

Remove the pan from the heat and stir in the raisins and nuts.

IMG_1440

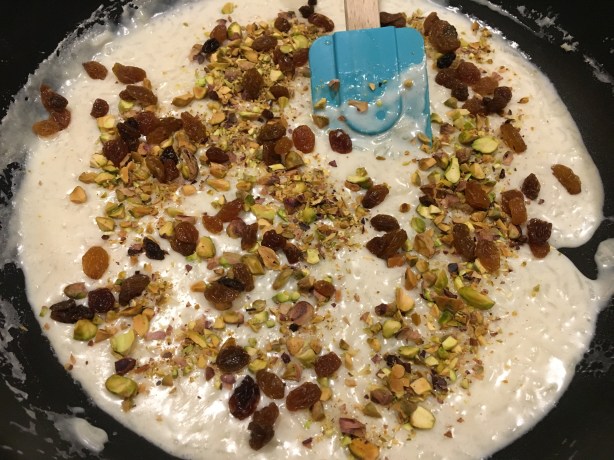
Raisins and pistachios added to pudding off the heat.

Transfer the pudding to your desired serving vessel(s) and enjoy immediately, or you can chill the pudding overnight, which is how Alton prefers it. If you do opt to chill the pudding, press plastic wrap on the surface of the pudding to prevent formation of a skin.

IMG_1442

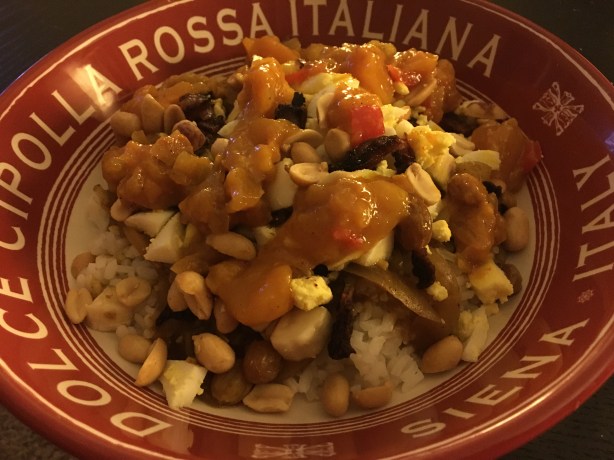
Alton’s rice pudding.

I tasted the rice pudding when it was warm, but chose to refrigerate it overnight before eating a full serving. This rice pudding is delicious. The pudding is thick, rich, creamy, and indulgent. The subtle flavor of coconut milk is in the background, while pistachio flavor is predominant. The raisins add little punches of fruit flavor, while the nuts add a little crunch. This is great for dessert or for breakfast, or for both! I fully intend to make this again soon. In fact, I am really wishing I had some right now! Excellent recipe.

Tapioca Pudding

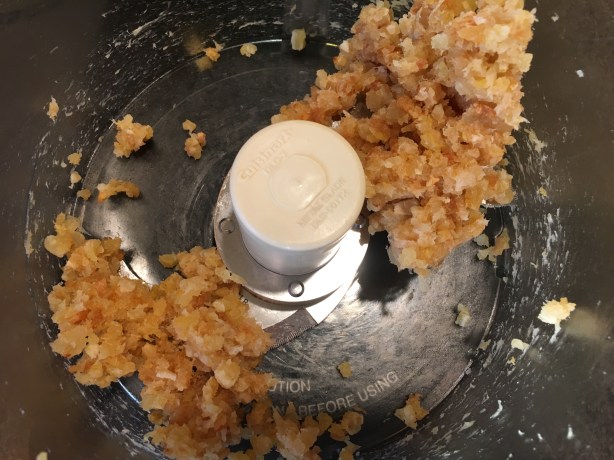
I do not recall ever having tapioca pudding prior to making this recipe. I asked my parents about tapioca pudding the other day and my mom said she remembers her mother making it, while my dad did not think he had ever had tapioca pudding. Tapioca, by the way, is a starch from the cassava plant. Tapioca is sold in several forms, but this recipe calls for large pearl tapioca. The recipe begins by soaking 3 1/2 ounces of tapioca in a pint of cold water overnight; you can do this at room temperature.

After the soak, drain the pearls and put them in a crock pot, along with 2 1/2 C milk, 1/2 C heavy cream, and a pinch of Kosher salt. Stir the pudding, put the lid on the cooker, and let the pudding cook on high for two hours.

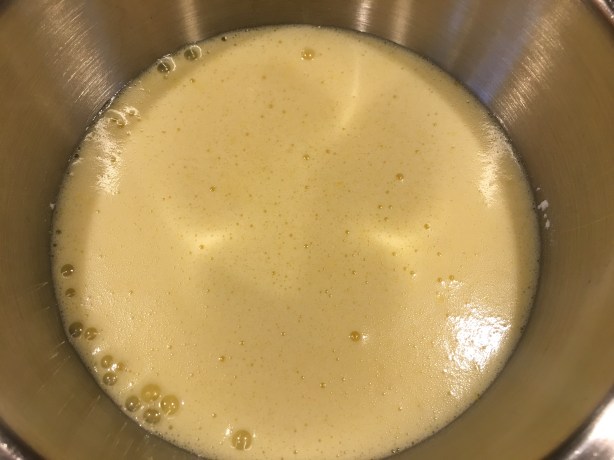
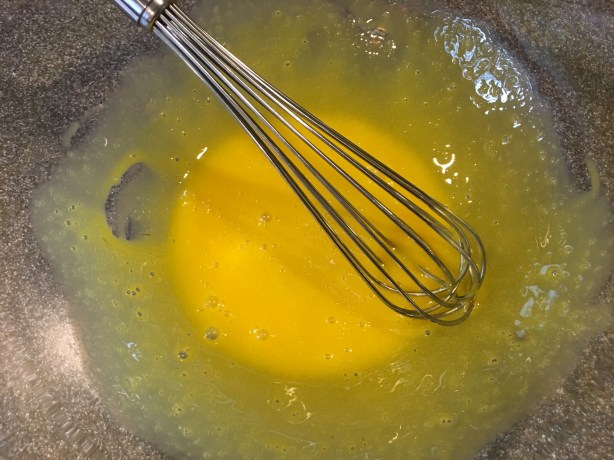
After the two hour cook time, beat one egg yolk with 1/3 sugar in a bowl – this will form a paste.

IMG_1513

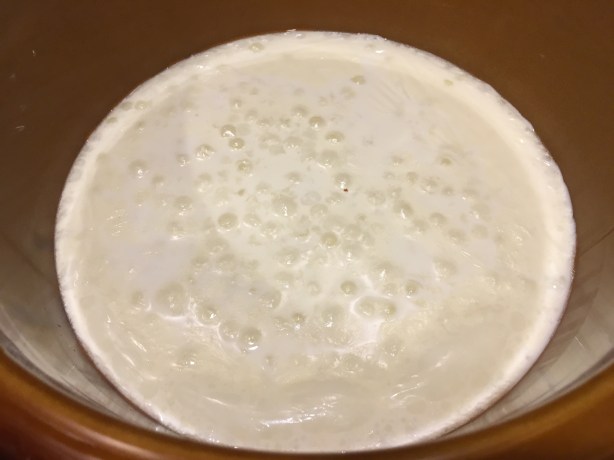
Tapioca after cooking for two hours.

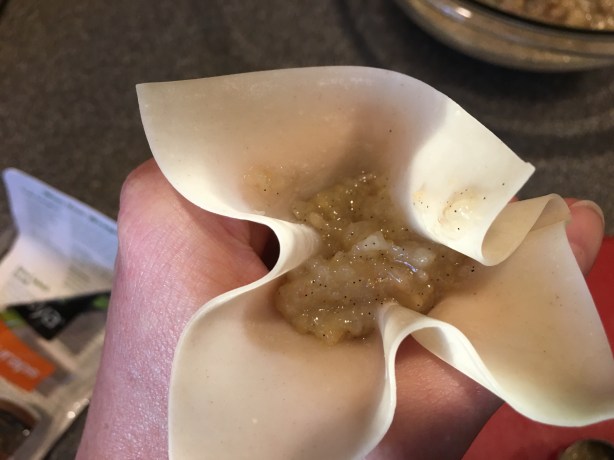
Temper the egg yolk mixture by slowly whisking 1 – 1 1/2 C of the warm tapioca into the eggs.

Once tempered, add the egg mixture back to the crock pot of tapioca and whisk to combine. Add the zest of a lemon to the cooker, place the lid back on, and let the pudding cook for 15 more minutes.

Transfer the tapioca to an airtight container, pressing plastic wrap directly onto its surface. Let the pudding cool to room temperature before refrigerating until it is thoroughly chilled.

IMG_1521

Pudding after cooking for 15 more minutes.

IMG_1558

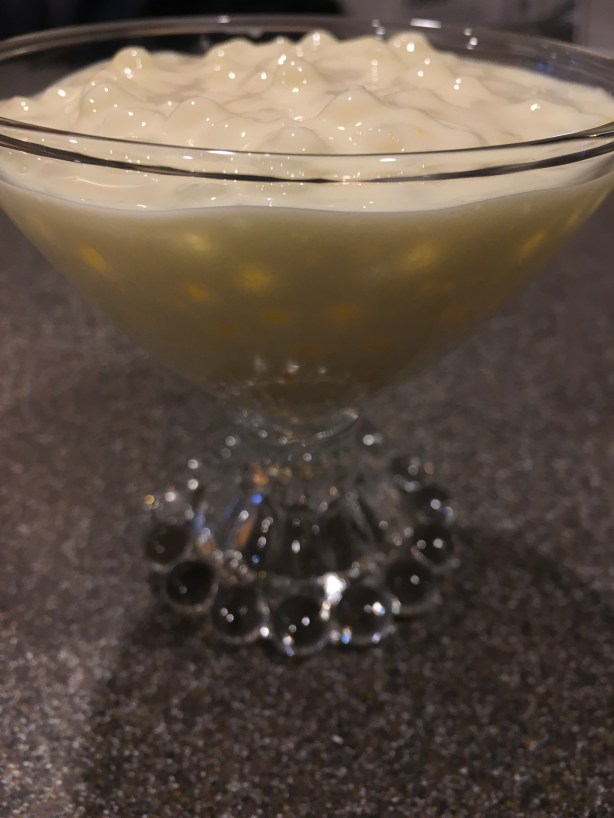
Chilled tapioca pudding.

This pudding was good, but not amazing like the rice pudding. Since I am not a tapioca pudding expert I cannot say for sure, but I felt like the texture of this pudding was maybe a little thinner than it should be. I liked the added texture from the slightly chewy tapioca pearls, but the base was a little on the soupy side. As for flavor, it was just sort of creamy with subtle lemon overtones. I may make this again, simply because I have half a bag of tapioca pearls remaining, but I won’t add this one to the permanent recipe vault.

Chocolate Pudding

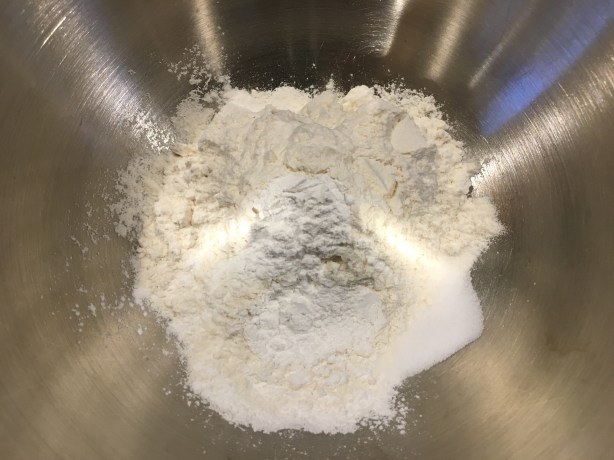
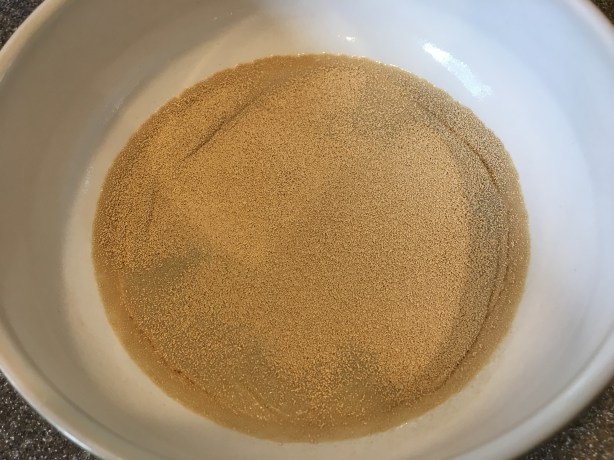
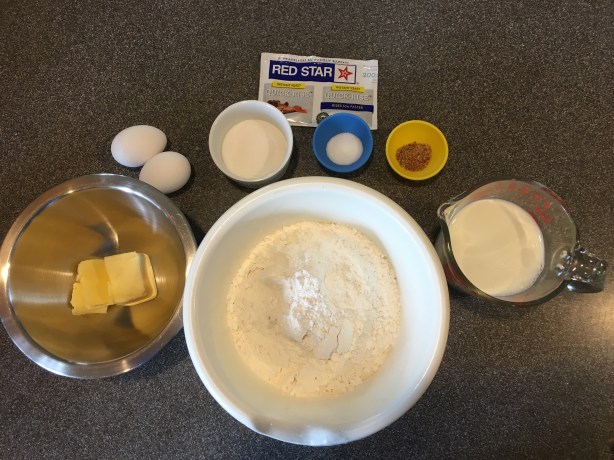
What pudding episode would be complete without a recipe for chocolate pudding? This is a two-step recipe, in which you first make a dry pudding mix, and then use the mix to make the pudding. To make the dry mix, in a lidded container combine 1 1/2 ounces non-fat dry milk, 2 ounces cornstarch, 1 t salt, 3 ounces Dutch cocoa powder, and 6 ounces powdered sugar. Shake the container to combine the ingredients.

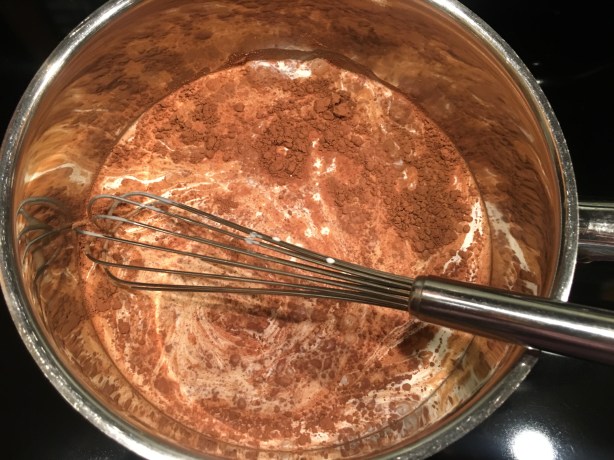
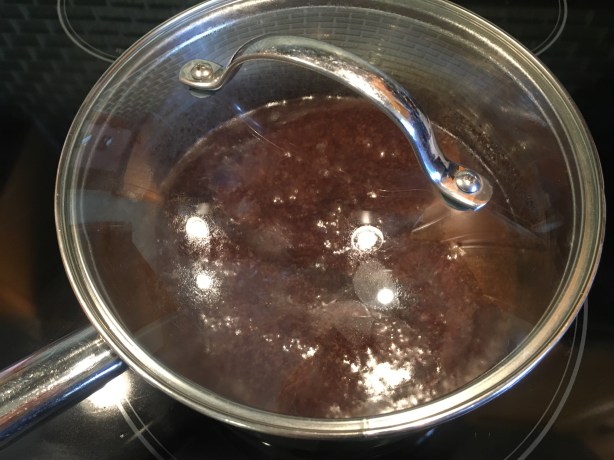
To make the pudding, put 1 3/4 C of the dry pudding mix in a saucier. Whisk 2 C milk and 2 C heavy cream into the dry pudding mix.

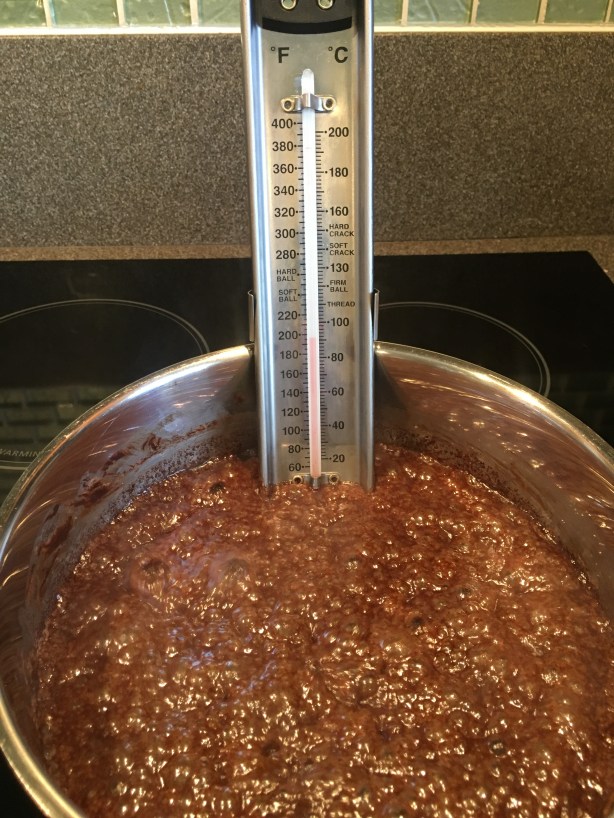
Bring the mixture to a boil over medium heat, whisking occasionally. Once boiling, decrease the heat to low and simmer for four minutes, whisking.

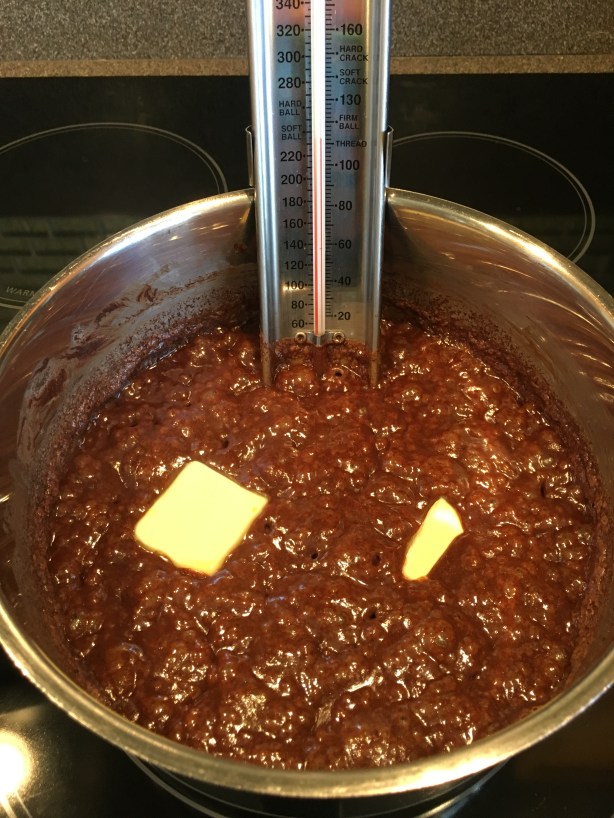
Remove the pan from the heat and stir in 1 t vanilla.

IMG_1458

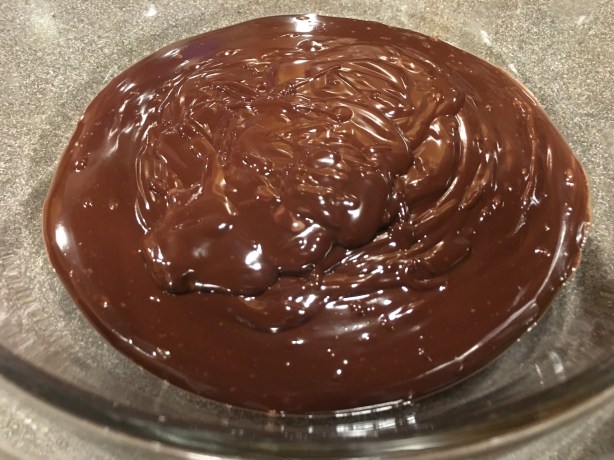
Adding vanilla off the heat.

Pour the pudding through a sieve and into a serving bowl. Press plastic wrap directly on the surface of the pudding to prevent the formation of a skin, and refrigerate the pudding for at least four hours before eating.

IMG_1481

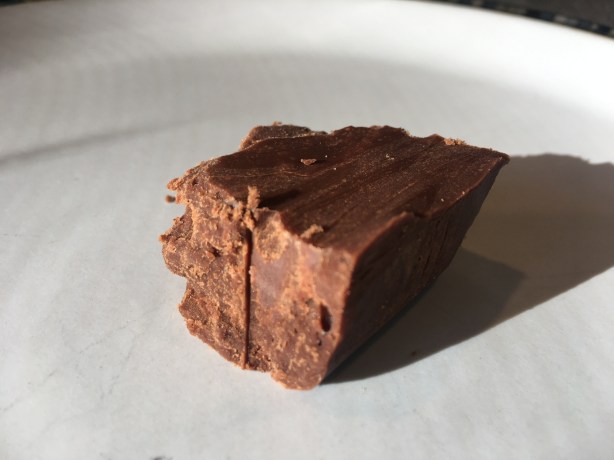
Alton’s chocolate pudding.

This is the best chocolate pudding I have ever eaten. The pudding is super rich and creamy in both texture and flavor. It is smooth and chock full of chocolate flavor, and a little goes a long way. I am going to whip up another batch of this pudding shortly. It is super good.

Just like that, the hectic holiday season is behind us and we are into 2019. We spent our Christmas at my brother’s house, so we did not host either Thanksgiving or Christmas in 2018. It always feels odd to me when I do not end up cooking much at the holidays, and my only real contribution to Christmas dinner was a batch of roasted Brussels sprouts. We had great food, though, including a salty Wayco ham.

I always have a long list of things I want to cook/bake that are unrelated to this blog project. I plan to actually sit down and make a list of the top things I want to make this year, so I can physically cross them off as I complete them. I had planned to make my list yesterday since it was the first day of the year, but I spent the day with a fever on the couch instead. Boo.

Savory Polenta

The 115th episode of Good Eats is one that Alton chose to remake in his new show Good Eats:  Reloaded. Savory polenta is the first recipe in this one. So, what is the difference between grits and polenta? According to Alton, grits and polenta are different preparations of the same main ingredient:  cornmeal. Grits are often made from ground hominy, which is white, while polenta is made from ground yellow corn. Either way, when purchasing cornmeal to use in either grits or polenta, always look for stone ground cornmeal; the terms “polenta” and “grits” are often featured together on the label of stone ground cornmeal. To make polenta, place 2 T olive oil in a saucier over medium heat. Add 3/4 C chopped red onion and 1 1/2 t Kosher salt, and cook the onion until it has softened.

Add 2 cloves of minced garlic and cook for two minutes.

IMG_0815

Garlic added to onion.

Next, add a quart of chicken broth and bring the broth to a boil over high heat.

When the broth is boiling, gradually add 1 C coarse cornmeal, whisking it in. Once all of the cornmeal has been added, place a lid on the pan and place it in a 350 degree oven for 40 minutes, stirring the polenta every 10 minutes.

Remove the pan from the oven and stir in 3 T butter, 2 ounces grated Parmesan, and 1/4 t pepper.

You can now eat the polenta as it is or you can pour the warm polenta into a parchment-lined 9×13″ pan. Let the polenta cool to room temperature in the pan, and then place it in the refrigerator for 1-2 hours.

IMG_0829

Polenta poured into 9×13 pan.

After chilling, flip the polenta out onto a cutting board and use a biscuit cutter to cut rounds.

Toss the polenta circles in olive oil and you can fry, saute, or grill them; I opted for sautéing. I served my polenta with a homemade tomato sauce and some grated Parmesan.

IMG_0839

Polenta rounds with tomato sauce and Parmesan.

This polenta is easy and delicious. We tasted the polenta after adding the butter, cheese, and pepper, and I would have been content to eat a bowl just like that. I also liked the sautéed version, as there was a slight golden crust on the outside, while the polenta remained tender and buttery on the inside. The garlic and onion flavors were obvious and made the polenta savory with a little kick. This would also be a great vegetarian dinner option if you substituted vegetable broth for the chicken broth, and this seems like a very kid-friendly dinner option too. Don’t bother with that tube of polenta at the grocery store when you can make this version at home!

Cheese Grits

I first remember having grits when I was in the Florida Keys for my cousin’s wedding. We stopped for breakfast at an oceanfront restaurant and grits were one of the side dish options. I instantly became a grits fan. For Alton’s grits, combine 2 C milk, 2 C water, and 1 1/2 t Kosher salt in a saucier and bring the mixture to a boil.

IMG_0707

Milk, water, and Kosher salt in a saucier.

Once boiling, slowly whisk 1 C coarse cornmeal into the liquid.

Place a lid on the pan and cook the grits for 20-25 minutes, stirring every two or three minutes, and keeping the heat as low as possible. I found that my grits were still too thin after 25 minutes, so I cooked them for about 35 minutes.

IMG_0714

Grits after stirring/cooking for ~35 minutes.

Stir in 4 T butter and season with Kosher salt, if needed.

IMG_0713

4 T butter.

IMG_0715

Butter added to grits.

Lastly, slowly stir in 4 ounces of shredded cheddar cheese.

IMG_0717

Cheddar, slowly added to grits.

We ate these grits for a pre-run breakfast, alongside purple barley bread and they kept me fueled for 8.5 miles.

IMG_0722

A bowl of cheese grits.

These grits are cheese, rich, and creamy. Due to their richness, I could only eat a small bowl before I felt pretty full. Alton’s grits are definitely heavier than his version of polenta, but equally tasty.

Pineapple Upside-Down Cornmeal Cake

Lastly, Alton finishes this episode with a sweet pineapple upside-down cake. Although this cake has been around forever, this was my first time making a pineapple upside-down cake. To begin the cake, place 3/4 C whole milk in a microwave-safe bowl and microwave the milk until it is boiling. Sprinkle 1 C coarse cornmeal over the milk and let it sit.

IMG_0748

Topping ingredients: butter, dark brown sugar, canned pineapple rings, toasted pecans, and maraschino cherries.

Next, place a 10-inch cast iron skillet over medium heat and melt 4 ounces of unsalted butter in the pan. When the butter has melted, use a pastry brush to brush some of the butter up the sides of the pan. The butter will brown slightly.

Add 1 C dark brown sugar to the pan and stir until melted, which will take about five minutes; watch the sugar carefully, as it can easily burn.

Once the sugar has melted, remove the pan from the heat and place canned pineapple slices around the perimeter of the pan, and one additional ring in the center.

IMG_0755

Pineapple rings added to caramel.

Put a maraschino cherry in the center of each pineapple slice and sprinkle 1/3 C of toasted/chopped pecans over the pineapple.

Drizzle on 3 T of the juice from the canned pineapple and set the skillet aside to cool slightly.

IMG_0759

Pineapple juice drizzled over topping.

While the skillet cools, combine 4 3/4 ounces flour, 2 t baking powder, and 1/2 t salt in a large bowl.

IMG_0762

Flour, baking powder, and salt.

In a medium bowl, whisk together 3 eggs, 3/4 C sugar, 1/2 C canola oil, and the milk-soaked cornmeal from earlier.

When the wet ingredients are combined, add the wet mixture to the dry ingredients and whisk for a count of six. The final batter will be a little lumpy, but that is okay. Do not over mix.

IMG_0768

Wet mixture added to dry ingredients.

Pour the cornmeal batter over the pineapple in the skillet and place in a 350 degree oven for 40 minutes.

Let the cake cool for 30 minutes before flipping the cake out of the skillet. Cut the cake into wedges and serve.

IMG_0779

Cooled cake flipped onto cake stand.

IMG_0788

Alton’s pineapple upside-down cake.

This cake is fun to make because it looks pretty when you invert it out of the pan. The topping is a delicious mix of dark caramel, crunchy pecans, and juicy pineapple; the best part, in my opinion, is the part by the edges of the pan, as the caramel is thick and slightly chewy there. The batter of this cake has the slight grittiness of cornmeal, and is only slightly sweet. I like the fact that the cake itself is not overly sweet, as the topping is sweet enough. This cake is great for breakfast, dessert, or both!

This chocolate episode came at a good time, allowing me to share some of Alton’s chocolate goodness with friends and relatives at the holidays. There is really no way we could have eaten all of this chocolate without help! It’s really too bad that my mom doesn’t live closer to me because, though she is tiny, she can pretty much eat her weight in chocolate. Somehow, we persevered and the recipes from this episode have been devoured. All of the recipes in this episode are ganache-based, meaning they are composed of a mixture of chocolate and cream. First up is Alton’s:

Ganache Frosting

This ganache is composed of only two ingredients:  chocolate and cream.

IMG_0594

Only two ingredients for this frosting: bittersweet chocolate and heavy cream.

The recipe starts with heating a pint of heavy cream (which is also a pound) in a microwave for 3-4 minutes, or until simmering. Note:  when heating milk products in the microwave, use a vessel twice the original volume of dairy to prevent overflow. While the cream heats, chop a pound of bittersweet chocolate with a serrated knife.

IMG_0595

A chopped pound of chocolate.

Place the chopped chocolate in the bowl of a food processor and pour the warm cream over the chocolate. Let the cream/chocolate sit for two minutes.

When the two minutes are up, pulse the chocolate and cream three times, or until smooth.

IMG_0601

Chocolate and cream after pulsing 3x.

Transfer the ganache to a bowl. You can use the ganache immediately as a pourable cake glaze.

IMG_0604

Ganache transferred to a bowl.

Or, you can let the ganache cool for an hour and whip it in a stand mixer to make a cake frosting.

This ganache will keep for two weeks if kept tightly covered and refrigerated. For later use, bring the ganache to room temperature before whipping with a stand mixer. I first used this ganache frosting to frost a simple sheet cake, which we ate for multiple days.

IMG_0617

A slice of sheet cake with Alton’s ganache frosting.

I actually prefer this frosting cold because I like the dense mouthfeel of the cold chocolate in contrast with soft, light cake. After frosting a 9×13″ sheet cake, I still had enough frosting for two dozen cupcakes, which I frosted for my in-laws’ Christmas party. I will say that the frosting is best aesthetically when used after the first whipping. This frosting is quite rich, so you only need a thin layer of frosting for a good punch of chocolate. This is about the easiest chocolate frosting you could ever make, and it is so much better than anything you could buy in the store.

Chocolate Truffles

When we headed to my sister-in-law’s house for Thanksgiving, I decided to bring Alton’s truffles to share. I made the truffles two days before turkey day. To make Alton’s truffles, place 10 ounces of chopped bittersweet chocolate in a microwaveable bowl and add 3 T of unsalted butter.

Set the chocolate aside while you bring 1/2 C cream and 1 T light corn syrup to a simmer in a saucepan over medium heat.

IMG_0541

Heavy cream and light corn syrup.

While the cream heats, place the chocolate/butter in the microwave for 30 seconds; stir the mixture and put it in the microwave for another 30 seconds or until the chocolate starts to melt.

Pour the simmering cream over the chocolate and let it sit for two minutes.

IMG_0552

Cream poured over chocolate/butter.

After two minutes, stir 1/4 C brandy into the chocolate, stirring until smooth.

IMG_0554

Brandy being stirred into chocolate mixture.

Pour the chocolate mixture into an 8×8″ baking dish and place it, uncovered, in the refrigerator for one hour.

After an hour of chill time, use a melon baller to portion the ganache into rough balls, transferring them to a parchment-lined sheet pan; do not worry about shaping the truffles at this time. When all of the truffles have been portioned, place them back in the refrigerator for 30 minutes.

IMG_0560

Portioned ganache.

This is the point of the recipe where things get a little more technical, as Alton used a heating pad to melt eight ounces of bittersweet chocolate, keeping the chocolate between 90 and 94 degrees; it is critical not to go above 94 degrees, as this will change the crystalline structure of the chocolate. I found that I had very uneven heating with my heating pad, so I gradually melted my chocolate in the microwave, stirring and checking the temperature after every 15-20 seconds.

Once your chocolate is melted and between 90 and 94 degrees, roll your truffles into smooth balls with gloved hands. Dip an ice cream scoop into the melted chocolate and place a truffle ball into the scoop, using your gloved fingers to coat the center with melted chocolate.

IMG_0564

Coating a truffle center in melted bittersweet chocolate.

Once coated in chocolate, place the coated truffle into a topping of your choice:  chopped pistachios, cocoa powder, powdered sugar, or toasted coconut. It is ideal to let each truffle sit in the topping until the next truffle is done being coated with chocolate.

Transfer the finished truffles to a wax paper-lined airtight container. Store the truffles in the refrigerator, but serve them at room temperature.

I ended up with 32 truffles, and I used toppings of powdered sugar, cocoa powder, and chopped pistachios.

IMG_0569

Truffles.

Oh my, these truffles are super rich. If you are able to keep your coating chocolate in the ideal temperature range, your truffles will have a crispy chocolate shell surrounding their dense, rich filling. The filling is creamy, rich, slightly bitter, and intensely full of chocolate. These are absolutely worth the time and effort of making, as well as the calories. They pair fantastically with bourbon or with coffee, depending on the time of day. This is a wonderful recipe.

Good Eats Fudgepops

This episode finishes up with Alton’s version of a fudgecicle.

IMG_0657

Ingredients for fudgepops: bittersweet chocolate, vanilla extract, cocoa powder, heavy cream, and whole milk.

Start by putting 2 T cocoa powder into a medium saucepan, and add 12 ounces of heavy cream and eight ounces of whole milk.

IMG_0662

Cocoa powder combined with milk and cream.

Bring the milk and cocoa to a simmer over medium heat, whisking to combine.

IMG_0663

Cocoa powder combined with milk and cream, and brought to a simmer.

When the dairy is simmering, pour it over eight ounces of chopped bittersweet chocolate, letting it sit for two-three minutes.

Whisk the chocolate mixture until smooth and add 2 t vanilla extract.

Using a turkey baster, equally distribute the chocolate mixture among popsicle molds.

IMG_0671

Chocolate distributed among popsicle molds.

Place the fudgepops in the freezer for four hours, or until set.

IMG_0729

Alton’s fudgepop.

Conversely, if you are craving hot chocolate, Alton says you can melt one of his fudgepops in the microwave. I chose to halve this recipe since I was just making the fudgepops for two of us, and I ended up with four fudgepops. These fudgepops are full of rich chocolate flavor and they are pretty creamy. They did have a very slight icy texture, but I thought these were pretty good. They were very hard to get out of the molds, but that may have been more of a function of my popsicle molds than due to the recipe itself. I don’t know that I would go out of my way to make these again, but I’ve also never been the biggest fudgepop fan.

Episode 109 centers around wonton wrappers and the different ways to use them. Wonton comes from the Cantonese term “wahn tan,” which means “cloud swallow.” While it is possible to make your own wonton wrappers at home, Alton was adamant that it is not worth the time and effort to do so. Instead, do yourself a favor and buy the wonton wrappers that are readily available in the produce section of almost any grocery store.

Perfect Potstickers

This episode starts with Alton’s version of potstickers, featuring a pork and vegetable filling. The filling is made by combining in a bowl 1/2 pound ground pork, 1/4 C chopped scallions, 1 beaten egg, 2 T finely chopped red bell pepper, 1 1/2 t Kosher salt, 1/2 t pepper, 1 t light brown sugar, 1/4 t cayenne pepper, 2 t Worcestershire sauce, 2 t ketchup, and 1 t yellow mustard.

Mix the filling thoroughly with gloved hands.

IMG_9715

The mixed potsticker filling.

As you fill your wonton wrappers, be sure to keep the remaining wrappers moist by covering them with a damp paper towel.

IMG_9716

Wonton wrappers.

To form the potstickers, place a wrapper so it is a diamond in front of you. Brush the two edges furthest from you with water and place a melon baller of filling (about 1/2 t) in the center.

IMG_9722

Wonton wrapper with the two far edges brushed with water and a melon baller of filling.

Fold the bottom of the diamond over the filling to form a triangle, pressing the edges together and squeezing to remove any air bubbles.

Make two pleats on each short side of the triangle by folding the wrapper under itself and pressing (see photo).

IMG_9725

Pleats made on each short side of the triangle.

Set the formed potstickers on a sheet pan, covering them with a damp towel until you finish filling the rest of the wrappers. For long-term storage (these will keep for 6+ months in the freezer), freeze the potstickers on a sheet pan and then transfer them to ziplock freezer bags. To cook the potstickers, heat a large skillet (that has a lid) over medium heat. Ideally, you do not want to use a nonstick skillet to cook potstickers, as you want them to stick to the pan. I, however, do not have a large skillet that is not nonstick, so I had to work with what I have. Heat the skillet until water droplets will “dance” across the surface of the pan. When the skillet is hot, brush the pan with a thin layer of vegetable oil and place 8-10 potstickers in the pan. Let the potstickers cook for two minutes, resisting the urge to lift or move them.

When the potstickers have begun to stick to the pan, add 1/3 C chicken stock to the pan and quickly put the lid on the pan. Decrease the heat to low and cook the potstickers for two more minutes.

If you need to cook more potstickers, transfer the cooked potstickers to a foil cone and place it in a 200 degree oven while you cook the rest.

Be sure to deglaze the pan between batches by adding water to the pan and scraping up any stuck bits. Alton recommends serving the potstickers with hoisin sauce (you can buy this in the grocery store) or a mixture of soy sauce and honey. I served my potstickers with a mixture of soy sauce and lemon juice.

IMG_9742

A plate of Alton’s potstickers.

These potstickers are fantastic. They are far superior to the frozen versions you get at any store. The filling is a perfectly balanced mixture of sweetness, spiciness, and tanginess. The wrappers are nearly translucent after cooking, having the texture of an al dente noodle on top and light crispiness on the bottom. I found that soy sauce overpowered the flavor of the filling, so I opted to eat mine with just a small amount of Asian mustard. Yes, it does take a little bit of time to fill and form the potstickers, but they are worth the time. I will absolutely make these again.

Vegetarian Steamed Dumplings

Another way to use wonton wrappers is to make steamed dumplings. If you do not have a steamer, Alton has a hack for you. To assemble his steamer, you will need a wide pot with a lid, a few pastry rings or tuna cans with the tops and bottoms removed, and disposable pie plates that you have perforated with scissors or a knife. To assemble the steamer, place 1/2″ water in the bottom of the pot, followed by a pastry ring or can. Top the ring/can with a perforated pie plate. Continue layering rings and pie plates to the top of the pot and put on the lid. You can then steam your dumplings by placing five dumplings in each pie plate layer. We have a bamboo steamer, so I used that. Anyway, back to the recipe. Cut 1/2 pound of tofu in half horizontally and place the layers between paper towels for 20 minutes. It helps to place a plate or pan on top to press out excess liquid.

Once the tofu is ready, cut it into small cubes and place it in a bowl.

IMG_9825

Cubing the tofu.

To the tofu add 1/2 C grated carrot, 1/2 C shredded Napa cabbage, 2 T chopped scallions, 2 T chopped red bell pepper, 2 t minced ginger, 1 T chopped cilantro, 1 T soy sauce, 1 T hoisin sauce (in the Asian section at the grocery store), 2 t sesame oil, 1 t Kosher salt, 1/4 t pepper, and one beaten egg.

Lightly stir the filling, as you do not want to break up the tofu.

IMG_9839

Dumpling filling.

Place your wonton wrappers in damp paper towels to keep them moist as you fill. To fill, place a wrapper so it is a diamond in front of you and place a melon baller (~1/2 t) of filling in the center. Brush all four edges of the wrapper with water and bring opposite corners together.

Press the edges together, squeezing out any air bubbles.

IMG_9844

Folding opposite corners together and pinching the seams.

Place the filled dumplings on a sheet pan and cover them with a damp towel while you fill the remaining wrappers. You can freeze them for later use or cook them immediately.

IMG_9846

Dumplings on sheet pan.

To cook the dumplings, heat water in a steamer until you can see steam. If using Alton’s steamer, spray the pie plates with oil. Place the dumplings in the steamer, put the lid on, and cook the dumplings for 10-12 minutes.

Alton recommends serving these dumplings in a bowl of chicken stock. For vegetarians, you could use vegetable broth. I had some homemade chicken stock in the freezer, so served my dumplings in that.

IMG_9855

Alton’s vegetarian steamed dumplings in chicken stock.

This is another wonderful recipe. In fact, we probably liked these vegetarian dumplings more than the pork potstickers. The filling of the dumplings is spicy and sweet, with occasional punches of fresh ginger and cilantro, and the dumplings look quite pretty when folded in this manner. Serving the dumplings in a bowl of warm stock makes for a delicious meal. Great recipe.

Pear Walnut Wontons

Dessert wontons? Yep, Alton has a recipe for those too. The filling for these wontons starts by combining 1/4 C sugar and 1/4 C water in a saucier. Bring the water and sugar to a simmer over medium heat, or until the sugar has dissolved.

IMG_9987

Sugar and water over medium heat.

Meanwhile, split a vanilla bean and scrape out its seeds.

IMG_9988

Vanilla bean to be scraped.

When the sugar has dissolved in the pan, remove it from the heat and add 1 T orange liqueur and the vanilla bean scrapings. Let the syrup cool.

Next, chop 6 ounces of dried pears and place them in the bowl of a food processor.

Pulse the pears until they clump together.

IMG_9998

Dried pears pulsed until clumpy.

Add the cooled sugar syrup to the pears and pulse until smooth.

Place 1 1/4 ounces toasted and chopped walnuts in a bowl (I toasted mine in a skillet over low heat) and add the pear mixture, stirring to combine.

Place the filling in the refrigerator for an hour or up to overnight. For these wontons, Alton used a different forming method than for the two previous recipes. For these, he placed a wonton wrapper on top of his fist, pressing the center of the wrapper down into the hole of his fist. He brushed on a little bit of water and filled the little indentation with filling. He then crimped the edges around the ball of filling, pushing out the air and forming a little octopus shape (at least, that’s what it looked like to me).  Okay, so this method of filling just didn’t work for me, though the little octopus-like dumplings were cute in the episode. I found that the filling leaked all over, the wrappers tore, and it was impossible to put much filling into the wrapper with this method. I gave up after throwing away several wrappers, and opted to fold my wontons as in the vegetarian dumpling recipe above.

IMG_0030

Attempting to fold wontons Alton’s way.

So, instead, I placed a wrapper so it was a diamond in front of me and placed a melon baller of filling in the center. I brushed all four edges of the wrapper with water and brought the opposite corners together, pinching the seams and pressing out any air bubbles. As with the other recipes, be sure to keep your empty wonton wrappers in moist paper towels as you fill, and place filled wontons on a baking sheet covered with a damp towel.

I chose to freeze a bunch of these right away since we only planned to eat a few, so I placed the sheet pan of wontons directly in the freezer. These babies get fried; afterall, it is dessert! To fry these wontons, heat 1/2 gallon of vegetable or peanut oil to 360 degrees.

IMG_0036

Oil heating to 360.

Add eight wontons to the hot oil, cooking them for two minutes, or until golden. Transfer the fried wontons to a rack over a sheet pan to drain and cool.

Alton recommends serving these guys with ice cream.

IMG_0044

Fried wontons with ice cream.

We had these for dessert last night, and they were a really fun dessert to have. The wonton wrappers were golden brown and crispy, while the still-warm filling was reminiscent of warm fruit pie filling. The walnuts gave the filling a little bit of texture. The filling is not overly sweet, so these really do pair well with the sweetness of ice cream. I plan to fry up some more of these for dessert over the weekend.

I watched the first episode of Good Eats: Reloaded, which aired Monday. I wasn’t sure what I would think of Alton revamping his classic episodes, as I felt that he might be diminishing the integrity of his original work. That being said, I feel that Alton did a good job of intertwining new techniques/technology with his original content. Plus, he’s only reloading a small number of episodes – those which he feels need to be revisited and improved upon. How can I argue with that when it is his body of work?

Certain Good Eats episodes are about food topics I am super excited to get in the kitchen and make. Episode 108 was all about doughnuts, a food item I had never before made, but that had always been on my list. Once again, this project gave me the incentive to get in the kitchen and scratch another food off my to-do list.

Yeast Doughnuts

Alton’s doughnut recipe is for yeast doughnuts, which are much lighter than their cake counterparts. Yeast doughnuts are obviously leavened with yeast, while cake doughnuts are leavened with baking powder. While yeast doughnuts are light and airy, cake doughnuts tend to be heavier and more dense, and I happen to think both are fantastic. The first step for Alton’s doughnuts is to put 2 1/2 ounces shortening in a bowl and heat 1 1/2 C milk until the milk is just hot enough to melt the shortening (I heated my milk in the microwave). Once hot, pour the milk over the shortening and set aside.

In a small bowl, sprinkle two packages of instant yeast over 1/3 C warm water and set this aside while you gather the other ingredients.

IMG_9612

Yeast sprinkled in warm water.

You will also need 2 eggs, 1/4 C sugar, 1 t fresh nutmeg, 1 1/2 t salt, 1-1 1/2 gallons vegetable or peanut oil, and 23 ounces flour.

IMG_9609

Ingredients for doughnuts: yeast, eggs, sugar, salt, nutmeg, shortening, flour, and milk.

Next, pour the yeast and shortening mixtures into the bowl of a stand mixer, along with the eggs, salt, nutmeg, sugar, and half of the flour.

Stir the dough on low speed with the paddle attachment. Once the flour is incorporated, increase the speed and mix the dough thoroughly.

Next, add the rest of the flour, mixing at low speed until incorporated. Increase the speed and mix the dough thoroughly again.

Now it is time to knead the dough, so replace the paddle attachment with the dough hook. Let the hook knead the dough on medium speed until the dough begins to pull away from the sides of the bowl.

Transfer the dough to an oiled bowl, cover it with plastic, and let it sit for an hour, or until doubled.

When the dough has risen, sprinkle flour liberally on a smooth surface and turn the dough out onto the flour. Sprinkle the top of the dough with flour also.

IMG_9631

Dough turned out onto floured surface, and liberally dusted with flour.

Fold the dough in quarters a couple times, pressing out any gas bubbles with each fold.

Next, use a rolling pin to roll the dough to 3/8″ thick; the dough will be quite sticky, so you may need to consistently dust it with flour.

Cut the dough into doughnuts using either a 2 1/2 inch doughnut cutter, or, as Alton prefers, a 2 1/2 inch pastry ring for the outsides and a 7/8″ pastry ring for the centers.

Transfer the doughnuts to a floured sheet pan, cover them with a tea towel, and let them rise for 30 minutes (this is called “bench proofing”).

IMG_9640

Doughnuts transferred to floured baking sheet to proof.

You can set excess dough aside, covered, for an hour and re-roll/cut more doughnuts. I ended up with a total of 25 doughnuts. Once proofed, heat the vegetable or peanut oil in a Dutch oven until it reaches 365 degrees.

Add doughnuts to the hot oil, avoiding overcrowding them. Cook the doughnuts for one minute per side, transferring them to a rack over a sheet pan to drain/cool. Tip:  use chopsticks or skewers to flip and transfer the doughnuts.

IMG_9648

Doughnuts frying for 1 minute per side.

IMG_9651

Alton’s yeast doughnuts.

Allow the doughnuts to cool completely before glazing with one, or both, of the recipes below. I did have to sample an unglazed doughnut, and I can report that it was lightly crispy on the outside and super airy on the inside. The dough was just lightly sweet with a hint of nutmeg. Now, on to those glazes…

Doughnut Glaze

Alton’s first doughnut glaze recipe is super simple, coming together in just a few minutes. Combine 1/4 C milk and 1 t vanilla in a saucier over medium heat.

IMG_9668

Milk and vanilla in a saucier over medium heat.

In the episode Alton specified that you want the milk to reach 150 degrees, but I just heated it until it was pretty warm. Once warm, whisk in 2 C sifted powdered sugar until smooth.

Remove the glaze from the heat and dip the doughnuts into the warm glaze.

IMG_9674

Alton’s glaze.

IMG_9676

Glazed doughnuts.

If you are glazing a lot of doughnuts, you may need keep the glaze warm by setting it over a bowl of warm water, but I did not need to do that. Let the glaze set up for a few minutes before eating. This glaze is great, giving the doughnuts a sweet vanilla flavor and a pretty sheen.

Chocolate Doughnut Glaze

If you happen to be a chocolate fan, Alton has you covered with his chocolate doughnut glaze. The chocolate glaze begins in the same way as the original doughnut glaze, combining 1/4 C milk and 1 t vanilla in a saucier over medium heat.

Heat the milk until warm and whisk in 2 C sifted powdered sugar.

Once the sugar is incorporated, add an additional teaspoon of vanilla, 1/2 C butter cut in pats, 1 T corn syrup, and 4 ounces chopped bittersweet chocolate.

When half of the chocolate has melted, remove the pan from the heat and continue stirring until the glaze is smooth.

IMG_9692

Glaze stirred until smooth.

Dip the doughnuts into the glaze, allowing it to set before eating.

IMG_9694

Alton’s chocolate glaze.

This glaze is also quite outstanding and results in super pretty doughnuts. The glaze sets up, but is still smooth and creamy. It gives the doughnuts a punch of chocolate flavor, though you can still taste the flavor of the doughnuts themselves.

IMG_9697IMG_9703
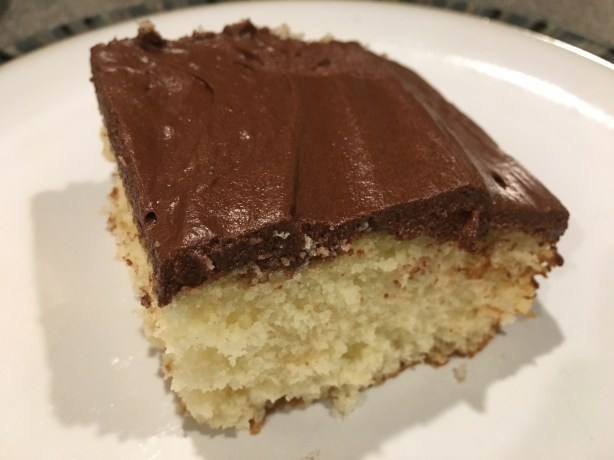
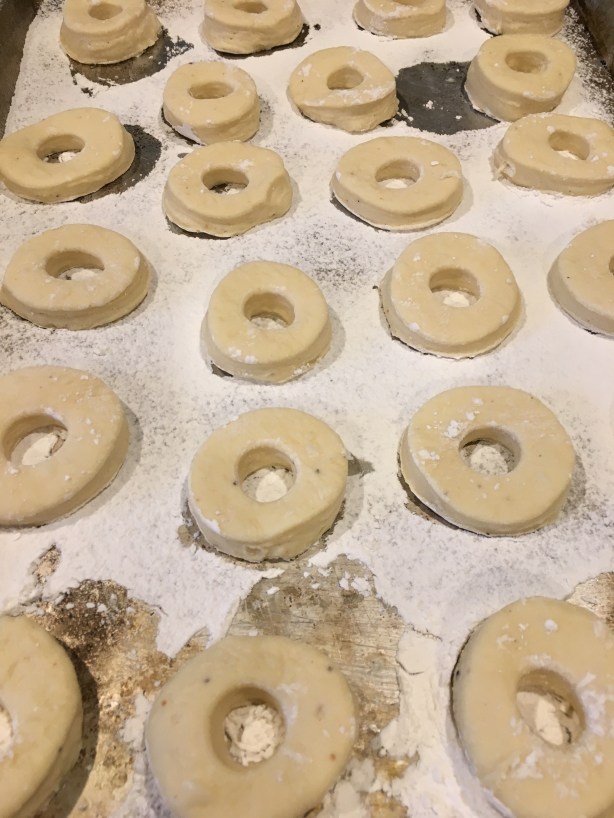
I really enjoyed this episode, and doughnuts will be made in my kitchen again. They really are quite easy and much better than what you can buy at the store. Personally, I think I liked the vanilla glaze more than the chocolate one, but I really liked both. I gave some doughnuts away and also froze some for later glazing. I think I know what we’ll be eating for breakfast Saturday!


My back has been bothering me for the last six days, so I haven’t been able to be as active as I like to be. Though it is a nice, albeit smoky, summer day, I find myself rather confined because of my darn back. Seems like a good time to write a blog post.

Banana Ice Cream

I can honestly say that I like all fruit I have tried. That being said, bananas are definitely lower on my favorite fruits list. Alton, of course, came up with some recipes to showcase bananas, starting with his banana ice cream. You will need 2 1/4 pounds of bananas for this recipe, and you will need to place them in the freezer (still in their peels) overnight.

IMG_8152

2 1/4 pounds of bananas

The online recipe tells you to remove the bananas from the freezer and let them thaw for about an hour. In the episode, however, Alton instructed to let the bananas thaw completely, which took five hours for my bananas.

You freeze and thaw the bananas to get a mushy texture, which is desirable for making this ice cream; basically, the bananas will replace the eggs that are in a custard-based ice cream. Once the bananas are thawed, peel them and place them in a food processor. Add 1 T fresh lemon juice to the bananas and process them; the lemon juice will prevent browning.

Add 3/4 C light corn syrup to the processor, along with either 1/2 t vanilla extract or, preferably, the scrapings from one vanilla bean.

With the machine running, drizzle in 1 1/2 C heavy cream.

Chill the ice cream base in the refrigerator until it reaches 40 degrees.

IMG_8176

Banana ice cream base, ready to be chilled.

Once chilled, process the banana base in an ice cream maker.

Freeze the ice cream, airtight, for 3-6 hours before eating.

IMG_8182

Churned ice cream, heading to the freezer for several hours.

IMG_8187

Alton’s banana ice cream.

This is one of the easiest ice creams you will ever make, as there is no cooking of custard, etc. The texture of this ice cream really does seem similar to that of a custard-based ice cream, as the bananas give quite a smooth, rich mouthfeel. And, if you want banana flavor, this is loaded with it. Being kind of “meh” about bananas, we enjoyed this, but I think true banana lovers would find this amazing. This is a cold and easy summer treat.

Bananas Foster

I remember going to some fancy restaurant as a kid, and my brother and I ordered bananas foster for dessert. Prepared table-side with lots of flair, we were awed by the flames enveloping our dessert. I don’t think I had eaten bananas foster since that time, and Ted had never had it, so it seemed like it would be fun to give it a go at home. I don’t have the greatest track record with flames, such as when my fish and chips caught on fire in episode 22, but I figured I’d give it a whirl. For this recipe, you will need two bananas, 2 T unsalted butter, 1/4 C dark brown sugar, 1/4 t ground allspice, 1/2 t ground nutmeg, 1 T banana liqueur (I got a miniature), 1/2 t orange zest, and 1/4-1/3 C dark rum.

Alton prepared his bananas foster on a table-side burner, but I opted to make mine on the stove. Either way, place a large, heavy skillet on the burner over medium-low heat. Meanwhile, slice two bananas lengthwise in half, leaving their peels on to prevent browning. Melt the butter in the pan, and add the brown sugar and spices.

Stir this mixture into a syrup and add the banana liqueur.

IMG_8304

Banana liqueur added to syrup.

Remove the bananas’ peels and place them, cut side down, in the pan for one minute.

IMG_8308

Bananas added to the pan.

Flip the bananas and cook them for another minute. Some of the bananas may break, but they will still taste great.

IMG_8309

Bananas flipped after one minute.

Using two forks, transfer the bananas to a plate.

IMG_8310

Bananas, transferred to a plate.

Allow the sauce to return to a simmer and then turn off the heat.

IMG_8311

Sauce returning to a simmer.

Add the rum to the pan, swirl it around, and ignite it with a long-handled lighter.

IMG_8313

Rum added to pan and ignited with burner OFF.

Continue to swirl the pan until the flames extinguish.

IMG_8315

Swirling the pan until the flames go out.

Cook the sauce for 30 more seconds and stir in the orange zest.

IMG_8317

Orange zest added to sauce.

Spoon the sauce over the bananas and add some vanilla ice cream. Or, you can serve your bananas foster over waffles

IMG_8323

Alton’s bananas foster with vanilla ice cream.

. I have to admit that this was a really fun one to make, as my flames were at least a foot high! If you were bold enough to try this around kids, they would be super impressed, as I was when I saw it years ago. Yes, there is some alcohol in this dessert, but most of it cooks out (hello, flames!). In addition to the fun flair (or should I say flare?) of this dessert, it is also super tasty. The bananas get tender and caramelized with spices and brown sugar, and then you pour over the warm, buttery, rum-flavored sauce. Add in some cold vanilla ice cream and it’s a pretty fantastic combo.

Fried Plantains

The only plantains I’ve really had have been in chip form from a grocery store, so I was eager to cook with this ingredient for the first time. Our chain grocery store did not have plantains, but a local, smaller market did.

IMG_8202

Two plantains.

To make Alton’s fried plantains, you will need the following items:

  1. a rack over a sheet pan

    IMG_8203

    Rack over sheet pan.

  2. a wide skillet with 1 1/2 C vegetable or canola oil at 325 degrees

    IMG_8210

    Oil heated to 325.

  3. an inverted sheet pan with a sheet of parchment paper on it
  4. a wooden/plastic spatula

    IMG_8205

    Inverted sheet pan with parchment, and a spatula.

  5. a medium bowl with 2 C water, 1 t Kosher salt, and 3 crushed cloves of garlic

    IMG_8206

    Bowl of water with Kosher salt and garlic.

  6. a tea towel or a pad of paper towels for blotting
  7. 2 plantains, peeled (you may need to score the peels with a knife) and cut into 1-inch medallions

    IMG_8209

    Plantains, peeled and cut into medallions.

The first step is to place the plantain medallions into the oil for 1 1/2 minutes. Flip the plantains and cook them for 1 1/2 minutes more. You want the plantains to be golden on both sides.

Decrease the heat under the oil and transfer the plantains to the parchment paper on the inverted sheet pan.

IMG_8213

Plantains transferred to parchment.

Use your spatula to smash each plantain medallion to about half of it’s original height.

IMG_8214

Smashed plantains.

Next, place the smashed plantains in the bowl of water with the garlic and salt for at least a minute. Alton never really specified why you place the plantains in the water, but I’m assuming it is to remove starch and impart flavor.

IMG_8217

Smashed plantains, placed in water.

After their soak, move the plantains to towels to dry.

IMG_8220

Soaked plantains drying on paper towels.

While the plantains dry, increase the heat under the oil, bringing it back up to ~325 degrees. Once at temperature, fry the plantains again for 2-4 minutes per side, or until golden brown.

IMG_8222

Plantains back in hot oil for second frying.

Transfer the fried plantains to the rack over a sheet pan and season them liberally with Kosher salt while they are still hot.

IMG_8224

Fried plantains on rack. Seasoned with Kosher salt.

IMG_8230

Fried plantains

We ate these for lunch one day and they were great. They are reminiscent of french fries, yet with slightly sweeter flavor. They are golden and crispy on the outside and soft on the inside. You could really pair them with any condiment you like. I ate mine with some hot sauce, which I thought was great with the subtle sweetness of the plantains. I really liked how Alton had you prep everything in advance for this recipe, as it made the frying process super easy. I highly recommend making these, and they’d make a great side for any burger or sandwich.

Although I have made pies in the past, meringue pie was a new venture for me with this episode. I don’t have anything against meringue pies, though I suppose I probably prefer a good double-crusted fruit pie. Having made Alton’s pecan pie last Thanksgiving, I was pretty confident that Alton’s lemon meringue pie would be spectacular. He broke his pie recipe into two parts, the first being the crust.

Pie Crust

Alton’s pie crust calls for both butter and lard, with the butter primarily providing flavor and the lard ensuring a flaky texture. The recipe starts with placing 3 oz of cubed butter in the freezer for 15 minutes, along with 1 oz of cubed lard. Also, at this time, place two pie plates in the freezer.

IMG_7639

Lard and butter, cubed and headed to the freezer.

While the fat chills, put some ice in a squirt bottle with 1/4 C water. Next, in a food processor pulse together 6 ounces of flour with 1/2 t salt.

IMG_7641

Flour and salt in the food processor.

Add the chilled butter, pulsing the mixture five or six times.

Add the cubed lard and pulse three more times.

Use the squirt bottle to thoroughly spritz the surface of the flour mixture and pulse the dough five times.

IMG_7646

Spritzing dough surface with ice water.

The dough should hold together when squeezed, which should take approximately 2 T of ice water. Continue spritzing the dough with more water until it holds together easily without crumbling. I found that I needed to spritz the dough several times.

Once the dough holds together, move the dough to a large ziplock bag, squeezing the dough into a ball, and then flattening it into a disc. Refrigerate the dough for 30 minutes.

When the dough has chilled, remove it from the refrigerator and cut off the two sides of the ziplock bag, leaving the zipper top and the sealed bottom intact. Open the bag and flour both sides of the dough.

IMG_7660

Edges of sides of ziplock cut off, and dough floured.

Close the bag again and use a rolling pin to roll the dough until it barely reaches beyond the open edges of the bag. I love Alton’s method of rolling pie dough in a bag because it keeps my counter and rolling pin clean!

IMG_7661

Floured dough, rolled out inside of ziplock bag.

Peel back the plastic and re-flour the top of the dough.

IMG_7662

Ziplock opened and top surface re-floured.

Place one of your chilled pie pans on top of the floured dough and flip the dough onto the back of the pan.

Remove the plastic from the dough and place the second cold pie plate upside down on the dough, so the dough is between the two pie plates (the dough will be lining the second plate).

IMG_7665

Second cold pie plate placed on top of dough upside down, so dough is lining second pie plate.

Flip the pie plates again and remove the top plate (the first one), and your second pie plate will be perfectly lined with your dough; just be sure to press the dough down into the edges of the pan.

IMG_7666

Pie plates flipped over with dough between them. Dough is lining second pie plate.

Cut away any excess dough hanging over the edges. There is no need to make the dough edges fancy, as they will be covered with meringue. Use a fork to dock the bottom of the crust and place the dough in the refrigerator to cool for 10-15 minutes. This helps to form fat layers in the dough, which will yield a flaky crust.

IMG_7735

Docked dough. Excess dough removed.

While the dough chills, preheat the oven to 425. When the oven is ready, place the pie crust on a baking sheet, line it with parchment paper, and fill the crust with dried beans or pie weights. Bake the crust for 15 minutes.

IMG_7671

Crust lined with parchment and beans, and placed in oven for 15 minutes.

After 15 minutes, remove the parchment and beans/weights, and bake the crust for an additional 10-15 minutes, or until golden.

Let the crust cool completely before using. You could use this pie crust for any type of pie, but I had to continue on and make a lemon meringue filling, as that was what Alton did in the episode. This pie crust recipe is super easy and I love Alton’s tips/tricks for rolling the dough and lining the pie plate.

Lemon Meringue Pie

I ended up making Alton’s lemon meringue pie twice in two days. Why? My first lemon meringue pie was lemon soup. I had followed Alton’s directions exactly as he made the pie in the episode, which resulted in a filling that was not nearly thick enough. For my second pie, I cooked my filling much longer than Alton recommended and ended up with a perfect pie. Here, I’ll go through the steps as Alton did them, giving my recommended changes along the way. The lemon meringue pie begins with making the meringue. Place 4 egg whites (save the yolks for the lemon filling) in the bowl of a mixer and add a pinch of cream of tartar (helps to denature proteins).

Whip the whites by hand until they are frothy.

IMG_7680

Egg whites beaten to a froth by hand.

Then, beat with the mixer on medium-high. When you have a light foam in the bowl, begin slowly adding 2 T sugar with the mixer running.

Beat the whites until you have stiff peaks. You can check for stiff peaks by quickly dipping/withdrawing your beater – if a peak forms and remains, you have stiff peaks. If a peak forms, but falls, you need to keep beating. Once you have stiff peaks, place a pan lid on the bowl and set it aside in a cool place.

Oh, and preheat your oven to 375. To make the lemon filling, whisk 4 egg yolks in a medium bowl and set them aside.

IMG_7686

Beaten egg yolks.

In a saucier whisk together 1/3 C cornstarch and 1 1/2 C water, placing it over medium heat.

IMG_7689

Cornstarch and water in saucier.

Whisk 1 1/3 C sugar and 1/4 t salt into the starch mixture. Stir this mixture often, bringing it to a boil.

Once boiling, simmer the mixture for an additional minute.

IMG_7696

Simmering starch mixture.

Remove the pan from the heat and slowly beat about half of the hot mixture into the bowl of beaten egg yolks, adding only a whisk-full at a time.

When half of the hot mixture has been added to the yolks, whisk the egg mixture back into the pan.

IMG_7700

Egg mixture whisked back into saucier.

Alton tells you to return the pan to the heat, simmering it for one minute; I did this with my first pie and the mixture was very runny, but I assumed it would thicken later. Nope. Instead, for my second pie, I cooked the mixture for about 10 minutes, until it was bubbling and quite thick. Keep in mind that the mixture will not thicken much later, so you want it to resemble your desired pie filling texture now.

Once thickened, turn off the heat and stir in 3 T butter.

IMG_7739

Butter whisked in.

When the butter has melted, add 1 T lemon zest and 1/2 C fresh lemon juice.

IMG_7744

Finished lemon filling.

Pour the filling into the baked/cooled crust.

IMG_7746

Finished lemon filling poured into cooled crust.

Working quickly, beat your meringue again for about 30 seconds to plump it up.

IMG_7748

Refreshed meringue.

Dump the meringue on the hot lemon filling, spreading it with a spatula to seal it against the crust edges. Smooth the top.

IMG_7749

Meringue, spread onto hot lemon filling.

Place the pie on a baking sheet and bake it at 375 for 10-12 minutes, or until golden. Let the pie cool completely before slicing.

IMG_7751

Meringue after baking.

IMG_7768

A slice of lemon meringue pie.

This pie was great… the second time around. Alton’s crust recipe is fool-proof, flaky, and buttery. His lemon filling has a perfect balance of tartness and sweetness, and is bursting with lemon flavor. And, his meringue came out perfectly both times I made it. If you are interested in making a lemon meringue pie, do this one, but be sure to cook your lemon filling until it is thick.

While I breeze through some episodes, this episode was one that took a little while for me to complete. Not only were there five recipes in this episode, but they also all contained nuts; this made for some pretty rich food, so I had to space the recipes out a little bit. First was Alton’s cashew sauce.

Cashew Sauce

This recipe is really two recipes in one:  one for cashew butter, and another for the cashew sauce that is made WITH the cashew butter. To make the cashew butter, combine 10 ounces of roasted/unsalted cashews with two heavy pinches of Kosher salt in a food processor.

Place 2 T honey in the microwave for ~15 seconds to loosen it up, and combine the honey with 1/3 C walnut oil.

With the food processor running, slowly add the oil/honey until the mixture is smooth.

IMG_7339

Honey/oil drizzling into cashews.

If you just want cashew butter, you can stop here.

IMG_7343

Cashew butter.

To continue on and make Alton’s cashew sauce, whisk 1/2 C of your cashew butter with 3/4 C coconut milk and 1/4 t cayenne pepper in a saucier over medium heat. Once smooth, use the sauce as desired.

Alton recommended serving the cashew sauce over chicken or rice. I chose to serve my cashew sauce over some sweet potato “noodles” and meatballs, along with a little bit of cilantro.

IMG_7351

Cashew sauce served over sweet potato noodles and meatballs.

IMG_7353First off, Alton’s cashew butter is super delicious; it’s sort of like a richer, sweeter, better peanut butter, and it is great on pretty much anything. We were also fans of the cashew sauce, which was rich, nutty, and had a perfect punch of heat from the cayenne pepper. And, if you are too lazy to make your own nut butter (it is worth it, though), you could always use purchased nut butter to make the sauce. This sauce is also super versatile, as you could use it over meat, pasta, or vegetables.

Pistachio Mixed Herb Pesto

I love pesto and it is something I make every summer. I typically make basil pesto, so I can use up the last of my fresh basil, freeze the pesto in batches, and continue to dream of summer as the weather gets colder. Sage pesto is nice to make in the fall too! Alton’s pesto recipe in this episode was a little different from the other pestos I have made in the past, as parsley was the primary herb and toasted pistachios were the nut of choice (I toasted my pistachios in a 400 degree oven for ~5 minutes).

IMG_7473

Ingredients for pesto: garlic, thyme, tarragon, sage, oregano, olive oil, Parmesan, parsley, and toasted pistachios.

To make Alton’s pesto, drop 1/2 to 1 clove of garlic into the lid of a running blender, chopping the garlic finely (I opted for a full clove since I like garlic). When the garlic is chopped, turn off the blender and add 2 T fresh lemon thyme (I could not find lemon thyme, so used regular thyme), 2 T fresh tarragon, 1 T fresh sage, 1 T fresh oregano, 2 C packed flat leaf parsley, 1/2 C grated Parmesan, and 3/4 C toasted pistachios.

With the blender running, drizzle in 2/3 C olive oil until emulsified.

IMG_7481

Pesto, after drizzling in olive oil.

Alton recommends serving his pesto on pesto or toast. I served the pesto over zucchini “noodles” with fresh Parmesan.

IMG_7484

Pesto over zucchini noodles.

This pesto is super flavorful, tastes like a variety of herbs, and has great color. Since everyone always thinks of basil and pine nuts/walnuts for pesto, this version really mixes things up. And, if you happen to have fresh herbs in your garden, this can also be a relatively inexpensive pesto recipe. Give this one a try for a tasty twist on pesto.

Pistachio Fruit Balls

For a sweet treat using nuts, Alton made these pistachio fruit balls.

IMG_7596

Ingredients for pistachio fruit balls: roasted pistachios, dates, dried apricots, orange juice, golden raisins, creme de cassis, and dried cherries.

Begin this recipe by grinding 1 C roasted pistachios in a food processor. Set the pistachios aside.

Next, in a large bowl combine 1/2 C pitted dates, 1/2 C dried apricots, 1/2 C golden raisins, and 1 C dried cherries.

IMG_7601

Combined dried fruit.

Run the dried fruit mixture through a meat grinder with a medium die, catching the ground fruit in a bowl.

Add half of the ground pistachios to the ground fruit, along with 1 T fresh orange juice and 2 T creme de cassis. Note:  creme de cassis is a black currant liqueur.

Using your hands, work the mixture together until thoroughly combined. Once combined, use a melon baller to form individual balls of the fruit mixture, and roll the balls in the remaining ground pistachios.

If you find that the mixture is too sticky, you can put some vegetable oil on your hands. Store the fruit balls in the refrigerator for up to a week.

IMG_7611

Pistachio fruit balls.

The online reviews of this recipe are mixed, which I find surprising. We thought these were a really great, healthy, sweet snack. Some reviewers complained of this being a messy or difficult recipe, but I found neither to be the case at all. You could always substitute a different liqueur if you did not have creme de cassis, but I wanted to test the recipe as written. These fruit balls had just the perfect amount of sweetness, held together perfectly, and had great crunch from the pistachios. We ate these as a snack every day for a week. I liked this recipe!

Macadamia Nut Crusted Mahi Mahi

When Alton made this recipe in the episode, he used mahi mahi, but I could not find mahi mahi where I live. Instead, Ted splurged and picked up a couple halibut fillets. This recipe makes enough for four servings, so I halved the recipe for us. To make the recipe for four servings, coarsely crush 5 ounces of roasted macadamia nuts; you can do this in the food processor or you can put them in a tea towel and whack it on the counter.

Put the macadamias in a bowl and add 2 T flour, 1/2 C Panko bread crumbs, and 1/2 a stick of butter, melted. Stir the mixture to combine and set it aside.

Preheat your oven to 425, placing a rack in the center of the oven. While the oven preheats, line a sheet pan with foil and brush it liberally with vegetable oil. Place fish fillets (6-8 ounces each) on the foil and season them with Kosher salt and pepper.

IMG_7623

Fish fillets placed on lubed foil and seasoned with salt and pepper.

Stick the fish in the preheated oven for five minutes to par cook.

IMG_7624

Par cooking the fish.

Remove the fish from the oven and brush it with coconut milk; it should take about 2 T.

Pat the nut mixture lightly onto the fish, crumpling the foil up around the edges of the fish to keep the nut crust from sliding off.

IMG_7629

Nut crust patted onto fish, and foil propped up.

Stick the fish back in the oven for 5-10 more minutes, or until golden brown. My crust took the full 10 minutes to be golden.

IMG_7630

Fish after cooking.

Let the fish rest at room temperature for ~10 minutes before eating. Honestly, I was worried that the time needed to make my nut crust golden would render my fish overcooked, but the fish turned out to be perfectly cooked. We enjoyed this on a warm evening, with a glass of white wine and a squeeze of lemon.

IMG_7633

Alton’s macadamia nut crusted fish.

This is a rich fish dish that would be worthy of serving for a special occasion. The fish was moist and the nut crust was rich, crunchy, buttery, and nutty. Great recipe. Oh, and if you don’t know, keep the macadamia nuts away from your dogs, as they are toxic.

Macadamia Nut Crust

It turns out that the macadamia nut crust above can also be used as a pie crust. So, again, to make the crust, chop 5 ounces of roasted macadamia nuts (you can roast them in the oven for about 5 minutes at 400 degrees).

Combine the chopped macadamia nuts with 2 T flour, 1/2 C Panko bread crumbs, and 1/2 a stick of butter, melted.

Pat the crust mixture into a pie plate and use with any pie filling recipe. If you need to blind bake the crust for your pie recipe, bake it at 375 degrees for 20-25 minutes. Well, I ended up making this pie crust twice. I needed to blind bake my crust because I was making a no-bake key lime pie, but it turns out that 20 minutes is way too long to blind bake this crust. Yep, my first crust was scorched.

When I made the crust the second time, I began checking it at 10 minutes and it was done in about 15.

IMG_7520

A slice of key lime pie with macadamia crust.

This crust added a great crunch and nutty flavor to my pie, and it was very easy to prep with no rolling/chilling of dough. The downside of this crust was that it was super crumbly, so it didn’t make for pretty slices of pie. Other than that, though, this was a buttery, nutty, crispy pie crust.

With having completed Alton’s fudge recipes, I have officially cooked my way through the first 100 episodes of Good Eats. How many recipes has that been? Honestly, I haven’t counted. Fudge is something I have a favorite standby recipe for, which my mom received years ago, handwritten on an index card, from an old woman she met at church. Though I don’t make fudge often, I know which recipe I always reach for. Did Alton’s chocolate fudge recipe dethrone Mom’s? Read on to find out.

Chocolate Fudge

For Alton’s chocolate fudge, butter an 8×8-inch square pan and line it with wax paper. For an easy way to line the pan, place the pan on top of a large piece of wax paper and use a sharp knife to cut the paper diagonally from each corner of the pan. Place the paper in the buttered pan and the corners will magically fold/overlap perfectly, and you can trim any excess with scissors.

In a two-quart saucepan combine 2 3/4 C sugar, 4 ounces unsweetened chocolate, 2 T unsalted butter, 1 T corn syrup (helps to prevent crystal formation), and 1 C half-and-half.

Stir the mixture over medium heat until you are certain the sugar has dissolved and the chocolate has melted.

Once the sugar has dissolved, increase the heat and bring the mixture to a boil. Once boiling, reduce the heat to medium-low and place a lid on the pan for three minutes; this helps to remove any crystals that have formed on the sides of the pan.

IMG_7228

Lid placed on pan for three minutes.

After three minutes, remove the lid and clamp on a candy thermometer, letting the mixture cook until it reaches 234 degrees; if you have high humidity, Alton says you will want to go a few degrees higher.

IMG_7231

Bringing fudge to 234 degrees.

As soon as you hit 234, turn off the heat and add 2 T butter to the top of the pan, but do not stir the mixture. The butter will keep the surface of the fudge from drying out while it cools. Be careful not to agitate the pan at all during the cooling process, as this could cause large sugar crystals to form in your fudge.

IMG_7233

Butter added at 234 degrees.

Once your fudge hits 110 degrees, use a wooden spoon to stir it very quickly. Stir the fudge until its surface becomes matte and it falls from the spoon in clumps. Finally, add 1 T vanilla extract and roasted/chopped nuts, if desired; I opted to leave my fudge plain.

IMG_7237

Quickly stirring fudge with a wooden spoon.

Spread the fudge into your prepared pan and let it cool at room temperature for two hours. This particular fudge should be stored at room temperature.

IMG_7239

Fudge poured into prepped pan.

IMG_7245

A piece of Alton’s fudge.

While Alton’s fudge had a very rich chocolate flavor, it lacked the dense creaminess I like in fudge. Instead, this fudge seemed to have a dry, slightly crumbly texture. Some online reviewers complained of this fudge being gritty, but that was not a problem with my fudge. I simply like my fudge to be a bit less dry. Don’t get me wrong… this fudge is certainly good, but it still can’t top my mom’s.

Peanut Butter Fudge

Unfortunately, there is no online link to Alton’s recipe for peanut butter fudge, though there appears to be a video. To make his peanut butter fudge, place two sticks of butter (cut in pieces) and 1 C smooth peanut butter in a large glass bowl. Cover the bowl with plastic wrap, poking a few holes in the top to release steam.

Microwave the butter/peanut butter on high for two minutes. While the bowl is in the microwave, prepare an 8×8-inch pan by buttering it and lining it with wax paper (see chocolate fudge recipe above).

IMG_7307

Buttered/lined pan.

After microwaving, remove the plastic and stir the mixture with a wooden spoon.

Cover the bowl with plastic again and microwave for two more minutes on high.

Remove the plastic and stir in 1 t vanilla and 16 ounces of powdered sugar, sifted (I sifted the sugar straight into the bowl).

Stir the fudge with a wooden spoon until it is dull and thick, and then switch to a potato masher to get the sugar all mixed in.

IMG_7325

Blended fudge, ready to go in pan.

Press the fudge into the lined pan, top it with additional wax paper, and refrigerate for a couple hours, or until set. Store this fudge in the refrigerator.

Unfortunately, I somehow never got a photo of a piece of this fudge. If I’m going to go for fudge, I typically reach for chocolate, but Alton’s peanut butter fudge is pretty fantastic. This fudge tastes like the peanut butter filling of a peanut butter cup, and is really quite addictive. Of the two fudge recipes in this episode, this is the one I would surely do again because it is super delicious and very easy to make.

From herbs in the last episode, the Good Eats trail takes us to spices in episode 98. So, what is the difference between a spice and an herb? An herb is a leaf, while a spice is a different part of a plant. If you want to keep your spices fresh longer, it is ideal to purchase spices in their whole forms, grinding them in a spice-only coffee grinder just prior to use. I remember that my dad began grinding his spices after watching this episode when it aired in 2004. Read on for Alton’s spice-friendly recipes.

Dried Pear and Fig Compote

A fruit compote is the first thing Alton made in this episode.

IMG_6924

Ingredients for fruit compote: white wine, dried figs, dried pears, vanilla bean, lemon zest, star anise, cinnamon stick, cloves, Kosher salt, lemon juice, and honey.

To make his compote, place 4 ounces dried figs, 4 ounces dried pears, 2 T honey (Alton used orange blossom), 1/2 a vanilla bean, 1 C apple cider, 1 C white wine, a 1-inch strip of lemon zest, 1 T lemon juice, 6 whole cloves, 1 cinnamon stick, 1 star anise pod, and 1/2 t Kosher salt in a medium saucepan.

IMG_6926

All of the compote ingredients placed in a medium saucepan over medium heat.

Bring the mixture to a simmer over medium heat, decrease the heat to low, and continue to simmer the compote for 1 to 1 1/2 hours. I found that it took the full 1 1/2 hours of simmering for my compote to thicken as Alton’s had.

IMG_6928

The compote, brought to a simmer and left for 1 1/2 hours.

After simmering, remove the cloves, cinnamon, star anise, and lemon zest; good luck finding the cloves – we didn’t find some of them until we ate the compote!

IMG_6929

The compote after simmering.

Serve the compote warm over ice cream or you can refrigerate it for later use. We ate the compote over vanilla ice cream and it was very flavorful and spicy.IMG_6930

IMG_6934

Compote over ice cream.

All of the spices seemed to be well-balanced, though clove was perhaps the most dominant spice. The compote was pretty sticky in texture and had little pops of crunch from the dried fig seeds, which were quite prevalent. Due to the rich color of the compote, and its spices, the compote seems to me like a good dish to make in the fall. This would also be great over a pork tenderloin. This is a recipe that truly shows how spices can contribute to a sweet dish.

Vegetable Curry

For a weeknight vegetarian dinner, consider giving Alton’s vegetable curry a try.

IMG_6946

Spices for Alton’s vegetable curry: coriander, onion powder, turmeric, cinnamon, cumin seed, mustard seed, and fennel seed.

IMG_6947

Spices, divided for their addition in the recipe. Yellow bowl has cumin seed, fennel seed, and mustard seed. Red bowl has coriander, onion powder, cinnamon, and turmeric. Green bowl has Kosher salt, sugar, and pepper.

The recipe begins with poking holes in a frozen bag of mixed vegetables. Microwave the veggies on high for 2-3 minutes, or until thawed.

Next, heat a large skillet over medium-high heat, adding 2 T vegetable oil to coat the pan. To the oil, add 1 t cumin seed, 1/2 t mustard seed, and 1/2 t fennel seed. If you have a splatter guard, Alton recommends that you use it now.

IMG_6954

Cumin seed, mustard seed, and fennel seed added to hot oil in skillet.

Meanwhile, whisk together in a bowl 2/3 C plain yogurt and 1 t cornstarch, setting the bowl aside.

When the mustard seeds begin to pop in your skillet, add 1/2 t freshly ground coriander, 1/2 t onion powder, 1/8 t ground cinnamon, and 1 t ground turmeric.

IMG_6957

Coriander, onion powder, cinnamon, and turmeric added to skillet once mustard seeds began to pop.

It is also time now to add two crushed cloves of garlic and three dried red chilies with their stems and seeds removed.

Cook this mixture until the garlic begins to turn golden, but watch it very carefully as the spices could easily burn. When the garlic begins to brown, add the thawed bag of vegetables to the pan, along with 1/2 t Kosher salt, 1/4 t sugar, and black pepper to taste.

IMG_6959

Thawed frozen veggies, stirred in, along with Kosher salt, sugar, and pepper.

Stir the vegetables until they are heated through and coated with the spice mixture. Finally, quickly stir the vegetables into the bowl of yogurt.

IMG_6961

Spiced vegetables added to yogurt.

In the episode, Alton appeared to serve his vegetable curry as a side dish, but I opted to serve his curry over rice for a main course.

IMG_6966

Vegetable curry served over rice.

We thought this curry was pretty impressive, though the chilies really didn’t make it very hot. I would prefer to have more heat in my curry, but that is just personal preference. Otherwise, this curry had a nice combination of spices and came together in a matter of minutes. To get some protein, you could always add some tofu or meat. I would not say this recipe wowed me, but it is good for what it is – an easy weeknight vegetable dinner. And, it does have lots of spice flavor.

Broiled Salmon with AB’s Spice Pomade

Alton’s third spice recipe features salmon. It begins by placing an oven rack in the top third of the oven and preheating the broiler. Brush a sheet pan with canola oil, placing a skinless three-pound side of salmon on the pan; I opted for a smaller piece, or really two pieces, of salmon since there were only two of us eating.

IMG_6912

My salmon.

Sprinkle the fish all over with 1 to 1 1/2 t Kosher salt and with 1 t black pepper.

IMG_6913

My salmon, sprinkled with Kosher salt and pepper.

In a blender combine 2 t onion powder, 1 t garlic powder, 1/2 t cayenne pepper, 1 t whole cumin seed, 1 T whole fennel seed, 1 T whole coriander seed, and 1 star anise pod.

Blend all of the spices and pour in 1/3 C canola oil while the blender is running.

Brush this spice “pomade” all over the fish and let the fish sit at room temperature for 30 minutes.

IMG_6915

Salmon, brushed with pomade and left to sit for 30 minutes.

After resting, broil the fish for 15 minutes and check it for doneness. To check fish for doneness, look for three things:  1- the fish should be firm and bounce back when touched, 2 – the fish should flake easily when scraped with a fork, and 3 – the fish should be at 131 degrees in its thickest part.

IMG_6921
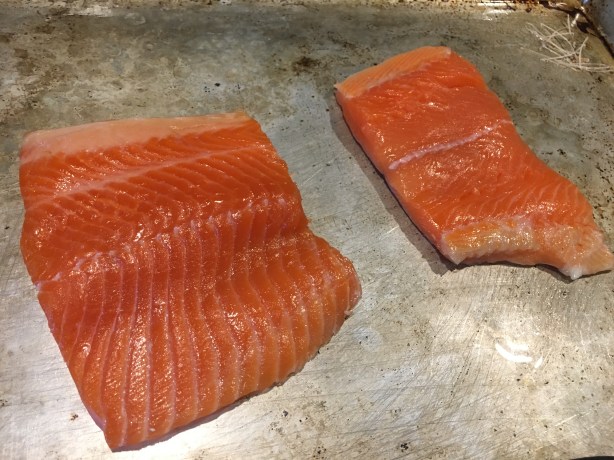
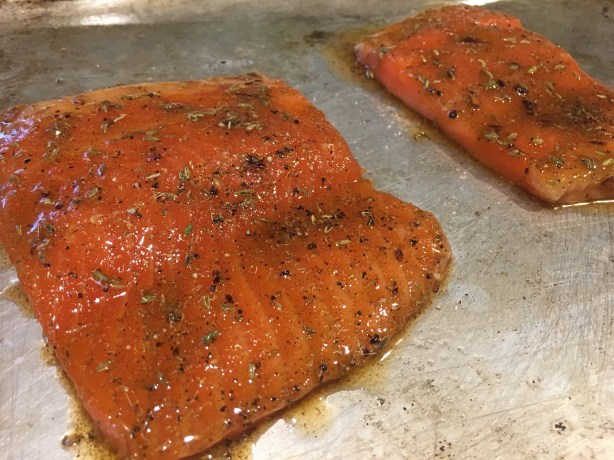
Keep in mind that Alton’s cooking time is for three pounds of fish, so you will need to modify cooking time for a smaller piece of fish. My salmon was honestly overdone on the edges. To me, a good salmon recipe is one that does not overpower the fish, yet enhances it. I think this recipe does that. The fish is flavorful and moist, but has the added flavor pop from the combination of spices.

Curry Powder Blend

The last recipe in this episode is for Alton’s curry powder. I have a lidded tin in my basement that contains nothing but curry powders. For as long as I can remember, my parents used this tin to house their curry powders, and I inherited it a couple years ago. We have sweet curry powder, Thai curry powder, hot curry powder, and maharaja curry powder. Never, though, had I made my own curry powder… until now.

For Alton’s curry powder, in a lidded container combine 2 T cumin seed, 2 T cardamom seed (I had to use ground), 2 T coriander seed, 1/4 C ground turmeric, 1 T dry mustard, and 1 t cayenne pepper.

Shake the mixture to combine. Since Alton’s curry powder contains lots of whole spices, you can grind the curry powder just prior to use.

IMG_6999

Alton’s curry powder.

I never knew my paternal grandmother, but my dad began serving me her curry recipe when I was very young, and it has always been one of my favorite things. It is fun to alter the curry by mixing different curry powders each time. To really test Alton’s curry powder, I used it exclusively in Grandma’s curry and it passed the test very well.

IMG_0392

A bowl of my grandma’s curry made with Alton’s curry powder.

Alton’s curry powder is a mixture of sweetness, nuttiness, citrus, bitterness, and moderate heat. I would call this a very good all-around curry powder, and it has been added to the tin for future batches of curry goodness.