Two days ago marked five years since Ted was diagnosed with cancer. It was also his birthday yesterday, so we certainly have some things to celebrate this week! Good eats will absolutely be on our plates the next few days, including the steak au poivre from episode 141 – stay tuned for that. Thank goodness we will be having nice weather too!

I just finished up the recipes from episode 140, which were three vanilla-centered recipes. I had to order some vanilla beans for these recipes; I didn’t get the most expensive ones, but they were fairly plump, moist, and aromatic, so I think they were sufficient. In case you wonder why vanilla beans are so expensive… Did you know that vanilla flowers can only be pollinated on one day every year? They also often have to be pollinated by hand. In addition to that, vanilla pods have to cure after they are harvested, which takes months.

Fruit Salad with Vanilla Dressing

To first showcase vanilla, and specifically vanilla extract, Alton whipped up a fruit salad with a vanilla dressing. To make the salad, place the following items in a large mixing bowl:  1 Granny Smith apple (peeled, cored, and diced), 1 C halved seedless red grapes, 1 pear (peeled, cored, and diced), 10-12 halved medium strawberries, 1 peeled/diced mango, 1 sliced banana, and 1/3 C toasted chopped walnuts. I toasted my walnuts in a small skillet until they were fragrant.

To make the dressing for the salad, whisk together in a small bowl:  1 t vanilla extract, 1 t lemon juice, 1 t honey, 1/4 t Kosher salt, 1/4 t pepper, 1/2 C plain yogurt, and 1/4 C mayonnaise.

Add the dressing to the fruit, and toss to coat. Season to taste with additional pepper.

IMG_2097(1)

Alton’s vanilla fruit salad.

When I made this fruit salad, I was reminded that I should make fruit salads more often. I liked the combination of flavors and textures that Alton chose, as some of the fruit added tartness and crunch while others were softer and sweeter. The nuts were a nice addition, and I don’t think I’ve ever included them in a fruit salad before. The dressing itself is only very mildly sweet, which is really all you need with all of the sugar from the fruit. The only thing I question with this recipe is whether it truly exhibited the power of vanilla extract. I appreciate that Alton included a vanilla recipe that only used extract, but this recipe was pretty faint in the vanilla department. I would argue that Alton should have perhaps demonstrated how to make homemade vanilla extract, as he could then have used the homemade extract to make a delicious vanilla poundcake. Or, he could have used the homemade extract to flavor a cocktail. Just my two cents.

Creme Brulee

Creme Brulee is Alton’s second vanilla-based recipe, and he uses a whole vanilla bean for this one. To start, use a sharp knife to split a vanilla bean open and use the back of the knife to scrape out the seeds. Bring a quart of heavy cream to a simmer, along with the scraped vanilla bean and its seeds.

Once simmering, remove the pan from the heat and let the vanilla steep in the cream for 15 minutes.

IMG_2128(1)

Cream after steeping.

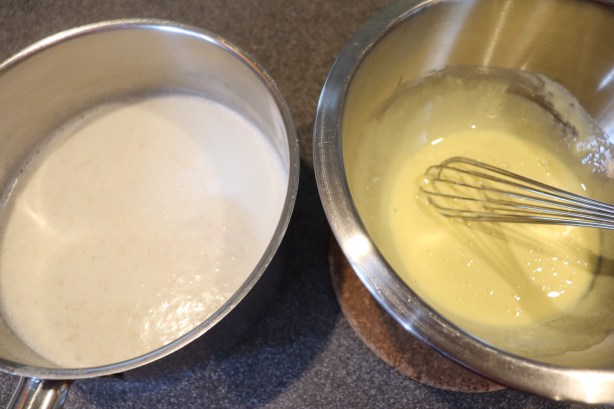
While the cream is steeping, whisk 6 egg yolks in a large bowl until they have lightened in color and preheat your oven to 325 degrees. Slowly add 1/2 C sugar to the yolks; vanilla sugar is ideal, if you have it. You can make vanilla sugar by placing a vanilla bean in some sugar. In fact, you can make it at this point of this recipe by rinsing the steeped vanilla bean and placing it in some sugar for later use.

Next, slowly add the warm cream to the eggs, whisking in just a little bit at a time until it is all added.

Line a roasting pan with a tea towel and place six ramekins inside, dividing the custard among them. Alton filled his ramekins after placing his roasting pan in the oven, but I found it easier to fill the ramekins on my countertop.

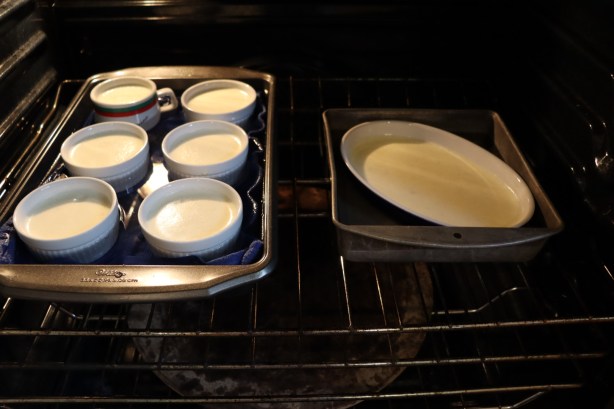
Either way, once the filled ramekins are in the roasting pan inside the oven, add hot (not boiling) water to the roasting pan until it comes about half-way up the ramekins.
IMG_2135(1)

Custards in the oven and hot water added to come halfway up the ramekins.

Bake the custard for 40-45 minutes or until it is set, but still jiggly in the center. Okay, so I had enough custard to fill six ramekins plus a larger, shallower dish (see photo above). My shallow custard was very obviously done after about 30-35 minutes, as it had greater surface area.

IMG_2136(1)

Shallow custard after baking.

My ramekins were still very jiggly at 45 minutes, and my intuition told me to cook them longer. I ignored my intuition, however, as I could hear Alton stressing that you do not want to overcook the custard.
IMG_2138(1)

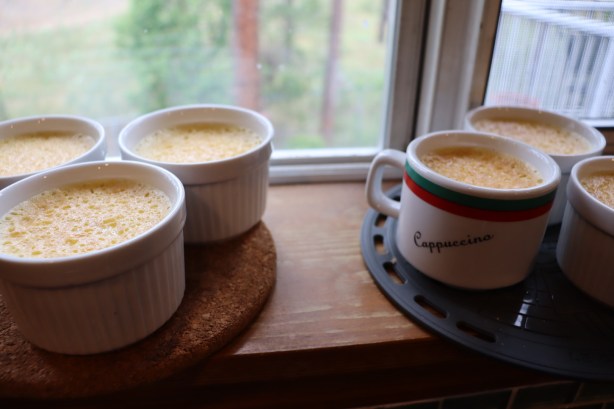
Ramekins after baking – still underdone in the middle.

Yeah, I should have listened to my intuition. My ramekins were still very wobbly in the center after cooling to room temperature. I decided to put them back in the oven again, and I ended up cooking them for at least 20 minutes the second time around. They were a little more golden on top than they should have been, but they ended up setting up just fine. Let the custards cool to room temperature and then refrigerate them until ready to serve.
IMG_2139(1)

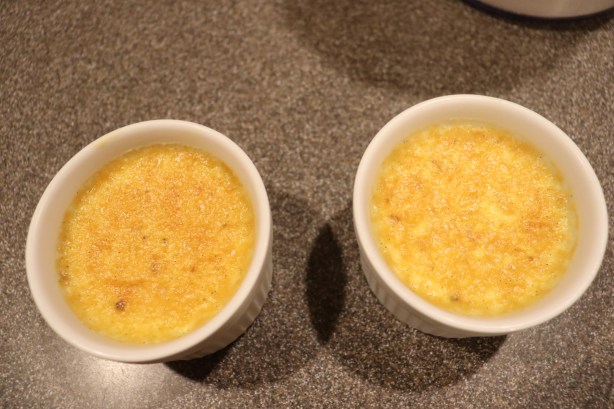
Custards after

To brulee the custard, sprinkle an even layer of sugar (again, vanilla sugar is best) over the top of the custard.

IMG_2140

Sugar sprinkled over the custard surface.

Using a torch, heat the sugar until it begins to brown in places. Then, pick the ramekin up and rotate it as you hold the ramekin at a 45 degree angle, letting the molten sugar flow over the surface as you continue to brulee. My sister-in-law gave me a small butane torch years ago, so I used that. Alton prefers to use a high-powered torch from a hardware store.

IMG_2144(1)

Alton’s creme brulee.

This was a delicious dessert, even despite my initial under-baking. The custard was perfectly smooth and rich, and had a deep vanilla flavor. Alton’s brulee method of rotating on an angle worked perfectly, giving a perfect golden, sugary crust every time. This is a wonderful recipe – just be sure to cook the custards until they are just barely wobbly in the center. Oh, and if your ramekins are sized as mine are, you will likely have enough custard for at least eight desserts!

Vanilla Poached Pears

My mom got on a short kick years ago of making poached pears. I recall her making at least three or four types of poached pears over, what seemed to be, just a few short weeks. If I’m being honest, I remember hoping she would finally make something different for dessert! I don’t believe that I had ever made poached pears prior to this recipe of Alton’s that I prepared last week. This recipe starts with pouring a 750 ml bottle of riesling or viognier into a large saucepan.

IMG_2098(1)

A bottle of Riesling.

Add 1 C water, 5 oz sugar (vanilla sugar is best), and 1 vanilla bean that has been split/scraped.

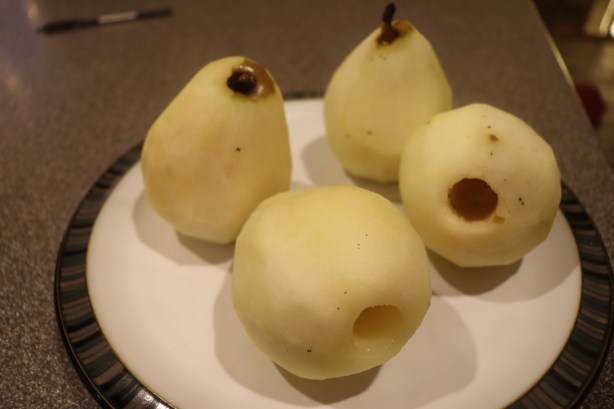
Bring the wine mixture to a simmer over medium-high heat. While the liquid heats, peel and core (from the bottom) four pears, leaving the stems intact; Alton did not specify a certain type of pear in the episode. Oh, and to core his pears, Alton used a spade drill bit, so Ted picked one up for me. The drill bit worked really well!

Place the prepped pears in the almost-boiling liquid and cover the pan.

IMG_2109(1)

Pears added to simmering liquid.

Let the pears cook for 30 minutes or until they are knife tender. Remove the pears from the liquid and let them cool for 30 minutes at room temperature. Conversely, I see that the online recipe instructs you to cool the pears in the refrigerator.
IMG_2112(1)

Pears after cooking for about 30 minutes.

While the pears cool, increase the heat under the cooking liquid and reduce the liquid until you have about one cup remaining, which should take 20-25 minutes. I found that it took a little longer than this for my liquid to adequately reduce to a syrup.

Once reduced, serve the pears with the warm syrup.

IMG_2117(1)

Alton’s poached pears.

Vanilla flavor and aroma were very evident in these pears, as the vanilla seemed to have actually permeated the pears themselves, and the syrup also had a lovely vanilla infusion. The syrup was sweet, but not cloyingly so, which I really appreciated. I should have cooked my pears a little longer than I did, so mine were a bit too firm, but that was my error. All in all, this recipe did a great job of showcasing vanilla and is a great way to utilize fruit in a dessert. This would also be an easy dessert to serve for a dinner party, as you could easily double the syrup and cook multiple pears in a large pot.


It’s a super gray and windy day here, which is sort of forcing us all indoors. Last week I made the recipes from this episode, which just didn’t seem seasonally appropriate. Why is it that eggnog is typically only consumed at the holidays? It must be due to our willingness to allow ourselves to indulge more during the holiday season since eggnog is most certainly a rich treat. Seeing as we are not really allowed to indulge ourselves in many ways right now, maybe now is actually the perfect time to drink a little nog.

My dad would make homemade eggnog when my parents would host holiday parties. I’m almost certain that he used the recipe from The Joy of Cooking. There’s a story about my brother as a young teenager at one of my parents’ parties. Apparently, he liked Dad’s eggnog and helped himself to a little too much. I believe he was lying on the floor under the dining table, and he only recalls hearing my dad say to my mom, “he’s crocked!”

Eggnog

Eggnog is basically just like any custard pie filling. Alton’s recipe here is an uncooked version, but he does also provide a cooked version for those who are concerned about Salmonella.

IMG_1915(1)

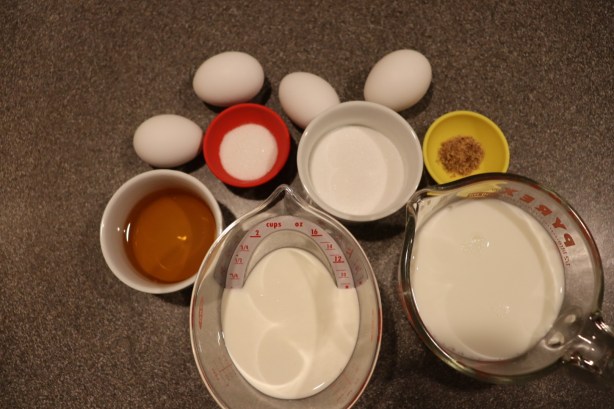
Ingredients for Alton’s eggnog: eggs, sugar, nutmeg, bourbon, cream, and milk.

For the uncooked version, separate four eggs, placing the whites in one large bowl and the yolks in another.

IMG_1916(1)

Four eggs, separated.

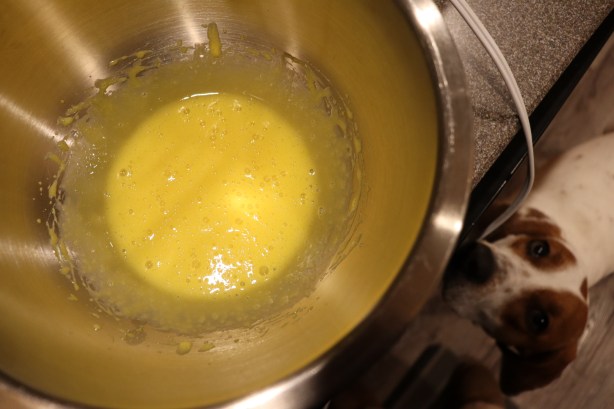
Beat the yolks until they have lightened in color and are thick. Interestingly, the online recipe calls for using a stand mixer to beat the yolks, but Alton explicitly says in the episode that he prefers a hand mixer for this recipe.

IMG_1917(1)

Yolks beaten until light and thick.

With the mixer running, slowly add 1/3 C sugar.

IMG_1918(1)

Sugar beaten into yolks.

Next, add 2 C whole milk and 1 C heavy cream slowly to the yolks.

IMG_1919(2)

Milk and cream added to the yolks.

Using a microplane grater, grate 1t fresh nutmeg; if your microplane has a plastic sleeve, you can place the sleeve on the back side of the grater to “catch” the nutmeg. Stir the nutmeg into the yolk mixture.

IMG_1920(2)

Fresh nutmeg added.

Finally, add 3 oz of bourbon (Alton used Maker’s Mark, which is also what we happened to have), stirring. Place the eggnog in the refrigerator to chill while you tend to the egg whites.

IMG_1922(2)

Bourbon stirred in.

Beat the whites to soft peaks (again, he used a hand mixer here). Once you have soft peaks, slowly add 1 T sugar and continue beating the whites until you have stiff peaks. It’s always fun to invert the bowl over your head to confirm that you have stiff peaks – if no egg white falls on your head, you’re good to go.

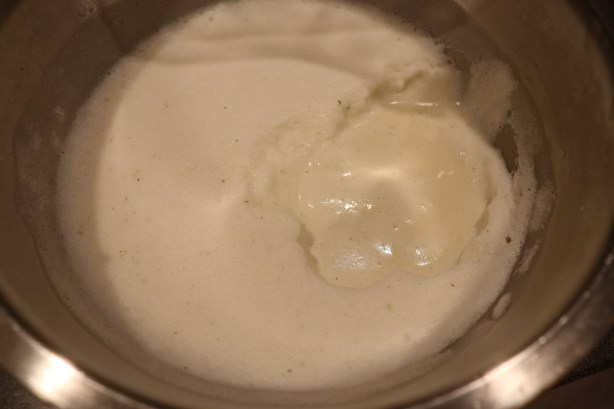
Slowly pour the chilled custard into the egg whites, beating on low speed. Chill the finished eggnog thoroughly before consuming.

IMG_1927(2)

Custard added to stiff egg whites.

IMG_1929(1)

Eggnog after chilling. Thick foam on top.

IMG_1932(2)

Alton’s eggnog.

The eggnog will keep in the refrigerator for a couple days, but you may need to re-froth the mixture with a hand mixer or blender. We drank our nog over the course of three days and I actually thought it maintained its froth very well. It’s been years since I had my dad’s eggnog, but I found Alton’s recipe to be very similar. This eggnog is rich, creamy, and has a perfect layer of  fluffy foam that floats on its surface. While the bourbon is apparent, it does not overpower the nutmeg or the dairy. I would certainly make this again. If you haven’t made eggnog before, keep in mind that homemade eggnog is nothing like the stuff you buy in the stores.

A few years ago, Alton posted a recipe on his web site for an eggnog that you can age for months in your refrigerator. Yes, I’ve tried it, and yes, it is delicious. The aged eggnog is more on the boozy side and lacks the foaminess you get from the egg whites in his un-aged version. Honestly, you can’t go wrong with either recipe.

Eggnog Ice Cream

I mentioned earlier that Alton also provided a recipe for cooked eggnog in this episode. With the cooked recipe, you have the choice of either drinking it or making it into ice cream. Either way, the recipe begins with placing 1 pint of whole milk in a saucepan, along with 1 C heavy cream and 1 t freshly ground nutmeg.

IMG_1934(2)

Milk, cream, and nutmeg in a saucepan.

Whisk the milk and cream, bringing it to a boil over high heat.

IMG_1935(1)

Milk, cream, and nutmeg being brought to a boil.

While the dairy heats, place a metal bowl on top of the saucepan and add 4 egg yolks. Whisk the yolks until they are light yellow and thick. Slowly add 1/3 C sugar. Remove the bowl from the heat when the yolks fall from your whisk in ribbons. Be careful not to cook the eggs. Note that the online recipe does not even call for heating the yolks.

Once the milk/cream is boiling, remove it from the heat. Temper the egg yolks by slowly whisking in the hot dairy.

IMG_1940(1)

Ready to temper the yolks by slowly adding the dairy.

Pour the mixture back into the saucepan and check its temperature with an instant thermometer – it should be right about 160 degrees. My temperature was quite a bit lower than this, so I continued to heat my custard until it reached 160.

IMG_1942(1)

Temperature after tempering, so back on the stove to reach 160.

Whisk in 3 ounces of bourbon and allow the custard to cool to room temperature. Refrigerate the custard until thoroughly chilled.

To drink as eggnog, fold in 4 pasteurized egg whites that have been beaten to stiff peaks and serve. Alternatively, to make ice cream, do not add the egg whites. Rather, just chill the custard overnight and churn it in an ice cream maker. Since I had already made the uncooked recipe for eggnog, I churned my cooked eggnog base in my ice cream machine.

IMG_1946(1)

Churning the custard in an ice cream machine.

IMG_1952(1)

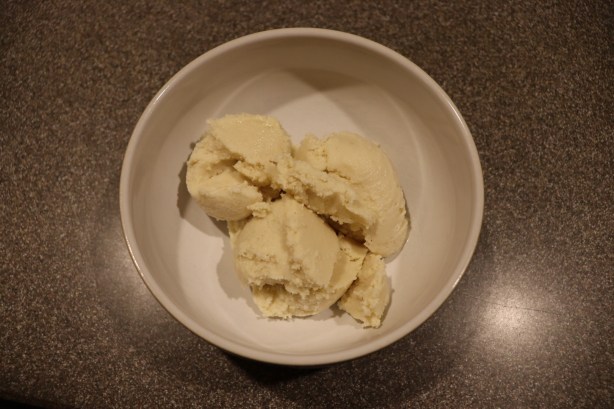
Alton’s eggnog ice cream.

I have to say that I was highly disappointed in this recipe because the resulting ice cream tasted very strongly of bourbon and its texture was very icy (probably because of the alcohol content). When I think of eggnog ice cream, I think of a very smooth, dense, dairy-forward dessert, but this lacked all of those traits. I’d look elsewhere for an eggnog ice cream recipe, but Alton’s eggnog recipes are certainly good for drinking.

My quest appears now be to complete a blog post during nap time. Will it happen this time? I’m guessing not, but we’ll give it a shot. We’re all still in isolation as we wait for this pandemic to be deemed as safely past. Since we can’t go out to eat, we may as well cook, right? We have been trying to support some of our local restaurants by getting takeout here and there, but I’m also cooking as much as I can with a six month old baby. Lately, I’ve been futzing with sourdough, as I have my mom’s old starter and a new one I picked up from a local eatery. This episode has nothing to do with sourdough, though. Instead, it deals with pocket pies. The recipes from this episode are all contained in one link, which is here.
Well, I did not successfully finish a blog post during nap time. In fact, it’s now nap time again two days later! Let’s give this another go.

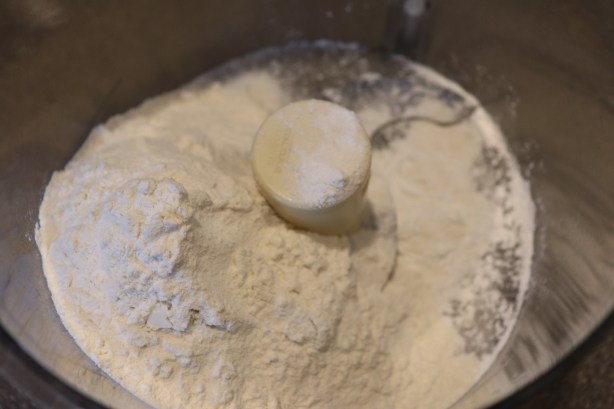
Alton’s pocket pies have numerous iterations, so you can play with fillings, cooking methods, etc. The online link contains recipes for his pocket pie dough and for two fillings. To make the dough, pulse together in a food processor:  2 t baking powder, 3/4 t Kosher salt, and 9.5 ounces flour; this will “sift” and aerate the flour.

IMG_1837(1)

“Sifting” flour, Kosher salt, and baking powder in the food processor.

Place 2.5 ounces of shortening in ice water to chill for a few minutes. Once chilled, remove the shortening from the water and place it in a large bowl.

Add the flour mixture to the shortening and use your fingertips to work the shortening into the flour. Make a well in the center of the flour and pour in 3/4 C milk, stirring well (you want gluten development here).

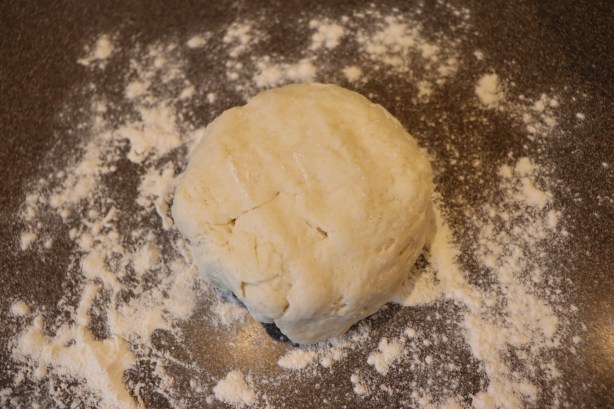
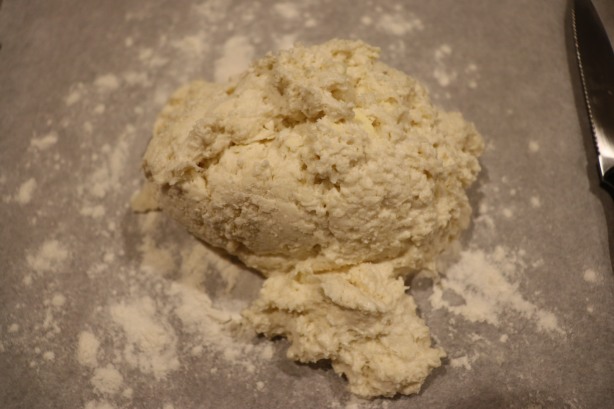
Turn the dough onto a counter and knead it 10-20 times with your hands.

IMG_1846(1)

Finished dough after kneading.

Roll the dough until it is 1/2″ thick and cut rounds with a 2.5 inch circular cutter. Roll each round until it is a thin disc measuring 5-6 inches in diameter. Place the dough rounds between sheets of wax paper and let them chill in the refrigerator for 1-2 hours before forming pies.

Alton’s favorite fruit filling for hand pies is a curried mango filling. You want this filling to be chilled before you use it, so you’ll want to make it several hours ahead. Peel and dice four mangoes, and place them in a large saucepan. Add 1/2 C brown sugar, 1/2 C cider vinegar, 2 t curry powder, and 1/4 C fresh lime juice to the pan.

IMG_1830

Mangoes, brown sugar, cider vinegar, curry powder, and lime juice in a large saucepan.

Bring the mixture to a boil over high heat, place a lid on the pan, and decrease the heat to a simmer. Let the filling simmer for 30 minutes.

Cool the filling at room temperature for an hour, and then place it in the refrigerator for 3-4 hours; a metal bowl will speed up the chilling.

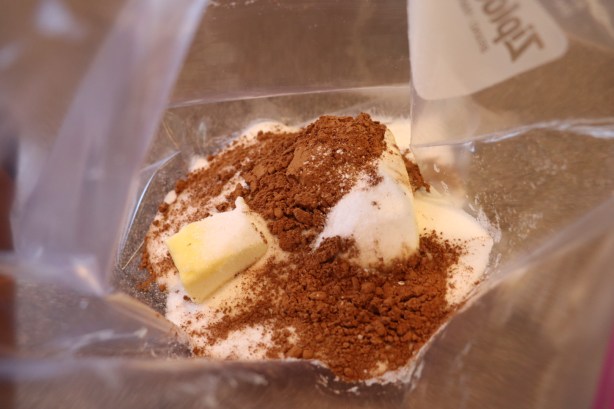
Alternatively, for dessert pies, you can make Alton’s favorite chocolate filling. To do this, put 10 ounces of softened butter in a large ziplock bag. Add 2 1/2 C sugar, 1/4 C + 1 T cocoa powder, and a pinch of Kosher salt.

IMG_1851(1)

Chocolate filling ingredients in a large plastic bag: butter, sugar, cocoa powder, and Kosher salt.

Seal the bag and mash the filling with your hands until it is combined. When you are ready to fill pies, you can simply snip one of the bottom corners off of the bag and pipe the filling directly onto the dough.

Although there are no real recipes for other fillings in this episode, Alton did mention some other filling possibilities. For example, you could use leftover beef stew as a pie filling. Or, you could make mini pizza pies by filling the dough with pizza sauce, cheese, and toppings.

Regardless of which fillings you utilize, to form the pies place a large spoon of filling on one side of each chilled dough circle. Rub the edges of the circle with egg wash (1 egg plus 2 t water). Fold the dough over the filling to form a half moon, and press any air out with your fingers. Press the edges together with your fingers to seal them well, and use a fork to crimp the edges together. Place the sealed pies on a parchment-lined sheet pan and cut three small steam vents in the top of each pie with kitchen shears. Doh! Nap time appears to be over again!

Fast forward to another nap time a day later, and here we are. Now, back to baking the hand pies. Bake the pies at 350 for 25-30 minutes, or until golden brown. Let the pies cool for several minutes before eating. I baked some mango pies and some chocolate pies, and some of them leaked a little bit, especially the chocolate ones.

The crust here was very pie-like, though I think the crust would have been better if it had a little more flakiness to its texture. The mango filling was sweet, but not overly so, so you could easily eat these for breakfast or a snack. I had to use a slotted spoon when I placed the mango filling on the dough, as the filling was pretty thin and seemed to run all over the dough. The curry flavor was definitely evident, but it wasn’t completely overpowering.

Pan frying is another option for cooking hand pies. To do this, heat a heavy skillet over medium-low heat, adding a pat of butter. Once the butter has melted, place two hand pies in the pan, jiggling the pan to be sure the pies do not stick.

Flip the pies once they are golden brown. I pan fried some chocolate hand pies for dessert and they leaked less than the baked chocolate pies. The pies came out looking a little flat – like pressed sandwiches, but I liked the richness of cooking the pies in butter.

These pies seemed much more indulgent than the baked ones. The chocolate filling was very rich and had a slight grittiness to its mouthfeel from all of the sugar. I’m sure the grittiness could be remedied by making the filling in a mixer, but it’s certainly more fun to mash it together in a plastic bag!

If you want to get super indulgent, you could always try deep frying your hand pies. To do this, heat two quarts of canola oil to 375 degrees in a Dutch oven. For hand pies that will be deep fried, do not cut steam vents in the tops, but rather use a fork to dock the dough a few times. Fry the pies, a few at a time, until they float and are golden brown. Transfer the fried pies to an inverted cooling rack on newspaper, and allow them to cool for at least five minutes before eating. I did not end up deep frying any of my hand pies, as I just ran out of time to try this application. I imagine that these would be the crispiest pies.

You can store cooked fruit or chocolate pies at room temperature for up to a week. Pies with meat fillings can be refrigerated/reheated for up to a week. You can also freeze uncooked pies on a baking sheet, throwing them in a 350-degree oven for 30 minutes when you are ready to eat them.

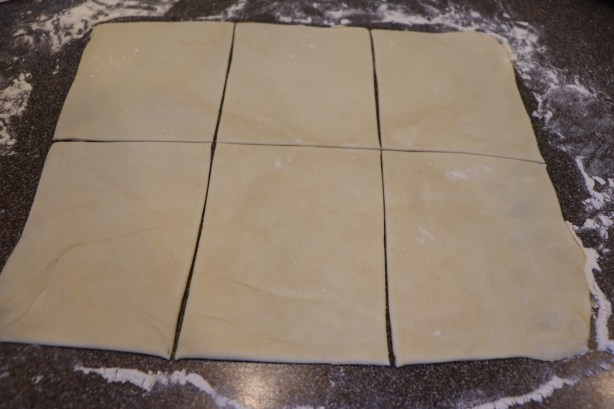
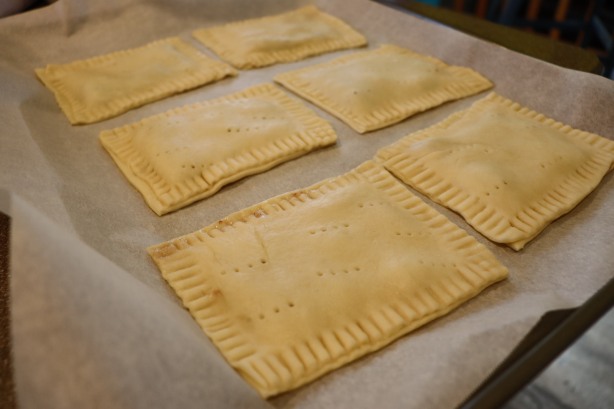
In addition to his baked, pan-fried, and deep-fried pies, Alton also made homemade toaster pastries in this episode. Yep, you can make pop-tarts at home. To make these, make a full batch of dough as for the hand pies above, but divide the dough in half after kneading. Roll each of the two dough pieces into a 12″ x 10″ rectangle, using a knife to trim the edges. Divide each dough rectangle into six 4″ x 5″ rectangles, cutting them with a pizza cutter.

IMG_1883(1)

Half of the dough rolled into a 12″ x 10″ rectangle and cut into six 4″ x 5″ rectangles.

Rub egg wash (1 egg plus 2 t water) all around the edges of six of the 12 smaller rectangles. Spoon a couple tablespoons of your desired filling (Alton used fruit preserves) onto the center of each egg-washed rectangle, spreading it with a spoon.

IMG_1887(1)

Egg wash rubbed around edges and filling spooned onto rectangles.

Use a fork to dock the remaining six dough rectangles and place these rectangles on top of the filled/egg-washed rectangles. Use your fingers to press any air out of the pastries and to seal the edges tightly.

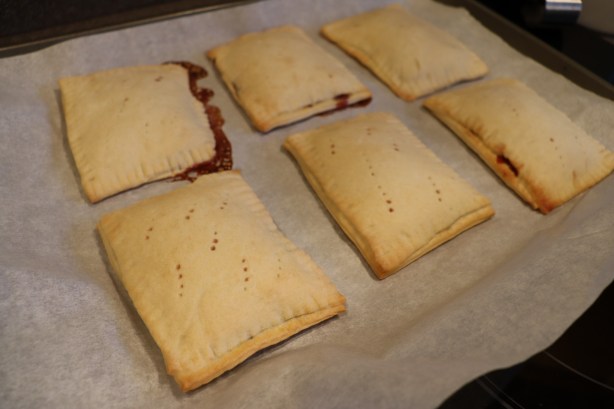
Crimp the edges with a fork and bake the finished pastries for 20 minutes at 350 degrees.

IMG_1892(1)

Crimped pastries placed on parchment-lined sheet pan.

IMG_1893(1)

Toaster pastries after baking for 20 minutes.

Cool the pastries, storing them in plastic for a week or freeze for a month. Reheat the pastries by toasting them in a toaster on the lowest setting.

IMG_1902(1)

One of Alton’s toaster pastries.

These were fun and easy to make, and were my favorites of all of Alton’s hand pies. Kids would really enjoy eating these, and you could fill them with any number of fillings. The resulting dough was crispy at the edges and tender in the center.

I have made many empanadas and hand pies (usually savory) over the years. I do have a dough recipe that I overall prefer over Alton’s, as it is easier to work with and results in a very flaky crust, but Alton’s crust is pretty good too. For dessert, I’d opt for pan-fried chocolate pies and for breakfast I’d certainly make Alton’s toaster pastries. Regardless of how you cook them or which fillings you choose, hand pies are equally fun to make and eat.


The baby is sleeping, Ted just left for a few hours, the dog is attempting to hide from the garbage truck, and we’re still in this period of Coronavirus isolation; seems like the perfect time to write another blog post. Hopefully I’ll make it all the way through before nap time is over.

Flour has been difficult to come by lately, which is super frustrating for people like myself who like to bake on the regular. I’m betting that the vast majority of flour hoarders will barely touch their stash before its shelf life has long passed. In fact, I need flour for the recipes in the next Good Eats episodes, so hopefully I can find some soon. Alas, I digress, as no flour was required for the avocado-based recipes in this episode. Now for a few avocado facts from this episode:  1) It takes 13 months for a seed to become fruit. 2) Avocados will never ripen while they are on the tree, so they can be “stored” on the tree for up to seven months. 3) All Hass avocado trees came from the same mother tree, which had died at the airing of this episode in 2005.

Avocado Compound Butter

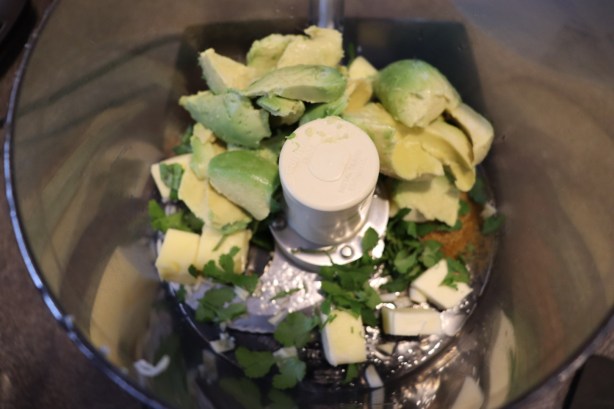
You may recall that Alton made compound butter back in episode 35. I honestly don’t think I had made compound butter in the five years (!) since I wrote that post, so it was suitable that this episode led me to make an avocado compound butter. This one comes together in a snap by pulsing the following ingredients together in a food processor:  1 T lemon juice, 1 minced clove of garlic, 2 t cumin, 1 T chopped cilantro, 2 oz softened unsalted butter, and 6 oz of ripe avocado meat.

IMG_1783(1)

Ingredients for compound butter in food processor: lemon juice, garlic, cumin, cilantro, butter, and avocado.

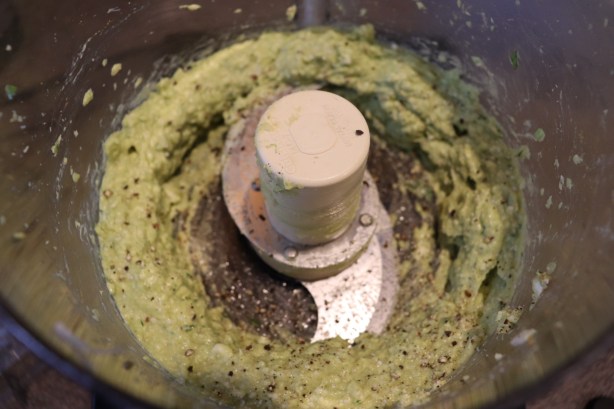
Once combined, season the butter to taste with Kosher salt and pepper.

IMG_1785(1)

Pepper and Kosher salt added to butter.

Transfer the butter to the center of a sheet of parchment paper, folding the paper over the butter. Holding a sheet pan at a 45 degree angle to the counter, press the edge of the sheet pan against the mound of butter, pulling the parchment toward you with your other hand as you simultaneously push away with the sheet pan; this will form the butter into a perfect log shape within the parchment paper. Twist up the ends of the parchment paper and chill the butter until it is firm.

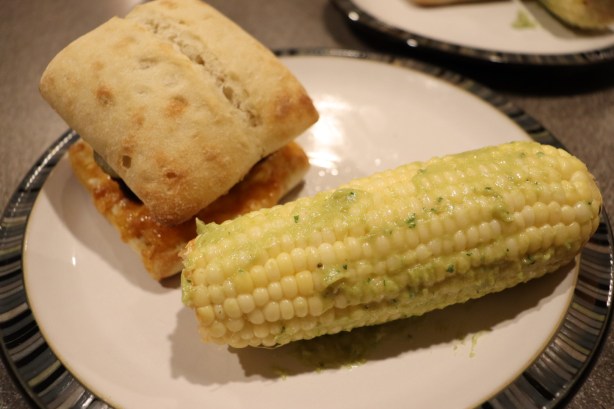
You can serve this butter with chicken, fish, corn, bread, or pretty much anything. We first ate ours with corn on the cob. Although the corn was pretty awful, the butter was fantastic.

IMG_1793(1)

Avocado compound butter on corn.

This butter is like a somewhat melty guacamole that you can serve on anything, and it is delicious. It is rich, yet savory, and has a slight tang from the lemon. The cumin, cilantro, and garlic give it layers of flavors. We often find ourselves with extra avocados when we buy the big bag from Costco, and this is a way I intend to use them in the future.

Avocado Ice Cream

Of the recipes in this episode I was most excited to try the avocado ice cream. To me, avocado ice cream just makes sense. Avocados are high in fat and have a super rich, creamy texture that seems like it would make a delectable ice cream base. Their flavor too is naturally on the sweeter/milder side. To make Alton’s avocado ice cream, place 12 oz of avocado meat in a blender with 1 T lemon juice, 1/2 C sugar, 1 C heavy cream, and 1 1/2 C whole milk. Blend the mixture until it is smooth and place it in the refrigerator until its temperature has dropped below 40 degrees (I chilled mine overnight).

Once suitably chilled, process the ice cream base in an ice cream maker. Alton claimed that this ice cream would only need 5-10 minutes of churning time, but it took a good half hour in my ice cream maker. For a soft-serve texture, you can enjoy the ice cream immediately, or you can place it in the freezer for a firmer texture.

IMG_1778(1)

Finished avocado ice cream.

Ted really didn’t care for this ice cream at all, saying it was too “vegetal” in flavor. I initially wasn’t sure what I thought of it. I’ve actually been eating a scoop of this ice cream as I’ve been writing this post. This ice cream becomes rock hard in the freezer – it’s hard to scoop even after sitting out for 15-20 minutes on the counter. The initial mouthfeel appears to be somewhat icy, but then melts into a rich, smooth consistency that coats the palate. There is no doubt that the flavor of this ice cream is avocado. I’ve been going back and forth on whether I like this ice cream or not, and I think the honest answer is that I really want to love this ice cream, but I don’t. From reading the online reviews of this recipe, this one is quite polarizing, with some true fans and some people who can’t stand it at all. I’m somewhere in the middle, I suppose. In any case, this ice cream is undeniably interesting, which is perhaps just reason enough to try it for yourself.

Avocado Buttercream Frosting

I have to agree with the title of this episode that the recipes therein are definitely experimental. I consider this final recipe for buttercream frosting to be the most experimental of the three. For avocado buttercream, use the whisk attachment of a stand mixer to beat 8 ounces of avocado meat with 2 t lemon juice for two to three minutes on medium speed.

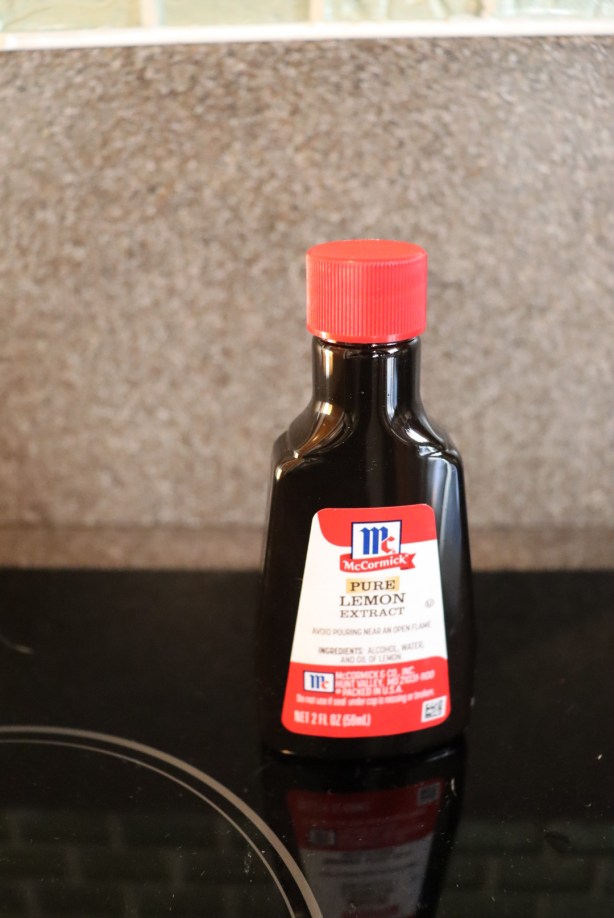
Sift one pound of powdered sugar and slowly add the sugar to the avocado on low speed. The sugar does not incorporate easily, and I found I had to scrape the bowl quite often with a spatula. Once half of the sugar is incorporated, increase the speed and add the remaining sugar. Finally, add 1/2 t lemon extract.

IMG_1817(1)

Lemon extract.

IMG_1815(1)

Avocado frosting after adding powdered sugar.

Refrigerate the frosting for two hours before using to frost a cake. I used my avocado frosting on a vanilla cake that I confess I made from a mix. To make things comical, when I went to frost my cake, I discovered that my cat had licked the top off of a portion of the cake. Yes, we trimmed that portion off.

IMG_1818

My cake, licked by my cat.

IMG_1821(1)

Alton’s avocado buttercream.

This frosting is kind of weird in its consistency, as it is very sticky and a bit glossy. It does not have the rich, buttery flavor and texture that are so typical of buttercream. It is also incredibly sweet. In fact, it is so sweet that it really has very little discernible flavor, other than a hint of citrus. I can’t say that I would know this frosting is made from avocado, especially if I tasted it without seeing the green color. Oh, and the color? Well, it’s different. This frosting could have a place on some type of cake for a little kid’s birthday, such as an alien or Shrek cake. Other than that, though, I thought this was sort of a dinger.

All in all, the recipes in this episode did make for quite the interesting kitchen experiment. I would definitely make the compound butter again. The frosting would be a no for me, unless I desperately needed green slimy frosting for a particular project. The ice cream? Although it wasn’t my favorite, I do think it was a fun one to make and try, and I think some people would really love it.

My dad’s funeral was a year ago yesterday, and I can’t help but imagine what he’d be saying in these crazy times. Hell, if he had died this year, would we even be allowed to have a funeral? If he were here, I would probably be steering him toward Alton’s live YouTube cooking videos he’s been doing alongside his wife. These videos are sort of like the “Pantry Raid” series within Good Eats, as Alton and his wife raid their pantry to assemble a dinner on a particular evening during our quarantine. We have sort of been cooking in a similar manner; for tonight, I decided to feed my sourdough starter, so I’m also making sourdough pizza crust that we’ll top with some frozen sauce and whatever toppings we have on-hand.

If you happen to have meat you need/want to use up, the recipes from the 136th episode of Good Eats could be suitable to make during this time. Both of the recipes in this episode are for meatballs and make enough to serve a family, likely with some leftovers. For the two of us, we were able to get at least two dinners out of both of these recipes.

Baked Meatballs

Alton’s baked meatballs are best mixed one day prior to eating, though you can get by with making them an hour before serving. Place the following ingredients in a large mixing bowl:  1/2 pound ground lamb, 1/2 pound ground pork, 1/2 pound ground beef, 1/2 t red pepper flakes, 1 1/2 t dried parsley, 1 1/2 t dried basil, 1 t garlic powder, 1 t Kosher salt, 1/2 C grated Parmesan, 1 egg, 1/4 C bread crumbs, and 5 ounces of frozen spinach that has been thawed/squeezed.

IMG_1643(1)

Ground lamb, ground pork, ground beef, red pepper flakes, dried parsley, dried basil, garlic powder, Kosher salted, grated Parmesan, an egg, thawed frozen spinach, and bread crumbs in mixing bowl.

Using gloved hands, use your fingertips to thoroughly mix all of the ingredients. Refrigerate the meat mixture for 1-24 hours.

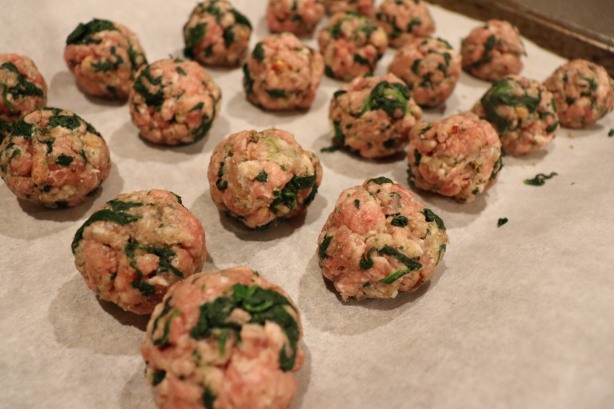
After chilling, portion the meat into 1.5 ounce portions, placing them on a parchment-lined sheet pan (Alton used a disher for this, but I just used my hands and my scale). When all of the meat has been portioned, roll the meat into balls with gloved hands.

IMG_1647(1)

Meat portioned into 1.5 ounce portions and shaped into balls.

Place 1/4 C of bread crumbs in a ramekin or small bowl and add a meatball, shaking the ramekin to roll the ball in the crumbs. Place the bread crumb-coated meatball back on the baking sheet and continue this process until all of the meatballs have been coated in crumbs.

IMG_1650(1)

Rolling meatballs in bread crumbs.

Set your oven to preheat to 400 degrees and place the meatballs in miniature muffin tin cups.

IMG_1652(1)

Crumb-coated meatballs placed in mini muffin tins to bake.

Bake the meatballs for 20 minutes.

IMG_1653(1)

Meatballs after baking.

Alton recommends serving his meatballs alongside pasta that has been tossed with olive oil, fresh herbs, and Parmesan, so that is how we enjoyed our meatballs.

IMG_1658(1)

Alton’s baked meatballs served over pasta with olive oil, fresh herbs, and Parmesan.

These meatballs are excellent. The combination of meats results in meatballs that are extra flavorful and not overly dense; I like the subtle gamey flavor that comes from the lamb. Rolling the meatballs in the breadcrumbs gives the meatballs a little extra crunch, as opposed to just adding the breadcrumbs as a filler. Normally, when cooking meatballs on a baking sheet, they sit in puddles of fat and end up with flat bottoms. Baking the meatballs in the mini muffin tins is genius because the meatballs sit above the fat as it drains away, and the meatballs retain a perfectly round shape. I plan to use mini muffin tins whenever I make baked meatballs in the future. This is one of those simple, classic recipes that Alton has just made better.

Swedish Meatballs

I recall my mom making Swedish meatballs sometimes when my parents would host parties. My parents had an old chafing dish that I’m sure belonged to one of their mothers, and which now resides in our basement. My mom would set out a small dish of toothpicks with those decorative cellophane curls on one end, and guests would stab and nibble to their heart’s content. My mom’s Swedish meatballs were pretty darn delicious, and I’m guessing her recipe may have come from The Joy of Cooking, though I’ll have to ask her to be sure. My brother happened to give me a new copy of The Joy of Cooking for Christmas (I also have my parents’ old versions), so I compared their recipe to that of Alton, and I can attest that they are incredibly similar. In this time of social distancing, why not whip up a batch of these meatballs to enjoy alongside a “quarantini” or three? It is, after all, the weekend.

To make Alton’s Swedish meatballs, tear two pieces of white sandwich bread into chunks and place them in a bowl. Pour 1/4 C of milk over the milk and toss to coat. Set the bread aside to soak.

Sweat 1/2 C of onion in 1 T clarified butter (Alton explained how to clarify butter in his mushroom episode), adding a pinch of Kosher salt.IMG_1616 Next, put 3/4 pound ground chuck in the bowl of a stand mixer, along with 3/4 pound ground pork, the milk-soaked bread from earlier, the onion, two egg yolks, 1 t Kosher salt, 1/2 t pepper, 1/4 t nutmeg, and 1/4 t allspice.

IMG_1618(1)

Ground chuck, ground pork, soaked bread, sauteed onion, egg yolks, Kosher salt, pepper, nutmeg, and allspice in bowl of stand mixer.

Using the paddle attachment, beat the mixture on medium for two minutes.

Using a scale, portion the meat into one ounce portions, rolling them lightly with gloved hands and placing them on a parchment-lined baking sheet.

IMG_1627(1)

Meat portioned into 1 oz balls.

If you have an electric skillet, set the skillet to 250 degrees and add 2 T clarified butter. If you do not have an electric skillet (I don’t), you can use a large skillet over medium heat. Either way, add the meatballs to the pan, turning them often with tongs until they are cooked through, which should take 7-10 minutes; you may need to do this in batches.

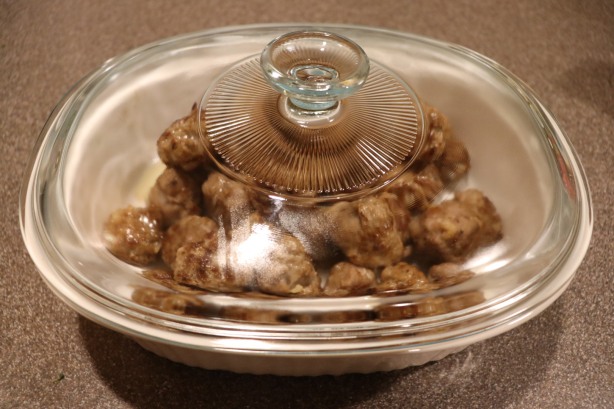
Using a slotted spoon, transfer the cooked meatballs to an oven-proof casserole dish. Cover the dish and place it in a warm oven while you make the sauce.

IMG_1633(1)

Cooked meatballs transferred to casserole dish to keep warm in oven.

Sift 1/4 C flour over the juices in the pan and stir it in. Add 3 C beef broth and 1/4 C heavy cream, and increase the heat. Bring the liquid to a simmer and continue to let the sauce simmer until it has thickened, keeping in mind that the sauce will thicken more as it cools.

When the sauce has reached your desired consistency, add the warm meatballs back to the sauce.

IMG_1639(1)

Meatballs added back to sauce.

Place the meatballs and sauce in a chafing dish if you plan to serve them over a long period. Of course, if you do not have a chafing dish, Alton has you covered with a method of making your own. First, set down three strips of shelf liner, forming a triangle shape. Next, place a brick on top of each piece of shelf liner, forming a triangle of bricks. Place a fuel can in the center of the brick triangle and place a second layer of bricks on top of the first; the second triangle should face the opposite direction of the first triangle. Light the fuel can and place a water-filled cake pan on top. Place a pie plate full of Swedish meatballs so it nests in the water, and you have a chafing dish. We ate these meatballs as our dinner for a couple nights, eating them with some side dishes.

IMG_1641(1)

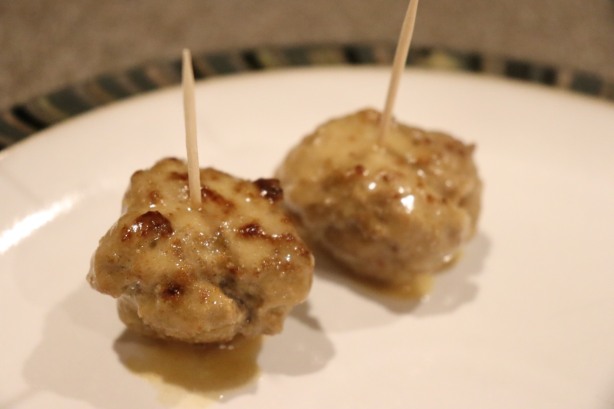
Alton’s Swedish meatballs.

While this recipe did remind me a great deal of my mom’s, I wish I had cooked the sauce a little longer, as my sauce was a little thinner than I would have preferred. Still, the sauce was very rich from the pan juices and the cream, and the nutmeg and allspice in the meatballs gave hints of warmth and spice . Swedish meatballs are not the prettiest food, but they are rich little morsels and a great contribution to any potluck… or quarantine happy hour.

Since we are all on lockdown for the Coronavirus, hopefully I’ll have some more time to cook and write. I also threw my back out two days ago, so I guess we may as well try to make the best of it. We are actually supposed to be on a cruise ship as I type, but instead I am perched in our family room. So, what does one eat during the apocalypse? How about waffles?

Basic Waffle

Alton touts the waffle as one of his favorite things, explaining that waffles are essentially a fried food, as the batter is cooked between oiled plates. I had never really thought of waffles as fried, but that explains why I like them so much. I’ll nearly always choose waffles over pancakes. Alton’s basic waffles are made by whisking together in a medium bowl 4 3/4 oz flour, 4 3/4 oz whole wheat flour, 3 T sugar, 1 t Kosher salt, 1/2 t baking soda, and 1 t baking powder.

In a larger bowl, beat three eggs until smooth and whisk in 2 oz melted butter.

Next, whisk in 16 oz of buttermilk at room temperature.

Preheat your waffle iron and add the wet ingredients to the dry ingredients, folding everything together with a spatula until just combined; the batter will have some lumps, but that is okay.

Let the batter rest for five minutes. Spray the plates of your waffle iron with nonstick spray, which will aid in browning and release of the waffles. Pour about three ounces of batter in the iron and cook until golden and crispy.

IMG_1678(1)

Batter on hot oiled iron.

IMG_1682(1)

Alton’s basic waffle, served here with butter and boiled cider syrup.

You can keep the waffles warm by covering them with foil and placing them in a warm oven. For later use (such as when a pandemic hits), you can freeze the waffles and reheat them in a toaster. I am picky about waffles, as I really don’t care for them when they are at all soggy. I like my waffles to be extra crispy on the outside. This is a really good waffle recipe, resulting in waffles that are crispy on the outside and tender on the inside. I ate my waffles with butter and some homemade boiled apple cider syrup, while Ted enjoyed his with some maple syrup straight from his aunt’s maple trees.

Chocolate Waffle

If plain ol’ waffles are too boring for you, or you’re looking for more of a dessert waffle, Alton has you covered with his chocolate waffle recipe. As with the basic waffle recipe from above, you will need two mixing bowls for this recipe. In the first bowl, whisk together 7 oz flour, 1 3/4 oz sugar, 1 1/2 oz cocoa powder, 1 t salt, 1 t baking powder, and 1/2 t baking soda.

In the second bowl, whisk three eggs until they are smooth and add in 2 oz melted butter. Follow that with 16 oz of room temperature buttermilk and 1 t vanilla extract.

Add the wet ingredients to the dry ingredients, folding with a spatula to barely combine.

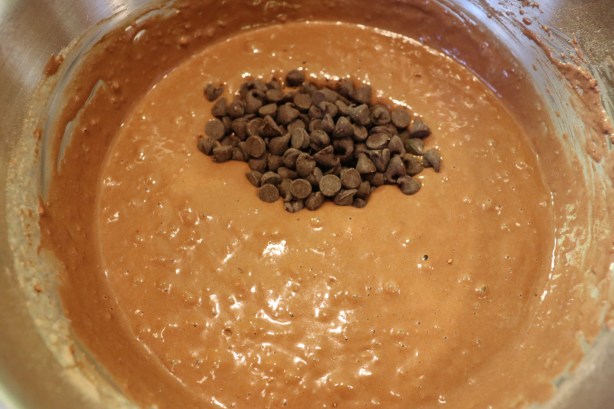
Finally, fold in 4 oz of chocolate chips.

IMG_1802(1)

Chocolate chips to be folded in.

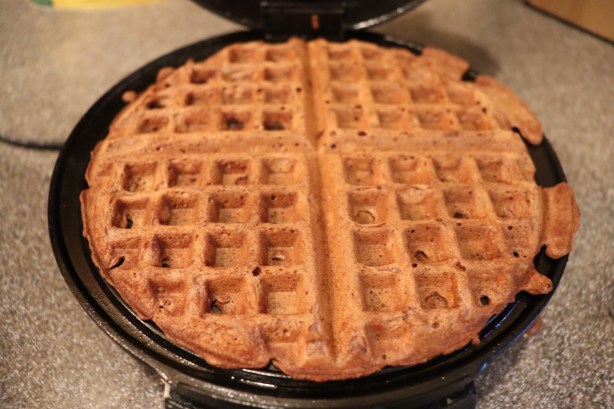
Add about 3 oz of batter to a standard waffle iron that has been preheated and sprayed with nonstick spray. Cook until crispy on the outside.

IMG_1805(1)

Waffle after cooking on a hot iron.

We first ate these waffles for breakfast with butter as a topping. We subsequently had the leftover waffles for dessert with vanilla ice cream.

IMG_1808(1)

Alton’s chocolate waffle, served with butter.

We were pretty surprised with how much we liked these waffles. Ted, in particular, does not really like anything sweet for breakfast, but he said he thoroughly enjoyed these. The waffles are actually not very sweet, as they contain quite a lot of cocoa powder, but you get little pockets of sweetness when you bite a chocolate chip. I personally liked these best served with ice cream, and I think kids would find these super fun for a special breakfast or dessert.

This was a fun episode for me to do, as vinegar was the star of the show. For as long as I can remember, I have loved all things vinegar-based. I absolutely loved to arrive at my grandparents’ house in Baltimore because my grandma always had a bag or two of Utz Salt and Vinegar potato chips waiting for me. I was also the weird kid in elementary school whose mom would pack pickled eggs in her lunch. I had discovered pickled eggs at our local Blimpie, and my mom and I would each get two eggs with a basket of pretzels. To this day, I still love pickled eggs, but, as Alton would say, “That’s another blog.”

Grilled Romaine

An interesting grilled romaine salad is first in this episode. The night before you want to serve this salad, place a metal loaf pan in your freezer and add 1/2 C red wine vinegar. Let the vinegar freeze overnight. This will be enough vinegar for four servings. When you are ready to prep the salad, cut the bottom off of two hears of romaine lettuce and slice them in half lengthwise.

IMG_1553(1)

Romaine hearts, halved lengthwise.

You will also need 1 C of finely grated Parmesan, 1 T olive oil, and black pepper. Spray a griddle pan with nonstick spray and preheat it over medium-high heat. Brush the cut sides of the romaine hearts with olive oil and generously grind pepper on top.

IMG_1554(1)

Romaine hearts, halved lengthwise, brushed with olive oil, and sprinkled with black pepper.

Place the grated Parmesan in a long, shallow baking dish and dip/press the oiled sides of the romaine into the cheese.

Place the romaine hearts, cheese side down, on the preheated griddle and cook for 1-2 minutes, or until the cheese is brown and crispy.

IMG_1559(1)

Romaine hearts placed cheese side down on lubed pan.

Remove the lettuce from the hot pan. Alton tells you here to place the grilled lettuce (cheese side up) on ice, as you want the lettuce to have a dichotomy of temperatures; I did not find this to be necessary as the non-grilled side of the lettuce was still cool after such a short cooking period. Remove your frozen vinegar from the freezer and scrape it with a fork to “fluff” it up. Sprinkle the frozen vinegar on top of the warm cheese and serve immediately.

IMG_1561(1)

Grilled Romaine topped with flaked frozen vinegar.

Alton recommends picking up the whole salad and eating it like a hot dog. This recipe is good and bad. The recipe is flawed when it comes to the application of the cheese to the lettuce, as the cheese does not adhere well when you apply it to the oiled lettuce, and most of the cheese sticks to the pan when you cook it. Ted suggested making Alton’s Parmesan crisps from episode 113, molding them over the top of the grilled lettuce. Otherwise, you could place the cheesy lettuce under the broiler for a couple minutes. Either way, Alton’s technique in this recipe just really does not work well. That being said, the salad itself was fun to eat, as I really liked the contrasting flavors and temperatures. The frozen vinegar is super intense, packing a real zing of flavor, and its contrast with the warm cheese and lettuce is interesting to the palate. Technique flaws aside, this was just a fun recipe to try out.

Sauerbraten

The Sauerbraten recipe in this episode was the one I was super excited to make. Why? Until a few years ago, my parents lived two hours from me. We visited them regularly and my mom would always make some stellar food. For years she told me she wanted to make Sauerbraten for Ted and me, but she never ended up doing it before she was unable to cook. Although I did not get to eat Sauerbraten with my mom, this was my chance to finally try Sauerbraten, and to talk to my mom about the recipe. Sauerbraten translates to “sour beef,” and this is a recipe that, although simple, requires a few days. First up, combine in a large saucepan:  2 C water, 1 C cider vinegar, 1 C red wine vinegar, 1 chopped medium onion, 1 large chopped carrot, 1 T plus 1 t Kosher salt, 1/2 t pepper, 2 bay leaves, 6 whole cloves, 12 juniper berries, and 1 t mustard seed.

IMG_1462(1)

Water, cider vinegar, red wine vinegar, onion, carrot, Kosher salt, pepper, bay leaves, cloves, juniper berries, and mustard seed in a saucepan.

Cover the pot and bring the mixture to a boil over high heat. Once boiling, decrease the heat and simmer for 10 minutes. Set this liquid aside to cool until it is just slightly warm to the touch.

While the vinegar mixture cools rub a 3 1/2- 4 pound bottom round with 1 T vegetable oil and sprinkle Kosher salt liberally over the meat.

IMG_1466(1)

Bottom round, rubbed with oil and sprinkled with Kosher salt.

Sear the meat in a hot pan on all sides, using tongs to flip it. Once all the sides of the meat are browned, place the meat inside the marinade and let it sit at room temperature for an hour. Alton placed his meat directly into his saucepan, but my saucepan was not large enough to accommodate my roast. Instead, I transferred my meat and my marinade to a large plastic container. Regardless of what vessel you use, you want the meat to be as submerged as possible.

Place the meat into the refrigerator and leave it for 3-5 days (preferably five). If your meat is not completely submerged in the marinade, flip the meat over once per day. After five days have passed, remove the meat from the marinade and whisk 1/3 C sugar into the marinade. If your marinade is not already in an oven-safe vessel, transfer it to one now.

Add the meat back to the marinade, place a lid on the pot, and place it in a 325 degree oven for four hours, or until the meat is tender.

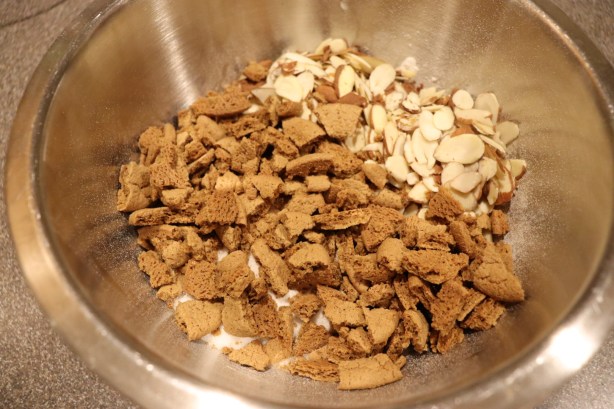
After cooking, remove the meat from the liquid, keeping it warm; I tented my meat under foil. Strain the cooking liquid, discarding the solids. At this point, you can add 1/2 C raisins, but I did as Alton did and opted to leave them out. Place the strained liquid over medium-high heat and whisk in five ounces of gingersnap crumbs (a food processor works best for this).

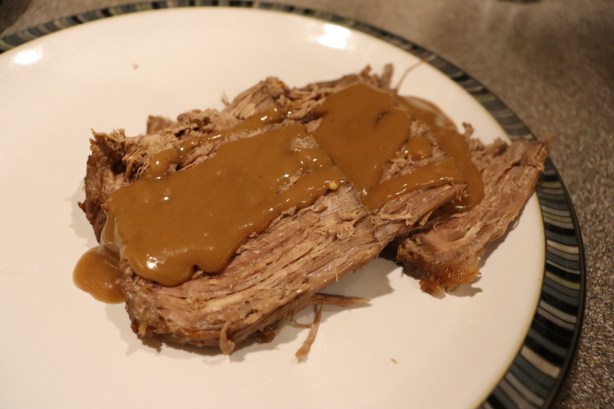
Whisk the sauce until it has thickened and serve it over the sliced beef.

IMG_1516(1)

Alton’s Sauerbraten.

Alternatively, you can shred the meat and serve it on Kaiser rolls with the sauce, though this is not a traditional presentation. Sauerbraten is certainly not a pretty dish, but it does have a great deal of flavor. The meat is falling apart by the end of the cooking and has quite a pronounced vinegar flavor, which is interesting. The sauce is pretty rich and is a mixture of sweet and sour flavors. I actually found that the sauce could easily overwhelm the meat, so I used only a little bit of sauce. We ate this for dinner two nights, serving it slice the first night and as sandwiches for the second night, and we liked it both ways. Mom said this recipe was very similar to hers, as her recipe also used gingersnaps to thicken the sauce. This is a very easy German recipe that is fun to make at home, and I’m so glad I finally got to try Sauerbraten

I haven’t really had much time for baking or desserts lately, which are some of my favorite things to make. This episode, though, forced me to take the time to make a few sweet treats for dessert and/or breakfast. Cobblers, crisps, and grunts were made in this episode, and Alton explained that any fruit found in the jam/jelly aisle of the grocery store will work well in these desserts; feel free to mix it up!

Rhubarb Peach Cobbler

A cobbler was made first, which Alton described as a fruit dessert topped with a pie crust-like topping. I really try to avoid making ingredient substitutions in this project, but I had to find a rhubarb alternative, as rhubarb isn’t in season yet and I could not find frozen rhubarb locally. I opted for leftover cranberries from Thanksgiving that we had tucked away in the freezer. Oh, and I used frozen peaches in place of the fresh peaches. To make the dough place 9.5 oz flour, 1 oz sugar, 1 T lime zest, and 1 t Kosher salt in a food processor, pulsing 3-4 times.

Add 4.5 oz cubed unsalted butter and 1.5 oz cubed lard (both fats should be chilled), and pulse until the mixture climbs up the sides of the bowl.

Add 1-3 T ice water until the dough holds together when squeezed between your fingers.

Place the dough in a large Ziplock, pat it into a disc, and place it in the refrigerator for at least 30 minutes. You can also freeze the dough for up to three months.

IMG_1596(1)

Dough placed in Ziplock bag to chill.

When your dough has chilled, it is time to make the fruit portion of the cobbler. Combine in a bowl:  1 C sugar, 2 T cornstarch, and 1/4 t Kosher salt, whisking to combine. Add 1 lb rhubarb, cut into 1/2″ pieces (this is where I subbed my frozen cranberries). Add 1 lb sliced peaches (I used frozen) and 1 T fresh lime juice, and toss the fruit with your hands.

Crumble 1/3 of the cold dough over the bottom of a greased 9×9″ glass pan and top with the fruit. I could tell that my fruit mixture was not going to fit in a 9×9″ pan, so I used a 9×13″ glass dish.

IMG_1603

1/3 of dough crumbled into the bottom of a baking dish.

IMG_1605

Fruit added to the dish.

Roll the rest of the dough within its Ziplock and cut the sides of the bag. Remove the top side of the bag and invert it over your hand so the plastic side is touching your hand.

IMG_1608(1)

Dough rolled out inside Ziplock. Top of bag removed to invert dough directly onto fruit.

Press the dough side onto the top of the fruit and peel off the remaining bag.

IMG_1609(1)

Dough placed on fruit.

Bake the cobbler at 375 degrees for 60 minutes, or until golden. If you use frozen fruit, as I did, you will need to bake the cobbler for 90 minutes. At the end of the baking, place the cobbler under the broiler for 3-5 minutes. Let the cobbler cool for 15-30 minutes before digging in.

IMG_1610(1)

Cobbler after baking.

IMG_1612(1)

Alton’s cobbler.

I was really happy with this cobbler, though I wish I could have made it with the rhubarb. The cranberries contributed a nice tartness in place of the rhubarb, though. I really liked the crispy, flaky texture of the cobbler topping, which is only lightly sweetened. If anything, some people may wish for this cobbler to be a little bit sweeter, but I happened to like its tart flavor. This cobbler is best when eaten the day it is made, as the crust portion loses its crispy, flaky texture over time.

Blackberry Grunt

I can’t say that I honestly knew what a grunt was until I watched Alton prepare his version. Basically, a grunt is a fruity filling topped with dough that is traditionally cooked on the stove; it gets its name from the grunting sound it makes as it cooks. Unlike the dough in the cobbler, the dough in this recipe is not sweetened. Really, the dough in this recipe is like a biscuit. To make the dough, place 9.5 oz of flour in a food processor, along with 2 t baking powder, 1 t Kosher salt, and 1/4 t baking soda. Pulse the flour mixture a few times to combine.

IMG_1531(1)

Flour, baking powder, baking soda, and Kosher salt in food processor.

Transfer the flour to a bowl and use your fingers to “cut in” 2 oz of cold, cubed unsalted butter; do this by using your fingertips to rub the butter into the flour.

Make a well in the center of the dry ingredients and pour in 1 C buttermilk. Stir the buttermilk into the flour just until combined loosely.

Dump the dough onto a floured piece of parchment paper, dusting the top of the dough with additional flour. Wrap the parchment up over the dough and place it in the refrigerator to chill.

IMG_1541(1)

Finished dough placed on floured parchment before going into refrigerator.

While the dough chills, combine 1 C sugar, 1/2 t ground ginger, 1 C water, and 1 lb 3 oz fresh or frozen blackberries in a bowl, stirring to combine.

Pour the fruit into a 10-inch cast iron pan over medium heat, bringing the fruit to a simmer. Once simmering, decrease the heat and continue to cook the fruit until it has thickened. It took quite a while for my berries to thicken – I would allow at least 45 minutes for this step.

When the fruit is ready, use a 1-ounce disher or two dinner spoons to place dumplings of dough on top of the berries, working from the outside to the inside.

IMG_1548(1)

Biscuit dough placed on top of berries.

Bake the grunt in a 400 degree oven for 15-20 minutes, or until golden brown.

IMG_1549(1)

Grunt after baking.

IMG_1551(1)

Alton’s blackberry grunt served with vanilla ice cream.

The dough in this recipe yielded a topping with the texture and flavor of a biscuit, which contrasted nicely with the fairly sweet fruit. I should have cooked my fruit a little longer, but impatience got the better of me and I ended up with a slightly soupy grunt. Still, though, the flavor was really good and the leftovers made for a nice breakfast.

Individual Berry Crisps

A crisp is last in this episode and this recipe is the fastest one to prepare. For the crisp topping, combine:  5 oz flour, 2/3 C sugar, 1 1/2 C chopped nuts,  and 1 1/2 C crushed gingersnaps, crackers, or cereal.

IMG_1571(1)

Flour, sugar, nuts, and crushed gingersnaps.

Cut in 4 oz of cold unsalted butter, cubed.

In a second bowl combine 12 oz frozen berries, 1/4 C sugar, 2 t cornstarch, and 1/2 C of your prepared crisp topping. Stir the fruit mixture well and divide it among four ramekins that are 7-8 ounces. I actually used our French onion soup bowls.

Top each crisp with 1/2 C of the crisp topping. Place the ramekins on a sheet pan and bake them for 30-35 minutes at 350 degrees.

IMG_1576(1)

Crisp topping placed on top of fruit.

Let the crisps cool for at least 15 minutes before eating.

IMG_1579(1)

Alton’s individual berry crisps.

This was my favorite recipe of this episode. Not only was this super easy and fast to make, but it was also really delicious. I used crushed gingersnaps in my crisps and I highly recommend doing so – they add great crunch and gingery flavor. If you use Alton’s ratio of 1/2 C crisp topping to each crisp, you will have quite a lot of crisp topping left over. I was able to make six crisps with one recipe of crisp topping. This is a really great recipe for any day of the week.


I have had the best intentions with my blog, but somehow it has been two months since I last posted. I guess it’s true what they say – “parenthood is a time warp!” Our little baby is now four months old, which is hard to believe. At her four month check-up yesterday, our pediatrician recommended that we start introducing solid food now, which is something I thought we’d wait a couple more months for. My sister-in-law gave me an awesome baby food cookbook that I can’t wait to try out, as it introduces babies to all sorts of interesting flavors; the goal is to avoid having a picky eater. Before I know it, she’ll be in the kitchen with me, and I can’t wait for that!

The recipes in this post are sushi recipes. With being pregnant, this was the first sushi I had eaten in a good year! Alton recommends the following ingredients and tools to make up a basic home sushi kit:  soy sauce, rice wine vinegar, short grain rice, Nori, a rice spoon, a sushi mat, wasabi, and pickled ginger. With those basic tools and ingredients, you should be set to try making sushi.

Sushi Rice

The first step in making sushi is preparing the rice. Ideally, for sushi rice, you want to use short grain rice. Surprisingly, my grocery store did not have any short grain rice, so I had to settle for medium grain rice. Place 2 C of rice in a sieve and rinse it three times with water, or until the water runs clear.

Place the rice in a medium saucepan with 2 C of water, stirring. Bring the rice to a boil over high heat. Once boiling, place a cover on the pan, decrease the heat to low, and cook the rice for 15 minutes. After 15 minutes, let the rice stand for 10 more minutes.

While the rice sits combine 2 T sugar, 1 T Kosher salt, and 2 T rice vinegar in a microwave safe bowl. Microwave the vinegar mixture for 30-45 seconds or until the salt is mostly dissolved.

IMG_0929(1)

Sugar, Kosher salt, and rice vinegar microwaved until nearly dissolved.

Next, dump the rice into a large wooden or glass bowl (a wide wooden bowl is ideal). Drizzle the vinegar mixture over the rice, and gently mix the vinegar into the rice, using cutting motions with a spatula. Fan the rice with a paper plate as you cut the vinegar into the rice until the rice has cooled.

IMG_0932(1)

Rice, placed in a large wooden bowl and the vinegar mixture being “cut” into the rice as it cools.

Cover the rice with a moist towel until use, but do not refrigerate the rice. I think this rice tastes pretty darn good on its own, as I love its subtle sweet and vinegary flavor. Alton recommends using this rice for any sushi preparation, such as his California roll, which is up next.

California Roll

If you are new to sushi making, as I am, Alton recommends his California roll recipe for a good place to start. For his California roll, you will need your prepared sushi rice from above, sheets of Nori, a bowl of water, sesame seeds, avocado, imitation crab sticks, cucumber, pickled ginger, soy sauce, and wasabi.

IMG_0933(1)

Nori sheets, cut in half.

IMG_0935(1)

Sliced avocado and cucumber matchsticks.

To begin, cover your sushi rolling mat with plastic wrap; I chose to place my mat into a large Ziplock bag. Tear your Nori in half crosswise, and place one half sheet on your pat, with the rough side up.

IMG_0936(1)

A half sheet of Nori placed rough side up on a plastic-covered sushi mat.

Dampen your fingers slightly and evenly distribute rice on the sheet, leaving about 1/4″ uncovered at one long end. Sprinkle the rice with sesame seeds and flip the whole thing over so the Nori is facing up.

Place 4-5 thin slices of avocado so they overlap down the center of the smooth side of the Nori.

IMG_0940(1)

Avocado placed down center of Nori.

Next, place pieces of imitation crab on top of the avocado, overlapping the pieces to form a solid layer.

IMG_0941(1)

Imitation crab on top of avocado.

Finally, top the crab with cucumber matchsticks (you’ll need about 8 matchsticks).

IMG_0942(1)

Cucumber matchsticks to finish off the roll ingredients.

To finish the roll, use the mat to roll it away from you with even pressure from your hands, trying to roll it as tightly as possible.

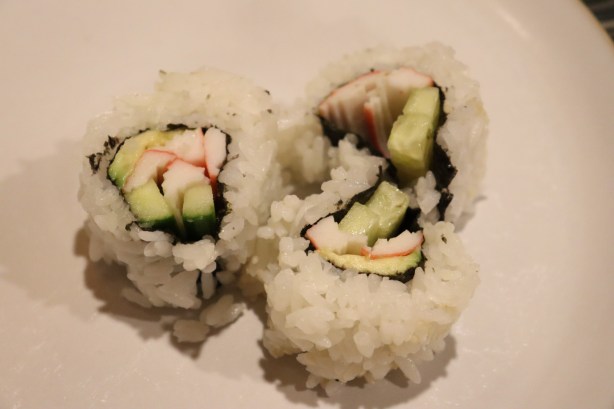
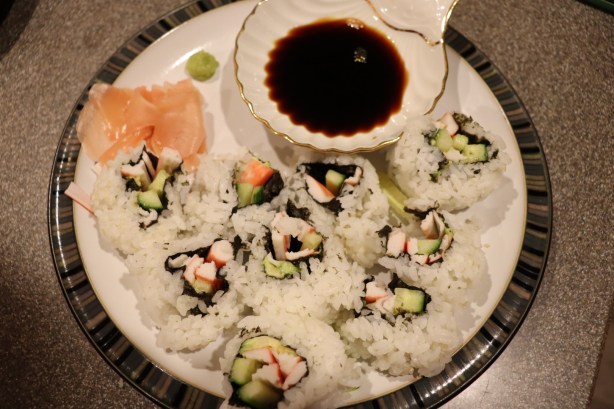
Dampen a sharp knife and slice the roll into six pieces, using a sawing motion with your knife. Serve the roll slices with pickled ginger, soy sauce, and wasabi as accompaniments.

IMG_0951(1)

Sliced California rolls.

IMG_0952(1)

A plate of Alton’s California rolls.

Oh, and when taking sushi from a communal platter, it is polite to always use the large ends of your chopsticks. I have to say that my sushi ended up extremely ugly. I obviously need some serious practice on my rolling technique! This roll recipe is a very easy way to practice, as you do not need many ingredients. You also do not have to worry about the freshness of your seafood, as imitation crab is already cooked. Of course, real crab would certainly be superior! I may make this again, just to try my hand at sushi again. I am determined to make prettier rolls, as mine were embarrassing!

In this episode, Alton also described how to make a tuna roll, though there is no link to this recipe online. To do this, place a half sheet of Nori with its rough side up on your plastic-covered sushi mat. Cut fresh tuna into narrow slices against the grain. Place/press prepared sushi rice to within 1/4″ of the edge of the Nori. Next, place wasabi down the center of the rice, followed by the fish slices. Roll the entire thing up and cut into slices.

Quite a lot has transpired since I last posted on the day I was scheduled to be induced for labor. I had a long induction, beginning September 18th and finally resulting in the birth of our daughter on September 21st. My preeclampsia worsened after giving birth, so I ended up in the hospital for an additional four days. In addition, our daughter was small at birth, so she ended up in the NICU for 11 days. We finally were all home together on October 1st, and we began settling into our new life.

Unfortunately, my father-in-law became very sick a couple weeks later, spending some time in the ICU. He eventually died on October 22nd. We were all in shock; actually, I think we still are.

Granola Bars

I really have not been doing much cooking at all since I had my baby, though I have managed to crank out the three recipes from this episode of Good Eats. Thankfully, this episode was composed of easy recipes that are not time-consuming, as I am strictly working on someone else’s unpredictable schedule now. Still, I was able to find time to whip up Alton’s granola bars. Begin by preheating your oven to 350, and spread the following ingredients on a sheet pan:  8 oz old-fashioned oats, 1.5 oz raw (unshelled) sunflower seeds, 3 oz sliced almonds, and 1.5 oz wheat germ.

IMG_0561(1)

Old-fashioned oats, raw sunflower seeds, sliced almonds, and wheat germ on a sheet pan.

Place the sheet pan in the preheated oven for 15 minutes, stirring the dry ingredients every five minutes. When you remove the sheet pan from the oven, decrease the oven temperature to 300.

IMG_0568(1)

Old-fashioned oats, raw sunflower seeds, sliced almonds, and wheat germ after toasting.

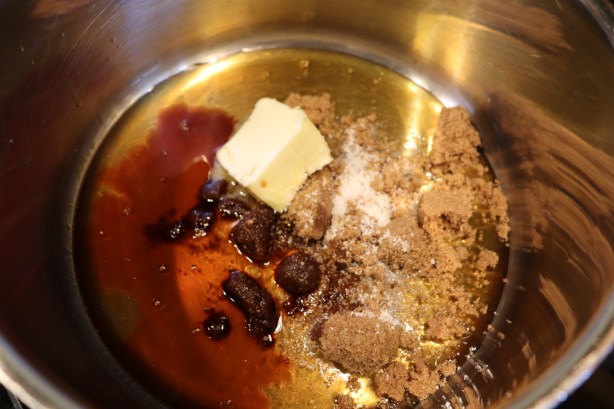
Next it is time to prep the wet ingredients by placing 6 oz honey in a medium saucepan with 1 3/4 oz dark brown sugar, 1 oz unsalted butter, 2 t vanilla, and 1/2 t Kosher salt. Set the saucepan over medium heat and stir until the sugar has completely dissolved.

IMG_0570(1)

Honey, dark brown sugar, unsalted butter, vanilla, and Kosher salt.

Add the oat mix to the liquid mixture, along with 6.5 oz of chopped dried fruit (I used apricots and cranberries). Toss to mix the ingredients thoroughly.

IMG_0573(1)

Oat mixture and dried fruit added to liquid ingredients.

Place the oat mixture in an oiled 9×9 pan, pressing it down with your hands.

IMG_0575(1)

Granola mixture pressed into square pan.

Bake the bars at 300 degrees for 25 minutes.

IMG_0576(1)

Granola mixture after baking.

Let the bars cool completely on a wire rack before turning them out onto a board, and cut the bars into 16 squares.

IMG_0578(1)

Cooled granola bars turned onto a board.

IMG_0580(1)

An Alton granola bar.

The nutrition in each granola bar is:

  • 193 calories
  • 30.5 g carbohydrates
  • 4.5 g protein
  • 6.8 g fat
  • 3.66 g fiber
  • 61.3 mg sodium

My bars crumbled a bit when I cut them, but they tasted really great. They were crunchy and chewy, and had a subtle hint of salt to compliment the sweetness of the fruit. I found myself reaching for these bars as an afternoon snack, and I ate some of the crumbly bits with yogurt for breakfast. This was my favorite recipe of this episode.

Protein Bars

If you’ve ever eaten a protein bar, you know they tend to taste less than stellar. With this recipe, Alton claims to have created the best tasting protein bar you can find anywhere. These bars start with preheating your oven to 350. While the oven heats, combine 4 oz soy protein powder, 2 1/4 oz oat bran, 2 3/4 oz whole wheat flour, 3/4 oz wheat germ, and 1/2 t Kosher salt in a bowl. I could not find soy protein powder even at my local health food store, so I finally ended up subbing whey protein powder.

Next, chop 3 oz each of raisins and dried blueberries, along with 2 1/2 oz each dried cherries and dried apricots.

IMG_0640(1)

Raisins, dried blueberries, dried apricots, and dried cherries.

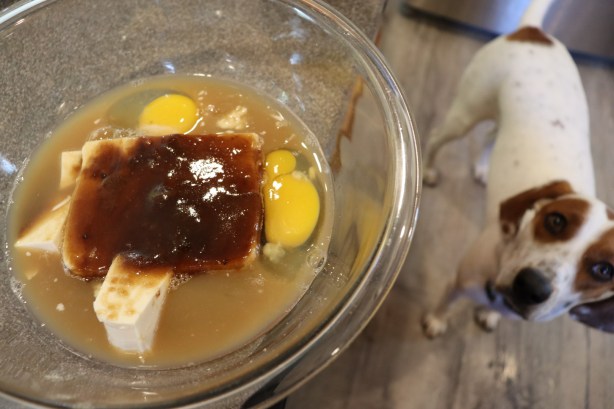
In a second bowl, whisk together a 12.3 oz package of silken tofu, 4 oz dark brown sugar, 2 eggs, 1/2 C unfiltered apple juice, and 2/3 C natural peanut butter. For those who have peanut allergies, you can substitute almond or cashew butter.

IMG_0646(1)

Silken tofu, dark brown sugar, eggs, and apple juice.

IMG_0647(1)

Silken tofu, dark brown sugar, eggs, apple juice, and peanut butter.

Add the wet ingredients to the dry ingredients, followed by the chopped dried fruit.

Use your hands to thoroughly mix the batter, and pour/press the finished batter into a 9×13″ pan that has been lined with oiled parchment paper.

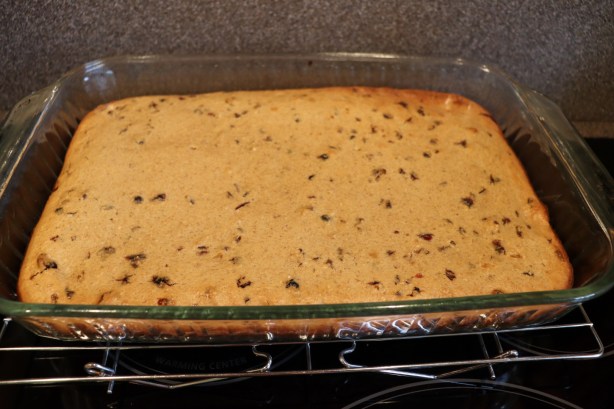
Bake the bars at 350 for 35 minutes, or until they have an internal temperature of 205 degrees.

IMG_0654(1)

Bars after baking to an internal temperature of 205.

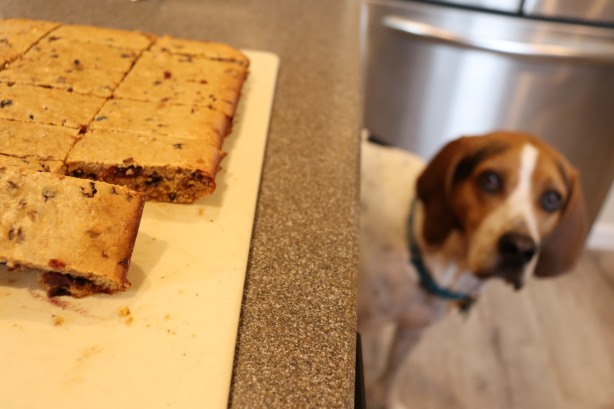
Cool the bars completely on a wire rack before turning them out onto a board, and cut with a pizza wheel into 24 bars.

IMG_0676(1)

Bars, cut into 24 pieces.

IMG_0674(1)

Alton’s protein bars.

These bars can be stored in the refrigerator for a week or in the freezer for up to three months. These bars are dense and cakey, and I really like the flavor/moisture from the dried fruit. They do have a fairly strong peanut butter flavor, so I’d opt for a different nut butter if you do not care for peanut butter. While I wouldn’t say these are a treat, they are pretty tasty for what they are, and I have grabbed them for a quick snack when I haven’t had time to eat. The nutritional breakdown for these bars is:

  • 154 calories
  • 21.1 g carbohydrates
  • 8.4 g protein
  • 4.8 g fat
  • 2.1 g fiber
  • 91.9 mg sodium
  • 17.7 mg cholesterol

Brown Rice Crispy Bar

The last bar Alton tackles in this episode is his take on the classic Rice Krispies treat. For his bars, Alton brings a pot of water to a bare simmer, placing a large metal mixing bowl over the top (my mixing bowls are insulated, so I used a large pot).

IMG_0698(1)

Ingredients for bars: dried fruit, mini marshmallows, honey, flax seed oil, and puffed brown rice. Not pictured: toasted slivered almonds.

To the bowl he adds 1 T honey, 3 T flax seed oil, and 7 oz miniature marshmallows. He stirs the mixture until it is melted and smooth.

Once melted, he turns the heat off, but keeps the marshmallow mixture over the warm water. To this he adds 3 oz puffed brown rice, 3 oz toasted slivered almonds (I toasted my almonds in a skillet), 1 1/2 oz chopped dried cranberries, 1 1/2 oz chopped dried cherries, and 1 oz dried blueberries.

After stirring everything together, he dumps the mixture into a 9×13″ pan (metal is best) that has been oiled with vegetable or canola oil. With oiled hands (I find that using damp hands works just as well) he presses the mixture down into the pan and allows the pan to cool completely before cutting into 24 bars.

IMG_0720(1)

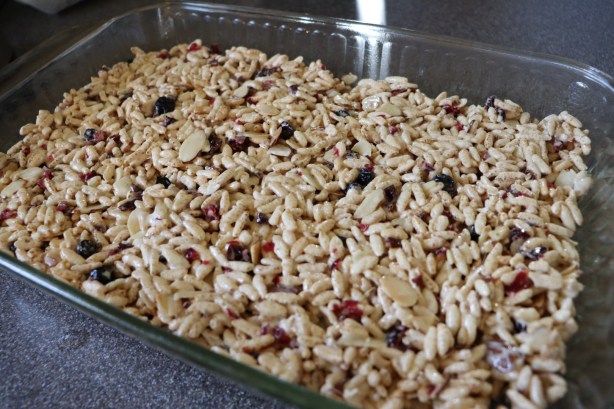
Bar mixture placed in oiled pan.

IMG_0721(1)

Alton’s rice crispy bars.

I had really high hopes for these bars because I am a fan of Rice Krispies treats, but these were super disappointing to me. My biggest grievance with these bars was their texture, which resembled stale cereal. After reading the online reviews of this recipe, I also saw that some people complained of the flax seed flavor, but that didn’t really bother me too much. Honestly, I tried to like these, but just couldn’t get past their unappealing texture. I did, however, like the dried fruit in these, so maybe I’ll add some dried fruit when I next make Rice Krispies treats. Nutrition-wise, these bars have:

  • 93.8 calories
  • 15.1 g carbohydrates
  • 1.16 g protein
  • 3.7 g fat
  • 1 g fiber
  • 4.3 mg sodium