Archive for June, 2020

I relish in the tradition of cocktail hour. I remember my maternal grandparents having an evening cocktail – Grandma’s drink of choice was a Manhattan. When I was little, my dad would come home from work and indulge in an evening martini, using the little etched martini glasses that were his father’s. I now have two of those glasses, but I save them only for special days.

Our barware also includes two decanters that came from Dad’s side of the family. For Ted’s 40th birthday Dad gave Ted a decanter he had received from his mother when he graduated from medical school, and we typically keep Scotch in there (when we have it). We keep dry vermouth in a teardrop-shaped decanter that Dad’s father got at an estate sale. Three generations of our family have now used that decanter for vermouth.

This episode of Good Eats features three types of cocktails, so we tried them for cocktail hour on three different nights. Alton also went over his bar necessities:  old-fashioned and Collins/highball glasses for drinks on the rocks, stemmed cocktail glasses and champagne flutes for drinks not on the rocks, a jigger (1.5 oz)/pony (1 oz) combo, ice, a Boston shaker, and a julep strainer.

Cocktails can have three components:  a base, a mixer, and an accent. A martini, for example, would have gin as a base, vermouth as a mixer, and an olive or lemon twist as an accent. Some cocktails only use two components, such as a rum (base) and coke (mixer). Now, let’s get to Alton’s drink recipes.

AB’s Martini

Alton’s version of a martini is pretty dry, meaning it has little vermouth in it. To make his version, place a cocktail glass in the freezer or fill it with ice to chill.

IMG_1954(2)

Martini glasses filled with ice to chill.

Put 1 C of ice in a cocktail shaker and add 1/2 a pony (1/2 ounce) of dry vermouth. Slosh the vermouth around to coat the ice.

Using a cocktail strainer, pour the vermouth out of the shaker, leaving only the vermouth-coated ice.

IMG_1957(1)

Strainer on shaker to pour out excess vermouth.

Add 2 1/2 ounces of gin (1 pony plus 1 jigger). I believe Alton may have used Gilbey’s London Dry gin, but he had the label covered. Stir the drink thoroughly. Alton prefers stirring because shaking makes the drink too cold, causing it to lose some of its aromatic qualities.

IMG_1959(1)

Gin added to vermouth-coated ice. Stirred, not shaken.

Place a single olive in your chilled martini glass and strain the drink into the glass.

IMG_1960(1)

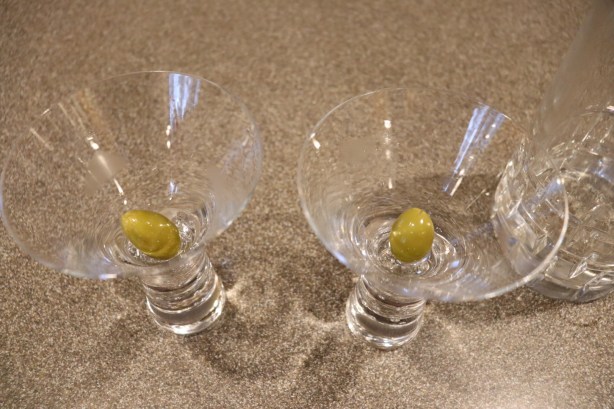
A lone olive in each glass.
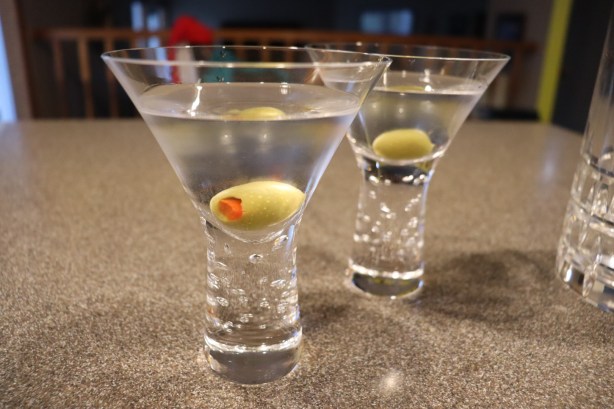
IMG_1962(1)

Alton’s martini.

So, it’s interesting that Alton liked his martini this dry in the past because he has been doing some live cocktail demos on Instagram lately, along with his live YouTube cooking show at his house. On one of the shows, he made a martini, and his current version contains much more vermouth. In fact, he uses a 2:1 ratio of gin to vermouth, stirring the ingredients together without pouring anything out. I suppose his preferences must have changed over the years. I typically drink a pretty dry martini because my dad drank them that way – it’s really the only way I’ve known them! In fact, I’ve made my martinis Alton’s original way since I first started making them years ago, so it’s really my go-to method. I happen to think that this makes a really fantastic dry martini. If you prefer your martinis with more vermouth, feel free to add more! I will admit that a wetter martini is more complex. Really, dry and wet martinis are completely different cocktails, so it’s worth it to try both. If you think you dislike gin martinis, give a wet martini a try. You just may find that you dislike super dry martinis, but that you enjoy those with a bit more vermouth. If you like your martinis on the drier side, Alton’s method is a surefire way to make a good one.

Daiquiri

I’m betting that when you think of a daiquiri, you picture a fruity, icy drink with whipped cream on top. Am I right? Well, there’s also a version that is served ice-free. For this drink, you will need to first make some rich simple syrup. Simple syrup is made by heating equal amounts of sugar and water until the sugar dissolves. Although he doesn’t mention it, Alton actually uses rich simple syrup in this recipe, which means it has more sugar than water. To make the syrup, combine 2 C sugar with 1 C water and heat on the stove until the sugar has completely dissolved. Let the syrup cool before using. You can store extra syrup in the refrigerator.

IMG_2049

Making rich simple syrup by dissolving 2 C sugar in 1 C water.

To make the drink, chill a champagne flute or a martini glass by placing it in the freezer or filling it with ice. Put a pint of ice in a cocktail shaker and add 2 oz of light rum.

IMG_2051

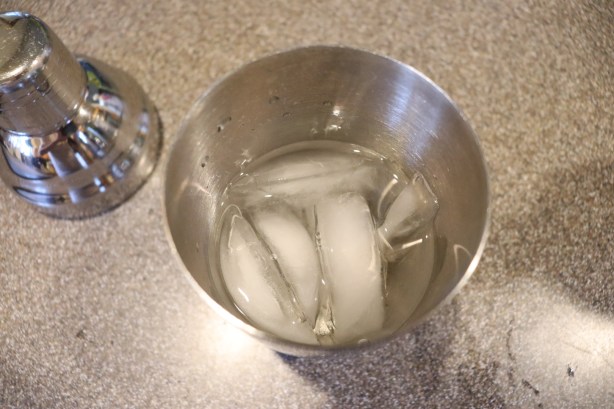
Ice and rum in shaker.

Add 1 oz fresh lime juice and 1/2 oz of the rich simple syrup.

You will want to shake this drink because it has cloudy/viscous ingredients. Shake the drink vigorously and strain it into your chilled glass.

IMG_2054(1)

Chilled glasses.

IMG_2056(1)

Alton’s daiquiri.

We don’t really drink rum very often at all, so this was a little different for us. This is sort of a pretty drink, as its pale green opacity looks appealing in the glass. I find this to be a very balanced drink, as it is simultaneously pleasantly sweet and tart. The alcohol flavor is not super strong, and this is an easy-drinking cocktail, which could be a potentially dangerous combo. This is a simple and delicious cocktail to add to your repertoire.

Mint Julep

The third cocktail in this episode is the bourbon-based mint julep. I have made mint juleps once or twice in the past (on Derby Day, of course), and they have been pretty underwhelming. I wondered how Alton’s recipe would make me feel about this drink. To make one mint julep, place 10 mint leaves (I used mint from our garden) in the bottom of an old-fashioned glass and add 1 1/2 t superfine sugar; you can make superfine sugar at home by blending sugar in a food processor.

IMG_2067(1)

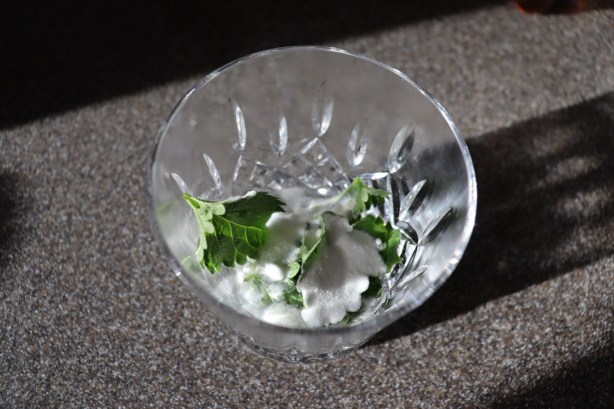
Mint and superfine sugar in a glass.

Muddle the mint and sugar together until you have a green paste.

IMG_2068(1)

Mint and superfine sugar after muddling to a paste.

Add a splash of seltzer water to the glass and fill the glass 3/4 full with ice. Add 2 1/2 oz of bourbon and a final splash of seltzer.

Stir the drink, garnish it with a mint leaf or two, and serve.

IMG_2077

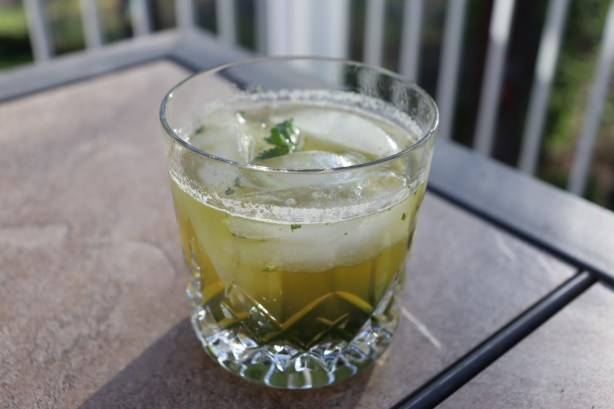
Alton’s mint julep after topping off with a final splash of seltzer.

I have never had a mint julep that I haven’t made at home, so I don’t have a large frame of reference, but this was by far my favorite mint julep. The mint was very apparent, but not overpowering, and the drink had just enough sweetness. The little bit of carbonation from the seltzer was a nice touch. Perhaps southerners would disapprove of this rendition of a mint julep, but I can only say that I really enjoyed this for a cocktail hour change of pace.


I’ve mentioned previously that my dear dad was a big Good Eats fan also, but he primarily watched for education. He would adopt a lot of Alton’s kitchen hacks along the way, and occasionally an episode would grab his attention enough that he would actually run to the store and try his hand at a recipe or two. Well, the 141st episode is one that got Dad really excited because it involves purchasing a whole beef tenderloin and butchering it at home into several cuts; as a surgeon, Dad was obviously proficient at such things, and he also really enjoyed learning new skills for himself. It’s also cheaper to do the butchering at home.

There is only one recipe in this episode, but prior to doing any cooking, Alton took to his demonstrations of butchering a tenderloin. When purchasing a whole tenderloin from a store such as Costco, you will want to look for a loin that has been peeled of extra fat and has the side muscle on. Apparently, this is called a PSMO (pronounced “pismo”) in the butchery world. It took a couple weeks for us to be able to find a whole tenderloin at Costco, as there was a bit of a meat shortage for a while, and when we did find one it was more expensive than normal.

When ready to begin cutting, rinse the whole tenderloin under water and let it drain in the sink for a few minutes.

IMG_2145(1)

Whole beef tenderloin.

Place the loin on a long cutting board (I had to overlap two boards) with the vertebral/rough side down and the wide end away from you. If there is a large white membrane visible on the top of the meat, tear/peel/cut the membrane away to expose the tenderloin underneath. My tenderloin did not have much of this membrane.

Next, you will notice that the meat is composed of three distinct portions – the long tenderloin in the center and two additional muscles that are attached. The long thin muscle on the side of the tenderloin will come off next; it is easiest to do this by cutting from the thin end to the wide end. Once removed, set this “chain” muscle aside. This meat will be used to make Philly cheesesteak sandwiches in the next tenderloin episode.

IMG_2146(1)

Whole beef tenderloin. You can see the chain muscle running along the top and the small head muscle at the bottom of the wide end of the loin.

IMG_2147(1)

Here, the chain has been removed – to be used later for cheesesteak sandwiches. The head muscle will be cut off next – you can see it starting to separate now.

Flip the tenderloin over and remove any excess fat, shaving it off with a sharp knife running toward you. Your loin will have some silver skin on it, which is the tough, shimmery band of connective tissue that is inedible. If you have a boning knife, insert its tip under the band of silver skin, perpendicular to the loin, and lift the silver skin up. Place your finger under the silver skin and pull it tight as you slide the knife away from you to remove the silver skin. Discard all of the silver skin.

Since you have now removed the “chain” muscle from the loin, you will notice that you now have the main tenderloin and a small muscle that attaches to the wide end of the loin. Remove this small “head” muscle, setting it aside. This muscle will be used to make a stuffed tenderloin roast in the next tenderloin episode.

To portion the remaining meat, you will want to use a long slicing knife. Alton prefers to use a Granton knife, which has a long dimpled blade. I don’t have a Granton knife, so I used my sharpest chef’s knife. Without sawing through the meat, slice off the tip portion of the narrow end of the loin. Set this piece aside to make beef carpaccio later. Still working from the narrow end of the loin, use a ruler to cut a three-inch portion; this will be a butterflied filet because it is cut from a skinnier part of the tenderloin. To butterfly this piece, cut it almost all the way through at its center and fold it open to bring the sides together – you should now have a filet that is about 1.5 inches thick. The cut sides will now form the flat top of the filet.

IMG_2152(1)

Butterflied filet at the top and other filet below.

Next, cut three more filets, each 1.5 inches thick. We’ll get to cooking the filets soon here.

IMG_2148(1)

Butchered tenderloin. Top left is chain muscle for cheesesteak sandwiches. Below that is a portion that will be used for a stuffed roast. Then there are the four filets (the top one is the butterflied one), and the small piece of meat in the upper right corner is for carpaccio.

You should be left with a remaining center hunk of tenderloin that is about 1-1.5 pounds. This piece will also be used later in the next tenderloin episode to make a center cut tenderloin roast.

At this point, if you plan to use the meat soon, you can double wrap it in plastic and store it in your refrigerator. For longer storage, vacuum seal the meat and stick it in the freezer.

Steak au Poivre

After portioning that entire tenderloin, this episode only provides a recipe for the four filet portions of the loin. The remaining cuts of meat will be used in the second tenderloin episode, which, oddly, is not the next episode. Instead, there is a cocktail episode that separates the two tenderloin episodes. It seems really silly to me that the two tenderloin episodes didn’t air back-to-back since the second episode is a continuation of the first. So, yeah, I froze most of the meat I cut from my tenderloin. The filets, though, I did not freeze, but rather used to make Alton’s steak au poivre. I only cooked two filets, though, instead of four. For four filets, you want to first grind 2 T of black pepper; you want this pepper to be very coarsely ground. If your pepper mill doesn’t do a very coarse grind, place the whole peppercorns in a pie tin, top them with a towel, and crush them with a mallet. Season your four room temperature filets with Kosher salt on both sides.

IMG_2204(1)

Filets (the right filet is the larger butterflied one) seasoned with Kosher salt.

Then, press the filets into the ground pepper on both the top and bottom sides.

Place a 10″ skillet (NOT non-stick) over medium-high heat, adding 1 T butter and 1 t olive oil (not extra virgin).

IMG_2202(1)

Butter and olive oil in pan.

When the fat just starts to color and you see a tiny bit of smoke, add the steaks to the pan, cooking them for four minutes per side for medium rare. I did not do the best job with butterflying my one filet, so it ended up being considerably larger than my other three filets. Since Ted likes his steak a little less cooked than I do, I figured I would cook the larger one for Ted simultaneously with a smaller filet for me, and they would be done around the same time.

Transfer the steaks to a warm plate on a heating pad and cover them with foil.

Pour any remaining fat out of the pan (my pan had none), leaving the solids. Set the pan over high heat.

IMG_2216(1)

Pan after removing steaks.

Turn the burner OFF and add 1/3 C of Cognac to the pan. Use a lighter to carefully ignite the alcohol.

IMG_2223(1)

Cognac added to pan and ignited.

When the flames have dissipated, place the pan back over medium heat and scrape the solids off the bottom of the pan with a whisk. Add 1 C heavy cream, bringing it to a boil over medium-high heat. Cook the sauce over low heat until it has thickened to your desired consistency. Taste the sauce and adjust for seasoning with Kosher salt and pepper. Stir in 1/2 to 1 t additional Cognac.

Add the warm steaks back to the pan and turn them to coat with the sauce.

Serve the steaks immediately.

IMG_2234(1)

Alton’s steak au poivre.

I don’t cook steaks often, and I always really worry about overcooking them, especially when they are good cuts of meat. I cooked my steaks for four minutes on each side and they ended up being a bit underdone, unfortunately. I chose to use a pan of my parents’ that I really am not familiar with, so maybe I should have gone with my cast iron instead? I think an extra minute of cooking on each side would probably have worked very well in the pan I used. The pepper crust on the meat was fantastic and the meat almost melted in your mouth. The sauce was rich without being heavy, and the Cognac gave the sauce a little sweetness to contrast with the heat of the black pepper. This really was quite delicious. If only I had cooked my steaks just a tiny bit longer…