Archive for April, 2019

I keep meaning to get in a good rhythm with this project, and then I keep having the rug pulled from under my feet. Just as I was starting to begin to recover from the death of my dad, my beloved dog, Hitcher, suddenly died from a pulmonary embolism eight days ago. We had Hitcher for 12 years, after finding him, starving on a roadside, when he was less than a year old. Although we knew Hitcher wouldn’t be around for a long time to come, it was completely unexpected for him to die last week, and his death has completely crushed me. Over the years, Hitcher was my constant “helper” in the kitchen, and made many cameos in this project. Seeing that I prepared the recipes from the next couple episodes before he died, he will make a few final cameos. It is just not the same to cook without him by my side.

224075_1040779094361_6486_n

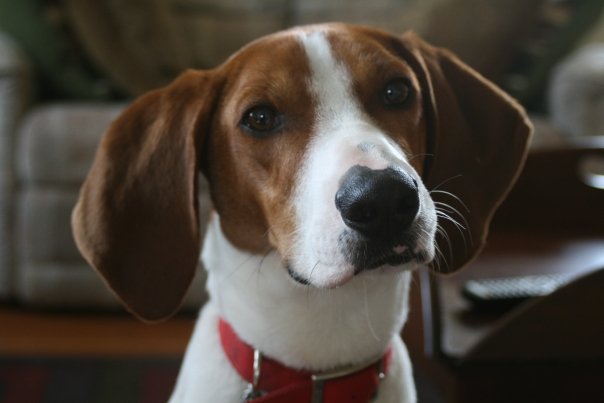
My beloved Hitcher in his younger years.

Gyro Meat with Tzatziki Sauce

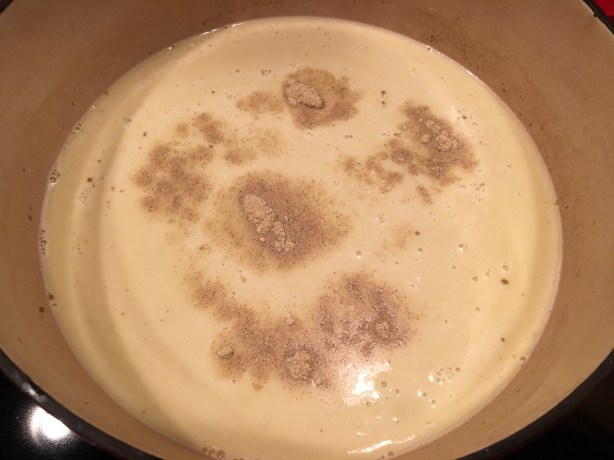
I actually made Alton’s gyro recipe several weeks ago, but then had too much going on to do the write-up. Lamb has a flavor that you either love or hate, and I happen to really love it. I tend not to cook with lamb very often because it is expensive, but this recipe gave me a good excuse. Gyro, by the way, means “to turn,” as gyro meat is typically cooked on a rotisserie. If you have a rotisserie, Alton has a method in this episode for using it, but he also has an alternative method if you (like me) do not have a rotisserie. Regardless of whether you will use a rotisserie, you will want to whip out your food processor for this recipe. The first part of this recipe is the Tzatziki sauce. Make the sauce by placing 16 ounces of plain yogurt in a tea towel. Wrap up the yogurt, suspend it with a chopstick and rubber band over a container, and allow it to drain for one to two hours. You will want to use a fairly thin towel for this – I had to switch to a thinner towel when I discovered no draining was occurring.

While the yogurt drains, peel, seed, and chop a medium cucumber.

IMG_1929

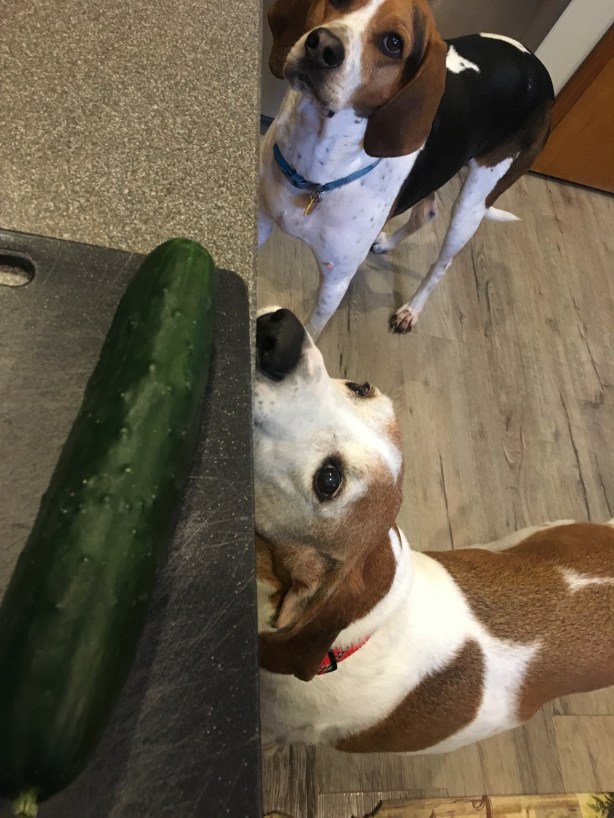
Ready to peel, seed, and chop one cucumber. Hitcher loved cucumbers.

Place the cucumber on a tea towel or paper towels with a pinch of Kosher salt and wrap up the cucumber, setting it aside.

IMG_1930(1)

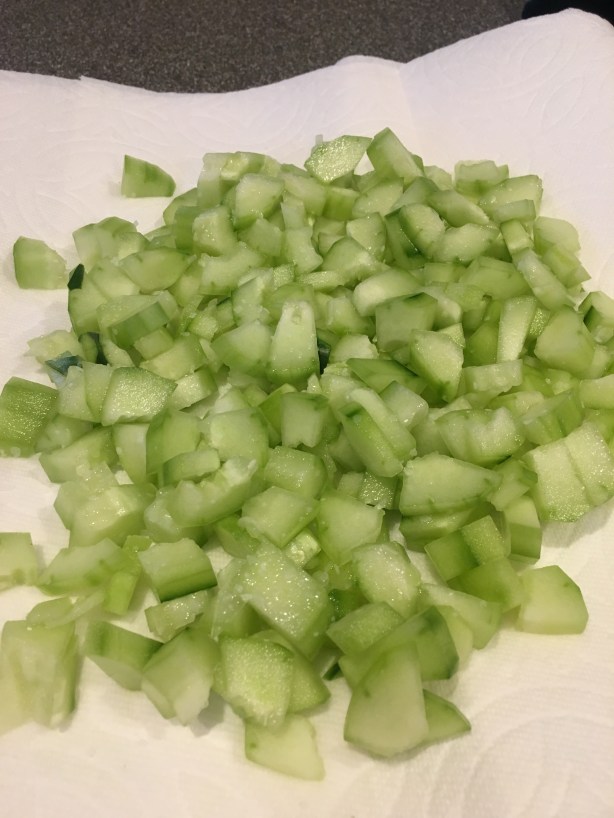
Peeled, seeded, and chopped cucumber placed on paper towels with Kosher salt.

Once the yogurt has drained, place 4 minced garlic cloves in a bowl, along with 5-6 chopped mint leaves, 2 t red wine vinegar, 1 T olive oil, the drained yogurt, and the cucumber. Stir the sauce to combine and refrigerate for up to a week.

For the gyro meat, start by chopping a medium onion with a knife, and then process the onion in the food processor until it is very finely chopped. Line a bowl with  a tea towel and dump the chopped onion into the towel. Squeeze as much juice as you can out of the onion, discarding the juice; you will be surprised at how much juice is in one onion.

Place the onion back in the food processor bowl, along with 1 T minced garlic, 1 T dried rosemary, 1 T dried marjoram, 1/2 t pepper, 2 t Kosher salt, and 2 pounds of ground lamb.

Process the lamb mixture until it forms a paste-like consistency.

IMG_1923(1)

Meat mixture processed until paste-like.

If you are using a rotisserie, place two large pieces of plastic wrap on your counter, overlapping them by about two inches. Dump the meat mixture onto the center of the plastic wrap, form a log shape, and roll the meat up tightly in the plastic. Place the meat log in a container and refrigerate the log for at least two hours, as this will allow the log to set into its shape. After chilling, place the lamb log on your rotisserie, leaving some room at the ends. Preheat your grill to high. For a charcoal grill, distribute coals evenly between the front and back portions of the grill, leaving the middle section clear of coals. Regardless of your type of grill, place a double layer of foil beneath the rotisserie to catch drippings and grill the meat on high for 15 minutes. After 15 minutes, decrease the temperature to medium and continue to cook the lamb for 20-30 more minutes, or until the center of the meat is 165 degrees. To finish cooking, turn the grill off and let the meat continue to spin for 15 minutes more, or until the internal temperature hits 175 degrees. If you do not have a rotisserie, skip rolling the meat into a log and dump it into a loaf pan. Place a pan with an inch of water in the oven and preheat the oven to 325 degrees. Place the loaf pan in the water bath and cook the lamb for 60 to 75 minutes, or until it reaches 170 degrees.

Remove the loaf from the oven and pour off any fat. Set a foil-covered brick on top of the meat and let the meat cool until it just cool enough to handle.

Slice the meat and serve it on warm pita bread with Tzatziki sauce, chopped tomato, chopped onion, and feta cheese.
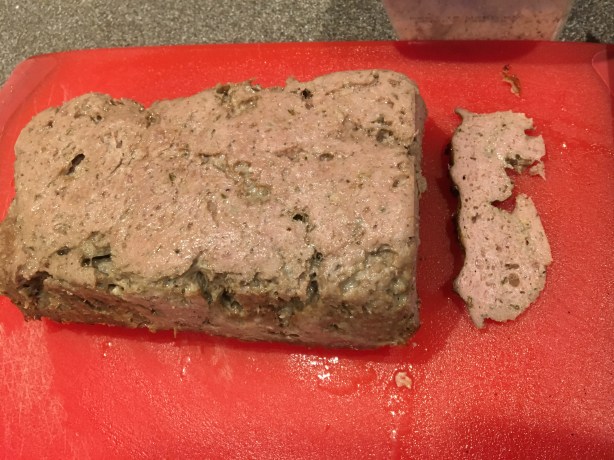
IMG_7866(1)

Sliced gyro meat.

IMG_7867(1)

Alton’s gyro.

I have not eaten many gyros, but I thought this was a delicious recipe. The meat  held together well when sliced and remained moist. The herbs accentuated and complimented the lamb’s grassy flavor, and the whole gyro was a pleasing combination of textures, flavors, and temperatures. With the warm lamb and pita, the cooling Tzatziki, tangy onion, and sweet tomato made a wonderful pairing. Unfortunately, I only got to have one meal out of this recipe since I had to leave town the following day, but I intend to make this again and enjoy it for several meals!

I think baking, and particularly bread making, can be intimidating for those who have little experience with it. However, I also find that baking can be one of the most rewarding culinary escapades. I began making bread at home many years ago, sort of just thrusting myself into the process, and I found that a hands-on approach was the fastest, and best, way to learn. I’ve had some flops over the years, but I’ve also made some really delicious bread and pastries. The 123rd episode of Good Eats takes the viewer through the two-day process of making a homemade loaf of white bread, and I think it is a great introduction to home bread making.

Very Basic Bread

Alton’s basic bread starts in the evening with a pre-fermentation step, which is also called a sponge. To make the sponge, place the following ingredients in a lidded, straight-sided container:  10 ounces of water (bottled is best), 5 ounces of bread flour, 1/4 t instant dry yeast, and 2 t honey.

Note that instant dry yeast is different from active dry yeast, as active dry yeast must first be activated in warm water, while instant dry yeast can be added without the hydration step. Whisk the sponge ingredients together until they are combined, place the lid on the container, and refrigerate the sponge for eight to 12 hours, or overnight.

IMG_7736(1)

Sponge after refrigerating overnight.

The following day, put the following ingredients in the bowl of your stand mixer:  11 ounces of bread flour, 3/4 t instant dry yeast, 2 t Kosher salt, and the refrigerated sponge from the night before.

Using the dough hook attachment on the mixer, let the machine knead the dough until it forms a ball in the bottom of the bowl, which should take a few minutes. Cover the bowl with a tea towel and let the dough rest for 20 minutes.

After the dough has rested, let the machine knead the dough (again, with the dough hook) for 5-10 minutes on medium speed or until the dough appears to be smooth and elastic. Oh, and if your dough starts climbing the dough hook, increase the mixing speed briefly and it should dislodge the climbing dough. You will know your kneading is complete when a small marble of dough can be flattened and stretched between your fingers, such that the dough is thin enough for light to shine through the dough without the dough tearing; this is called the windowpane test.

IMG_1856

Dough after kneading for 5-10 minutes and able to pass windowpane test.

Once your dough passes the windowpane test, place the dough ball in a tall, clear, oiled container. Place a rubber band around the container to mark the top surface of the dough, as this will allow you to monitor how much your dough rises. Next, place the container in a cold oven, leaving the container uncovered. Place a 9 x 13″ baking dish beneath the dough and pour in some hot water. The hot water will provide a warm, moist environment in which the bread can rise. Shut the oven door and allow the dough to rise for one to two hours, or until it has doubled in size.

After rising, dump the dough onto a smooth surface and use your knuckles to dimple/flatten the dough into a rectangle.

Fold the left third of the dough in to the center of the rectangle, and then fold the right third of the dough over the top (as if making a tri-fold wallet).

Repeat the procedure again, first using your knuckles to flatten the dough, and then folding the dough like a wallet again.

After folding the dough a second time, cover the dough with a towel and allow it to rest for 10 minutes.

IMG_1875

Dough after resting for 10 minutes.

Next, flatten the dough and form it into a smooth, tight ball by pulling the ends under the dough, as if forming a jellyfish. Smooth the ball by lightly rolling it on the counter in a circular motion between your hands, as if almost tossing it laterally from hand to hand.

When your dough has formed a smooth ball, place the dough on a cornmeal-sprinkled pizza peel, cover the dough with a towel, and allow the dough to rise at room temperature for an hour. Toward the end of the rise, place the base of a large, unglazed terra cotta planter upside down in a cold oven (if the oven is hot, the planter base will crack). Preheat the oven to 400. If you do not have a planter base, you can use a pizza stone.

IMG_1833

Inverted terra cotta planter base in cold oven.

After rising, brush the bread with a shaken mixture of 1/3 C water and 1 T cornstarch, and use a sharp knife to cut four slits in the top of the dough, forming a square shape.

As for the first rise, pour hot water into the 9 x 13″ pan beneath the planter. Using the pizza peel, slide the dough onto the terra cotta base (the dough will stick a little), and set the oven timer for 50 minutes.

IMG_1887

Dough placed on hot terra cotta planter base. Tray of water beneath.

After 50 minutes of baking, use a thermometer to check the internal temperature of your bread – it should be between 205 and 210 degrees.

IMG_7779(1)

Bread at 207 degrees.

Once your bread is in the desired temperature range, remove it from the oven and allow it to cool for at least 30 minutes before slicing.

IMG_7850(1)

Finished bread.

IMG_7852(1)

Finished bread, sliced.

This is a really good recipe because it isn’t over complicated and it works. This recipe produces a great, all-purpose loaf of bread with a crispy crust and chewy crumb. This is a great everyday go-to bread recipe.


Since it appears that spring has officially sprung, this leek episode seems super appropriate, both for the ingredient and for the episode title. I have used leeks in many recipes in the past, but they have typically assumed more of a back-up role to other ingredients. In these recipes, however, the leek takes center stage.

Grilled Braised Leeks

This recipe is (or, at least was) Alton’s favorite leek preparation. If you have ever worked with leeks before, you will know that it is crucial to clean them thoroughly, unless you enjoy sand and grit in your teeth. To clean leeks as Alton does, barely cut off the white root tip of each leek, discarding the tips. Next, cut off the dark green leaves of the leeks and discard them.

IMG_8115(1)

Trimmed leeks.

Place a leek on a cutting board such that the center oval inside the leek is perpendicular to the cutting board.

IMG_8116(1)

Leek, placed so its oval is perpendicular to the cutting board.

Use a sharp knife to cut straight down through the top of the oval, slicing the leek in half lengthwise, while keeping the leek layers together.

IMG_8118(1)

Leeks split in half.

To rinse the leeks, hold onto their white ends as you dip/swirl them in a large bowl of water; any grit should fall to the bottom of the bowl.

IMG_8120(1)

Leeks, swirling in water to clean.

To store cleaned leeks, wrap them in a layer of damp paper towels, followed by a layer of plastic. This recipe uses a grill, so preheat your grill such that one end of the grill is hot and the other is cool. While the grill heats, brush the cut sides of eight leek halves (prepped as above) with bacon drippings. We happen to keep a jar of bacon drippings in our refrigerator, so I just melted some of the drippings in the microwave. After brushing the leeks with bacon fat, sprinkle them liberally with Kosher salt.

Place the leeks, cut side down, on the hot side of the grill, and check them after three minutes of grilling.

IMG_8125(1)

Leeks placed, cut side down, on the grill.

You want your leeks to have grill marks, but you do not want them to get charred. My leeks were ready after three minutes. When your leeks have grill marks, transfer them to a large piece of foil and brush on some balsamic vinegar; Alton said he used about 1 T of balsamic vinegar, but he appeared to use more than that in the episode.

Reassemble the leeks by placing two matching halves together and fold the foil closed to make a tight pouch. Place the foil packet over indirect heat and grill for 10-12 more minutes, or until the leeks are tender.

Serve the grilled leeks with any combination of black pepper, goat cheese, artichokes, and greens. This leek recipe really showcases the leek. I served my leeks with pepper, marinated artichoke hearts, and goat cheese, and it was a fantastic combination of flavors.

IMG_8133(1)

Grilled braised leeks served with pepper, goat cheese, and marinated artichoke hearts.

I do think my leeks could have used more time on the grill, as the outer layers of the leeks were pretty chewy and had a strong onion-like bite to them. The inner layers, however, were tender and had the sweetness of cooked onions. I definitely want to make these again, but I think I will let them sit on indirect heat for at least a good half hour. Next time, I will also purchase the smallest leeks I can find, as the larger leeks seemed to have much tougher outer leaves. These would be a perfect accompaniment to any summer (or spring) barbecue.

Leek Rings

For a twist on onion rings, Alton turns here to the leek. This recipe uses 12 ounces of leeks, and you’ll first want to remove their root tips and their dark green leaves. Next, slice the leeks into half-inch rings, separating the layers to form rings.

IMG_7825(1)

Leek layers separated into rings.

To set up the breading stations for this recipe, combine 2 C flour with 2 t Kosher salt and divide the mixture between two containers. For the third station, combine 1 1/2 C milk with a beaten egg in a third container, and place the liquid container between the two flour containers.

Preheat three quarts of oil (vegetable, safflower, or canola) in a large Dutch oven to 375 degrees. While the oil heats, you can bread your leek rings by using your left hand to place a handful of rings into the first flour container, tossing them to coat.

Next, with the left hand, move the floured rings to the milk and toss the rings with your right hand.

IMG_7834(1)

Rings into the milk station.

Also with the right hand, move the milked leeks to the second flour container and use a fork to toss.

Remove the breaded leeks with your left hand, transferring them to a spyder or to a plate. Use the spyder to gently drop the leeks into the hot oil, frying them for 30-90 seconds, or until golden brown.

Transfer the fried leeks to a rack over a sheet pan to drain.

IMG_7845(1)

Fried leek rings.

We ate these a side with dinner one night and they were pretty fun. We thought they looked a lot like calamari rings. The nice thing about these was that they stayed pretty crispy, while onion rings can sometimes get a bit soggy. Before eating these, I wondered if they would need some sort of dipping sauce, but a little extra Kosher salt was all these needed for me. They have a slightly sweet onion-like flavor and a crispy outer shell. It was a little tedious to separate the leek layers and to bread them, but these were a fun thing to do for something different.

Leek Potato Soup

Alton’s take on Vichyssoise soup is the final recipe in this episode. It starts with melting 3 T butter in a lidded six quart pot over medium heat.

IMG_7787(1)

Butter in large pot.

While the butter melts, prep a pound of leeks, as done above for grilling (trim, cut in half through the oval, wash). Slice the leek halves into thirds lengthwise, and then chop them.

Add the chopped leeks to the melted butter, along with a large pinch of Kosher salt. Turn the heat to medium-low and let the leeks sweat for 20-25 minutes.

Once the leeks are tender, add 14 ounces of Yukon gold potatoes, peeled and chopped, along with a quart of vegetable broth.

Increase the heat to medium-high and bring the liquid to a boil. Once boiling, decrease the heat to a simmer, put a lid on the pot, and cook the soup for 45 minutes.

After 45 minutes, use an immersion blender, or a regular blender, to puree the soup to a smooth consistency.

Combine a cup of heavy cream with a cup of buttermilk and stir the dairy into the soup; combining the dairy prior to adding it to the soup will help to prevent curdling.

IMG_7809(1)

A cup of cream and a cup of buttermilk.

Finally, stir in a teaspoon of white pepper.

IMG_7813(1)

Dairy and white pepper added to soup.

Serve the soup topped with chopped chives.

IMG_7818(1)

Leek potato soup

This was a really delicious and simple soup. It was rich, without being heavy, and the leeks contributed a sweet flavor and aroma. This is a soup that could be eaten year-round, as you could serve it hot in colder seasons or cold in warmer weather. It is also a great vegetarian option, and it really highlights the flavor of leeks.