Archive for March, 2017

Sweet or Savory Pâte à Choux

When I was in elementary school, a different kid in my class was tasked with bringing snacks for the class each week. No-bake cookies with chocolate and oats were in regular rotation because they were easy to make and most of the kids liked them. My mom usually sent me with cupcakes or other (baked) cookies. One girl’s mother scored massive points with all of the kids (and probably made all the other parents feel like slouches), as she always made homemade cream puffs.

Personally, I have never made cream puffs or eclairs… until now. Baking and pastry are definitely two of my favorite things, so I eagerly whipped up a batch of Alton’s Pâte à Choux yesterday. Pâte à Choux is a pastry dough that is designed to make pastries that can be filled; therefore, when you bake the dough, it is supposed to only form one or two large bubbles, as opposed to the numerous bubbles desired in certain breads and such. In order to create these large bubbles in the pastry, steam needs to be created. Bread flour, and especially bread flour for bread machines, is ideal for Pâte à Choux because it has the highest protein content of all flours, which allows it to absorb more liquid; more liquid equals more steam production. To make Alton’s Pâte à Choux, combine a cup of water and 6 T butter in a pan. If you are making savory dough, also add 1 t Kosher salt. Or, if you are making a sweet dough, as Alton did in the episode, add just a pinch of Kosher salt and 1 T sugar.

Bring this water/butter mixture to a boil over high heat. Meanwhile, weigh out  5 3/4 ounces of bread flour. I did not have bread flour for bread machines, so just used bread flour.

When the butter has completely melted and your liquid is boiling, add all of the flour, at once, to the pan.

IMG_5968

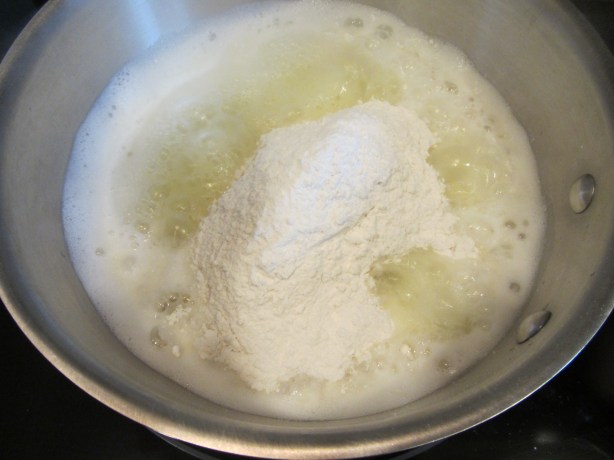
Flour added to boiling butter/water.

Stir the flour into the liquid with a spatula until a paste forms. Decrease the heat to low and continue to stir the dough until all of the flour is incorporated and the dough is no longer sticky. Turn off the heat and transfer the dough to the bowl of a standing mixer, setting it aside until it is cool enough to touch.

While the dough cools, place four eggs and two egg whites in a measuring cup; the egg yolks will act as an emulsifier in the dough, while the whites will give the dough structure.

When the dough has sufficiently cooled, slowly add the eggs to the dough, keeping the mixer running. You want to continue adding egg until the dough hangs from the paddle attachment in a ‘V’ shape; for me, this required all of my eggs.

IMG_5978

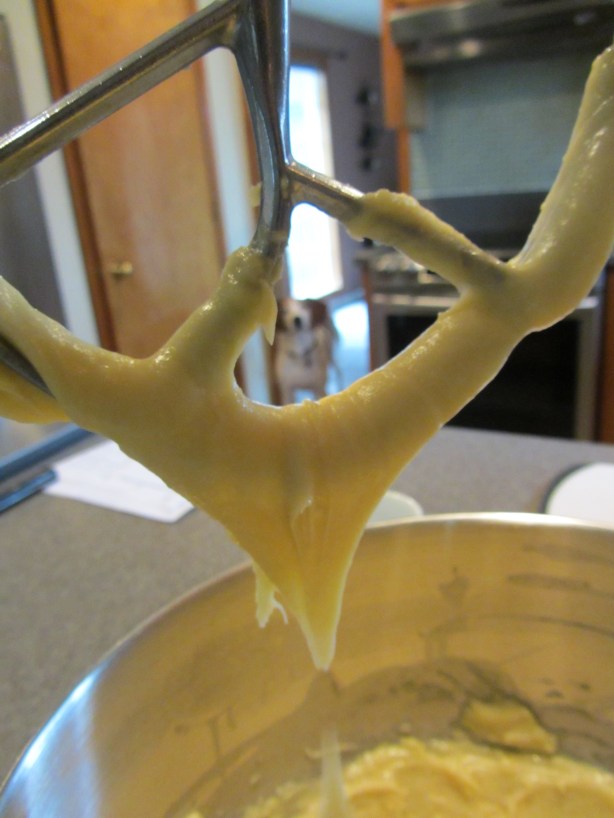
Dough after adding all of the eggs. A perfect ‘V’ shape off of the paddle.

At this point, you can use your dough immediately, or you can let it rest at room temperature for a couple hours before using. When you are ready to use your dough, prepare a piping bag with a piping tip; Alton did not specify which tip to use, but I used one that was about 3/8″ in diameter and it worked fine. Large Ziploc bags work well for piping too – just snip off one corner, insert the inside part of the coupler, place your desired tip on top, and screw on the coupler ring.

IMG_5966

Ziploc bag turned into piping bag.

Preheat your oven to 375 degrees and line a sheet pan with parchment paper. If your parchment is sliding around, you can pipe a dollop of dough on each corner of your sheet pan, pressing the parchment down in the dough to keep it from sliding.

To make eclairs, pipe the dough into ‘S’ shapes, with the tail of each ‘S’ facing up toward you. With a wet finger, pat down the tails.

Alternatively, you can make cream puffs by piping the dough in concentric circle patterns, finishing in the center. Again, pat down any points with a wet finger.

IMG_5985

Dough, piped into concentric circles for cream puffs.

Place the eclairs (or cream puffs) in the center of the oven, increasing the temperature to 425 degrees, and setting the timer for 15 minutes. After 15 minutes, decrease the oven temperature to 350 degrees, and bake the eclairs for an additional 10 minutes. As soon as your eclairs/cream puffs are cool enough to handle, pierce them with a sharp paring knife to release excess steam.

IMG_5988

Piercing a hot eclair to release steam.

Cool the pastries completely.

At this point, you can bag and freeze the pastry shells for up to a month, bag and store them at room temperature for a week, or you can fill them with a filling of your choice. To do as Alton did in this episode of Good Eats, make vanilla pudding, using only 3/4 of the recommended liquid.

Then, using a small star tip and a piping bag, poke a hole in each eclair/cream puff, filling them with the pudding until the pudding starts to come out the end. Chill the filled pastries.

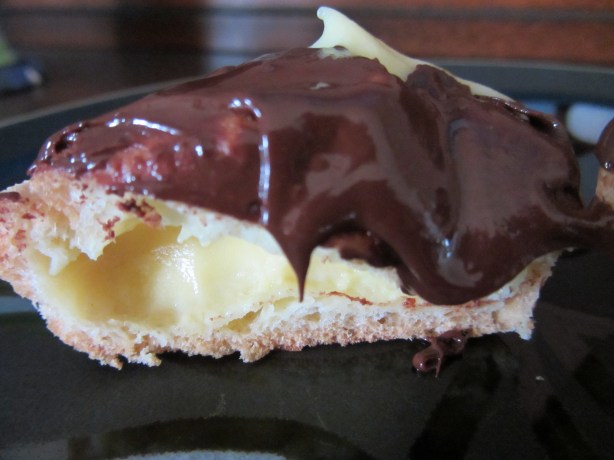
To bedazzle your eclairs/cream puffs with chocolate, melt 1 C chocolate chips with 1 t vegetable oil in a double boiler. Dip each pastry into the chocolate mixture. Or, you can pour your chocolate into a squeeze bottle and decorate them that way. I opted for the dipping method.

If you do not plan to eat your eclairs right away, keep them refrigerated. I made a mixture of eclairs and cream puffs, ending up with 17 eclairs and 6 cream puffs. I stuck most of my pastries in the freezer for later use, but filled several yesterday.

IMG_6003

Chocolate dipped eclairs.

I have to say that this is a great recipe. Not only are these delicious, but they are really super easy. My pastries turned out light, airy, and slightly crispy on the outside. The pastry itself was barely sweetened and each pastry had a perfect cavity inside for filling. The vanilla pudding was a super easy filling option, and the chocolate set up into a slightly crispy shell. This one is a keeper. For a different option, you could make ice cream sandwiches with cream puffs, splitting them in half. Or, you could make Alton’s savory Pâte à Choux, filling split puffs with a savory salad.

IMG_6007

A cream puff, cut in half.

Funnel Cake

So, what else can you do with Pâte à Choux? Well, you always opt for funnel cake! To make this classic carnival/fair favorite, heat ~1 inch of vegetable oil to 375 degrees.

IMG_6011

Oil, heating to 375 degrees.

Using a #12 piping tip, pipe Pâte à Choux into the hot oil in a circular pattern. Cook the pastry until it is golden brown, flip it over, and cook until the second side is golden.

Remove the pastries to a rack over a sheet pan and dust them liberally with powdered sugar.

My funnel “cakes” turned out more like funnel “straws,” but they were still quite delicious.IMG_6018 
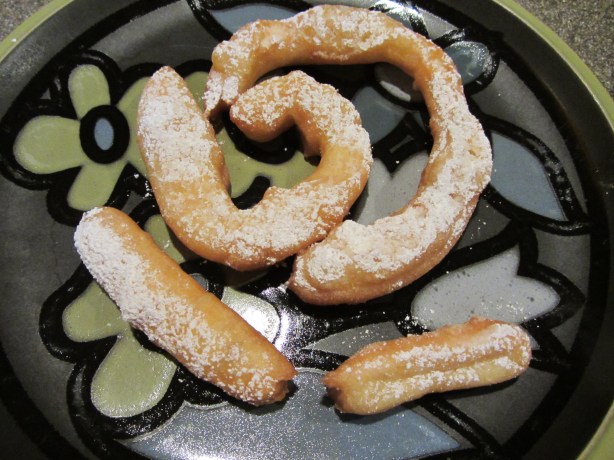
I found that the pastry was too thick for the #12 tip, though I had set my dough aside for a while. Still, my pastries were like eating little fried pillows with powdered sugar. These were definitely tasty, though not as pretty as they should be.

I have never been the biggest fan of pork chops. I remember sitting at the kitchen table when I was little, staring down a seemingly gray hunk of pork my mom had cooked for dinner, and dreaming of dessert; looking across the round oak table, my brother’s face mirrored my own. To this day, my mom says she has never understood why neither of her kids liked pork chops. My mom has always been a great cook, so I doubt she cooked pork chops poorly. Still, my impression of pork chops was summed up perfectly by Lorelai Gilmore when she said that eating pork chops is like sucking on a Pottery Barn catalog. I mean, really… tell me that you have never had that exact experience. So, last night for dinner, I set out to see if I could finally find a pork chop I liked.

Stuffed Grilled Pork Chops

After watching this episode of Good Eats, I determined that I needed to head to the local butcher shop to get my pork chops. See, according to Alton Brown, all pork chops are not created equal. While all pork chops come from the back of the pig, shoulder and sirloin chops are particularly tough and require wet cooking methods. Center-cut pork chops are the best, and Alton’s favorite center-cut chops are rib cut chops because they are composed of one muscle, making them the best choice for stuffed pork chops. My butcher shop cut two chops for me, making them about two inches thick, which is perfect for Alton’s recipe. For these chops, Alton insists that you make a brine, as pork is inherently dry, and a brine will serve to impart both flavor and moisture. To make the brine, combine in a lidded container 1 C Kosher salt, 1 C dark brown sugar, 1 T black peppercorns, and 1 T dry mustard. Add 2 C of hot cider vinegar and shake the container to dissolve everything.

Set the brine aside for 5-10 minutes to let the flavors fully develop. Next, add a pound of ice to the brine, and shake the container again until the ice is almost melted.

Now you are ready to place your chops into the brine, ensuring that they are completely covered. Though I only had two pork chops, I needed the full amount of brine to cover my chops, so if you are cooking four large chops, you may need to double the brine. Refrigerate the chops for two hours in the brine.

Toward the end of your brining period, you can make your pork chop stuffing. For four pork chops, combine 1 1/2 C crumbled cornbread, 1/4 C halved dried cherries, 2 T golden raisins, 1/4 C chopped walnuts, 2 t sliced fresh sage, 1/2 t pepper, 1/2 t Kosher salt, and 1/4 C buttermilk.

Set the stuffing aside while you prep your brined chops. The online recipe tells you to rinse your brined chops, but Alton did not do this in the episode. I did pat my chops with paper towels to remove excess moisture.

Next it is time to cut stuffing pockets in your pork chops. To do this, Alton placed his pork chops in a bagel slicer, but I just held mine with one hand and cut with the other. Either way, place your chops fat-side up and insert a long, thin knife (preferably a boning knife) straight down until you hit bone. Angle the blade up toward the surface, creating a cavity in one direction. Turn the knife around and cut in the other direction. You can check to see that your cavity is large enough by feeling with your finger. There is a video of Alton cutting his pockets, which you can access from the recipe link above.

In the episode, Alton used a large plastic syringe, with the tip cut off, to fill his pork chop pockets with stuffing. I used a plastic bag that I cut the corner out of, creating a makeshift piping bag. Still, I found that I had to use my fingers to push the filling down into the pocket. I filled my pork chops with as much filling as I could, and I used all of it.

To grill your pork chops, you will want to preheat your grill to high heat for at least 10 minutes. Brush your chops with oil and place them on the middle burner for 2 minutes.

Rotate the chops 90 degrees and leave them for 2 more minutes; this will create nice criss-cross grill marks.

IMG_5949

Pork chops, turned 90 degrees and left for 2 more minutes.

Flip your chops, leaving them for 2 minutes.

IMG_5950

Pork chops, flipped after 4 minutes of cooking. Left to cook 2 more minutes.

Finally, rotate the chops 90 degrees for a final 2 minutes.

IMG_5951

Pork chops, rotated 90 degrees to cook for 2 final minutes.

You want to cook your chops to an internal temperature of 140 degrees. If your chops are not done, place them over indirect heat and cook them until they reach 140. My chops took quite a lot (20-30 minutes) of additional grilling to reach 140.

IMG_5952

Pork chop after cooking to internal temperature of 140.

So, how did Alton’s stuffed pork chops taste? These were the best pork chops I had ever had. The pork was tender and moist, and just slightly pink in the middle, and you could taste the seasoning from the brine. The filling was a delicious accompaniment, with tartness from the cherries, sweetness from the raisins, occasional bursts of sage, and crunch from the walnuts.

IMG_5954

Pocket of filling inside pork chop.

This is a must-do recipe, especially if you are a pork fan. I guess I need to call my mom to tell her I finally met a pork chop I liked.

P.S. A bonus tip from Alton:  If you ever need to know how much propane you have in your tank, you can check the level by pouring ~a cup of boiling water down the side of your propane tank. You can tell where the propane level is by feeling where the metal switches from hot to cold.

While my beer was fermenting from last episode, I got busy prepping the four recipes from the 75th episode of Good Eats. The main player in this episode is that famous star of the cocktail party:  dip. Alton raises the question in this episode of what, exactly, constitutes a dip. Is salsa a dip? Alton concludes that salsa is not, in fact, a dip. Why? It does not meet Alton’s dip criterion, which is that a dip must be able to travel from its vessel to your mouth without going “splat” on the floor. Sour cream and onions do, however, make a suitable dip, which is the first one up in in this episode.

Onion Dip from Scratch

Sour cream and onion dip, also known as “California Dip,” was apparently very popular in the 60s, and Alton’s take on it begins with a bowl containing 1 1/2 C sour cream and 3/4 C mayonnaise (I used homemade mayo).

img_5823

Sour cream and mayo (homemade) make the dip base.

The next step is to heat a medium skillet over medium-low heat, adding 2 T olive oil, 1 1/2 C diced onions, and a pinch of Kosher salt. The onions should be cooked until they are caramelized and golden, which will take about 20 minutes.

Once the onions are golden brown, set them aside to cool a bit. Finally, add the onions, 1/2 t Kosher salt, 1/4 t white pepper, and 1/4 t garlic powder to the sour cream/mayo bowl, stirring to combine.

img_5826

Caramelized onions added to dip base, along with Kosher salt, white pepper, and garlic powder.

This dip came together super easily and was quite addictive, and I served it with good bread, baby carrots, and bell pepper.

img_5829

Alton’s onion dip with veggies and bread.

The sweet caramelized onion flavor is just right with the tangy sour cream and creamy mayo, and it is easy to see how this would be a crowd favorite.

Hot Spinach and Artichoke Dip

Back when I did Alton’s episode on artichokes, I seriously questioned his judgement in not including a recipe for spinach/artichoke dip. Alas, I guess this dip episode explains why he did not. Spinach and artichoke dip is definitely one of my favorites, so I was excited to make Alton’s version. Alton has a newer version of this recipe on his web site, which I actually made for our neighborhood New Year’s Eve party this year. The big difference between the Good Eats recipe and the new recipe is that there is a higher ratio of cream cheese to spinach.

img_5843

Ingredients for artichoke/spinach dip: mayo, sour cream, frozen spinach, artichoke hearts, cream cheese, Kosher salt, garlic powder, red pepper flakes, and Parmesan.

For the original recipe, begin by combining 1/4 C mayo (I again used homemade), 1/4 C sour cream, and 6 ounces of cream cheese, warmed in the microwave.

Heat 1 C of chopped frozen spinach and 1 1/2 C frozen artichoke hearts  in a cup of boiling water until warmed through; I had to use canned artichoke hearts, so I did not heat them. Be sure to thoroughly drain the spinach, squeezing out any excess water.

To the mayo/cream cheese mixture, add the spinach and artichoke hearts, along with 1/3 C grated Parmesan, 1/2 t red pepper flakes, 1/4 t garlic powder, and 1/4 t Kosher salt.

img_5850

Spinach, artichoke hearts, Parmesan, red pepper flakes, garlic powder, and Kosher salt added to dip base.

This dip is, of course, best served warm. You can keep the dip warm by putting about an inch of water into a Crockpot, setting the bowl of dip into the water. Set the Crockpot to low and it will keep the dip warm for serving.

img_5854

Spinach and artichoke dip, kept warm in a Crockpot.

We ate Alton’s artichoke dip with bread, crackers, and veggies.This dip creamy, tangy, has a touch of heat, and has a variety of textures.

img_5853

Spinach and artichoke dip.

I do have to say that I prefer Alton’s updated version of this dip over the original, as I like a greater ratio of dip base to artichokes/spinach. We also really appreciated the heat from the red pepper flakes in this recipe. This is one I will make again, albeit the updated recipe.

Guacamole

A dip episode would not be complete without a recipe for guacamole. We make guacamole pretty frequently, usually just tossing together some avocados, lime juice, Kosher salt, garlic, and sometimes some salsa. If I want to put more time into it, I go to a recipe my mom created that uses roasted tomatillos. To make Alton’s version, squeeze the juice of a lime into a bowl and add the flesh of three avocados, tossing the avocados to coat them thoroughly and prevent browning.

Drain the lime juice from the avocados, reserving it for later.

img_5863

Lime juice drained off of avocados and set aside for later.

To the avocados add 1/2 t Kosher salt, 1/2 t cumin, and 1/4 t cayenne pepper. Mash the avocados with the seasonings, using a potato masher.

Once you have your desired consistency, add 1/2 an onion, chopped. Next, add 1 T cilantro, 1/2 of a seeded jalapeno, 1 clove of garlic, 1 T of the reserved lime juice, and 2 Roma tomatoes, seeded and chopped.

Mix everything together, press plastic wrap onto the surface, and let the dip sit in a cool place for two hours before serving.

img_5886

Alton’s guacamole.

Of course, we ate our guac with some tortilla chips. This guacamole was good, but it was nothing outstanding, and I wouldn’t go out of my way to make it again. I did like the additions of the tomatoes, onion, and jalapeno, as they added texture and flavor, but I thought it could use a touch more heat.Mom’s recipe remains my favorite, as those roasted tomatillos take guac to a new level.

Chicken Liver Mousse

Last up in this episode was Alton’s chicken liver mousse, which was to be my foray into cooking with liver. I only made half a batch of this recipe, as it was just for the two of us and the shelf-life of this dip is only a couple days. For a full batch of the dip, heat a large saucier over medium heat and melt 2 T of butter.img_5891 
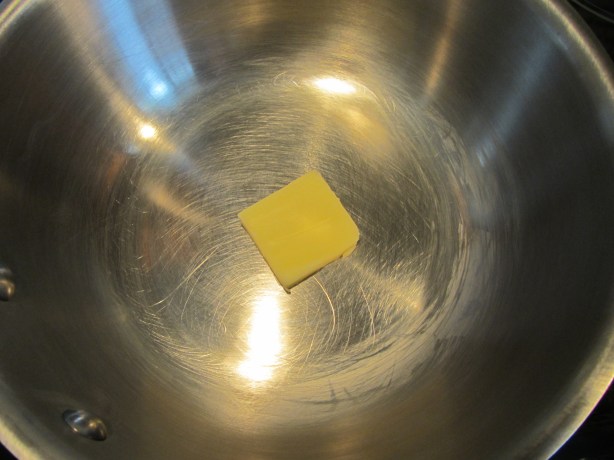
To the melted butter add 2 C chopped onions, 1 chopped Granny Smith apple, 1 t fresh thyme, and a heavy pinch of Kosher salt. Cover the pan and let it cook until the contents are golden.

Next, add a pound of cleaned/drained chicken livers to the pan. I found chicken livers near the chicken in my grocery store. Honestly, I find chicken livers hard to stomach when they are raw; they just are not at all appetizing to me, and I may have gagged a little… just a little.

Anyway, stir the livers gently, cooking them until they are gray on the outside, but still pink on the inside; Alton says this will take about three minutes, but it took several minutes longer for my livers to be cooked. Once the livers are cooked, add 1/4 C brandy to the pan and simmer for a minute.

Remove the pan from the heat, letting it cool for five minutes. Once the liver mixture cools, puree it in a food processor until it is smooth.

In a separate bowl, beat a cup of heavy cream until it has soft peaks.

Finally, fold the whipped cream into the liver mixture in two installments.

img_5914

Alton’s chicken liver mousse on crispy baguette.

Serve immediately or cover and refrigerate for up to two days. We thought this was just okay. We have had other chicken liver pâtés that we have really enjoyed (in fact, we had a great one last week at a restaurant), but this one was not our favorite. The color of this mousse was sort of gray and unappealing, and Ted commented that he found the mousse overly sweet. Of the recipes in this episode, this one was our least favorite.