With things finally settling down slightly for Ted’s health in December, I was able to devote a little more time to my Good Eats project. Already skinny, Ted had lost over 30 pounds after his second cancer surgery, bottoming out with only 131 pounds on his 6’1″ frame. Needless to say, weight gain became the goal in our household, and I cooked anything and everything that appealed to him, even remotely. Thankfully, some of the recipes from the last few episodes I was blogging about did have some appeal to Ted. Most recently, the recipes I tackled were all from Alton’s episode on puff pastry.
Puff pastry can be a tricky beast, but its difficult nature can be avoided by following Alton’s puff pastry rules and process.

A box of frozen puff pastry.
Puff pastry is composed of numerous alternating layers of butter and pastry. The first rule of puff pastry is to avoid condensation during the thawing process. To do this, wrap your sheet(s) of puff pastry in a paper towel.

Puff pastry sheet, thawing. Soon to be wrapped in a paper towel to avoid condensation.
Wait 15-20 minutes before gently trying to unfold the pastry sheet; if the sheet offers any resistance, give it more time to thaw. From this point, give the pastry a check every five minutes. Once you can unfold your pastry sheet, gently fold it into a triangle shape, and allow it to thaw for a few more minutes.
Puff pastry, continuing to thaw in a triangle shape.
Once ready to go, unfold the sheet all the way, crimping the seams with your fingers.


Your puff pastry is now ready for use. It is always a good idea to place a sheet pan in the freezer (or outside, if it is cold enough). That way, if your pastry gets too warm, you can quickly cool it down.
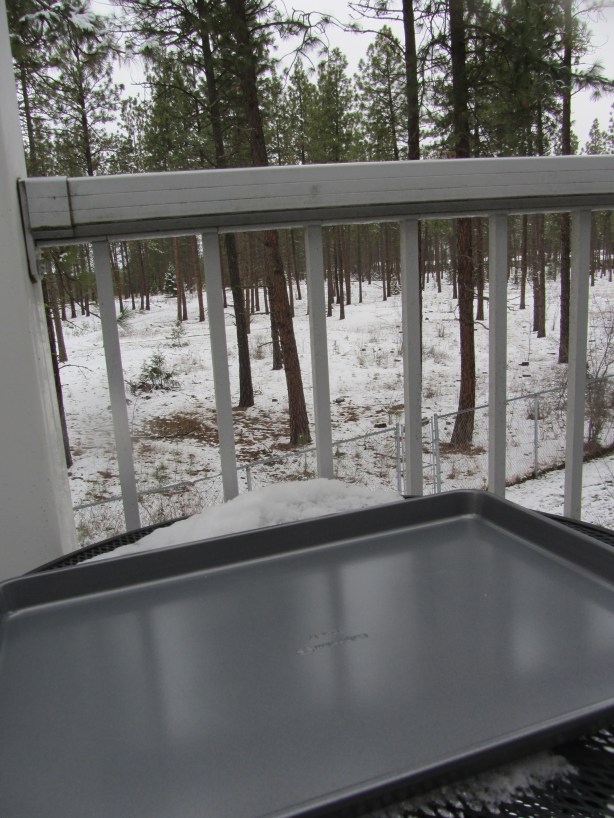
Chilling a sheet pan.
If your pastry gets too warm, you will know it, as it will begin to stick and get difficult to work with.
Fruit Tart
Alton’s first puff pastry recipe is for a fruit tart. To make two individual tarts, begin by thawing one sheet of purchased puff pastry as described above. Also, preheat your oven to 400 degrees. Once your pastry is ready, sprinkle sugar over both sides, and gently roll the pastry with a rolling pin to flatten the seams. Place two small saucers diagonally on the pastry and cut around them with a pizza cutter.


Note: you will have some excess pastry to discard. Alton emphasizes that using a sharp tool is critical, as you do not want to damage the delicate layers of pastry. Once you have your two circles of pastry, place them on your already-cold sheet pan and put them in the refrigerator.
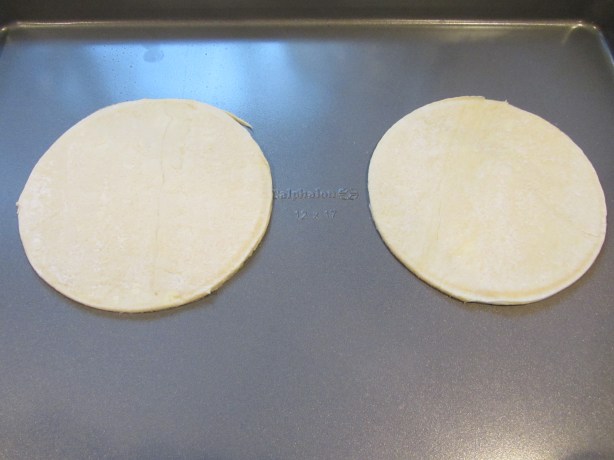
My cut-out puff pastry circles.
Meanwhile, peel, core, and quarter a Granny Smith apple.

Granny Smith.
Using a vegetable peeler, make wafer-thin slices of apple. To avoid browning, quickly place the apple slices in a mixture of 1 C water and 1 T lemon juice.
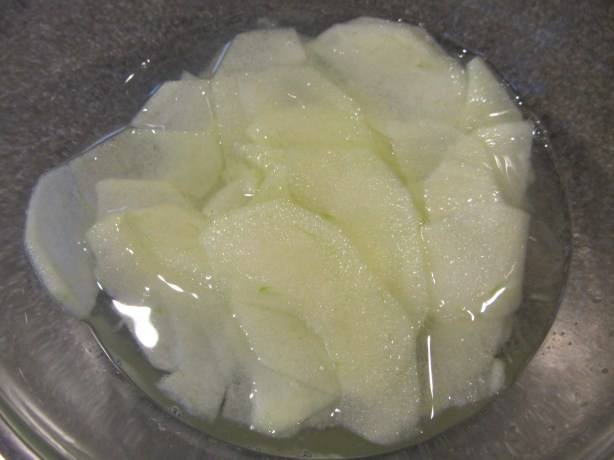
Apple slices in water/lemon juice.
Once your apple is sliced (you will not need a whole apple), pull the pastry circles from the refrigerator and flip them over so the cut side is facing down; this will allow for maximum puff because the healthy edges are facing up. Prick the centers of each circle with a fork, avoiding the edges. “Docking” the center of each pastry circle will allow steam to escape from the centers, which will prevent them from puffing. This will give a nice puffy edge to each tart.
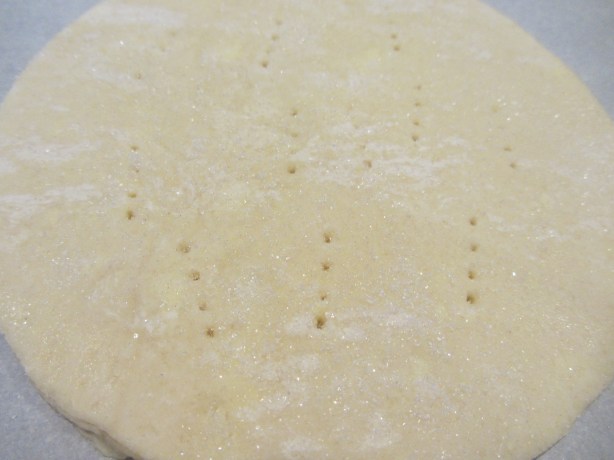
Docked puff pastry circle.
Place a piece of parchment under your pastry circles and sprinkle them with sugar. Decorate the tops of each tart with your thin apple slices, positioning them in an interlocking spiral, and bake your tarts for 15-20 minutes.
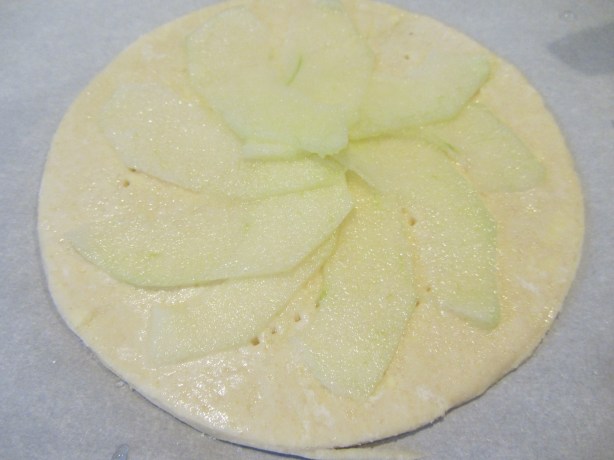
Thin apple slices arranged in an interlocking spiral on the puff pastry circle.
You want to bake them until they are golden and their edges are crispy.
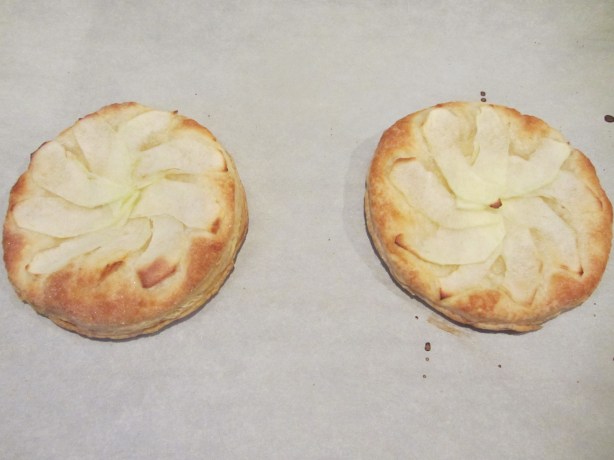
Apple tarts after baking – golden and with crispy edges.
While your tarts are still warm, microwave some apricot jam for ~30 seconds, or until just loosened up.
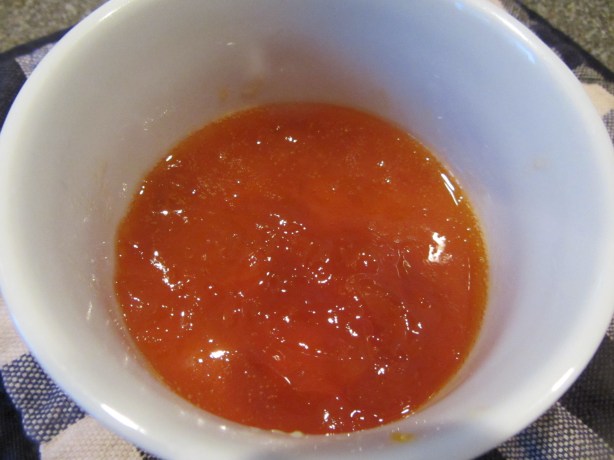
Apricot jam, microwaved just until loose.
With a pastry brush, gently dab the jam all over your tarts, being careful to avoid disrupting your pretty apple slices. Let your tarts cool for at least four hours.

Finished fruit tarts.
Alton prefers his tarts at room temperature, but I warmed ours up. Ted and I each ate a tart for breakfast. One tart was the perfect size for one person. Sure enough the tarts were pretty, not overly sweet, and they perfectly demonstrated the best of puff pastry. The puff pastry was flaky, buttery, crisp, and light. I could definitely see making these again. They were very easy and a great introduction to working with puff pastry, which I have had little experience with. For alternative fruit toppings, Alton recommended trying pears, mangoes, strawberries, or nectarines. I would like to try making these with nectarines in the summer.
Stacked Puff Pastry with Cherries
Next up in Alton’s puff pastry arsenal is his stacked puff pastry. When I watched this episode of Good Eats, this was the recipe I was most intrigued by. For Alton’s recipe, you’ll need two sheets of thawed puff pastry (see how to thaw above), one egg beaten with 2 T water, 1 can of drained pie cherries, and 1/2 C of bread or cake crumbs. You may want to slightly stagger the thawing of your puff pastry sheets, as you will work with one sheet prior to the other. Place your first thawed puff pastry on a parchment-lined baking sheet.

Thawed puff pastry.
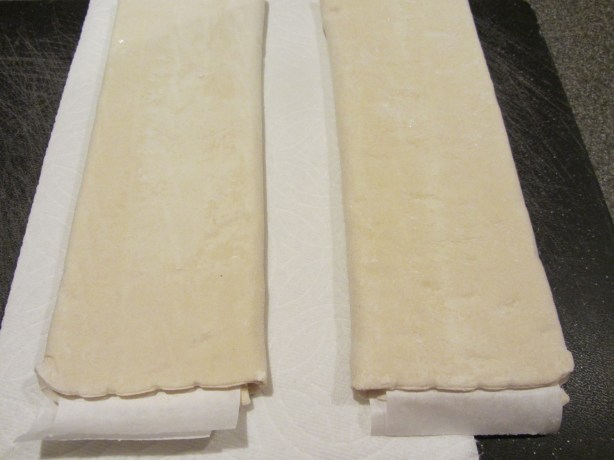
Using a ruler as a guide, cut a 1-inch wide strip off of each side of the pastry, reserving them for later; these will be your walls. Use a pizza cutter to cut your walls.
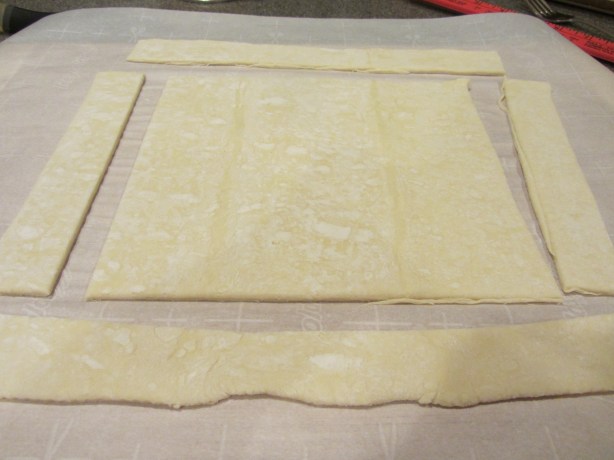
1-inch strips cut from each side.
Dock the center of the remaining center square of pastry with a fork. Since this will be the floor of your pastry, you do not want it to rise. Brush the edges of the square floor with egg wash, but not within 1/4″ of the very edge.
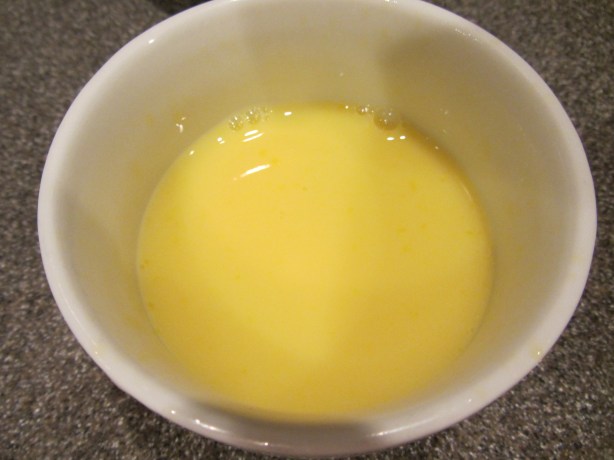
One egg beaten with 2 T water.

Pastry floor, docked with a fork and edges brushed with egg wash, avoiding very edges.
Place two wall strips of pastry on opposing sides of the floor, cut side out. Dab egg wash on the corners and place the other two walls on top. Dab the corners with more egg wash, and fold the tabs over. This will give you a square-shaped floor with raised walls all around.


Place the floor and walls in the refrigerator while you get the second thawed sheet of puff pastry. You will need to cut a “roof” for your floor and walls, which should be approximately 7 x 7 inches. Again, do your cutting on parchment paper to avoid sticking. Fold your roof in half (over a piece of parchment) and use scissors to cut some slats.

Slats cut in roof.
Place the roof in the refrigerator with your assembled floor. While your puff pastry cools off, preheat your oven to 400 degrees. Add your cake or bread crumbs to your drained can of cherries, and allow the mixture to sit for 10 minutes. The crumbs will absorb the excess moisture from the cherries.

Pie cherries.

Pie cherries and crumbs, sitting for 10 minutes to absorb excess moisture.
You are now ready to complete assembly of your stacked pastry. Spoon the cherry filling onto the pastry floor, avoiding the walls. You want to use more filling than you think you will need. Egg wash the walls, avoiding their very edges.

Cherry filling spooned onto the floor. Use more than you think you need.
Place your roof on top of your floors/wall, cut side down to allow for maximum puff, gently pressing the edges. Egg wash the roof, avoiding the cut edges.
Egg-washed roof.
Bake your pastry for 30 minutes before decreasing the temperature to 350 degrees for an additional 30 minutes. Alton’s stacked cherry pastry looked quite perfect, with a pretty lattice top. Mine looked a lot more like a puff pastry bouncy house.

My stacked puff pastry looked a lot like a bouncy house.
I quickly realized that I had not put enough filling onto my floor, as there was a gap between the roof and the filling. Also, I thought the filling would be better if it were slightly sweeter. I would like to try this again, using cherry pie filling in place of the tart pie cherries, and adding a sprinkle of sugar on top of the egg-washed roof. Though my stacked pastry was far from perfect, I still found it fun to make, so I think I’ll have to give it another go. And, the puffy magic of puff pastry was certainly on display with this one!
Salmon Turnovers
I made the final recipe from this episode on Christmas Eve. Salmon turnovers seemed like a perfect thing to share with my parents, as we began our Christmas celebration. Alton’s recipe calls for 1 C cooked rice, 1/2 C sauteed mushrooms, 1-2 T dill pickle relish, 2-3 scallions, 1 T parsley, Kosher salt and pepper, 1 sheet of puff pastry, 1 egg beaten with 2 T water, and 1 can of boneless/skinless salmon. To make my dinnertime prep easier, I cooked my rice and sauteed some mushrooms early in the day; I sauteed my mushrooms with some olive oil, garlic, salt, pepper, and a splash of balsamic vinegar. To make the filling, combine the rice, mushrooms, relish, scallions, parsley, salt, pepper, and salmon in a bowl.


One sheet of puff pastry will yield four turnovers. Since we were having guests, I thawed two sheets. You will have excess filling, even with making eight turnovers.
Two sheets of puff pastry.
Preheat your oven to 400 degrees. Thaw your pastry, as written above, and place it on a piece of parchment. Cut each sheet of pastry into four equal squares.

Puff pastry sheet, cut into four even squares.
Place a generous spoonful of filling on the middle of each square and brush the edges with egg wash. Fold the pastry over the filling, forming a triangle, and use a fork to securely crimp the edges.

Filling scooped in the center of each pastry square.
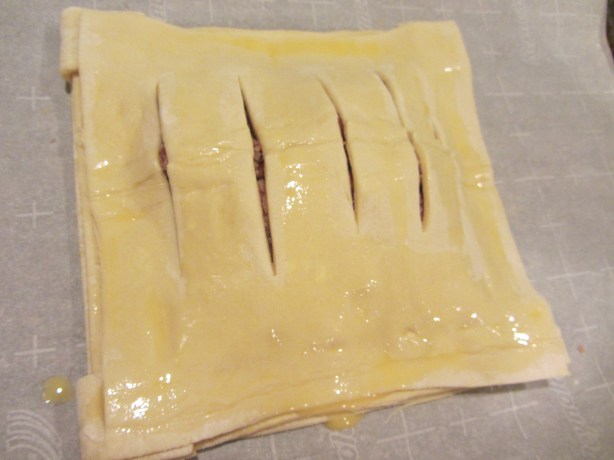
Use a paring knife to cut two slits in the top of each turnover, and brush the tops with egg wash.
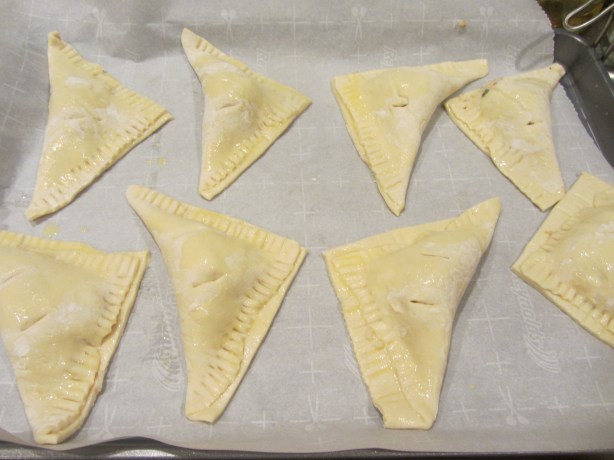
Vents cut in the top of each turnover, and tops brushed with egg wash.
Bake the turnovers for 30 minutes.
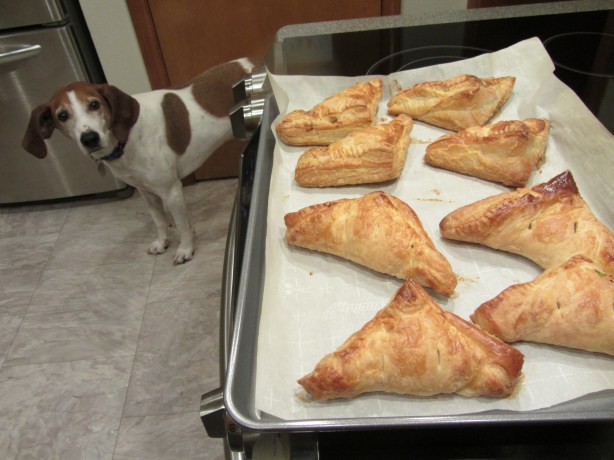
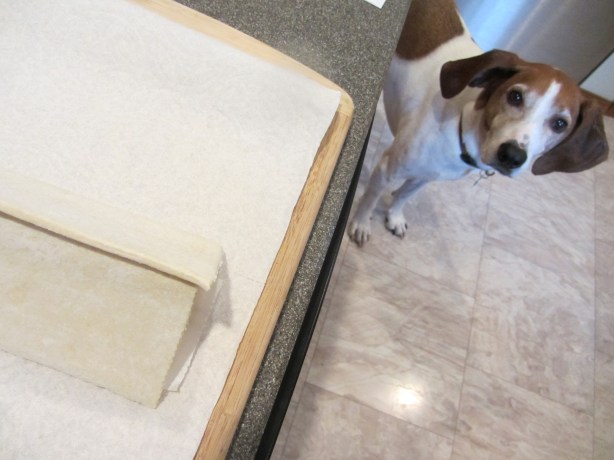
I think the turnovers appeal to someone!
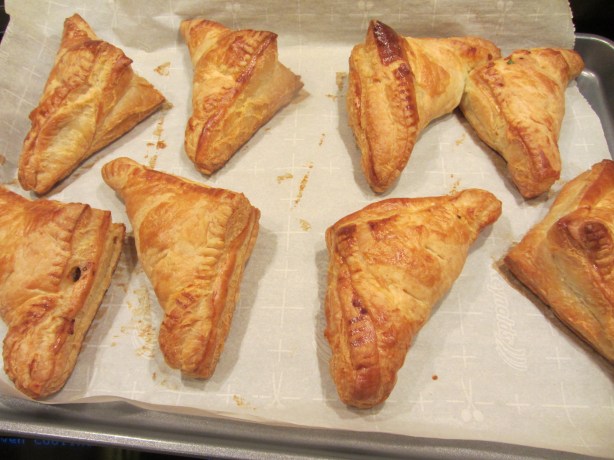
The finished turnovers.
We all thought these turnovers were really good, and they would make a nice weeknight meal. The pastry was light and crispy, and the filling had a nice mixture of flavors. You really could use any filling you would like for these. I enjoyed Alton’s salmon concoction. According to the episode, Alton’s favorite turnover filling is a combo of Manwich mix and cheddar cheese. My brother and sister-in-law heated up leftover turnovers in the oven the following day, and said they reheated very nicely. The previous night, I had placed them in a paper bag in the refrigerator to allow the pastry to breathe. Alton’s turnover recipe has inspired me to make turnovers more often. They are so easy and really delicious. Puff pastry is really not difficult to work with if you follow Alton’s basic rules: 1) Keep it cool. 2) Use a sharp tool for cutting. 3) Dock the base. 4) Vent the top. 5) Always put the cut side down. 6) Rest before baking.

[…] a thawed piece of puff pastry on a floured surface (you can see details of how to thaw puff pastry here), patting its seams. Lightly roll the pastry with a rolling pin to smooth it out, and perforate it […]